Posted on Leave a comment

How To Dry Fry Food – Dry Frying Is The New Health Kick

Move over fat fryers, there’s an alternative method of cooking in town, and it doesn’t need extra utensils or equipment.

I’ve fried dry for a long time, but I didn’t actually realise dry fry was an actual termed method of frying.

What Is Dry Frying?

Many of you probably dry fry some meats.  If you have meat with some fat on it, like bacon, it’s likely that you might not add any more fat to cook the meat in, but simply just take advantage of the fat on the meat itself.   Using a thick bottomed or non stick pan, start off with the pan cold and fry on a low heat until some fat is released.  You can then turn up the heat a little and cook your food as normal, with no added fats or oils.

Frying Pan

What About Food With NO Fat?

You might think that foods with no fat would stick and burn, but in many cases, you would be wrong.  You do, however, have to have patience to use this method as it does take a lot longer to cook your food throughly.  The basic principle is that you fry over a low heat for a longer time and turn the food often.

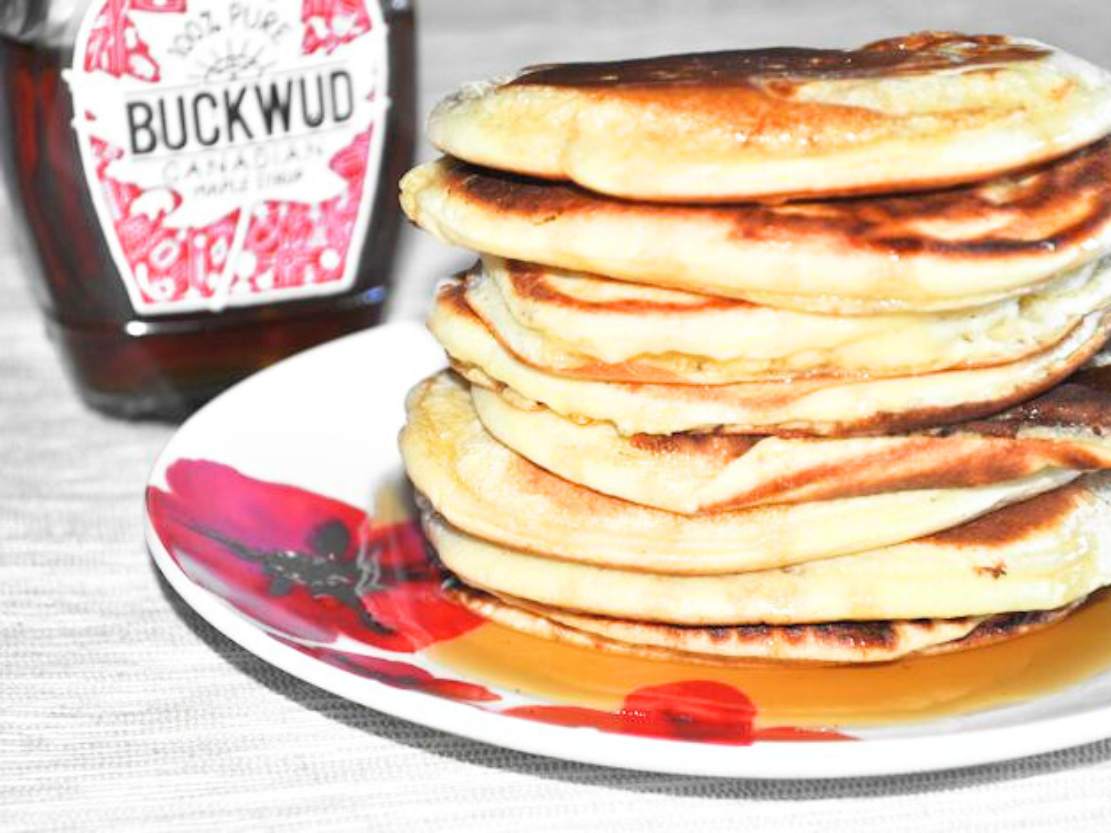
I dry fried these pancakes very easily, yet you do have to get used to doing it.  This method is also great for releasing the flavour of nuts and spices.

With vegetables, and especially onions, I’d be tempted to add a teaspoon or two of water at a time if they may look like dry frying alone is not enough.  Be very careful not to add too much water though, or your food won’t have the lovely fried aroma and taste as it will simply taste stewed.   There is the option of adding a spray or two of one calorie fat sprays, but I try to get away without it when I can.  I do keep a can handy in the kitchen cupboard at all times, just in case it’s needed.

As a rule, I tend to grill most meat and fish rather than fry, but on the special occasions that we have a tender fillet or sirloin steak, then I do dry fry those on the hob in a frying pan.

Fruit

Dry fried fruit can be amazing.  Especially if you top it with some lovely sugar, syrups or sauces, or add it to the top of a fruit crumble and sprinkle on some cinnamon infused sugar.   Check out how to dry fry banana and top with a dusting of cinnamon sugar.  My kids love it on top of ice-cream.

Posted on 2 Comments

American Pancakes Recipe (Fluffy Pancakes)

I was on the hunt for a springy pancake recipe.  In Scotland, we often make Scotch Pancakes, or what’s often called “drop scones” but they tend to be a little flatter than I was looking for.

I came across Nigellas American Pancakes Recipe in the hope that I’d have some lovely springy pancakes.  I adapted the recipe slightly to add a wee bit more baking powder and sugar to make them taste more like scotch pancakes, and I don’t use any oil or butter to cook mine in a thick bottomed hot pan.

American Pancakes Recipe (Fluffy Pancakes)

Adapted from Nigella Lawsons American Breakfast Pancakes
Prep Time 10 minutes
Cook Time 10 minutes
Total Time 20 minutes
Course Baking

Ingredients
  

  • 1.5 tablespoons Baking Powder
  • 2 Large Eggs
  • 30 g Soft Butter
  • 300 ml Semi Skimmed Milk
  • 30 g Caster Sugar
  • 225 g Plain Flour

Instructions
 

  • I just used to mix this all up in a big plastic jug to make it easier to pour into the pan, but I’ve found that my mixer gives me better results with the batter so I just put up with a few mix trails as I go. I put all the ingredients apart from the flour and baking powder in the bowl and give them a mix around, then I put in the flour and baking powder and use the fold function to add it in. I’m not sure that really makes any difference, but it seemed to. This pancake mix is actually quite thick in comparison to many of the older scotch pancake recipes as the intention is to have a pancake with a bit of a fluffy middle.

  • Heat a thick bottomed frying pan (or any pan) on the hob. I prefer not to use oil to cook my pancakes, but it means I do have to keep a close eye on them. I leave the heat almost at the lowest that it can go and cook them slowly.

  • When you see the top of the dollop of pancake mix beginning to bubble up, then it is time to turn over your pancake to cook the other side, which won’t take long at all. Don’t leave pancakes alone on the hob as they will burn very quickly.

  • You can get anything from 8 – 18 pancakes from this mix, depending on how big you make your pancakes.
Posted on 8 Comments

Simple Valentines Day Cupcakes Recipe

We all like the kind of recipes that are quick and easy to make.  This one is what my kids like to make (and eat).  We can all make something special for parents, a girlfriend, or just for fun for Valentines Day.

We used the Dr Oetker can of icing to decorate this (and to make it faster).

Plopped on the top are hearts from the Haribo sweets collection and they are just plopped on top of the basic sponge recipe mix below, which I simply divided into 24 individual cake cases.  Some of the cakes we ice, and others we don’t.


Basic Cupcake Cake

Lesley Smith
Prep Time 15 minutes
Cook Time 25 minutes
Total Time 40 minutes
Course Baking
Cuisine Cakes

Ingredients
  

  • 4 Medium Eggs
  • 2 teaspoons Vanilla Flavouring
  • 8 oz Butter
  • 8 oz Caster Sugar
  • 8 oz Self Raising Flour

Instructions
 

  • Cream the sugar and butter and set the oven to 160 degrees c.
  • Add in the eggs and beat or mix until smooth.
  • The final step is simply to fold in the flour until fully mixed through and you've added air with the folding.
  • Divide into individual cake cases. You will get 12 muffin sized cakes or 24 smaller cupcakes for decorating.
  • Bake for 15 - 20 minutes, or until a skewer tester comes out clean.


Posted on 2 Comments

Piedmontese Beef – Low Fat Mild Chilli Recipe With Soy Beans (Lower Fat Than Aberdeen Angus and Chicken)

Not many of you will have heard of Piedmontese Beef.

Piedmontese is pure Irish Beef and is lean.  If you think you can’t eat beef because of a high fat content, you might be pleasantly surprised.  Piedmontese beef is bred to be lower in fat than chicken is, and we all tend to associate chicken with low fat cooking.

The official stats for Piedmontese are:

  •  Calories:  104 per 100g
  • 1.9g of fat per 100g
  • 31.5mg cholesterol per 100g
  • 21.6g of protein per 100g

Chicken per 100g is:

  • Calories: 200 per 100g
  • 13g of fat per 100g
  • 78mg cholesterol per 100g
  • 25g protein per 100g

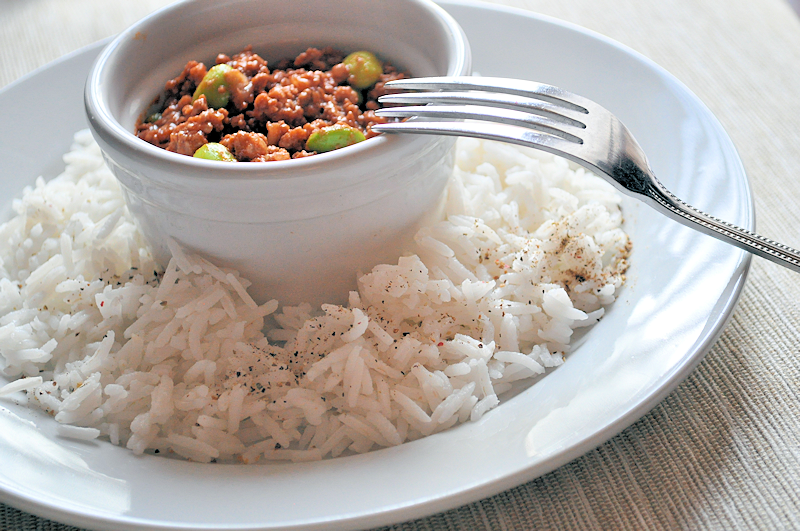
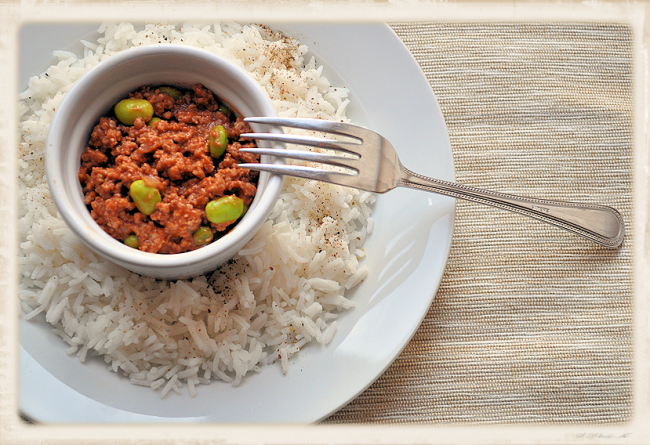
I decided to make my Piedmontese mince into a mild chilli.  It was really very good and even my fussy youngest polished his off.  If you want to try it, you’d need to head on over to the Fresh Food Guru in the UK and order some for yourself.

Piedmontese Beef Low Fat Mild Chilli with Soy Beans

Lesley S Smith
Prep Time 20 minutes
Cook Time 30 minutes
Total Time 50 minutes
Course Mains
Servings 6

Ingredients
  

  • 1 kg Piedmontese Beef Mince
  • 1 Large Onion Chopped
  • 200 g Soy Beans Green Endamame for Cooking (I used frozen)
  • 2 teaspoons Mild Chilli Powder
  • PinchSalt
  • PinchPepper
  • 75 g Rice Per Person
  • 500 g Tomato Passata
  • Water
  • Ground Rainbow Peppercorns To decorate the Rice

Instructions
 

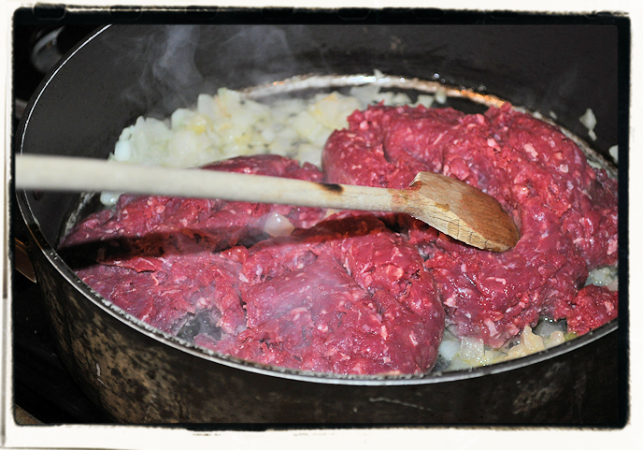
  • Using a thick bottomed pan, add the mince and onions. Use a wooden spoon to move the mince around and break it up as it browns.
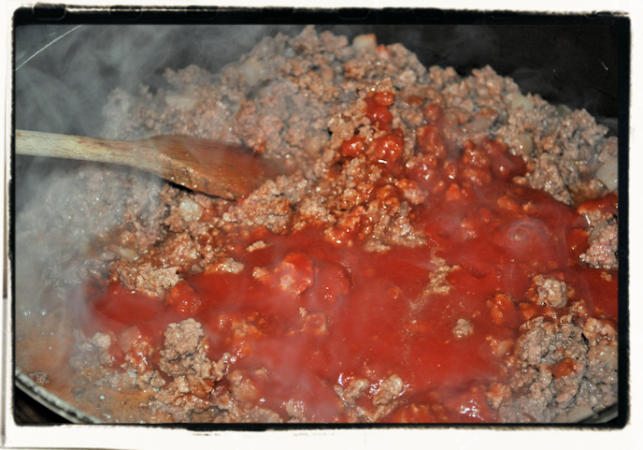
  • When the mince is completely broken down and browned, add the tomato passata, a little water, the soy beans, chilli powder, salt and pepper. Put your rice on to cook while you finish the chilli.
  • Simmer for 10 minutes. Add a little more boiling water if needed while your chilli is cooking. I added around 300ml in total as this was quite a lot of mince.
  • Simply serve up on the plate and decorate the rice with rainbow peppercorns.


Posted on 4 Comments

Soup Maker: Butternut Squash & Sweet Potato Recipe

Buying vegetables that are nearly end dates is a common feature of my shopping now.  I get them home, immediately make them into some kind of soup and then I have some frozen goodness in the freezer for whenever it is needed.

I would never have actually done that pre soup maker days as the effort required was just too much, especially for a small batch of soup.

These vegetables were on their last day for being sold, so I snapped them up for pennies.  I had made 3 batches of soup within an hour or so of coming home from the shop.

Soup Maker: Butternut Squash & Sweet Potato Recipe 1.6 Litres

Lesley S Smith
Prep Time 10 minutes
Cook Time 21 minutes
Total Time 31 minutes
Course Soup
Servings 6

Ingredients
  

  • 300 g Sweet Potato Chopped
  • 300 g Butternut Squash
  • TablespoonParsley
  • PinchSalt
  • Hot Water
  • Stock Cube
  • Parsley and Lemon Seasoning

Instructions
 

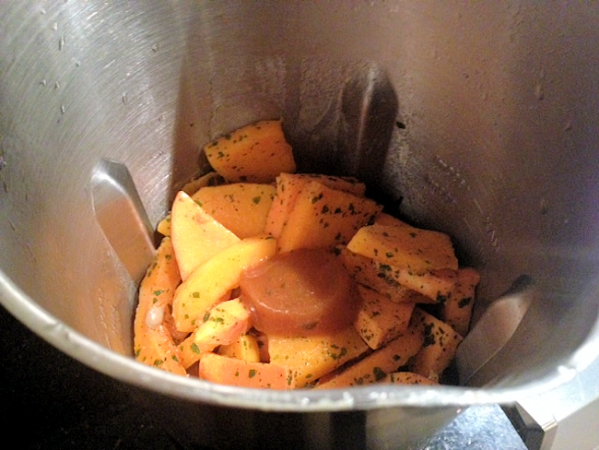
  • Prepare the vegetables and chop up into reasonably small pieces for speed of making the soup.
  • Put the vegetables, stock cube and a pinch of salt into the soup maker or pot.
  • Add water to the 1600 ml mark in a soup maker, or to the same level in a measuring jug with the vegetables in if you plan to use a pot for your cooking.
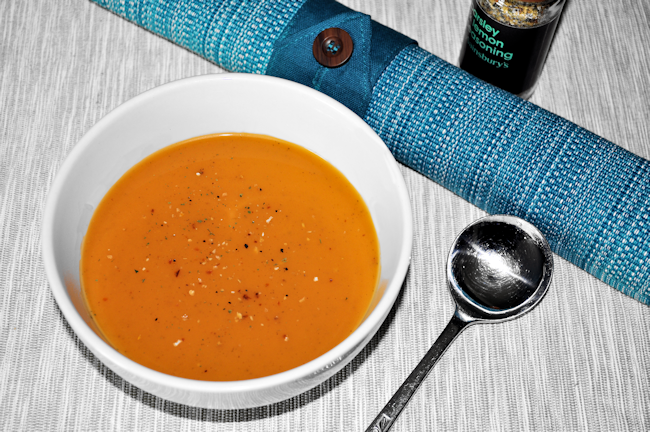
  • Choose your soupmaker setting and set it to go. I use the smooth setting most frequently. If you are making this in a pot, take off a simmering heat when the vegetables are fully cooked and use a blender to puree your finished soup. Sprinkle parsley and lemon seasoning on the soup before serving.

Notes

All the ingredients for the 1.6 Litre output of soup need to total up to approximately 800g.  I simply add a few carrots, potatoes and the onion and then top up with the largest main ingredient to the 800 grammes.


Posted on Leave a comment

Review: Kenwood KMX54 kMix Stand Mixer with Peach Pavlova Recipe

Being asked to review a Kenwood KMX Stand Mixer is right up my street.  I do a lot of cooking, and baking is really never far from my mind.  A good baking session means that feeding my kids home-made goodies is better than the sweets and crisps that they would tend to eat otherwise.

kMix 3

I’ve been using an old Kenwood Food Processor for a few years and managed to somehow crack the bowl over Christmas.  I suspect it took a tumble onto our tiled floors, but after so much use, I really couldn’t complain.  I had found the bowl size too small for us and very rarely used it for anything other than the mixing functions.  I will keep my old mixer to use the grinder and the blender, but the kMix Stand Mixer is a welcome addition to my kitchen appliances.

kMix 5

I waited for it with the patience of a not very patient puppy dog, and it was unpacked and on my counter within minutes of its arrival.
kMix 1

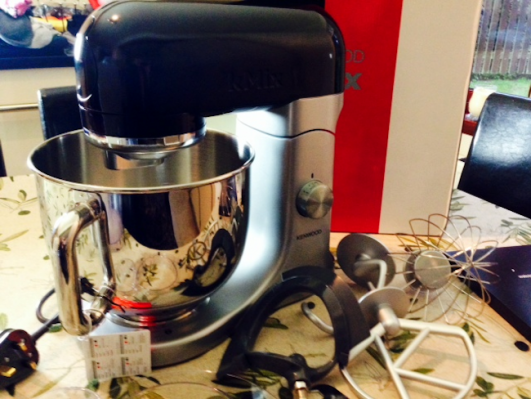
It’s fairly heavy, so it will stay on my counter top from here on in.  I was quite surprised by the size of the bowl as it is so much bigger than my old processor.  I was pleasantly surprised to also see a splashguard that fits like a glove, as well as a handy spatula for scraping out the very last remnants from the bowl.

I was looking forward to the kneading, mixing, whisking and blending, and I was not disappointed.

Putting on the attachments is a breeze.  I didn’t expect the easy of the glide in, twist and secure.  There’s no messing around with this top-notch machine.  When I turned it on, it gradually hummed into life, really getting into gear in a refined and controlled way.  It reminded me of a quality car with a gentle purr as it begins to crank up the speed.

The classy guard ensures there is no horrible flour spinning around the kitchen if the machine is just a little too keen to get going, and it stays clean as a whistle on the outside.
kMix 2

Stylish.

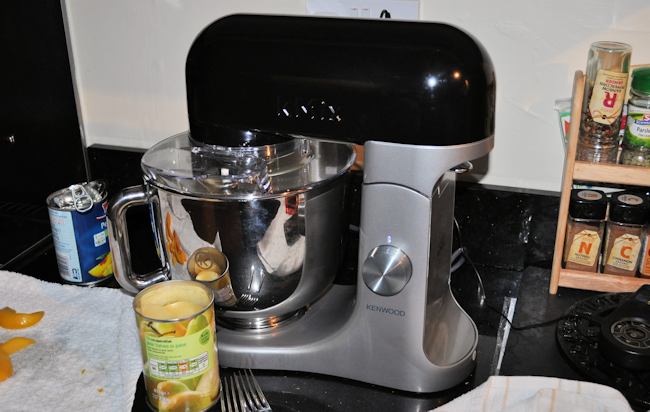
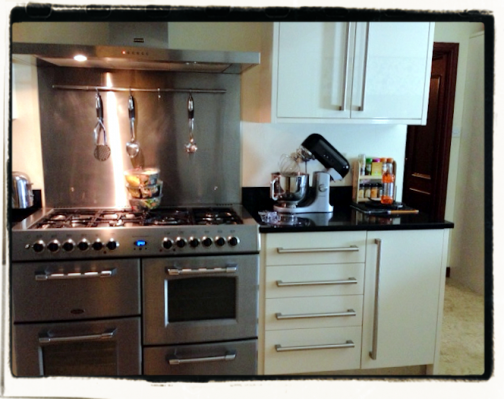
I chose the retro black version as it matches in perfectly with my black worktops and my microwave, which you can’t see as it is just out of shot.   With the round lines, it looks great and I have been really pleased with it for the short time I’ve had it.

Here’s what I really like about it so far.

  • Cakes, meringues and marshmallows are a breeze.  I never thought I would say that about meringue…
  • Slow start of speed means the ingredients stay where they should be.  That is always a good point.
  • The motor stops if you open the machine by mistake.  It’s a great safety feature.
  • I didn’t realise at first, but the machine has a fold function to help with adding ingredients at the end of the meringue whipping stage 🙂
  • The attachments are sturdy.  Very sturdy.  They can be slightly altered with the included spanner to get the height perfect for your machine.
  • There are four attachments with the machine, as well as a splashguard and spatula.  There is a beater, a whisk, a dough hook and a flexible beater to get to the edges of the bowl for soft ingredients.  The flexible beater even has its own instruction book.
  • It will rub fat into flour and save you the time of doing it by hand.
  • The bowl is really easy to clean.
  • I can put all the attachments into the dishwasher without worrying.
KMix Cream

Peach Pavlova Recipe

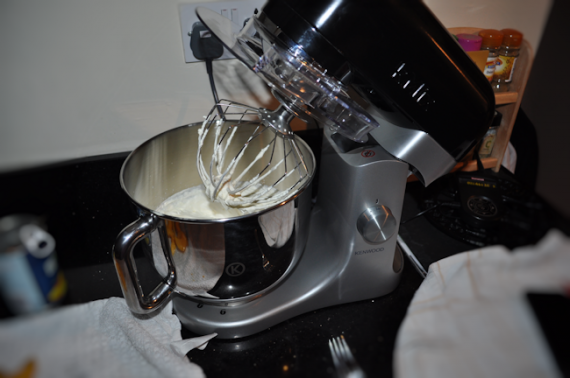
If you’ve ever wanted to make a really fast and reasonably stable pavlova, this is the recipe for you.  The vinegar and cornflour added helps to stabilise the egg and make the foam just that little bit stronger.  I don’t find that it affects the taste of the meringue at all.

I thought I had messed up this recipe by adding the vinegar, cornflour and vanilla essence just into the mixing bowl at the end.  The recipe called for folding it in.  Thankfully, it all worked out and the meringue was lovely.

I took a recipe that came with my Kenwood kMix for pavlova with exotic fruits, and adapted it to make my pavlova.

Pavlova with Peaches – Basic Recipe

Lesley Smith
Prep Time 20 minutes
Cook Time 1 hour 20 minutes
Total Time 1 hour 40 minutes
Course Dessert
Servings 10

Ingredients
  

  • 5 Egg Whites
  • 250 g Caster Sugar
  • Half teaspoon Vinegar
  • 1 teaspoon Vanilla Essence
  • 2 teaspoons Cornflour
  • 450 ml Double Cream For Whipping
  • PeachesSliced from Fresh or Tinned

Instructions
 

  • Put the oven on to approximately 130 C or Gas 1 - 2. Line a baking tray with baking paper.
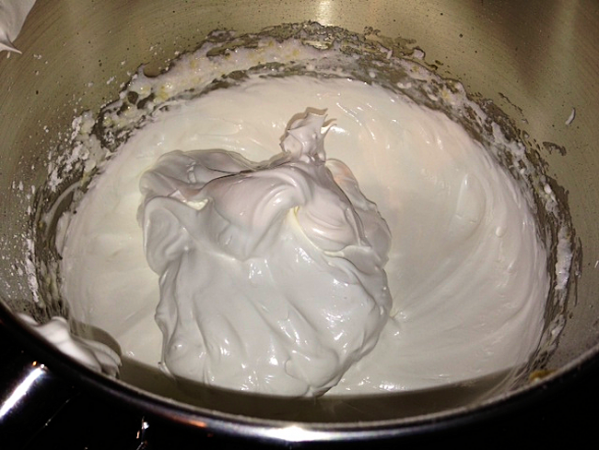
  • Separate the egg yolk from the egg whites and put them into a mixer bowl. Whisk them for a few minutes until they form stiff peaks.
  • Add the sugar slowly, about 50g at a time and whisk again for a few minutes each time, until the sugar is all added.
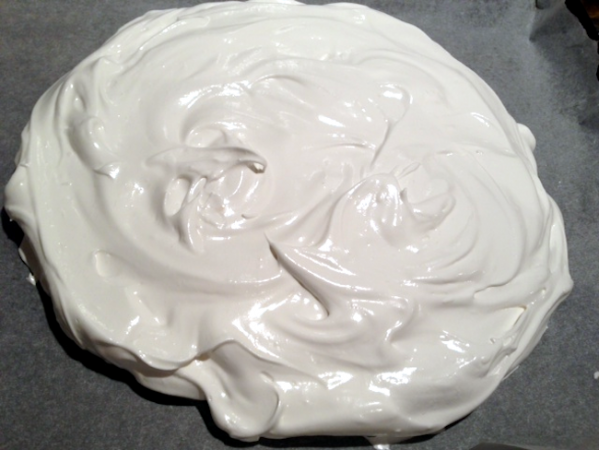
  • Add the vinegar, cornflour and vanilla essence and continue to mix for up to 8 minutes, until the mix is smooth and glossy.
  • Spoon your mix onto the baking paper and put in the oven for at least an hour, and up to an hour and a half. Leave the meringue to cool down.
  • When the meringue is cool, whisk your cream and spread it over the top of the meringue, before topping with the fruit of your choice.

Argos have large ranges of Kenwood products available here.
 

Posted on 1 Comment

Chicken and Mushroom Stir Fry

We eat a lot of stir fries in this house.

They’re easy and quick to make and fill the kids bellies up well with little effort.

Buy your own veggies, or buy some pre-cut and washed vegetables to just throw in the pot.

For this stir fry, I’d bought a bowl of stir fry veges from the Co-op and just added what there was in the fridge to make it up.  I had some chicken, some more beansprouts and a couple of onions.

To serve, I simply throw it all in a big dish, plonk it on the table and everyone just helps themselves.

Chicken & Mushroom Stir Fry

Lesley Smith
Prep Time 20 minutes
Cook Time 15 minutes
Total Time 35 minutes
Course Mains
Servings 4

Ingredients
  

  • 200 g Cooked Egg Noodles
  • 400 g Chicken Chopped or diced.
  • 50 g Shredded Carrots
  • 75 g Beansprouts
  • 200 g Sliced Mushrooms
  • 100 g Chopped Onions
  • 100 g Shredded Green Cabbage or Spinach or Lettuce
  • 100 g Mange Tout
  • 300 g Hoi Sin Sauce

Instructions
 

  • Pan Fry the chicken with the onions in a thick bottomed pan or wok until fully cooked. I use butter, but just a little at a time to cook the chicken.
  • Add the pre-prepared vegetables with 2 - 3 tbsp of vegetable oil and stir for up to 5 minutes until all the vegetables are fully cooked.
  • Add the Hoi Sin Sauce and cook for a further few minutes until the food is hot throughout.


Posted on 7 Comments

How To Cook A Haggis

Being Scottish through and through, I’m often asked how to cook a haggis.  If you can stomach this popular dish, then you may find you really do like it.  Haggis is usually a little spicy with a mealy texture.

Traditionally, a haggis was made up of the heart, liver and lungs of a sheep or lamb, with oats, suet, herbs and spices added to it.  Originally, haggis would have been cooked in the sheep or lamb stomach, but these days, the casings are usually artificial and quite like the skin of a sausage.   There are also vegetarian options for those who cannot stomach the meaty variety.

Most of us will buy our haggis pre-cooked and we are essentially just reheating, but you can also make your own.

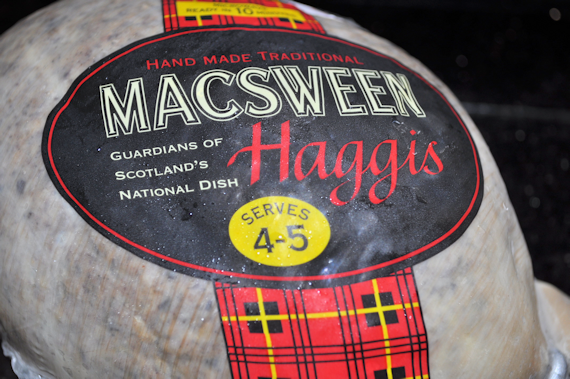
Macsween Haggis

1  Heating up a Pre-Cooked Haggis

There is no real right or wrong way to reheat an already cooked haggis, which is what you will usually get from a shop.

Slow Cooking

I slow cooked haggis last year with a baked potato to go with ours, and they can also be boiled or roasted.   The beauty of a haggis is that it’s already cooked before it gets to you, so you really do just need to heat it up thoroughly.

On The Hob

In a pan on the hob, all you need to do is wrap the haggis in tin foil and put it in a big pan with plenty cold water.  The water needs heated to simmering point and left for approximately 100 minutes per kilo.  You really don’t want your haggis to be in water that is boiling and severely bubbling away, or the skin is very likely to burst on you.

Baking

In the oven, simply wrap the haggis in tin foil with a little water.   Put it in an oven dish with a heat of around 180 – 190 C for around an hour.  Most haggis will come with instructions on the pack for how to get the best out of your wee rubgy shaped ball of haggis.

To Serve

Just drain the water off, open the haggis skin and fluff up the haggis with a fork while you serve it up.

2  Cooking a Haggis From Scratch

Choose your meat, chop it into small pieces or mince it, add spices like cayenne pepper, allspice, nutmeg and ginger.  You add the spices that you like.  If you make your own, you can also add extra ingredients like onions for more flavour.

  • Sheeps stomach.
  • Heart liver and lungs of a lamb or sheep.  Some people use pig products.
  • 2 finely chopped onions.
  • 10 ounces of oatmeal.
  • Tablespoon of salt.
  • Water
  • Your chosen spices.  Approximately a teaspoon of each.

What To Do

  • Pre clean a sheep stomach, turn it inside out and soak it overnight in cold salted water.
  • Boil the heart, liver and lungs until fully cooked.  Keep the water the meat has been cooked in.
  • Mince or very finely chop and mash the www.direct.gov.uk/passportsmeat.
  • Mix the meat with the oatmeal, onions and spices.
  • Spoon the mixture into the stomach pouch and seal it up.  I’ve heard of people using needle and thread to do this, but any way of sealing it will be fine.   Pierce the pouch a few times to let steam escape.  I’ve heard of people using muslin squares instead of a stomach pouch or artificial casing, but I’ve not seen the results of that and have no idea how well it would work.
  • Put the haggis in the stomach pouch into a big pan with cold water and add the water the meat was cooked in.   Bring it to a low boil and simmer for 2 – 3 hours to allow the spices to flavour the meat.


Posted on 2 Comments

The Sausage Softie Is Sooo Under Rated – Online Shopping At It’s Best

Sausage-Buttie

Getting meat through the post seems second nature to me nowadays.  Look backwards a few years and I’d never have done it as I liked to see what comes home in my shopping basket.

As much as I like Tesco and Asda home shopping, I’m never comfortable with the fresh produce that can arrive as it is usually not the ones I’d have picked for myself.  All us picky shoppers will know exactly what I mean.  I tend to scour the backs of the shelves for the longest dated items etc.

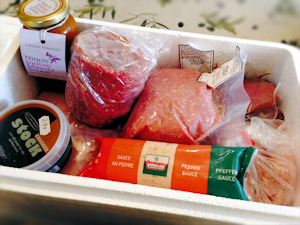
I’ve been getting my meat from Andrew Gordon for a fair while now, and recently, he decided to help those of us who either don’t like to go shopping, or just haven’t the time to do it for ourselves.  He has a new website that delivers across the whole of the UK and I’m now used to a delivery of meat arriving on my doorstep.

I really like the chicken and mince packs as he often has deals on offer that keep the prices down and allow for bulk buying and freezing for another day.

The biggest draw for me is that I know when the box is packed, that I am always going to get the best produce and never have to worry about whether it’s short dated or poor quality.  I know it’s the best and I know that he can trace the meat back to the source which helps me to persuade my youngest child that he isn’t eating horse (some news items just never go away).

Meat Delivery

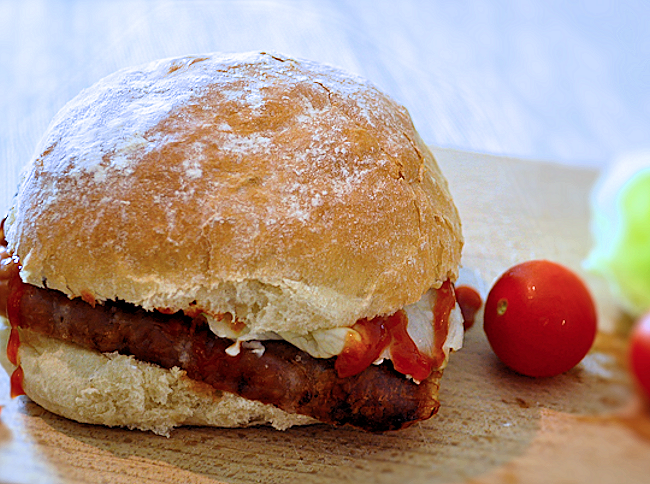
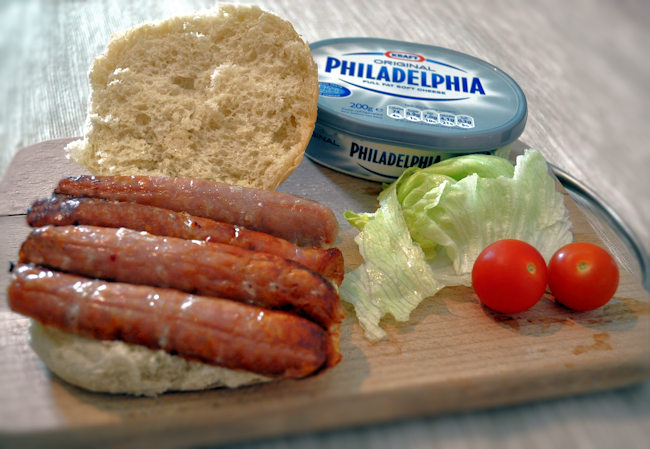
Sausages are usually good value and are a good size.   I split two sausages in half per child.  My kids like them and really get stuck in.   As it’s my kids, there is loads of ketchup – so much so, it’s oozed out the side of eldests sausage butty in the picture!!!!   There’s no sides, tatties, chips or anything else needed and simply a bun and some veg for a full meal.   That’s my kind of cooking.

Sausage Buttie 2

We had a fresh delivery today and I really do need to post a fair few more recipes very soon.

Posted on 3 Comments

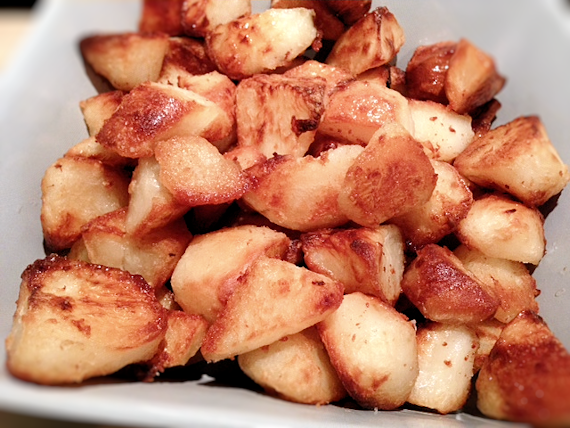
Simple Home Made Roast Potatoes Recipe

I like lots of recipes to be quite simple and for my roast potatoes, I usually use this basic method to make mine and sometimes just throw some extra spices or citrussy flavours into it.  Everyone has their own roast potatoes recipes so this is just a guide to making the basic potatoes without any fanfare or fancy cooking.

Anyone can make roast potatoes without a deep fat fryer and I prefer mine done in the oven to how my mum used to make them.  I made roasties for new years day and to be honest, if I’d known when I was younger, how easy they were to make, I’d probably never have bought pre-made ones back then.

Simple Home Made Roast Potatoes Recipe

Lesley S Smith
Prep Time 10 minutes
Cook Time 50 minutes
Total Time 1 hour
Course Side Dish
Servings 8

Ingredients
  

  • 5 kg Potatoes For Roasting Peeled and Chopped into Quarters
  • 100 g Goose Fat
  • Salt

Instructions
 

  • Par boil potatoes for 5 - 10 minutes with a little salt in boiling water.
  • Line a tray with foil and put the goosefat into the oven to melt.
  • When the potatoes are ready, pop them into the tray of melted goosefat and pop them in the oven at around 200 - 220C for 10 minutes. Don't turn them over at this point or they may smush up.
  • Take them out of the oven, turn the potatoes over to coat the goosefat over all the potatoes and put them back in the oven for a further 30 minutes.
  • Take them out again, give them a shake and then return them to the oven for another 10 minutes. If you like them as crispy as we do, then just keep them in for a little longer.


Posted on 49 Comments

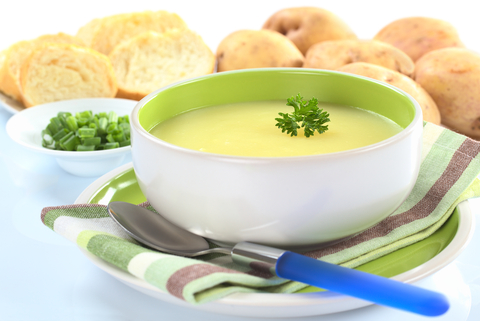
Soup Maker Recipe: Cream of Potato and Leek Soup 1.6 Litres

Potato and leek soup is so simple to make that it’s in the pot and cooking in just a few minutes in the soup maker.  I rarely bother with exotic spices and herbs for basic vegetable soups and as this one has cream in it, it isn’t suitable for freezing.  Leave out the cream and add water as a substitute if you plan to freeze.

Soup Maker Recipes: Cream of Potato and Leek Soup

Lesley S Smith
4.50 from 2 votes
Prep Time 10 minutes
Cook Time 21 minutes
Total Time 31 minutes
Course Soup
Servings 4 - 6

Ingredients
  

  • 500 g Potatoes Peeled and Chopped
  • 200 g Leek Chopped
  • 100 g Onion Chopped
  • pinch Salt
  • pinch Pepper
  • 100 ml Fresh Cream
  • 700 ml Boiling Water Or fill soupmaker up to 1600ml mark on kettle.
  • 1 Vegetable Stock Cube Crumbled

Instructions
 

  • Pop all the ingredients into the kettle. Set to smooth setting.
  • Simmer for 21 minutes in the kettle. If you make the soup manually, you will have to blend it after cooking.
  • Serve with fresh bread and parsley.


Posted on 4 Comments

Scottish Raspberry Trifle Recipe With Jelly Fluff (No Custard)

I really dislike custard so it’s just as well that this old family recipe is free of custard and uses a completely different method of replacing custard with something much more fluffy, light and yummy.

My mum is a second world war baby and the pudding dish we use instead of custard has several names.  You might come across it called any of these:

  • Milk Jelly.
  • Jelly Fluff.
  • Evaporated Milk Jelly.
  • Jelly Mousse.
  • Carnation Milk Jelly.
  • Jelly Whip.

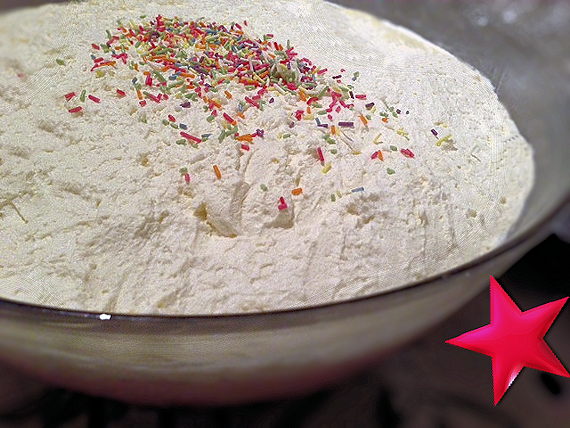
It sets much faster than regular jelly so be prepared when you’re making your puddings with it.    You can make it without whizzing it in the mixer and it will look like a cloudy jelly – but for adding to trifle, it works much better with the air bubbles to make it much lighter and fluffier.

Trifle with custard to me is just not trifle.    I made the mistake with this Christmas trifle, of letting a child add the hundreds and thousands so it’s a bit heavy handed in the middle with  nothing around the outside.  We didn’t care as it tasted amazing.  It’s quick and easy to make and no e-numbers anywhere.  You could use fresh fruit, but for speed, I used tinned.
I use a fairly large bowl for this recipe as it makes more than you realise.  If you only have a smaller bowl, you could make a couple of small individual trifles in glasses as well.

Scottish Raspberry Trifle Recipe with Jelly Fluff (No Custard)

Lesley S Smith
Servings 10

Ingredients
  

  • 1 tin Raspberries
  • 1 tin Sliced Peaches
  • 3 Raspberry Jellies
  • 400 g Double or Whipping Cream
  • 1 tin Approx 400g Evaporated Milk
  • 6 - 8 Sponge Fingers
  • Hundreds and Thousands

Instructions
 

Jelly

  • The first step is simply to get your bowl out and pop the sponge fingers in the bottom. Drain the tin of raspberries and peaches and pop them in with the sponge fingers.
  • Melt 2 Jellies in the microwave with three tablespoons of water. When they are fully melted, make it up to just under two pints of cold water and mix it well in. If you want a stiffer jelly, just use a little less water. Pour the jelly into the bowl with the fruit and sponge fingers. Let it set for a couple of hours. If you want it ready faster, you could pop it in the freezer for half an hour.

Jelly Fluff

  • When your jelly is set, get ready for your jelly fluff. Add a tin of evaporated milk (I used light evaporated milk for this years trifle) to a mixer and put it on low for a few minutes. You can do this by hand, but the jelly fluff just won't be so fluffy.
  • Melt one jelly with a tablespoon of water in a jug in the microwave while the mixer is going and then add it to the evaporated milk in the mixer. Turn the mixer up and whizz until it is light and fluffy in the bowl. Leave it for around 10 minutes before pouring it onto your jelly. If it gets a little too thick, just whizz it for a minute.
  • Once the jelly fluff is set, it is simply a case of whipping up your cream, spreading it on the top and popping some decoration on the top.