Posted on 42 Comments

Top Tips For Using A Soup Maker

What are my top tips for using a soup maker?  Read on to find out.
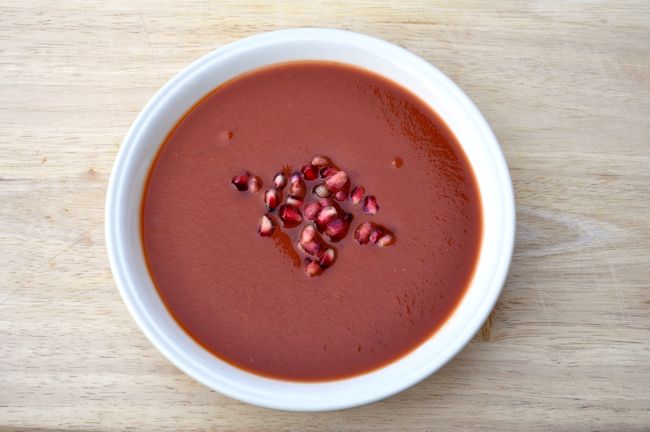
Tomato Soup 8 Why Should You Use A Soup Maker?

For me, a soup maker was a welcome present from Morphy Richards, which has seen a labour of love grow from early beginnings.

Morphy Richards now have a new machine on the go, which seems to have a sauté base, so I covet that version at the moment.  For now, I will stick with my kettle version of a soup maker.

I imagine that if you are looking for soup maker recipes, that you already own a machine, but if you don’t, there are major differences between the two styles that prevail.

Types of Soup Maker

Kettle / Jug Type

This is like the version that I have.  It resembles a large kettle, but you cannot see the inside of it while the soup cooks.  You do need to use the minimum and maximum settings on the kettle to make sure you have the right amount of ingredients and fluid in your soup maker. My version can also make smoothies, which is a very welcome thing indeed.  The blender attachment is in the top of the kettle, which makes for very easy cleaning.

Blender Type

These versions tend to be slightly more expensive.  They can often sauté onions and vegetables, but with the kettle versions catching up, that benefit will soon be wiped out.

These usually resemble a traditional counter top blender, with the blending tool in the bottom of the glass.  They are said to be more difficult to clean, but I cannot vouch for that.  You really would have to find out for yourself.

Considerations For Buying A Soup Maker

Decide what SIZE of soup maker you will need.  My version makes soup from 1.3 – 1.6 litres.  If you are only making soup for one person, you might be fine with a small quantity soup maker, or simply freeze what you have made for another day.

Different SETTINGS do made a difference.  I wanted the option to have both smooth and chunky soup from my soup maker.  The smoothie function was an added bonus.  It isn’t obvious when you look at some versions, but reading more deeply into functions and settings, you might find the one you are coveting cannot do one or the other.

If you want ease of CLEANING, then you have no option but to read through the reviews of people who have owned soup makers.  I have only suffered from one burnt bottom of the pan, and that was my own fault, as I forgot to stir the ingredients with the fluid before I popped on the lid.   It is worth nothing though, that even though the bottom did burn, just a little….a ten minute soak with hot soapy water, and it scrubbed off no problem.

Soup Maker Tips and Tricks

  • Prepare as much of your ingredients as possible in advance. Considering that most of my recipes are simply chop and plop, it’s quite easy to do.
  • Use boiling water for your stock, or liquid addition. I find that if I use it cold from the tap that the vegetables may not be fully cooked when the soup is ready.  Starting with hot stock, gives it a great chance to add more flavour and taste.
  • If you plan to use anything frozen, make sure the ingredients are fully thawed first.
  • Make sure all meat that goes into the soup maker is pre-cooked. Soup makers do not have long enough settings to cook your meat.
  • Chop your ingredients into small pieces, especially potatoes, carrots and turnip. This allows the vegetables to fully cook in the short soup maker cycle.
  • Ensure the lid is fully closed or sealed.
  • Do NOT open the lid during cooking. If you do you may find yourself splattered with very hot liquid.
  • Some soup makers have a strong pulse setting. I’ve seen many people recommend holding down the lid, to avoid soup being pushed up and out of the blender.  I do not have this problem with my version, but remember to check out the possibilities of your own.
  • Follow your manufacturers minimum and maximum guidelines. My jug has these clearly marked on the inside of my machine.
  • Do not submerge your soup maker fully in water to clean.  Follow your instructions to the letter, or you may short out your machine.
  • Follow your manufacturers instructions for cooking, cleaning and maintenance.

SAFETY WHEN USING A SOUP MAKER

  1. NEVER fill your soup maker past its manufacturers recommendation or outside the minimum and maximum fill levels.
  2. Do NOT immerse any parts of your soup maker fully in water.
  3. Keep soup makers and kettles away from the edges of counters, especially if you have children, to avoid them being dragged over the edge.
  4. Do not be tempted to open the lid during cooking. The soup maker contents may explode over you.
Posted on 5 Comments

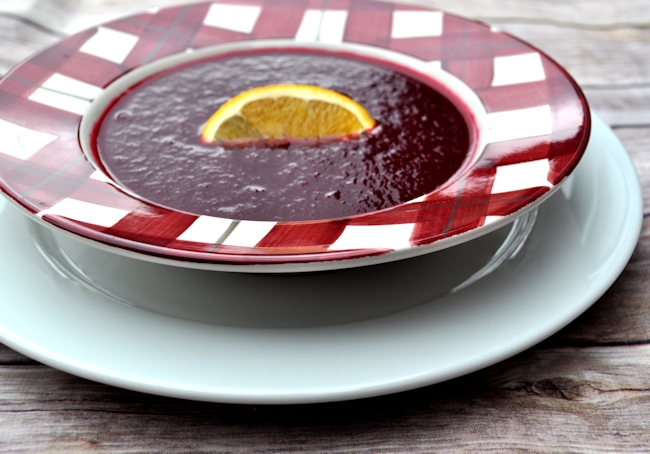
Soup Maker Recipe: Beetroot and Orange Soup Recipe

I’ve struggled for a while to get a beetroot soup that I can cope with.  This beetroot and orange soup seems to be my ideal soup for this vegetable.

For me, it needs the addition of the citrus to be palatable.  Everyone else is different.  I also left out the salt and pepper in my version, but feel free to add it to yours.  I had to experiment with beetroot, as the first versions I made came out orange.  I suspect it was more to do with the variety of beetroot and where it was grown than anything else.

The kids preferred a little cream mixed into theirs at the serving stage, so it’s all good for turning this into a cream of beetroot soup, quite easily.

Soup Maker: Beetroot and Orange Soup Recipe

5 from 1 vote

Ingredients
  

  • 600 g Cooked Beetroot Quartered
  • 100 g Red Onions Chopped
  • 100 g Carrots Chopped
  • 1 Stock Pot Vegetable or Chicken
  • 800 ml Boiled Water
  • 200 g Orange Juice
  • PinchSalt
  • PinchPepper

Instructions
 

  • Simply add all the ingredients to the pot, apart from the orange juice.
  • Select the smooth setting.
  • When the soup is ready, stir in the orange juice before serving.
Posted on 12 Comments

Soup Maker Recipe: Creamy Tomato Soup (Passata Recipe)

This is a wickedly easy way to make a good tomato soup that doesn’t require hours of steaming and peeling tomatoes, or having to sieve your soup by pushing it through a muslin cloth.

You could substitute fresh tomatoes for the tinned ones, and not lose any flavour or taste with the recipe.  Make it how it suits you.

We add cream at the serving stage, which makes it a much more creamy soup.  It is a thick soup, so if you like your soups watery, this isn’t for you.

Some people have commented that this soup with passata burns in their machines.  It’s not happened to me, but if you think it’s a possibility, then it might not be a soup for you.

Soup Maker Recipe: Creamy Tomato Soup (Passata Base)

Lesley Smith
Prep Time 10 minutes
Cook Time 21 minutes
Total Time 31 minutes
Course Soup
Servings 4 -6

Ingredients
  

  • 1 l Tomato Passata
  • 2 teaspoons Sugar
  • 400 g Tin Plum Tomatoes
  • 2 Vegetable Stock Cubes
  • 200 ml Whole Milk
  • 2 tablespoons Tomato Puree

Instructions
 

  • Add all the ingredients into your soup maker. If you plan to freeze some soup, leave the milk out of the batch, and add it in proportion when you reheat the soup to serve. Freezing soup with cream or milk in it, will cause it to separate or curdle on reheating.
  • You will look for the smooth setting for this soup, as you want it as pureed as possible. If it isn't smooth enough for your taste, simply choose the smoothie setting on your soup maker if you have one, or use a stick blender to smooth it even more.
  • Serve Immediately, with Croutons, or Why Not Try a Scone, For Something Different

Notes

This soup may not be suitable for all machines. Some people have commented that this soup with passata might burn in their machines.   A reader commented that Morphy Richards does not recommend passata in their soup makers.


Posted on 3 Comments

Soup Maker Recipe: Pumpkin Soup

It’s coming up to that time again, when we all wonder what to do with the lovely insides of pumpkins that we put out for Halloween.  I’d made my soup and had some lovely pictures, then managed to delete the pen drive, so this is a legally borrowed one that looks identical to how mine looked.

Enjoy your Halloween when it comes.

Remember, when using soup maker recipes, never fill your soup maker above the maximum level from the manufacturer, no matter what the recipe says.  We often use different soup makers, with different maximum levels.

Soup Maker Recipe: Pumpkin Soup

Lesley Smith
Prep Time 15 minutes
Cook Time 21 minutes
Total Time 36 minutes
Course Soup
Servings 4 -6

Ingredients
  

  • 400 g Finely Chopped Pumpkin
  • 200 g Finely Chopped Onion
  • 100 g Finely Chopped Carrot
  • 100 g Finely Chopped Potato
  • 1 teaspoon Salt
  • 1 Litre Stock Chicken, Beef, Pork or Vegetable
  • Cream Optional at the serving stage.
  • Parsley Garnish or Herbs (Optional at the serving stage.)

Instructions
 

  • For this recipe, to get more taste, you can lightly fry the onions in a frying pan with a teaspoon of coconut oil. The onions must stay white, so they will not need to be on for long. You can miss out this step and just put the ingredients straight into the pan if you are in a hurry, but the taste will not be so rich.
  • Add all the ingredients to the soup maker. Put your setting onto smooth. With your stock, fill to the maximum or 1600-1800g for all ingredients manually in a pot.
  • Serve when fully blended with garnish, parsley or herbs. Optional to add a swirl of cream to the soup when it's in the plate for some creaminess.


Posted on Leave a comment

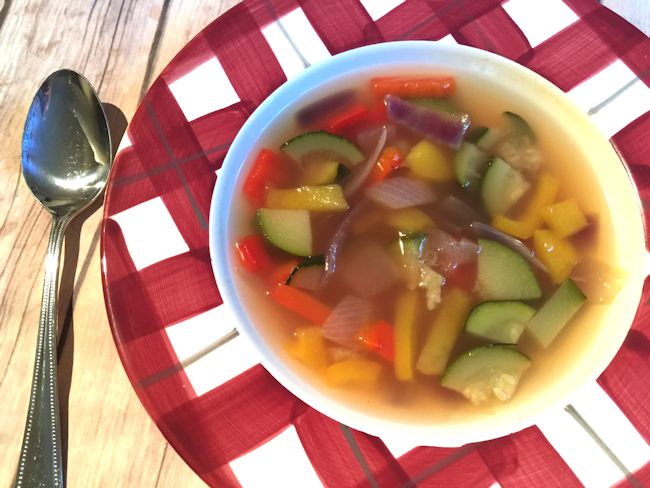
Soup Maker Recipe: Mediterranean Vegetable Soup

This is so easy, that it’s almost impossible to get wrong.  Simply chop the vegetables, throw in the pot, add stock and a little salt, then off you go.

Soup Maker: Chunky Mediterranean Vegetable Soup Recipe

Lesley Smith
Prep Time 5 minutes
Cook Time 25 minutes
Total Time 30 minutes
Servings 4 -6

Ingredients
  

  • 1 teaspoon Salt
  • 1 l Chicken or Vegetable Stock You could add water and a stock pot or two stock cubes.
  • 600 g Chunky Mediterranean Vegetables Diced Red Onions, Courgettes, Red and Yellow Peppers

Instructions
 

  • Add the diced vegetables to the soup maker, along with the salt.
  • Add the stock, either up to the maximum 1600-1800g for a Soup maker or the full 1 Litre of stock if you are cooking this in a saucepan. Use more or less liquid, depending on how much soup you are looking for.
  • Select the chunky setting and wait until it's ready.
  • Serve with fresh bread.


Posted on 22 Comments

Soup Maker Recipe: Red Lentil Soup Recipe

Who doesn’t love a plate of red lentil soup?  Lentils don’t agree with me, but I do love them, so every now and then, I actually do make a pot.

That’s the beauty of the soup maker, as it’s just so easy to do.  It works especially well for my mother, who decides she wants a hot meal at odd hours of the day now, yet won’t eat tinned.

I’ve always got bags of lentils in the cupboard, and at a push, I’ll just throw in what’s at the bottom of the fridge to make up some vegetable content.

Soup Maker Red Lentil Soup Recipe

Lesley Smith
5 from 4 votes
Cook Time 21 minutes
Total Time 21 minutes
Course Soup
Servings 4 - 6

Ingredients
  

  • 200 g Split Red Lentils Rinse & Soak in water for half an hour before cooking.
  • 1 l Stock To Taste - Beef, Chicken or Vegetable
  • 200 g Potatoes
  • 1 teaspoon Cracked and Ground Black Pepper
  • 1 Chopped Onion

Instructions
 

  • For this recipe, to get more taste, lightly fry the onions before adding to the pot, however it isn't necessary, Add the lentils to the cooking pot, with the chopped onion and potatoes.
  • Add the stock, either up to the maximum 1600-1800g for a Soup maker or the full 1 Litre of stock if you are cooking this in a saucepan.
  • Select the smooth setting for a pureed soup, or the chunky if you prefer some bits in your lentil soup. If you plan to leave your soup chunky, chop your onions and potatoes very finely before adding them to the pot.
  • Serve with hot fresh bread.

Notes

Lentil soup is very much a personal thing.  Some people like it so that their spoon stands up on its own, and others like it more watery.   Add more or less lentils with experience, once you know the likely consistency that a set amount yields.  I like mine smooth and not too thick.  If it turns out too thick, I simply add a little more water or some milk at the end of cooking.

Image representative only.  Your finished soup will vary, depending on the content and consistency that you choose for cooking.

Posted on Leave a comment

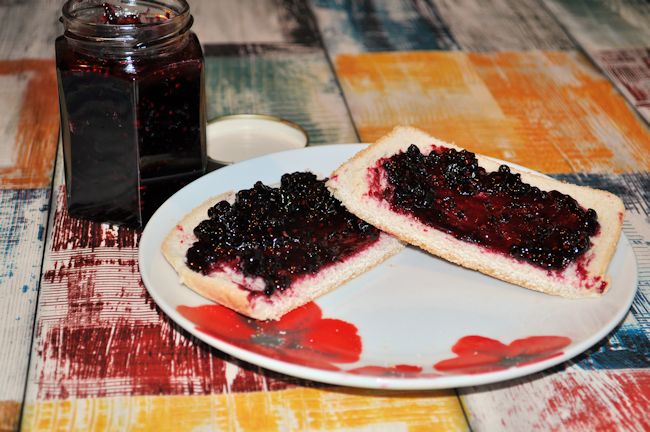
Foraged Wild Blackberry Jam Recipe

At the weekend, two of my boys decided to pick some blackberries.  With the instruction of not to pick below waist height, I hope they stuck to it, but if not, we’ll never know for sure.

I used golden caster sugar for a change for this recipe.  The taste and smell while it was cooking was the best of any jam I have ever made.   It’s also not as sweet as strawberry or rhubarb jams.

It would be amazing served warm with ice cream.

Blackberry Jam 3

Wild Blackberry Jam Recipe

Lesley Smith
Prep Time 5 minutes
Cook Time 15 minutes
Total Time 20 minutes
Course Bread
Cuisine Baking
Servings 4 -6

Ingredients
  

  • 800 g Wild Blackberries
  • 750 g Golden Caster Sugar
  • 50 g Butter
  • 4 tablespoons Pectin
  • 50 g Water

Instructions
 

  • Put the washed blackberries and the water into a thick bottomed saucepan. Simmer for around 10 - 15 minutes to soften the fruit.
  • Add the golden caster sugar and bring to the boil slowly.
  • Add the pectin, then allow the jam to rapid boil for around 5 minutes. Add the butter.
  • You might have some scum to scoop off the top, or you might not have. Whichever way, let the jam settle for a few minutes after turning off the heat, and place it into clean and sterilised jars for storage.

Posted on 2 Comments

Review: New Whole Hog Roast Hire in Aberdeen (Spit Roasted) Yum

If you’ve read my blog for any time, you’ll know who my favourite butcher is.   Andrew Gordon has a traditional butcher shop in Aberdeen, and runs an online butcher shop at the Fresh Food Guru website.

One of his specialities is with piedmontese beef.  It’s a beef that is leaner than chicken, and is proving very popular with people who are looking for a healthier meat option choice.

New Hog Roast Hire Catering

He had diversified into taking whole hog roast system hire bookings for events, whether they are for weddings, corporate functions, hotel specialities, or even just the good old garden barbie.

His team will arrive at your venue and do all the cooking on the hog spit roast system.   The meat cooked this way is tender, succulent and divine.

I’m not a great fan of crackling, so I would always leave that out of my own hog in a bun choice, but for those who love it, I’m told that it is second to none.

AGHG600-300x200

Menu

  • Large Fresh Brioche Buns.
  • Candied Crisp Crackling.
  • Whole Roasted Outdoor Reared Pig.
  • Thick Apple Sauce.
  • Traditional Sage & Onion Stuffing.
  • Fresh Coleslaw.
  • Chef in Full Whites/Blacks, Chef’s Assistant.

The whole hog is roasted on a spit roast machine and carved just for the guests, by his own staff.  The whole package is controlled carefully and adheres to strict food and hygiene regulations.

All I can say, is good luck to Andrew and his team in their new venture with their yummy food.

AGHG2-650

AGHG7-650

Posted on Leave a comment

Mixed Pepper Bake with Turkey Bacon

This is simple to make and easy to feed the family with some lovely colours.

Mixed Pepper Bake 4

Mixed Pepper Bake

Lesley Smith
4 from 1 vote
Course Mains

Ingredients
  

  • 2 Red Peppers
  • 2 Yellow Peppers
  • 1 Green Pepper
  • 3 Small Onions
  • Handful Green Beans
  • Rapeseed Oil
  • 400 g Turkey Bacon

Optional

  • Barbeque Flavouring

Instructions
 

  • Stir fry chopped onions and green beans in a frying pan with some rapeseed oil until they soften. If you plan to add some flavouring, this is the time to add it.
  • Use a slotted spoon or spatula to put onions and green beans into a shallow baking tray.
  • With the remains of the oil used for the onions, lightly fry your turkey bacon until is cooked to your taste. With the barbeque flavouring still in the pan, ours took on that flavour.
  • Pop the chopped peppers and turkey bacon into the baking tray and bake at 180C for twenty minutes, or until the peppers are cooked through.

Posted on 2 Comments

Raspberry Jam Recipe

Easy Raspberry Jam Recipe Using Jam Sugar

Silver Spoon
Prep Time 5 minutes
Cook Time 15 minutes
Total Time 20 minutes
Course Bread
Servings 4 -6

Ingredients
  

  • 1 kg Jam Sugar
  • 1 kg Raspberries
  • 50 g Butter

Instructions
 

  • Put raspberries into a thick bottomed pan. This needs little crushing as raspberries break down quite easily.
  • Add sugar to the raspberries.
  • Bring to a slow boil, stirring while the sugar breaks down and melts.
  • Add the butter and allow to rapid boil for approximately 4 minutes. Stir.
  • While the jam is cooking, wash jars in warm soapy water, then place on baking sheet for around 10 minutes at 170 degrees. Take out of the oven a few minutes before you are ready to put your jam into it. The ideal conditions are to put your jam into jars when the jars are still warm,
  • Cover the jam jars if you plan to keep some for later, and simply keep until you need it. Once a jar is opened, make sure you refrigerate it until it is used. I used small jars and from this recipe, I filled 5 small/medium sized jars.


Posted on 3 Comments

Home Grown Vegetables From The Plot This Week

Our plot is beginning to mature, and in its third year, our crop is getting bigger and bigger.   The man tends to be the one who keeps it up so I do need to get more pictures of how it looks now.

For now, I have the pictures of the fruit and vegetables we took home this weekend.

We have strawberries, rhubarb, potatoes, pea pods, cabbage, turnip, onion and beetroot.

Plot Peapods
Plot Potatoes 2
Plot Potatoes
Plot Rhubarb
Plot Strawberries
Plot Vegetables 1
Plot Vegetables 2


Posted on 3 Comments

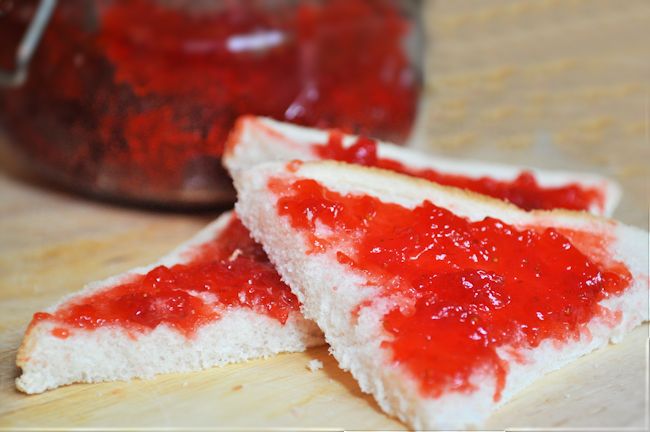
Easy Strawberry Jam Recipe

For this recipe, I used Silver Spoon Jam Sugar to avoid having to use pectin.  As a rule, strawberry jam can be tricky to set, but there were no problems at all using this recipe.  I’d even go as far as saying it set too much, so I might be tempted to slightly up the fruit to sugar ratio for my next batch.

We have had loads of strawberries from our plot this year, so making jam for the next year has been a sensible idea.  It’s nice to think that due to the plot, we won’t have to buy jam for a whole year.  It’s an impressive achievement considering we only had about 4 strawberries in total last year.

[gmc_recipe 28704]