This was a very interesting challenge for me, given that until recently, we drove down to France on a yearly basis for our summer holidays.
Despite spending months in France, in total, I doubt that we’ve actually even tried anything that remotely resembles French cuisine. In the past, I’ve always thought of frogs legs and yukky green things, and to be honest, never really gave it a chance.

Expedia challenged me to come up with a dish that was inspired by France, and as part of their world on a plate challenge.
They sent me some lovely French ingredients to work with, including duck confit, black truffe paste (I had no idea what to do with this. It took a bit of work to figure something out), fleur de sel sea salt, dried Morel mushrooms, red fruit coulis, a cheese wedge of Beaufort, goose fat, cooked chestnuts, chestnut puree and Perard fish soup.
As much as I tried, I couldn’t persuade anyone in my house to consider trying the fish soup, which is a shame, but it will go to a good home where it will be enjoyed.


The challenge for me, was what to do with those ingredients. They’re not anywhere near my usual staples for cooking, so it did take some thinking.
A chestnut gravy seemed like a good place to start, and that’s where I did go, and used the truffle paste as part of that, to enable those who like the taste to try it, and those who don’t, to leave it off their plate.
As an underground fungi, they’re more like a type of below ground mushroom, and pigs seemingly like them. Finding that out, means that I could add it to my chestnut gravy as a taste booster, or even to soups.
I do have to say though, that at nearly £50 a jar, it’s not something that would be on my shopping list. For that reason, part of me is actually hoping truffles don’t become a taste or flavour that we enjoy too much as a family.
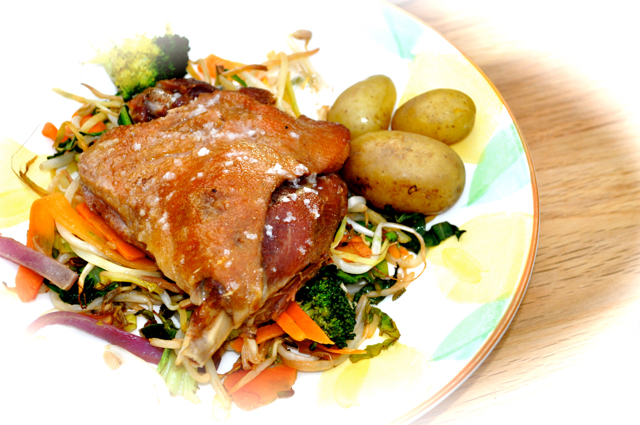
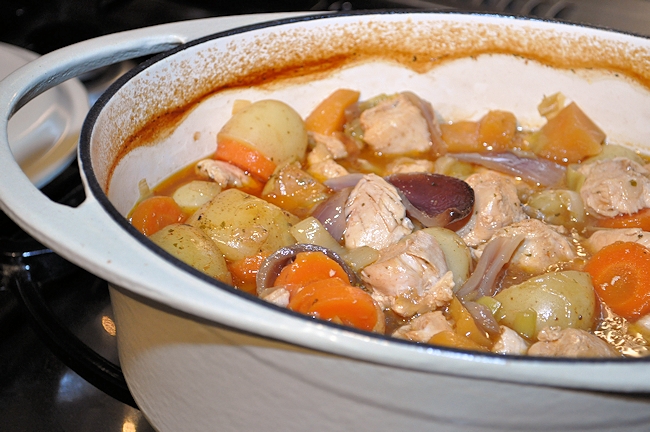
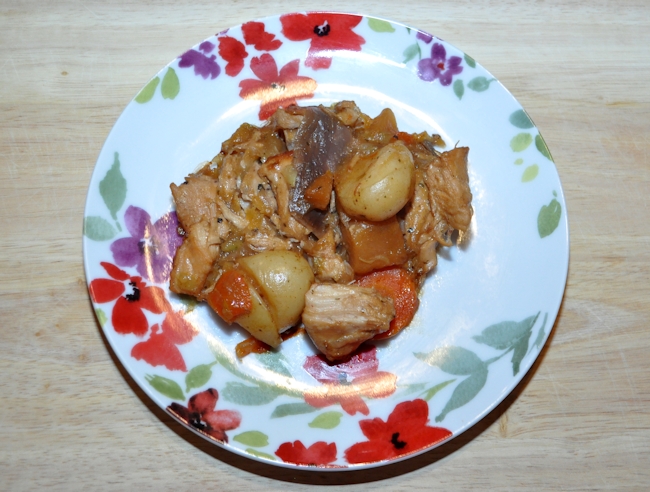
To make our meal, I took the advice on the tin of Duck Parfait, to remove the duck and put it into a roasting dish for cooking. After 20 minutes, it was lovely and crispy on the outside. I’d rubbed the skins with the salt, which added an unusual flavour.
With the addition of some lovely vegetables and a Chestnut Gravy Sauce that I made up on the spot with our ingredients, the meal was actually lovely, and well appreciated by all. These aren’t ingredients I would have chosen originally, but even I was impressed with how good this looked at the dinner table.
Chestnut Gravy Sauce for Turkey

- 200 g Cooked Chestnuts.
- 2 cms Chestnut Paste.
- 1 Teaspoon Sea Salt.
- 1 Clove Garlic chopped (optional).
- 400 ml Unsweetened Almond Milk.
- 1 Teaspoon Truffle Paste.
I've made the garlic optional, as the truffle paste is very garlicky. It depends how strong you like your gravy sauces.
Combine all in a blender and whizz until as combined as it can get to. Mine ended up with some tiny black dots in the sauce, which gave it a little character.
Heat in a pan until thoroughly hot. If it's a little too strong, add a little cream to dilute it.
As truffles can be an acquired taste, serve in a dish on the side, so that diners can choose how much to use.

Expedia provided or paid for all food in this post. All views are my own.


Delicious! I have made this recipe many, many times. Always perfect.
Yep it works perfectly. Get a good crumbly stilton though.
My old machine said hot or cold water. No way cold water cooks the veggies in my old machine. Actually…