Posted on 2 Comments

Basic Meringue Recipe – Great For Meringue Nests

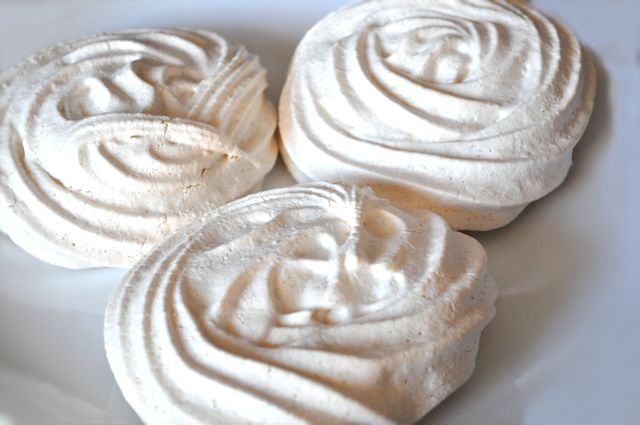
Being able to make meringue nests is one of the jobs I wish I had learned years ago.

Now that I know how to do it, making all sorts of meringues is now quite easy.  For this recipe you can use a piping bag, or if you don’t have one, just pop your meringue mix onto your making paper and use the back of a spoon to form peaks.

This will take around 30 – 45 minutes to dry in the over if the nests are small, but one large pavlova size meringue will take up to an hour and a half to dry out in the oven, and then it has to be left to cool.

The vinegar is in all my meringue recipes and will be forever more.  It helps to stabilise it, and the chances of it collapsing are greatly reduced, although meringues are by their nature, crumbly and light.

Basic Meringe Recipe – Useful For Meringue Nests

Prep Time 20 minutes
Cook Time 45 minutes
Total Time 1 hour 5 minutes
Course Dessert
Servings 10

Ingredients
  

  • 5 Egg Whites
  • 250 g Caster Sugar I used golden sugar for the meringue in this picture.
  • Half teaspoon Vinegar
  • 1 teaspoon Vanilla Essence
  • 2 teaspoons Cornflour

Instructions
 

  • Put the oven on to approximately 130 C or Gas 1 - 2. Line a baking tray with baking paper.
  • Separate the egg yolk from the egg whites and put them into a mixer bowl. Whisk them for a few minutes until they form stiff peaks.
  • Add the sugar slowly, about 50g at a time and whisk again for a few minutes each time, until the sugar is all added.
  • Add the vinegar, cornflour and vanilla essence and continue to mix for up to 8 minutes, until the mix is smooth and glossy.
  • Line 2 baking trays with baking paper. Put your meringue mix into a piping bag with the nozzle of your choice. Starting from the middle, work out by going round in circles to create the meringue nest shape on your baking paper.
  • Pop your meringues into the oven for approximately 30 - 45 minutes. Let the meringues cool down in the oven if it's possible.
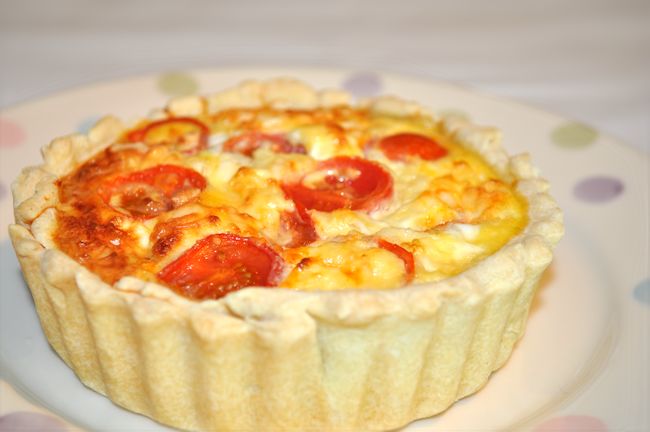
 

Posted on 6 Comments

Shortcrust Pastry Recipe

For almost every other pastry, I buy it in the shops as ready make blocks and sheets, but for the shortcrust pastry version, I usually make it as it is just so simple and quick to make.

It can also be frozen once it’s made for another day, so for example, if you were going to make 4 x 4″ flan case base size portions, I would use half this quantity.

What I often do is make the full batch and freeze half of the dough for another day.  This batch size will make up to 8 x 4″ flan case size bases.

Shortcrust Pastry

Lesley S Smith
Prep Time 45 minutes
Total Time 45 minutes
Course Baking

Ingredients
  

  • 500 g Plain Flour
  • 220 g Butter
  • 1 tablespoon Caster Sugar
  • pinch Salt
  • Water

Instructions
 

  • Put flour and butter into a bowl and either rub the butter into the flour, or mix it in the food processor until it is a breadcrumb consistency. Make sure that all the lumps of butter are rubbed in.
  • Add a couple of pinches of salt and caster sugar, and mix with the breadcrumb consistency ingredients.
  • Add a little water at a time and either mix by hand, or in the mixer / processor until the dough forms a ball. Stop when the dough has bound together. I add a tablespoon at a time until the ball begins to form.
  • Wrap the dough up with cling film and refrigerate for approximately half an hour before using it.


Posted on 2 Comments

Cheese and Tomato Quiche Recipe, with Maw Broon’s Sauces

Cheese & Tomato Quiche 2

This recipe size makes up to 8 x 4″ flan case sized Quiches.  Use half the quantities for a smaller batch.

Quiche is nice and easy to make and almost everyone enjoys Quiche hot or cold.  Eaten hot, it’s great with some baked beans and is fabulous cold as part of a salad, and can even go in lunch boxes.

We’d been sent some lovely Maw Broon’s sauces to try.  As a Scottish person who grew up on the Broon’s books, the Maw Broon’s range isn’t one that I’m going to let slip through my fingers.

Two of my children love Tomato Sauce and the other loves Brown (or Broon) sauce.  The verdict in this house was one of thumbs up.

My boys are usually Heinz fans only, so I was slightly apprehensive that they wouldn’t like it, but they did.  There are no artificial flavourings, colourings or sweeteners, so it’s all good.

For the Quiche, it all starts with the shortcrust pastry.  I’ve added the recipe for that first, and then followed it up with the cheese and tomato quiche one underneath.  Enjoy.  This makes for delicious quiche/flans.

[gmc_recipe 25753]

[gmc_recipe 25773]

Posted on 7 Comments

Dry Fried Bananas With Cinnamon Infused Sugar

This dish is perfect for serving as a topping for ice-cream, crumbles and desserts, or you can simply eat it on it’s own for a sweet treat with a bit of goodness from the banana thrown in.

If you want to find out more about dry frying, have a look here.

Dry Fried Bananas With Cinnamon Infused Sugar

Lesley S Smith
Prep Time 1 minute
Cook Time 5 minutes
Total Time 6 minutes
Course Dessert
Servings 1

Ingredients
  

  • 1 Small Banana Per Person
  • 2 teaspoons Cinnamon Infused Sugar
  • sprinkle One Cal Spray

Instructions
 

  • Use a spray of one cal on the bottom of your pan. Add the chopped banana and bring to a low heat.
  • When you smell the banana cooking, use a fish slice to turn over the bananas to the opposite side. Turn them a few times over the space of a couple of minutes while always cooking on low to dry fry. If you need to, add one or two more sprays of your one cal or half a teaspoon of water.
  • Sprinkle a teaspoon of cinnamon infused sugar over your bananas, leave for around 30 seconds and then turn the bananas over.
  • Turn your bananas out onto a plate and sprinkle over a teaspoon of cinnamon infused sugar to serve. This is fantastic when it's served as the topping for ice-cream or a crumble.


Posted on 8 Comments

Simple Valentines Day Cupcakes Recipe

We all like the kind of recipes that are quick and easy to make.  This one is what my kids like to make (and eat).  We can all make something special for parents, a girlfriend, or just for fun for Valentines Day.

We used the Dr Oetker can of icing to decorate this (and to make it faster).

Plopped on the top are hearts from the Haribo sweets collection and they are just plopped on top of the basic sponge recipe mix below, which I simply divided into 24 individual cake cases.  Some of the cakes we ice, and others we don’t.


Basic Cupcake Cake

Lesley Smith
Prep Time 15 minutes
Cook Time 25 minutes
Total Time 40 minutes
Course Baking
Cuisine Cakes

Ingredients
  

  • 4 Medium Eggs
  • 2 teaspoons Vanilla Flavouring
  • 8 oz Butter
  • 8 oz Caster Sugar
  • 8 oz Self Raising Flour

Instructions
 

  • Cream the sugar and butter and set the oven to 160 degrees c.
  • Add in the eggs and beat or mix until smooth.
  • The final step is simply to fold in the flour until fully mixed through and you've added air with the folding.
  • Divide into individual cake cases. You will get 12 muffin sized cakes or 24 smaller cupcakes for decorating.
  • Bake for 15 - 20 minutes, or until a skewer tester comes out clean.


Posted on 3 Comments

Making Sweet Microwave Popcorn – Like The Cinema

I bought popcorn kernels ages ago with the intention of putting them into a pan to make but really never got round to it.  I’d planned a Lakeland delivery as we needed some more sodastream gas canisters – so I added their microwave popcorn maker to the basket.

I thought it was the best of the options as it was £16.99 and would fit in a cupboard between uses.  My gadget count has been increasing lately and my kitchen counters are beginning to fill up with the load placed on them.

I’d tried just putting some kernels into a microwave container but most of them didn’t pop so this was my last attempt at finding something space-saving to make fresh popcorn with.  The biggest problem was that although I like plain popcorn, my the boys like sweet popcorn, just how it comes when we go to the pictures.  Actually, so do the gerbils.

We’ve managed to get it right and it was easier than I thought.   All we needed to do was simply add a few spoons of icing sugar to the kernels in the bowl and mix it all around. Don’t be tempted to try butter added to the sugar.  We did – and it tastes great, but the heat with the butter does unspeakable things to the microwave bowl.

Simply add enough popcorn kernels to fill the measuring scoop to the maximum line on the measuring cup.   Leave plain or stir in some icing sugar and just microwave until most kernels are popped.   It will take about 2.5 – 4 minutes depending on the strength of your microwave.  Our newer microwave sadly needs 4 minutes to make popcorn whereas our last one would have done it in the 2.5 minutes.

You can sprinkle sugar on after making popcorn, but we’ve found it didn’t imitate the cinema popcorn experience that way.

There will be some unpopped kernels in the bottom of the bowl.  Try to resist having another go at popping unpopped kernels.  They didn’t pop for a reason, and many are likely to burn and smell awful if you try again.

Microwave Popcorn 1

What we have now though is popcorn on tap whenever we want and without mess or having to have packets of the stuff in the cupboard at a fortune in comparison money wise.  It’s a win win for us.  I’m glad I bought it as we will get lots of use out of it.

The next time we go to the cinema, we may just squirrel some bags of it to take with us since it’s so expensive there, but shhh, that’s not really allowed is it?


Posted on 3 Comments

Mini Victoria Sponge Cakes with Buttercream & Jam

To make my small Victoria Sponge cakes, I use the red Pyrex Silicone Muffin Cases from Tesco which do the job brilliantly and are really easy to squish up in my kitchen cupboard.  Sometimes the kids don’t want a slice of cake, and if I put some into lunch boxes, it’s easier when the cakes are individual.  Kids also want to have things that look different from their friends who have their cakes in traditional paper cases, and I’m happy to oblige.

These fairly plain and standard cakes are firm favourites with my boys and so easy to make as well.

Individual Victoria Sponge Cakes with Buttercream and Jam

Prep Time 15 minutes
Cook Time 15 minutes
Total Time 30 minutes
Course Dessert
Servings 12

Ingredients
  

  • 8 oz Plain Flour
  • 8 oz Butter
  • 8 oz Caster Sugar
  • 4 Eggs
  • Icing Sugar

Icing

  • 5 oz Butter
  • 10 oz Icing Sugar
  • Jam

Instructions
 

  • Cream the sugar and butter and set the oven to 160 degrees c.
  • Add in the eggs and beat or mix until smooth.
  • Sift in the flour.
  • Divide into individual cake cases.
  • Bake for 15 - 20 minutes, or until a skewer tester comes out clean.
  • Turn out cakes and leave them to cools lightly before splitting them in half across the centre to give two cake halves.
  • Mix butter and icing to make the buttercream icing.
  • Spread the buttercream icing and jam on individual cake halves and then put them together and finish with a dusting of icing sugar.

Victoria Sponge 1


Posted on 10 Comments

Halloween Devils Food Cake Recipe

This recipe is one from Nigela Lawsons website (minus the decoration) that we decided we could make a great Halloween cake with.  Nigella carries a monthly cookalong which gives us a recipe to follow and post a picture of.

I couldn’t resist trying it out for ourselves as it just looked so rich.  The kids wanted involved so they did the weighing, measuring and preparing and I did the oven bit.  We used shop bought ready icing for the decoration, but I’m sure it would be easy enough to make.

The boys wanted a fab cake for Halloween night so it is now tucked up in a Tupperware tub to be brought out for THE night.  A real spooky home-made Halloween cake.

Nigella Lawson Recipe with a Halloween Twist – Devils Food Cake

Nigella
Course Dessert

Ingredients
  

Cake

  • 50 g Best Quality Cocoa Powder Sifted. I used Green and Blacks
  • 100 g Dark Brown Muscovado Sugar
  • 250 ml Boiling Water
  • 125 g Soft Unsalted Butter Plus some for greasing.
  • 150 g Caster Sugar
  • 225 g Plain Flour
  • Half teaspoon Baking Powder
  • Half teaspoon Bicarbonate of Soda
  • 2 teaspoons Vanilla Extract
  • 2 Large Eggs

Frosting

  • 125 ml Water
  • 30 g Dark Brown Muscovado Sugar
  • 175 g Unsalted Butter Cubed
  • 300 g Best Quality Dark Chocolate Finely Chopped

Instructions
 

  • Preheat the oven to around 180C/Gas 4/350F. Nigella recommends to line the bottom of two sandwich tins approximately 8 inches in size with baking parchment paper and butter the sides. I don't have baking paper, so I improvised with a few sprays of cake release in my tins.
  • In a large bowl, put a half cup of the muscovado sugar with the cocoa and the boiling water. Whisk it together until it is mixed and leave to the side.
  • Cream butter and caster sugar until pale and fluffy.
  • Mix the flour, baking powder and bicarb together in a bowl ready to use.
  • Drop the vanilla extract drop by drop into the butter and sugar while still mixing. Quickly add in one egg and then add a scoopful of the flour mix and then the second egg. This is a new way of doing it for me as I tend to just throw them all in together.
  • Add all the rest of the cake ingredients to the mixing bowl and finally fold in the cocoa mixture.
  • Put half the mixture into each baking tin and cook in the oven for approximately 30 minutes or until a cake skewer comes out clean.
  • When cooked, leave the tins to cook for a few minutes before turning out the cakes to cool.
  • While the cake is cooking, take the frosting ingredients, ie the water, muscovado sugar and the butter into a pan on low heat to melt. When the mixture begins to bubble, take the pan off the heat and add in the chopped chocolate. Nigella recommends swirling the pan to hit the chocolate with heat. I forgot that bit, and just used a spatula and it seemed to turn out ok. Once the chocolate is melted, whisk until glossy and smooth.
  • Leave the frosting for about an hour, but whisk it up a few times in that hour while the cakes are cooling and ready for the frosting.
  • Take one of the cake halves and turn it top side down. Spread with a third of the frosting and put the second cake half on the top and spread the remaining frosting over the top and sides. If you want to create a swirly effect use a spatula. Some people will try for a smooth effect.


Posted on 3 Comments

Toffee Popcorn Cup Cake Recipe – withTruvia (Stevia)

I’ve wanted to use Stevia in cooking more for a while, after my successful sorbet recipe, so I’ve begun by mixing sugar and Truvia half and half for this recipe.  I’ve cut out an egg to counter for the reduced amount of sugar and it worked just perfectly.  The cakes had a slightly caramelly taste which I put down to the Truvia and matched the Toffee Popcorn very well.

I had the popcorn as Garrett Popcorn from Chicago are opening a new shop in the UK after summer and they sent us a preview of their popcorn to try and send them feedback.  We loved the toffee, but the cheese wasn’t popular here at all.  If the can had been all toffee popcorn I’d have had very happy boys indeed.  I wanted to try something different from just eating it, so we had a taste and then used the rest in our cooking.

With hindsight, I’d break down some toffee popcorn in future to put through the cake mix and use one to top the cakes, but it was our first foray into cooking popcorn into something else and we’re really pleased with how it turned out.  Garrett didn’t ask for a write up on my blog, but just asked for some feedback.  The toffee popcorn was just too good to eat in one sitting as my boys would have finished it quick smart.

I’d also been sent the Typhoon Vintage Scales from Red Candy and have been itching to use them as my old set broke down.  They remind me very much of the scales my grandmother used to have in her shop.  I used to work there when I was 12 and they were on the sweetie counter, which I absolutely loved having to serve from.  Red Candy has some amazing red pieces for kitchens, and they really brighten up a room.  They’re worth a look.

typhoon-vintage-scales


Onto the recipe.

Toffee Popcorn Cup Cake Recipe – with Truvia (Stevia)

Lesley Smith
This is a large recipe batch that makes us 36 cakes, but you can cut the quantities if you need smaller amounts.
Prep Time 15 minutes
Cook Time 25 minutes
Total Time 40 minutes
Course Baking
Servings 36

Ingredients
  

  • 12 oz Butter
  • 12 oz Plain Flour
  • 3.5 teaspoons Baking Powder
  • 6 oz Sugar
  • 2 oz Truvia Stevia
  • 5 Medium Eggs
  • 72 Garrett Toffee Popcorn

Instructions
 

  • Put oven on at 180 degrees to heat up.
  • Cream butter and sugar.
  • Add eggs and beat until creamy,
  • Add flour and baking powder, and fold it in until the mixture is light and airy.
  • Pop the cake mix into cake cases, put pieces of popcorn into the top and bake for 15 - 25 minutes depending on your oven.


Posted on 9 Comments

Mars Bar Chocolate Crispies Recipe

We made these for our local school fundraiser.  Kids take in things we’ve made and they sell them to each other to reduce the price of a big trip away with their year group.  I did worry at first about how these would turn out and they did end up chewy and more for a child’s taste buds than mine, but none came home again which must tell it’s own tale.

We used larger quantites as they were for selling, but I’ve cut them down for this post.  We decorated with smarties, but you could use any sweeties, or equally not add any in at all.

Mars Bar Chocolate Crispies

Prep Time 10 minutes
Cook Time 10 minutes
Total Time 20 minutes
Servings 12

Ingredients
  

  • 60 g Butter Preferrably unsalted, but we've used salted and there was no difference to the taste.
  • 2 tablespoons Golden Syrup
  • 100 g Rice Krispies
  • 2 Mars Bars Chop up into tiny pieces.
  • 100 g Chocolate
  • Sweeties to decorate.

Instructions
 

  • Melt the chocolate in the microwave or over a bain marie (bowl laid on top of a pan of simmering water). If you're using a microwave, do it in short bursts or depending on the chocolate you use, it could separate or burn.
  • Add the butter and stir it into the chocolate until it is melted. Then add the golden syrup.
  • Add the rice krispies and stir them on gently enough so as not to damage or break the krispies.
  • Fold in the tiny pieces of mars bar. They will semi melt into the mix as it will still be hot at this stage.
  • Pour into 20 cake cases and top with sweeties to decorate, leave to cool and then just eat.


Posted on 1 Comment

Cake In A Cup Recipe, with Flaked Almonds

I’m not really a cake hand though my kids and the man love their cakes.  I’d rather have a bar of Dairy Milk personally, or maybe a Green & Blacks if I feel flush.

Finding simple and easy ways to give the kids a cake led me to trying a cake in a cup a while back.  I couldn’t say I liked it, but the kids did and that’s all that matters.

Cake In A Cup – Flaked Almonds

Lesley Smith
Prep Time 5 minutes
Cook Time 3 minutes
Total Time 8 minutes
Course Baking
Servings 1

Ingredients
  

  • 3 tablespoons Self Raising Flour
  • 3 tablespoons Brown Sugar
  • 3 tablespoons Butter Margarine or Vegetable Oil
  • 1 Egg
  • 3 tablespoons Flaked Almonds

Instructions
 

  • Crack the egg and put it into the bottom of your cup.
  • Add in the sugar, softened butter and flour.
  • Mix it all together with a fork until it gets to the consistency you expect for cake mix.
  • Fold in the flaked almonds.
  • Microwave for 2 + minutes (until the centre is fully cooked - a skewer is good to test the centre)
  • Top with icing and sprinkles of your choice.


Posted on 4 Comments

Cinder Toffee, Smothered in Chocolate

Cinder toffee is similar to the Crunchie bar we have in the UK, but also quite different in texture.  It’s quite messy to make and you really have to be quick with it or it solidifies so quickly that you can’t get it out of the pan.   Be prepared to work quickly.

There is a lot of science involved in cinder toffee, or honeycomb toffee as it is also sometimes known.  Sugar can be the ultimate comfort food with zero calories that are good for us, but still we enjoy eating it while our teeth suffer with the potential for future cavities.

Making cinder toffee is a little like the experiments we did at school, or the ones we buy our kids to show the volcano erupting when bicarbonate of soda is added to the mix.  This is made using high heat, so it’s not good for children to make it, but they can have lots of fun watching it being made.

I adapted this from a Nigella recipe that I found online, but added a little butter to make it slightly easier to work with.

Nigella calls it hokey pokey, but I guess we can all call it what we like.  There are hundreds of variations of the same recipe for cinder toffee, honeycomb and fizz in the mouth candy.

We know it more as the type of sweet that is like a Cadbury Crunchie.

It’s easy to make, though you might find some trouble in cleaning your pan afterwards, but soaking in water and washing up liquid should help with that.  Make sure you grease the cooking pan for your cinder toffee very very well, or it will stick like glue and you might need to cut it out.

Have your bicarb out and ready to be used.  There’s no time for weighing once your hot sugary mess is ready to use.

Cinder Toffee / Honeycomb

Lesley Smith
Course Baking

Ingredients
  

  • 200 g Caster Sugar
  • 4 tablespoons Golden Syrup
  • 2 tablespoons Bicarbonate of Soda
  • 30 g Butter
  • 200 g Chocolate Bar

Instructions
 

  • Weigh out your bicarb of soda and keep it separate. Make sure your tray is greased before you start to cook. Use a fairly large pan as when the mixture swells up, you could be surprised just how far it comes up the side of your pan.
  • Put butter, caster sugar and syrup into a very thick bottomed pan and heat it gently until the sugar dissolves completely. Turn up the heat at this point and boil it without stirring for a quick boil so that the mix goes darker while it simmers and just for a few minutes. Don't let the mixture go too dark or it will begin to burn. Don't take your eyes off the pan, or let children come near it as it is boiling sugar and sugar hurts if it comes into contact with any living thing.
  • Now for the science bit. Take it off the heat, put the bicarbonate of soda in and quickly but calmly stir the mixture. Don't be too vigorous or you might end up with a few sugar burns, and those hurt, believe me. The mix will swell up as the chemical reaction takes place. At this point, you'll be glad you didn't use a small pan. Keep children at a safe distance.
  • Pour the mixture into your pre-greased tin and leave it to set for a few hours. Depending on the size of tin you use, your cinder toffee could be ready to eat in minutes. If the layer in your tin is thick, it will take a fair while to cool.
  • Once it's cool, melt your chocolate in a microwave or double pan method (or just put a heat proof plate on the top of simmering water in a pan, and put the chocolate in the plate). Dip your cut up pieces of cinder toffee into the chocolate and leave to cool.