Posted on 8 Comments

Top Tips for Baking the Perfect Cupcakes

Cupcakes

1. Use the minimum of utensils and keep your ingredients list reasonable.

I have a habit of making a huge mess of the kitchen when I am cooking, and with 6 mouths to feed, the kitchen can look like a bomb site quite easily.  I have got cup cake making down to a fine art with only my mixer, a cup, a dessert spoon and a knife at the ready.  I use no bowls whatsoever and just put everything straight into the mixer.

2 – Choosing Ingredients

Use the best ingredients you can afford.  It does make a difference.  The quality of flours can be quite different when you have your finished cup cakes.   If you’re using chocolate, use real chocolate and not the cooking kind that nobody really likes.  For chocolate powder, splash out on something like Green and Blacks Cocoa powder and not cheaper versions with fillers, and you’ll be very glad you did.

Use unsalted butter instead of margarine.  I really don’t understand the margarine or spread brigade as I’d rather have a little less of the real stuff than a heap of manufactured fats full of additives and other difficult to pronounce ingredients.

Baking really is a case of getting the mix of ingredients right.  As long as you add butter, sugar and flour at the same proportions and 1 egg for each 120g of any one of the other ingredients, you should be fine.

3 – The Mixing Moments

How much to mix is always a big issue with cup cake chefs.   I do have my mixer on at a fairly low-speed for a couple of minutes and then I turn it up high for the last little while at the sugar and butter stage to try to blast some air into the mix.

4 – When to Add the Ingredients

I’m going to go completely against the grain here.

Sifting the flour in can add extra air, but I suspect most home bakers don’t bother.  I am not telling you that I actually follow the rule for sifting flour into the mixer, as there are times when I don’t.  I’ve never had complaints from not sifting and my cakes seem to be as light as when I do sift, but I can often hear my grandmother in the background nipping my ears for not doing it right.  Guilt will sometimes make me reach for the sieve.

If you’re really brave like my sister-in-law, you can throw everything in the mixer at the same time and just mix until it’s ready to spoon into cases.

5 – Get the mix even in the cases.

This one is common sense.  If some cases have more mix than others, some will be cooked more quickly than the rest.  Try using a standard sized spoon or scoop to get the same amount of cake mix in each cup cake case.

6 – How to know if it’s mixed.

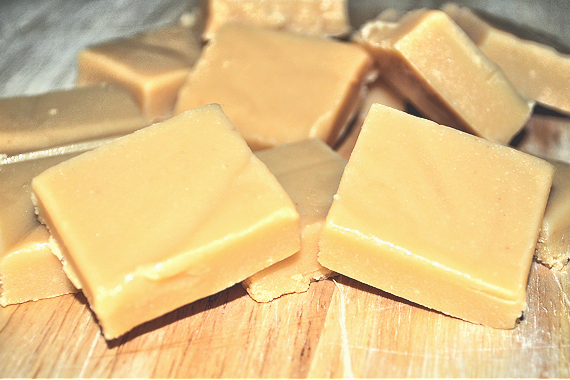
The consistency should be creamy and not like Scottish Tablet with a grainy consistency.

7 – Work your oven.

It takes a while to get to understand a new oven.  Each one works differently and gives different results.  If you know your oven tends to run hotter or colder than recipes usually ask for, change your baking time.   Use a skewer to know when they are ready.  If a skewer comes out clean, then the cakes are ready.

Resist the temptation to open the oven part of the way through cooking.  Your cakes may well just fall flat as a pancake…

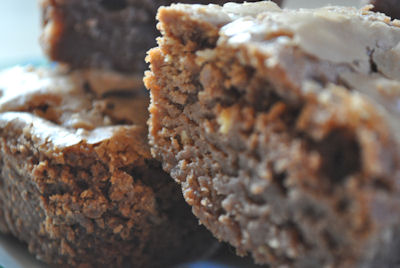
8 – It’s disaster time..

Cakes that don’t look perfect are rarely a disaster.  Make a form of Eton Mess using the sponge, or change a bread and butter pudding recipe, or cover it all up with icing.  If it tastes great, then it doesn’t matter what it looks like.


Posted on 5 Comments

Baxters Beetroot – Stir Fry and Chocolate Brownies.

Baxters sent a gorgeous hamper with a lovely Baxters apron and a selection of Beetroot from their range.  Baxters are reasonably local to us, and I’ve often bought their beetroot as it tends to be a nice sweet vinegary taste.

Their products have been in my life as far back as I can remember, so we’re regular customers in this house.

Baxters have been going in the UK for several generations and the make soups, preserves, condiments, beetroot and chutneys among other thing.   Baxters create their own recipes and showcase some of the them on their website.  They even have the opportunity for you to add your own recipe to their website, and if they like it, they might feature it online.

They have a visitors centre that is based around a highland village experience in Fochabers, Aberdeen.  I’ve driven past it several times, but have not stopped off as yet, but after this challenge, I may well give their Highland Village a visit in the near future.

Baxters Beetroot 2

They challenged me to come up with a recipe for their Beetroot so I used it as an alternative to rumpledethumps for leftovers in a Chicken, Bacon and Beetroot Stir Fry which went down a treat.

I opted for another recipe for one of the jars of beetroot in making the Beetroot and Chocolate Brownies from their website.  I had to tailor the recipe as I didn’t have quite enough beetroot for their version, and it went down well with the kids.

Baxters Beetroot 1

I can’t say that it was my favourite and I much preferred the savoury stir fry to the sweet versions, but the kids loved the brownies.  I think I just have more of a savoury tooth.

Here we go with my two recipes from the challenge.

Baxters Beetroot and Chocolate Brownies

Baxters
Prep Time 10 minutes
Cook Time 45 minutes
Total Time 55 minutes
Course Baking - Brownies
Servings 24

Ingredients
  

  • 1 x 340g Tin Baxters Baby Beetroot
  • 150 g Softened Butter
  • 300 g Milk Chocolate
  • 375 g Brown Sugar
  • 4 Eggs
  • 150 g Plain Flour
  • 35 g Cocoa Powder

Instructions
 

  • Preheat your oven before you start and set it to 180ºC, or reduce it to 160ºC for a fan oven.


  • Grease a medium to large baking try or roasting tin.

  • Soften the chocolate by putting it into a microwave for a few minutes, or on the hob as a plate on top of a pan with water in it, similar to a bain marie method of softening the chocolate.

  • Add all the ingredients into a mixer if you have one, or a large bowl. Mix them all together for several minutes, until the mixture is smooth.


  • Pour the smooth mixture into the baking tray and bake for 40-45 minutes. The brownies should feel a little soft under he centre and might be a bit wobbly, but they'll harden up as they cool.

Notes

Baxters recommend that the beetroot is well drained. You can also rinse them in some water. The vinegary flavour will not be tasted when you eat the brownies.

Chicken, Bacon and Beetroot Stirfry

Lesley S Smith
Prep Time 10 minutes
Cook Time 25 minutes
Total Time 35 minutes
Course Mains
Servings 8

Ingredients
  

  • 10 Rashers Bacon
  • 2 Chicken Breasts Cut into strips.
  • 4 Eggs
  • 600 g Mixed Stir Fry Veg Beansprouts, pumpkin strips, shredded carrot, green leaf salad, mange tout.
  • 1 Onion Chopped.
  • 1 Jar Baxters Crinkle Cut Beetroot Chopped into smaller pieces. Wash, drain and dry the beetroot before adding to a stir fry.

Instructions
 

  • Use your pieces of meat, chicken or bacon and lightly fry in a wok or thick bottomed pan until fully cooked.

  • Add eggs to the pan and let them cook similar to scrambled eggs, stirring in with the meat as it cooks.


  • Add an onion to the pan and let the mixture slowly cook for a few minutes on low.

  • Stir in your stir fry vegetables and either spray cooking oil, or add a couple of tablespoons of oil to make the stir fry.

  • Add the beetroot towards the end of cooking if you are happy with the pinky shade that your meal till take on from cooking for a few minutes.

  • I had split my stir fry into two lots. For the kids, I gently folded the beetroot in with their finished stir fry to keep it sharp, bright and pleasant to the eye.


  • For my own, I stirred in the beetroot and let it cook with the stir fry for a few more minutes to take on the beetroot taste. I am happy to say this is one recipe that I am going to make several variations of.


Posted on 2 Comments

Guest Recipe: Carol’s Caribbean Christmas Cake

This is a fabulous Guest Recipe, featured and supported by Country Products.

We all want to know how to make fabulous cake when Christmas comes around, and the Caribbean Christmas Cake looks and sounds like  a worth cake to try out for special days.  I hope you enjoy it.

Carol’s Caribbean Christmas Cake

Carolann

Ingredients
  

  • 300 ml Apple Juice
  • 100 ml Rum
  • 225 g Butter
  • 225 g Soft Brown Sugar
  • 1 tbls Treacle
  • 4 Large Eggs
  • 225 g Plain Flour
  • 1 tsp Mixed Spice
  • 1/2 tsp Ground Ginger
  • 1/2 tsp Nutmeg
  • 170 g Chopped Nuts
  • 900 g Mixed Fruit
  • 1 Orange Zest
  • 1 Lemon Zest
  • Assorted Glace Fruits
  • Brazil Nuts
  • Almonds Blanched
  • Apricot Glaze

Instructions
 

Cake

  • Soak all the fruit in a bowl the day before in the apple juice and rum. This plumps up your fruit and will make your cake wonderfully moist.
  • Grease and line a 20cm tin.
  • Weigh out your dry ingredients into a bowl (Flour, mixed spices) and set aside.
  • Cream butter and sugar and add treacle and mix well.

  • Add the orange and lemon zest.
  • Add the eggs a bit at a time. If you get curdling add some flour between pouring in your eggs.
  • Drain your fruit and add to the mix with the chopped nuts.
  • Pour mixture into your tin. And line the outside with brown paper or newspaper and secure with string. This stops the sides burning.

  • Bake at 150 degrees for about 4 hrs. After 3 hrs check by pricking with a skewer and if it comes out clean then it’s done. Leave to cool in the tin and then turn out, prick the base and drizzle rum over.
  • Wrap in baking paper and foil and store in a tin.

Icing and Decorating

  • Place cake on a cake board.


  • Arrange all of your glace fruits and nuts on top. Be creative!
  • In a pan place your apricot jam (about 4 tbsps) and a tbsp of water.
  • Bring to the boil stirring all the time until it is smooth then take off the heat. Add a tbsp of rum and stir well.
  • Using a pastry brush, brush over the fruit with the glaze. The glaze helps preserve your fruit, nuts and cake.
  • Brush the sides of your cake with your glaze.
  • Now roll out your marzipan in a long roll and make a collar to go around your cake making sure it goes about ¼” above the top of the cake.
  • Roll out your fondant icing and again make a collar to go around the cake to cover the marzipan. Be sure to dampen the marzipan before adding the icing so that it sticks to the marzipan. I always use a measure when doing this procedure so as to get the right size of collar around.
  • With the extra ¼” push down towards the cake. This is the lip where you will add your holly leaves.
  • Make a small amount of royal icing for piping your leaves on.
  • Cut out your holly leaves. Make sure you cut out plenty in large and small size.

Notes

Depending on when you make your cake feed it with rum but if you make it 2 or 3 months before Christmas then just feed it once or twice a month. Too much feeding and your cake will become soggy.


Posted on 16 Comments

Pirate Cup Cakes

I spotted this lovely box in Sainsburys (I think).  I had to buy it, and my eldest decided to don his cheffing apron and make a batch of cakes with them for Halloween.

I know it’s a bit past Halloween now, but these are great cup cakes for birthday parties.

How many little boys could bypass some delightful cakes with tasty icing for a special occasion?

The box contained enough cup cake cases and flag toppers to make up to 24 cakes.  I think he did a pretty good job of the icing and decoration for his first attempt from start to finish at making cakes, with absolutely no help from mum (well ok, just a bit).

He is rightly chuffed to bits with the outcome.

Here is the recipe that he used to make his cakes.

Pirate Cup Cakes

Prep Time 10 minutes
Cook Time 15 minutes
Total Time 25 minutes
Course Bakery
Servings 24

Ingredients
  

  • 8 oz Caster Sugar
  • 8 oz Butter Melted
  • 4 Medium Eggs
  • 8 oz Self Raising Flour
  • Packet Coloured Icing We used green and red, ready made sugarcraft icing.
  • Sprinkles or Topping For on top of your cakes.

Instructions
 

  • Add melted butter and sugar into a bowl, or mixer and mix until smooth.

  • Add the four eggs and continue to mix until thoroughly mixed.

  • Finally, add sifted flour and mix until the desired consistency is reached. I sometimes add an extra ounce or two of flour if I don't like the look of the mix.

  • Place into the cupcake cases and bake for 15 - 18 minutes at 180 degrees. Makes your oven is pre-heated.

  • When your cakes are cooked, take them out of the oven and let them cool before adding sugarcraft icing, sprinkles and the flags.


Posted on 32 Comments

Scottish Tablet (crumbly, melt in the mouth toffee) in the microwave.

tablet

Lots of people have asked for a recipe for Scottish tablet, so I think it’s about time I posted the simplest version of one online.  Home made Scottish tablet is wickedly sinful, but delicious.  It’s also quite difficult to make, and there are lots and lots of different ways to make it.  This version is in the microwave.

Please read all the comments below, before you decide to make this version of tablet.  Some people struggle with it.

If you only have a very small microwave, I’d be tempted to go for half these quantities.

I prefer to microwave to the melted stage as every time I try to do it in a pot, I burn it before the sugar is melted.

Microwave Scottish Tablet Recipe

Lesley S Smith
Very sweet, and you do need to keep an eye on this. The cooking time does vary by microwave. Some people have not found success with this, but if you can make it work, it's fabulous.
3.17 from 6 votes
Prep Time 10 minutes
Total Time 10 minutes

Ingredients
  

  • 200 ml whole milk
  • 180 g butter
  • 800 g sugar preferably caster but I have used Demerara
  • 1 tin condensed milk - approx 400g

Instructions
 

  • You need a large bowl that fits into your microwave. Some people may prefer to transfer into a thick bottomed pot to finish the tablet after the sugar is completely melted.
  • With the butter, condensed milk, whole milk and sugar in the bowl, put in your microwave and melt the sugar at 1 minute intervals, while stirring in between. You don't want the mix to boil as it will rise up in the dish and spill over if you're not careful.
  • When you think the sugar is completely boiled, use your finger on the back of your stirring spatula as it cools, to see if there are no sugar crystals left. You want the mix to be smooth.
  • From the melting point, the mix will boil very quickly. I do mine in 30 second bursts as I have a high wattage microwave. If you have a lower wattage one, you might get away with 1 minute + bursts. Remember to keep an eye out for the mix rising up the bowl as if it spills you will have a gooey, hot and sticky mess. Stir quite vigorously each time you take the mix out for a few seconds.
  • Keep going until the mix begins to turn from light brown to a darker brown. It could take 10 - 15 minutes to change.
  • To find out if it is ready, use a cup of water and take a teaspoon of mix from the bowl. Leave it for a couple of minutes and if it forms a soft ball between your fingers if you roll it, then it is ready. With a very soft ball, the tablet will be softer. If you take a bit longer and have a slightly firmer ball, your tablet will have the traditional hard and crumbly texture that makes it so popular.
  • This is the bit that makes the difference to how well it works. Take the mix out of the microwave and either use a hand whisk or a wooden spoon to beat the mix until it begins to cool and go slightly grainy. It takes anything from 5 - 10 minutes, depending on how large a batch you are making.
  • Once the tablet begins to thicken, move it quickly into a pre foiled tray and spread it out.
  • Put into the freezer for about 1 - 2 hours.
  • Turn upside down on a chopping board and score the tablet with a knife.
  • Cut or break the tablet into pieces.

Notes

I prefer to microwave to the melted stage as every time I try to do it in a pot, I burn it before the sugar is melted.
If you only have a very small microwave, I'd be tempted to go for half these quantities.
Cooking time will vary depending on the power of your microwave but could be anything from 15 - 30 minutes.
Posted on 5 Comments

Rainier Cherry Loaf Cake

The kids wanted to make a cake, so Cherry cake it was.

Initially, I thought this was a waste of my lovely (expensive) rainier cherries.  Nothing beats those for the look and taste.  I only buy them very rarely as a treat, but to keep the kids amused, I sacrificed my lovely fruit.

cherry-cake-4


Rainier Cherry Loaf Cake

Lesley S Smith
Gorgeously decadent Rainier cherries in a rich cake.
Servings 10 servings

Ingredients
  

  • Cake
  • 4 oz Rainier Cherries
  • 8 oz butter
  • 8 oz caster sugar
  • 8 oz self-raising flour
  • 4 medium eggs
  • 2 tablespoons condensed milk
  • 1 teaspoon vanilla essence
  • Buttercream Icing
  • 6 oz butter
  • 12 oz icing sugar

Instructions
 

  • I know I don't make cakes the way most do, as I never seem to have the time to potter. I use my mixer and throw it all in. The recipe below is the right way.
  • I soften my butter in a microwave to make it easier to mix. Add the sugar and butter, cream together.
  • Add eggs, vanilla essence and condensed milk, mix together until mix becomes smooth.
  • Sift in flour and mix throughly.
  • Wash, dry, and take out the pits of the cherries, chop them up and add them to the cake mix.
  • Add mixture to a pre-greased cake tin.
  • Bake at 160 for approximately 40 minutes. Your baking time may depend on the heat in your oven. I use a skewer to find out if my cake is ready. When you put the skewer into the centre of the cake and it comes out clean, with no cake mix on it, it's ready.
  • When cake is cooked, allow it to cool, and then slice it through the middle.
  • Cream the icing sugar with the butter, spread some on the middle of the cake (you could also add jam or cream instead).
  • When the cake is ready, pipe some of the buttercream icing on the top and serve.

Notes

When my back was turned, my kids turned the cake gold with food spray. Sadly, I have no picture of it while it was pre-gold...

Posted on 11 Comments

Carrot Cake with Scotty Brand Carrots

carrotcake4

This is a lush carrot cake and sooo easy to make.  I made this using the carrots we were so kindly given from Scotty Brand.

I used small loaf tins.

Yield – up to 6 small tins.

Scotty Brand blogger badge

Ingredients

  • 4 oz castor sugar
  • 4 oz demerara or brown sugar
  • 8 oz butter
  • 8 oz self-raising flour, or plan flour with baking powder
  • 4 medium sizes eggs
  • 200g grated carrots
  • 100g chopped nuts
  • 250g mascapone cheese
  • sachet gelatine
  • cinnamon
  • nutmeg
  • topping
Method
  1. Cream butter and sugar together.
  2. Add eggs and mix until the batter becomes smooth.
  3. Sieve in self-raising flour and add the carrots.
  4. Mix until all ingredients are fully bended together.
  5. Fold in a teaspoon of cinnamon, nutmeg and the chopped nuts.
  6. Spoon out into baking cases, tins or trays.
  7. Bake in oven at approximately 160 F for about 12 – 15 minutes.  Oven times may vary depending on if it is fan assisted, gas or standard electrical.
  8. For the filling, wait until the cake is cool.
  9. Melt the gelatine and mix it with the mascapone.
  10. Cover top of cakes with the mascapone.
  11. Leave for half an hour to begin to set.
  12. Add decoration, or sprinkle top of cake with ground cinnamon.


Posted on 13 Comments

Traditional Scottish Oakcakes

Oat cakes, normally known as oatcakes in Scotland, are a traditional Scottish food.  I’ve heard there is a version in England that is more like thick pancakes, and I’ll have to look for those to try in the future.   The Scottish oatcakes recipe is simple and quick.

Oatcakes are a great accompaniment to stovies, corned beef hash, or any slow cooked meal, stew or stroganoff.

A Scottish breakfast could also be found using the humble oatcake with butter, cheese, or jam added to the top.

Most Scottish food is relatively easy to make, and to smash the assumption that it is all deep fried mars bars up the Aberdeenshire neck of the woods, I suspect that adding more traditional Scottish recipes to my blog could be a good idea.  Sorry to disappoint the deep fried mars bar brigade, but I’ve yet to meet a Scot whose eaten one.

To make oatcakes, make sure you buy proper oatmeal, preferrably pinhead as more rough versions can be harder to work with.

Please don’t be tempted to try porridge oats, buy oatmeal – every time.

Oatcake Recipe

  • 8 – 10 large oatcakes.
  • Preparation, 15 minutes
  • Nutritional, oatmeal is a good source of dietary fibre.

Ingredients

  •  200g pinhead oatmeal
  • 35g butter
  • half teaspoon of baking powder
  • half teaspoon of salt
  • 6 – 8 tablespoons of water

Method

  • Heat the butter and water in a saucepan or the microwave.  I blast mine in the microwave for 10 seconds at a time until the butter is melted. Mix the oatmeal, baking powder and salt in a bowl.
  • Add the melted butter and water to the oatmeal mix in your bowl.  Mix together until it forms a stiff dough.  You may need to add a little extra water to make the dough form.  If you need more water, add half a teaspoon at a time,  and don’t be afraid to get your fingers in the bowl to make the dough work.

  • Dust a clean surface with some oatmeal to roll out the dough.
  • Use a cutter to cut oatcakes into circles, or whatever shape you have available.  If you don’t have a cutter, just cut them into triangle or square shapes.  I used a sandwich cutter for larger sized oatcakes.
  • Grease a heavy bottomed frying pan or griddle.  I have a cast iron pan that I use for things like this.  The oatcakes should be cooked on a low heat for approximately 5-6 minutes each side until they begin to go brown.
Being new to the foodie community, I’m making my oatcakes my first entry into best of british – Scottish Challenge
Rules:
 The full rules are posted on The Face of New World Appliances. However, here is a summary of what you have to do to enter:
  • Post your recipe on your blog with a link back to The Face of New World Appliances AND to the hosting post.  Visit the host post to find out how to enter fully.
  • The round-up of entries will be posted on or before the 20th July.


Posted on 10 Comments

Guest Recipe : The Best Carrot Cake in the World from Lindsey Cave

A lovely Guest Recipe from Lindsey, who you can find on Twitter as @MrsVanderCave, with her blog at backofbeyondbaking.blogspot.com.  That topping is perfection by the look of it.

——————————–

carrotcake

This recipe is actually for a carrot cake but it makes a big cake which can sometimes be a bit OTT, particularly if you like to watch your weight! So I came up with the idea of making individual cakes using half the recipe. This recipe has been named as the best carrot cake in the world ever after I used it in the school cookery book that I collated for my son’s school PTA fundraiser

The recipe below is gluten-free and for a full-sized cake but it is easily transformed back into a regular recipe by swapping the gluten-free flour for ordinary plain flour and excluding the Xantham gum. For 8 muffins just half the recipe and bake for around 18minutes.

The best Carrot cake in the world ever!

Pre heat the oven to 180c. Grease and line two 20cm cake tins. I use my cake tin liners from Lakeland.

Ingredients

250ml corn oil
175g caster sugar
3 eggs
175g gluten-free plain flour (I use Doves gluten-free flour mix)
2tsp Xantham gum (Doves Farm make this, you can get it in Tesco and Sainsburys)
1.5 tsp gluten free baking powder (check the label on your baking powder)
1.5tsp bicarbonate of soda
3/5tsp salt
1.5tsp ground cinnamon
a pinch of freshly grated nutmeg
1/4 tsp ground ginger
115g chopped walnuts
225g carrots finely grated
5tsp vanilla extract
2 tbsp soured cream
For the frosting
175g full fat cream cheese chilled
25g unsalted butter at room temperature
225g icing sugar sifted

Method

  • Place the corn oil and sugar in a bowl and beat well with an electric mixer until thickened.
  • Add the eggs one at a time and beat well after each addition. The mixture should now be pale and fluffy.
  • Sift the flour, Xantham gum, baking powder, bicarbonate of soda, cinnamon, nutmeg, ginger and salt into the egg mixture and beat well.
  • Fold in the carrots, walnuts, vanilla extract, and soured cream.
  • Divide the mixture between the tins and bake in the oven for 1hr 5minutes or until a skewer inserted into the centre of the tin comes out clean.
  • Once cooked, turn cakes out of the tins onto a wire rack to cool.
  • For the frosting place all the ingredients in a bowl and whip until light and fluffy.
  • Sandwich the two cakes together with a little of the frosting then cover the whole cake with the remains of the frosting. Swirl the frosting as you go to give the classic carrot cake look.


Posted on 7 Comments

A cake worth the calories……..the sweetie cake

It’s mums birthday today.  If you didn’t know, you do now.

I tend not to make too big a fuss when it’s my birthday and I actually never tell anyone in real life as I don’t want them to feel as if they “have” to buy me something, which they don’t.   I’ll have popped out this morning to buy myself a top and some cards for the kids to give me later, and then I’ll let them have the surprise.

A sweets cake is something that my boys have often longed to get, but I haven’t got round to making.

I spotted one on a Tweeters timeline last week and that gave me the idea to make one for my own birthday instead of getting the usual hurriedly bought birthday cake for mum that tends to be too sweet, too sickly and nobody can eat it.  I can’t remember who it was who had made something similar (but did look better than mine) and if you know, let me know so I can link up to her.

I know you really only want to know how to make a sweetie cake, don’t you?  I made a rather large cake, but you could make a smaller one.  I use a basic sponge mix, but we can add some variations if we want to.  Sorry, I work in ounces, but it’s easily changed to grammes by working at approx 28g per ounce.

Ingredients

  • 12 oz castor sugar
  • 12 oz butter
  • 2 oz chopped hazelnuts / almonds
  • 6 medium eggs
  • golden syrup or honey
  • food colouring
  • filling
  • icing
  • 12 oz self-raising flour
  • 1 x large bag of jelly babies & jelly beans (substitute for any sweets you like)

Method

I use a mixer, so it does take the hard work out of mixing for a cake, but it also produces a much lighter sponge than I have ever achieved by hand.

Cream the eggs and sugar together.  I microwave the butter to make it really soft so that it creams quickly and fully.

Break the eggs into a bowl.  I rarely do anything with them, but I know some people like to whisk eggs before they add them to a mix.  I don’t.  I just break, check there are no rotten ones, then simply add them in.  Once the mix with eggs added has mixed until it is a smooth paste, I then add my flour and three tablespoons of golden syrup.

Mix for a good three minutes in the mixer to make a uber smooth mix.  After that, I hand stirred in the hazelnuts and a couple of drops of food colouring.  I used red to give a nice pink sponge.

Pour into greased baking tray and bake at 140 degrees.  It takes about an hour to cook in my oven, and you will probably know your own oven well enough to be able to judge the heat to use.

When cooked, turn out on to wire rack to cool and allow you to shape it.  I cut the sponge to get two halves, then I slice the top off the uneven part and take the outside edge off the sponge, to leave the soft inner sponge.  I used to think that cakes which turned out of the oven like this were disasters.  I now know better and that some artwork with a knife can rescue some very unattractive looking sponges.

Adding a filling to the bottom part is simple, and for the benefit of the kids, I used a mix of chocolate and toffee icing with Nutella (their favourite).

I turn the topped sponge upside down to place on top of the filled bottom section and then cut around the crusts to make sure it looks even.

The next step is the easiest.  I cheated and bought pre-made icing which was ready to roll.   Spreading a little icing sugar on my counter, I rolled it out until it was large enough to cover the whole cake.   With a pastry brush, I painted a very thin layer of golden syrup on one side of the icing to help it to stick to the cake.  The syrup does make picking up the icing and putting it over the cake tricky, but if you roll the icing out to bigger than you need, it is doable.

I lifted the cake up and trimmed off the excess icing, wrapped a ribbon around the bottom of the cake and placed the sweeties on the top, aided by a drop of gelatine to make them stick.  Hey presto, the “sweety cake” my youngest asked for.

sweetiecake6


Posted on 8 Comments

Chocolate Brownie – Blind Bakeathon – Scottish Mum Style

I couldn’t get the internet to work, so I decided to bake a batch of brownies.  The only problem was that I didn’t have all the right ingredients for it, so I compromised – Do you think it worked?

Ingredients

  • 190g unsalted butter
  • 185g chocolate  (I had half Galaxy and half cooking chocolate)
  • 130g plain flour
  • 100g chocolate spread (I used Nutella)
  • 3 large eggs
  • 275g caster sugar
  • 40g chopped hazlenuts or choc chunks or fudge pieces etc.  (I had chopped hazlenuts)
Before you start – put your oven on at approx 150c or 140c for fan asssisted.

Step 1
Easy to do, just put the chocolate and the butter into separate bowls and microwave until melted.   With cooking chocolate you have to do it 20 seconds at a time or the chocolate might curdle.  Mix the butter and chocolate together and leave to cool.


Step 2
Put the eggs and sugar into a mixer and whisk.  It may take up to 10 minutes depending on your mixer for it to go light and fluffy in colour and texture.  When the mix leaves a trail if you dip a spoon in, it is ready.

Step 3
Fold the butter/chocolate mix into the eggy mix until completely mixed.

Step 4
Put the chocolate spread / Nutella into the microwave for 1 minute

Step 5

Sift the plain flour into the bowl and fold into the mixture.  Try using a figure of eight in alternation with a regular fold.

Step 6
Fold the nutella into your mixture.

Step 7
Fold the hazlenuts, or chocolate chunks into the mix.  When it is ready the mix will look like a treackly gooey mix.

Step 8
Pour the mix into a greased baking tray.  Mine is a rectangle shape about 20cms long.

Step 9
Bake for approx 45 minutes until the side begin to shrink and the middle doesn’t wobble when you shake the tin.

Step 10
Wait until the brownie is completely cool, cut and turn out of baking tray.

Voila – Verdict – They were too nice to leave lying around.  Sadly I will have to make them again.

Posted on 1 Comment

Quick and Easy Chocolate Fudge

This is the easy recipe for chocolate fudge that I got off of a tin of Nestle Condensed milk.  I don’t usually do much in the way of  potted recipes and this one is VERY sweet, but I thought I would share the results of how it came out.

Ingredients

400g chocolate
397g tin condensed milk
25g butter
100g icing sugar
55g sugar strands / chopped nuts etc for decoration

Put chocolate, condensed milk and butter into a bowl and microwave until all melted.  Take out of micro at 10 – 20 second intervals and stir well until it is very smooth.

When nice and smooth, beat in sieved icing sugar (if you don’t sieve it, it will go into lumps).

I used little cake cases, but the recipe calls for a tray bake.  I got 40 little sweets in the cases.  When the mixture is in, sprinkle on the sugar strands or chopped nuts.

Put in fridge for about an hour.

Hey presto.