Posted on 8 Comments

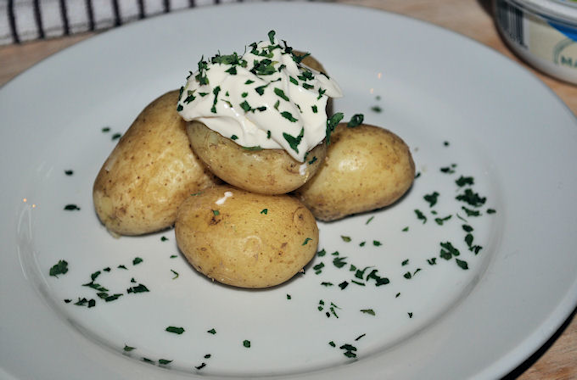
Scotty Brand Ayrshire New Potatoes with Sour Cream and Parsley

Sometimes, I think we overthink our cooking.  What’s wrong with some plain and simple boiled new potatoes, served with some sour cream and a topping of parsley like my grandmother would make.

This is just so simple to make and the sour cream tastes lovely over the newly cooked spuds.

Follow Scotty Brand on Facebook or Twitter to keep up with their newest recipes and news.

http://www.facebook.com/scottybrandltd

@scottybrand_ab

Ayreshire New Potatoes with Sour Cream and Parsley

Lesley Smith
New potatoes with sour cream and parsley.
Servings 6

Ingredients
  

  • 1 bag of Ayrshire new potatoes from Scotty Brand
  • 4 tablespoons of sour cream
  • Sprinkling of parsley

Instructions
 

  • Wash and scrub the new potatoes.
  • Simmer in boiled water for 10 - 15 minutes.
  • Serve hot in a separate dish from the main course.
  • Add one tablespoon of sour cream for each portion of potatoes.
  • Sprinkle the top of the potatoes with parsley for a pretty finish.


Posted on 4 Comments

Princes Wild Alaskan Pink Salmon Toasted Sandwiches

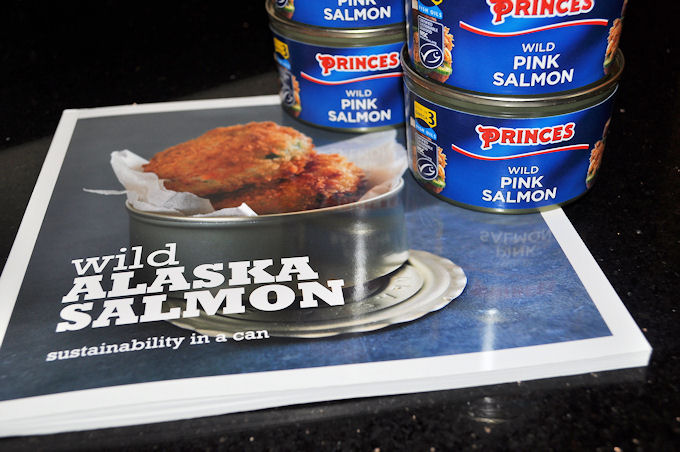
Princes sent the Scottish Mum household a box of Alaskan salmon with the request to create our own recipe and report back.

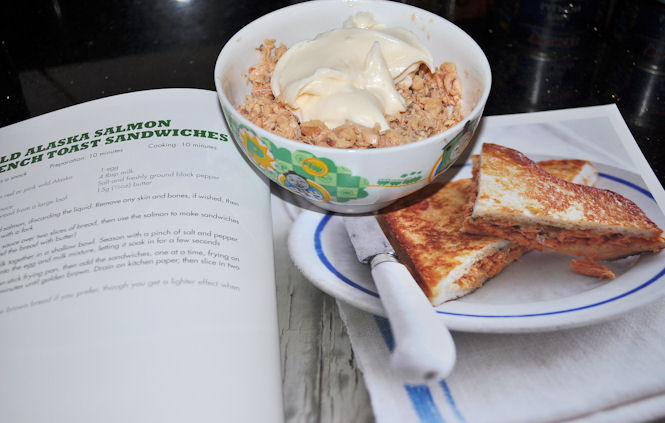
They also kindly sent us a lovely salmon recipes book, and a couple of our tins of Wild Pink Salmon are going to be made into salmon fish cakes as the recipe in the book looks so absolutely and deliciously tasty.   Having salmon in a can is handy for those meals where the kitchen cupboard is looking a little bare and we struggle for something good, nutritious and filling to feed our families.

Inspired by the Wild Alaskan Salmon French Toast Sandwiches in the recipe book, I went to work.


Princes Wild Alaskan Pink Salmon Toasted Sandwiches

Lesley Smith
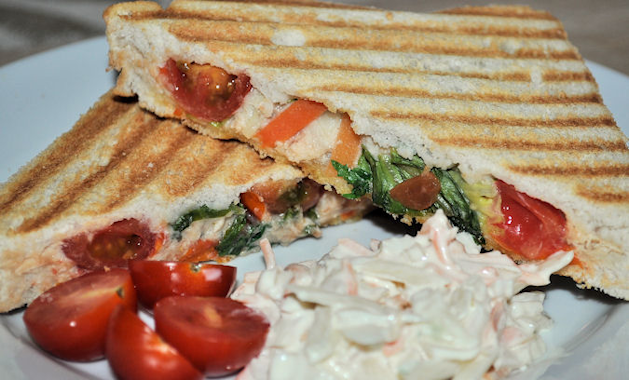
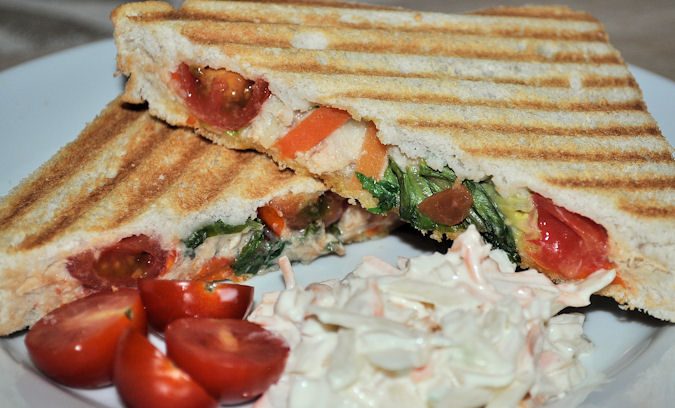
Serve as a snack, or a main meal. I use a panini press, but you could use a regular sandwich maker, or make them under the grill.
Servings 6

Ingredients
  

  • 2 x 213g can pink wild Alaska salmon
  • 4 heaped tablespoons of mayonnaise
  • 12 slices bread
  • butter
  • salt and pepper
  • lettuce
  • cherry tomatoes
  • coleslaw

Instructions
 

  • Drain the can of wild Alaskan salmon.
  • I removed skin and bones from the can as I know my kids won't eat these, but you can choose to keep them in.
  • Mash the salmon and add the mayonnaise. Use a fork to mix the mayonnaise thoroughly with the salmon.
  • Add a pinch of salt and pepper and mix that in gently.
  • Lay out bread for making the sandwiches. I butter on one side only.
  • Spread the salmon and mayonnaise mix on the buttered side of the bread, and top with lettuce and sliced cherry tomatoes.
  • Place the top piece of bread on and put in the panini press to cook.
  • After approximately 4 - 5 minutes, or when the bread is a lovely golden colour, remove from panini press, slice, and serve with cherry tomatoes and coleslaw on the side.


Posted on 4 Comments

Kellogg’s Rice Krispies Challenge from Britmums

Kelloggs sent us a big pack of Rice Krispies, with a fab case of colouring pens, colour changers, glitter glues and more.  The colouring pack alone has kept my kids entertained for a few days now, and they’ve rediscovered an enjoyment of colouring in again.

Middler has learning difficulties, but he likes to colour in.  His older brother helped him to do the figures and they made a pretty tidy job of it as a team.

The next picture is my entry for the Britmums #ColourMeInRK competition, sponsored by Kelloggs.  The prize is £500, or a year’s supply of Rice Krispies.  When I mentioned a prize, the kids took colouring in very seriously indeed…..

There is also the opportunity for 10 entries to be put on a T-shirt for the child to wear.

Lots of bloggy fingers crossed.
The Scottish Mum Kids

If you want to enter, visit the Britmums Linky and link up a blog post entry of your own.

Posted on 1 Comment

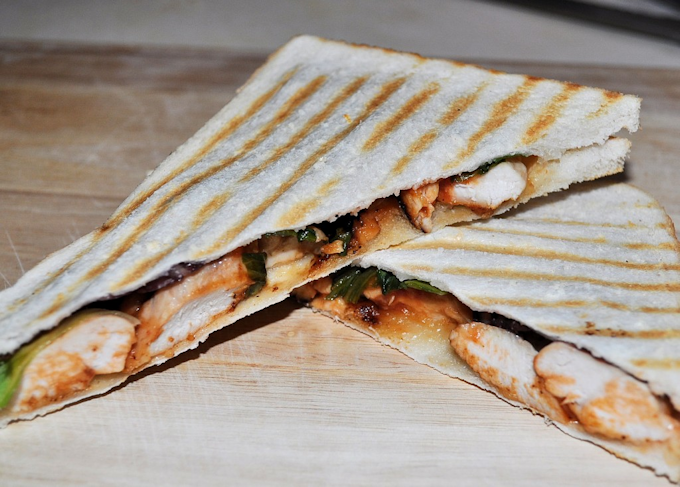
Simple Lemon Chicken Recipe for a Toasted Sandwich / Panini

A simple lemon chicken recipe for using in a toasted sandwich or panini is a lovely, light and zingy taste.   The mix also qualifies under quick chicken recipes, and can be sued with rice, potatoes, nan bread or polento to mix up the meal a little.

Lemon Chicken Toasted Panini Style Sandwich

Lesley Smith
Quick and easy, we use toasted chicken panini recipes for sandwiches when I'm in a hurry and don't have enough time to make a full meal.
Servings 4 - 8 depending on how much filling is used

Ingredients
  

  • 500 g chicken fillets / breasts
  • 1 lemon
  • 2 tablespoons caramelised onions
  • 2 tablespoons mango chutney
  • 1 teaspoon black peppercorns
  • 100 g lettuce
  • salt to taste
  • rapeseed oil to cook chicken

Instructions
 

  • I use a heavy and very large cast iron saute pan for cooking frying pan style. If you only have a small frying pan, it might be easier to cook the caramelised onions and chicken separately. Add rapeseed oil to your pan. I add the full sized pieces of chicken and cook both sides for a few minutes before taking them out of the pan and cutting them into smaller pieces.
  • When the chicken is cooked through, add the mango chutney, black peppercorns and caramelised onions. Allow the mix to cook slowly for five minutes, turning frequently to stop it burning.
  • While the mix is cooking, squeeze the lemon and add the juice to the pan.
  • Prepare the bread for the filling by buttering one side if you spreads (I have a Kenwood panini maker which gets used for lots of different things, but doesn’t need butter on the outside of the bread in the way that some sandwich makers do).
  • Top the bread with sandwich filling and simply add the second slice of bread.
  • Toast in the panini maker for a few minutes until ready. (you might use a sandwich maker or simply put it under the grill, but grilling will mean you need to turn it over half way through).
  • Garnish and serve.


Posted on 14 Comments

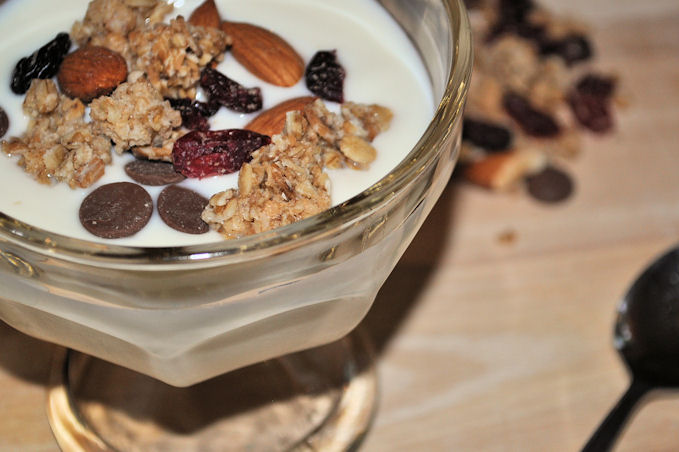
How to make yoghurt at home with a yoghurt maker. Natural Yoghurt with Granola

I thought it was about time to do this since I’ve talked but not really gone into depth about how to do it on Twitter, or how it works.  Making yoghurt at home is easy and really quite simple.  I wish I had done it years ago as it would have saved me a small fortune in lunch boxes.

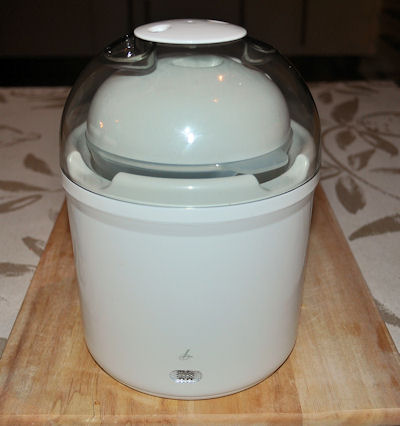
I’ve certainly cheated by using a yoghurt machine, but how easy it is to have home-made yoghurt is ridiculous.

I bought my yoghurt machine from Lakeland, and it isn’t a bad price considering there isn’t any more outlay once you’ve bought it.  I did consider the Easiyo one.  Looking looking at the stats, it might have been cheaper initially, but it would have needed endless topping up of their sachet systems to make yoghurt with, and I thought those were very expensive.

Ok, ok, I know you just want to get into finding out how to make yoghurt, and miss out my long-winded explanations.

I was slightly apprehensive about getting my machine as I thought it would be more hit and miss, but it really was very very easy.  For this recipe, I sprinkled Granola on the top.

Home Made Natural Yoghurt Recipe

Lesley Smith
5 from 3 votes

Ingredients
  

  • 1 litre milk. It can be cows goats, soy or sheep.
  • 2 teaspoons live culture.
  • 2 teaspoons of skimmed milk powder if you like your yoghurt very thick.

Instructions
 

  • Switch on yoghurt maker to warm up before you start.
  • Put 1 litre of milk into a jug or the dish for the yoghurt maker. I have used UHT versions of milk as to use non UHT means that it would need to be heated up. Keep UHT milk at room temperature and not in the fridge, unless it has already been opened..
  • Optional: Heat the milk gently in the microwave for a minute to take the edge off how cold the milk is.
  • Stir the milk, and add the live culture and skimmed milk powder.
  • Stir thoroughly and place the lid of the yoghurt maker on.
  • Leave for 8 hours and come back to lovely thick yoghurt.
  • Put straight in the fridge to chill for later.
  • When chilled, add any sugar, fruit or spice to taste, it can also be used for cooking.

Notes

You can use skimmed, semi-skimmed or full fat milk, and the only difference will be the thickness of the yoghurt. Adding some milk powder takes care of that and gives you a lovely thick and creamy yoghurt.
Soy yoghurt doesn't seem to take as long as the cows milk and I've found that at 6 hours, it seems to be ready.
For your starter culture, buy a plain yoghurt with live culture. Some health food stores and online will sell a powdered yoghurt starter, but I find these expensive.
Save a couple of teaspoons of your freshly made yoghurt to make your next batch 🙂
If you are using unpasturised milk, ensure that you heat it up to boiling point and let it cool before you use it for yoghurt making. This ensures that any bad bacteria are killed off before you add the lovely good live culture to your milk.


Posted on 30 Comments

Funky Foodies July (Month 2) & WINNER for June 2012

STAR RECIPE WINNER – for June 2012 is Mama Cook with her recipe for :  Spanakopita (spinach and feta pies) for the whole family.  Congratulations.

JULY FUNKY FOODIE LINKY IS OPEN

Apologies for being a couple of days late with the start of the linky.

  • Funky Foodies is a monthly linkie, which will be opened on the first day of the month and will close on the last day.
  • A medal will be awarded for the Star Recipe every month, and the fabulous trophy in the blog badge will be awarded at the end of a whole year of the Funky Foodies.   If you want to find out more about it, read here.
  • All you have to do is share as many recipes from your own blog a month as you’d like.  If you struggle to add your recipe, send me your link and I’ll add it for you.
  • Try to pop around and share the comment love with other funky foodies.  We all like a little love and might come across some fabulous recipes.
Simply add the link to your recipe on your own blog, and share your latest recipe with everyone taking part.  If you don’t want to miss the linkie being opened, subscribe to RSS or by email in the blog header.

I’ll add recipes of mine to share, although I don’t count in the recipe challenge.

Funky Foodies

Feel free to copy the badge or use the html in the widget at the bottom of the page to add the small blog badge to your own blog / post.  It makes finding you easier for other funky foodies.

If you want to add the July blog hop to your own recipe, get the InLinkz code and add to the html.


Posted on 10 Comments

Puff Pastry, Ham, Hot Dog, Cheese and Sweetcorn Pizza

The puff pizza – does it exist?  I have no idea actually and perhaps I should really go and look it up.   I keep it in reserve for days when the fridge is coming to the end of its content and needs a help along with some tinned goodies (shhhhh) to fill some empty bellies.

I always have a block or two of puff pastry in the freezer.  I never make it as it’s such a faff, but maybe one day I will and then get myself converted to fresh puff from then on, but for now, it’s always on hand.

Today is an almost at the end of the fridge day and the kids have played footie, cricket, done chores, and have not sat still in the lovely sun that we rarely get to see.

Puff Pizza

With no passata on hand, it’s just a hodgepodge of what was available in my fridge and cupboard today.

Ingredients

  • 500g block of puff pastry
  • 300g wafer thin ham
  • 500g grated cheese
  • small tin sweetcorn
  • tin of hotdogs
  • salt
  • pepper

Method

  1. Flour an oven dish, I used a very rectangle tray that we use for making oven chips.
  2. Roll out pastry to cover the bottom of the tray.
  3. Sprinkle all your toppings of choice onto the puff pastry.
  4. Cover with tin foil, shiny side down.
  5. Bake in oven at 200 for 25 minutes.
  6. Remove tin foil and bake for further 5 minutes.
  7. Serve with whatever is left in the fridge salad wise.

Your oven may run hotter or colder to make sure you keep an eye on how your puff pastry is progressing.

Posted on 2 Comments

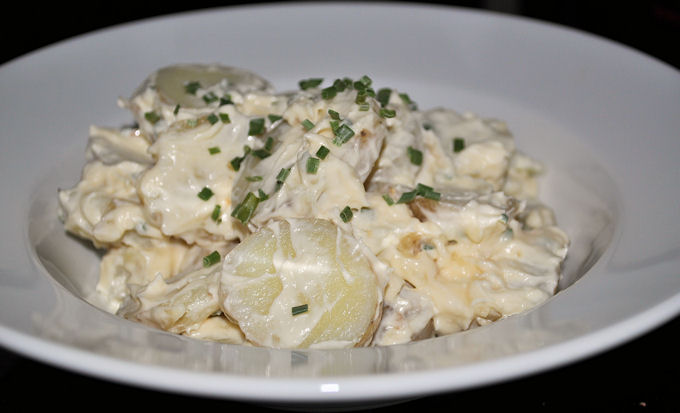
Luxury Potato Salad with Scotty Brand Ayrshire New Potatoes

Our newest delivery from Scotty Brand arrived on Friday.  Lovely Scotty Brand Ayrshire new potatoes.  I resisted the temptation to throw a couple of bags on for the evening meal over the weekend, and plan to do something different with them over this week.

Packs of Ayrshire New Potatoes are run with a fabulous promotion to win family adventures in Scotland, and is inspired by Disney Pixar Brave.  You can find lots more on the Scotty Brand website, and promotional numbers from each pack of new potatoes to use on the website and see if you have won a prize. To do it, just peel back the sticker below and enter the code to see if you’ve won.

I love potato salad, and so do the kids, but I buy it far more often than I should, as making fresh is much nicer.  With the lovely new potatoes, a bag did get boiled to make potato salad.

Luxury Potato Salad

Ingredients

  • 1 bag Scotty Brand new potatoes or approximately 750g.
  • sea salt.
  • 1 level teaspoon honey mustard.
  • 5 tablespoons of mayonnaise.
  • 4 tablespoons of double cream.
  • 2 teaspoons of chopped chives.

Method

  1. Wash potatoes and boil with a few pinches of sea salt for 10 – 15 minutes.
  2. Leave potatoes to cool before cutting into thick slices.
  3. Fold in mayonnaise and double cream.  You may need a little more or less mayonnaise, so add it a tablespoon at a time.
  4. Add the teaspoon of honey mustard and fold in gently until it is fully mixed.  Leave this out of you don’t like mustard.
  5. Serve with chives sprinkled on top for a decadent potato salad.

Posted on 11 Comments

Carrot Cake with Scotty Brand Carrots

carrotcake4

This is a lush carrot cake and sooo easy to make.  I made this using the carrots we were so kindly given from Scotty Brand.

I used small loaf tins.

Yield – up to 6 small tins.

Ingredients

  • 4 oz castor sugar
  • 4 oz demerara or brown sugar
  • 8 oz butter
  • 8 oz self-raising flour, or plan flour with baking powder
  • 4 medium sizes eggs
  • 200g grated carrots
  • 100g chopped nuts
  • 250g mascapone cheese
  • sachet gelatine
  • cinnamon
  • nutmeg
  • topping
Method
  1. Cream butter and sugar together.
  2. Add eggs and mix until the batter becomes smooth.
  3. Sieve in self-raising flour and add the carrots.
  4. Mix until all ingredients are fully bended together.
  5. Fold in a teaspoon of cinnamon, nutmeg and the chopped nuts.
  6. Spoon out into baking cases, tins or trays.
  7. Bake in oven at approximately 160 F for about 12 – 15 minutes.  Oven times may vary depending on if it is fan assisted, gas or standard electrical.
  8. For the filling, wait until the cake is cool.
  9. Melt the gelatine and mix it with the mascapone.
  10. Cover top of cakes with the mascapone.
  11. Leave for half an hour to begin to set.
  12. Add decoration, or sprinkle top of cake with ground cinnamon.


Posted on 9 Comments

Apetina Cheese – Summer Suncatcher Salad, with a Chance to Win a Fabulous Hamper


Apetina is a new cheese to me.  

I was delighted to be asked to make a new salad that would help our family nutrition by keeping the kids happy.  Looking for the cheese to buy, I was quite surprised to find they also have gorgeous little snack pots.  

The lovely looking Apetina Sun Dried Tomato Snack Pack and the Garlic and Olive Snack Pack also made it into my shopping trolley, along with a classic block.  It really is worth a try, and also suitable for vegetarians.
The cheese crumbles with ease when it is being eaten and seems to absorb flavours well.   Arla also make a light variety which I would have loved to try, but my local shop didn't have any left.

To keep my kids happy, a sharing dish is usually the best option, especially if I can put together all the ingredients that I know my kids love.  They always pick from the big help yourselves dishes on the table.

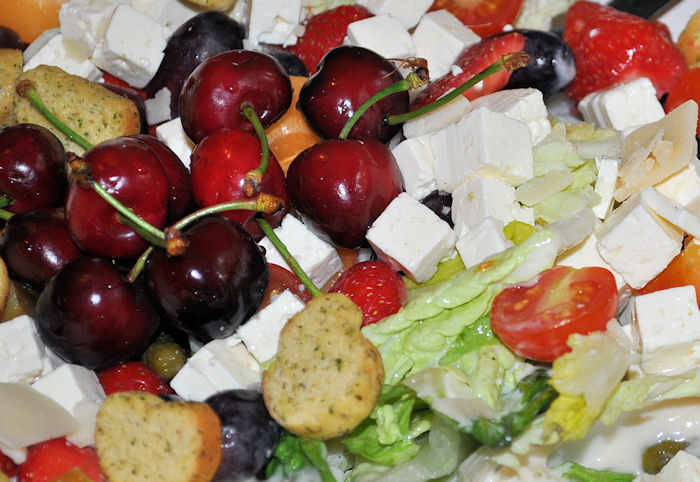
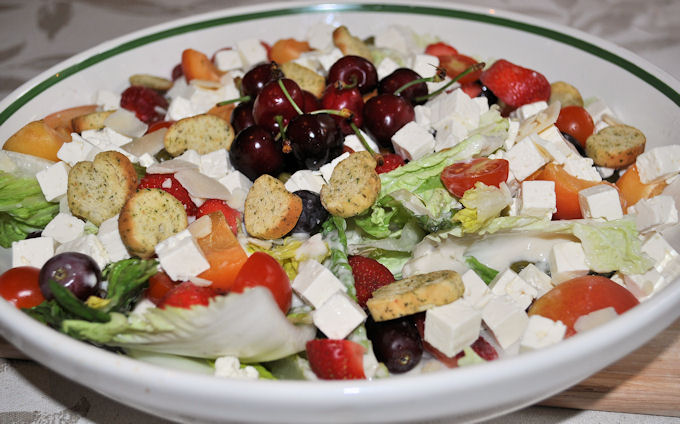
Apetina Cheese – Summer Suncatcher Salad Recipe
Ingredients

  • 1 x 200g tub of classic Apetina cheese
  • 1 chinese leaf lettuce
  • 150g grapes
  • 200g strawberries
  • 4 apricots
  • 10 cherry tomatoes
  • 15 cherries
  • croutons
  • olive oil
  • sour cream

Method

Salads are just so easy to make.  The first step is washing all salad ingredients and placing the lettuce in the bottom of the bowl, to make a bed for the rest of the salad to sit on.

  1. Drizzle a little olive oil onto the lettuce.
  2. Spread a little sour cream over the surface.
  3. Cut strawberries into quarters.
  4. Half the cherry tomatoes.
  5. De-stone the apricots and cut them into quarters.
  6. Sprinkle the fruit and tomatoes onto the bed of lettuce.
  7. Drain a tub of Apetina cheese and place on the salad.
  8. Top with cherries and croutons.
  9. Serve with sour cream as a side dish.

In our house, this was a success as I used the fruit that my kids love to mix with the cheese.  I like mixing fruit and veg where they work well together and salads are perfect for that.  We had a suncatcher that we made a few weeks ago on the window, so my boys named the salad the suncatcher as it had such lovely colours and looked spectacular on the table.

My Apetina recipe will be entered into the contest over on the Apetina Facebook page.  It will also be featured in the Recipe section of the website.

If you like the Facebook page, and vote for your favourite salad of the week, you'll be entered into a prize draw to win this fabulous picnic hamper.  Inside the basket, there will be a salad bowl with servers, and a dressing bottle.

The final week prize will be a BBQ, so head on over using the Apetina link to vote.


Sponsored Post

Viral video by ebuzzing
Posted on 6 Comments

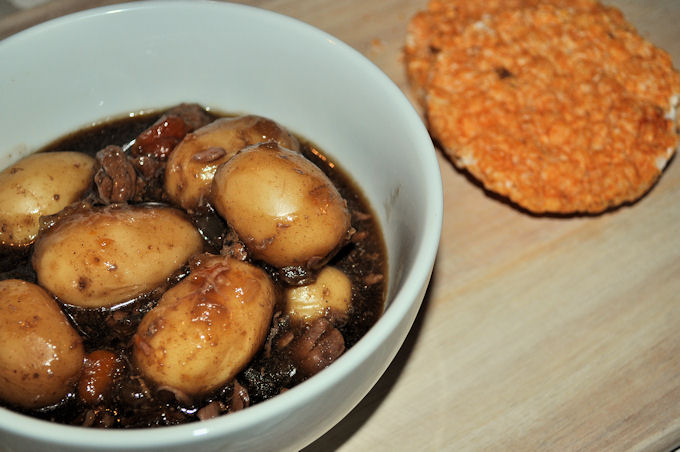
Slow Cooked Beef Stew with New Potatoes

Beef and New Potato Stew

Beef and New Potato Stew

Being the fan of slow cookers that I am, mine has seen something of  a slacking off period this last few weeks.   Now back and determined to get back to using it more often, we’ve just sat down to a lush slow cooker beef recipe that includes new potatoes.  As always I am cooking for a large family (usually 6 + at any one time to feed).   Reduce the side of the portion to suit your own family size.

Slow Cooked Beef Stew with New Potatoes 

  • 6 – 8 servings.
  • Preparation, 15 – 20 minutes + cooking time.
  • Nutritional, rich source of vegetables and meat.

Ingredients

  •  1.2 kg stewing steak, diced.
  • 500g mixed vegetables.  I used celery, leek, carrot and turnip.
  • 1 large or 2 small onions.
  • 1kg baby new potatoes.
  • 2 x beef stockpots.
  • salt, pepper and / or spice to taste.

Method

  • Brown the stewing steak and add to slow cooker.
  • Brown onions and mixed vegetables and add to slow cooker.
  • Add stockpots.
  • Wash new potatoes and mix with meat and vegetables in the slow cooker.
  • Cover with enough boiling water to skim the top of your ingredients.
  • Add 1 teaspoon salt and 1 teaspoon pepper.
  • Put on lid and cook for 8 hours on low, or 4 hours on high for large wattage slow cookers.  Adjust heat and time depending on the size of your element.
  • Thicken, season to taste and simply serve.

Serving Suggestion

Serve with bread or rice cakes.