Posted on 11 Comments

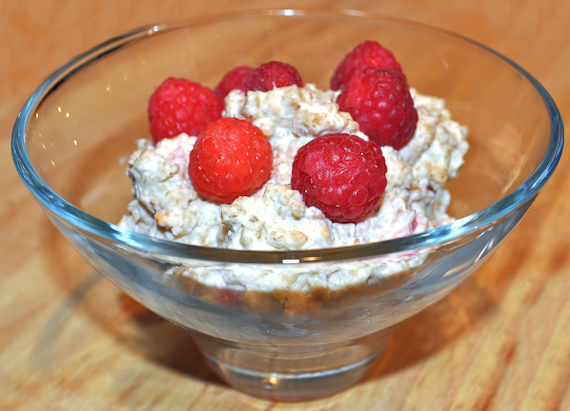
Scottish Raspberry Cranachan (Cream Crowdie)

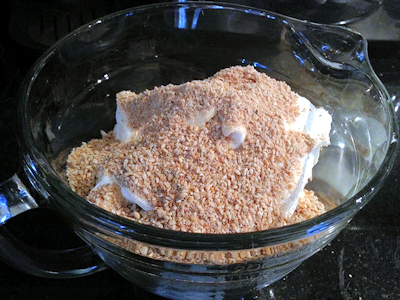
Raspberry Cranachan is the traditional Scottish dish.  It’s one that I do like, but not too often with the calorie count in it.

Cranachan

It’s traditional, it’s Scottish and with raspberries it can be quite tart.   You can reduce the sweetness of the added sugar by using more fruit and leaving out the honey.  Some people prefer much less oatmeal in their cranachan.  Add it slowly until you have enough for you.

Scottish Raspberry Cranachan (Cream Crowdie)

Lesley S Smith
5 from 1 vote
Prep Time 10 minutes
Cook Time 5 minutes
Total Time 15 minutes
Course Dessert
Servings 6

Ingredients
  

  • 250 g Oatmeal
  • 50 g Honey
  • 4 tablespoons Whisky
  • 1 pint Double or Whipping Cream
  • 500 g Raspberries

Instructions
 

  • Toast the oatmeal in a frying pan until it reaches a nutty consistency. Leave to cool.
  • Whip cream until it reaches soft peaks, but it still pliable.
  • Fold the oatmeal, half the raspberries, honey and whisky into the cream. If you whip it in, the consistency will not be light and fluffy.
  • Fill serving dishes and finish with some fruit on top. Serve immediately. If it is left too long, the oats will go soft.


Posted on Leave a comment

Review: The Nutribox

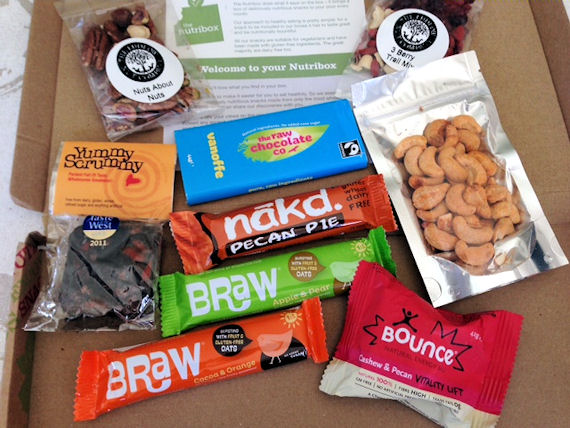
Nutribox offered to send a wee box of delicious nutritious snacks to try.  The snacks come boxed and straight to our doors.   They have a healthy eating approach to living and they only want to have snacks that are both nutritious and tasty to send out to their customers.

Nutri Box3

All the snacks are gluten free and suitable for vegetarians which means they are suitable for most of us.   There are two options when ordering, ie to have a full box or a mini box to try some of the snacks, or to give as a gift.

We tried the mini nutri box but not the vegan one.

There were mixed reactions from the kids as to the taste of some of the snacks, but the red chilli cashews and the brownie were very popular indeed.

Nutri Box Chilli Cashews

Nutri Box Brownie

I like a piece of chocolate, but I’d have to say I’d give the chocolate bar a miss as it just wasn’t to my taste.

Nutri Box2

All boxes come with a mix of energy boosting dried fruit and nut mixes, energy bars and raw ingredients.  At first when I looked at the price of the boxes, my thoughts went to how expensive they seemed to be, but when I priced some similar items in supermarkets and online stores, the price seemed to make much much more sense as the retail price of raw ingredients and snacks like these seems to be very high.

We all enjoyed some of the snacks, but I’d have to seriously think twice about signing up for an online monthly box.  The easy cancellation option makes it a good option for a gift and I may send one to a friend later in the year as I think this would be perfect as a present.

Disclaimer: I was provided with a Nutribox Mini for Review


Posted on 11 Comments

Fillet Steak, Bag Roasted in Red Wine

Using roasting bags is a relatively new find to me. I’ve usually roasted in tin foil, but have found that roasting in a bag actually gives me a much better texture and taste.

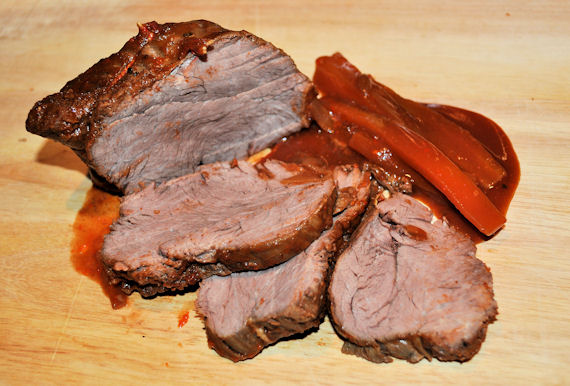
Fillet Steak 7

It actually doesn’t look like much on a plate, but it tasted absolutely heavenly. I’m not quite sure how else I would ever cook a fillet again, as this has spoiled me rotten. Our fillet steak came from Andrew Gordon Butchery and Fine Foods as does most of the meat on this blog nowadays. It’s always easier to have a successful meal when we start with great ingredients.

The addition of red wine made me a little nervous when I was making it, but I needn’t have worried. I’d love to try it in stout another day. The piece of fillet was gorgeous, and I think that’s what made me nervous about cooking such a great piece of meat this way, but for us, it was amazing.

Fillet Steak

Fillet Steak, Bag Roasted in Red Wine

Lesley Smith
Prep Time 20 minutes
Cook Time 1 hour
Total Time 1 hour 20 minutes
Course Mains
Servings 5 - 6

Ingredients
  

  • 800 g Fillet Steak
  • 5 Large Carrots Cut into batons.
  • 3 Large Onions Sliced in strips.
  • 100 ml Red Wine
  • 500 g Tomato Passata
  • 1 teaspoon Rainbow Peppercorns
  • 1 teaspoon Salt
  • 1 Clove Garlic

Instructions
 

  • This is so easy to do. Simply rub the pepper and salt evenly into the fillet steak.
  • Put the passata and wine into the roasting bag first, and then add the other ingredients one by one. Gently hold the neck of the bag and allow the contents to mix and coat the vegetables.
  • Add the fillet steak to the bag and gently move the ingredients around until the fillet steak is fully covered by the ingredients.
  • Pop in a pre-heated oven at 180 degrees c for approximately an hour. If you like your meat well done, leave it for 1.5 hours and check on it. If you wish to thicken your gravy, pop it in a pan and reduce or thicken it for a few minutes until it reaches the texture you prefer.
  • Serve with mash, bread, rice or salad.

Posted on 5 Comments

Sticky BBQ Chicken, Cherry Tomatoes & Cucumber

Sticky BBQ Chicken 570

Much easier than it looked, I think I’m now hooked on cooking in the bag. This time round, I bought Maggi So Juicy to try it, but after seeing it is a Nestle product and knowing the boycott around them for the advertising campaigns at mothers in third world countries to get them to buy baby formula, I doubt I’ll buy it again. My next attempt will just be a roasting bag with herbs and spices in it.

I didn’t see anything to worry me on the ingredients list, although I’d have preferred to do without the Maltodextrin if it was at all possible.

All there is to it, is to open the top, take out the bag and pop your chicken into it. Then shake the seasoning into the bag, tie the end with the clip provided and turn the bag over and over until all the seasoning coats the chicken.

I used chicken breasts from my favourite online butcher. I forgot to pierce the 4 small holes in the top of the bag, but it didn’t seem to do any damage. I added 5 whole chicken breasts to the pack and there was plenty of room for them to cook despite being huge.

The bag expands a fair bit so make sure you put it in the lower to middle of your oven, otherwise, you could end up like me with the top of the bag sticking to the upper rack and having to peel it off.

Thankfully the bag stood up to a fair bit of punishment all in all, and I did spend longer cooking it than was recommended on the pack. I cooked for an hour, whereas the recipe said 30 – 40 minutes for drumsticks. I reasoned that the big chicken breasts would take longer to cook and they came out just perfectly.

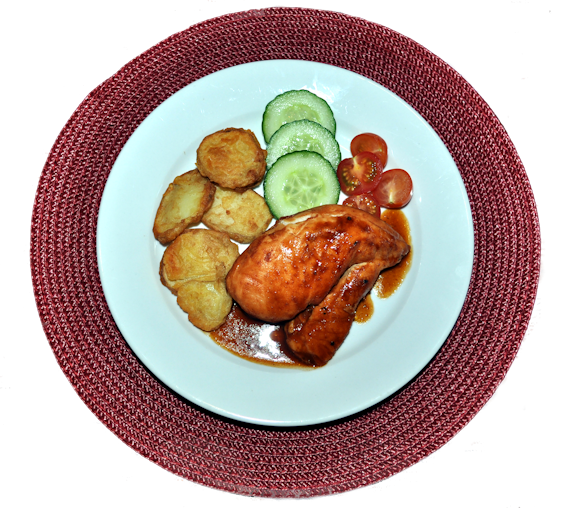
I served with Potato fritters, cherry tomatoes and cucumber.

My next job is to try it without the ready made herbs and spices.

Sticky BBQ Chicken 2

Posted on 6 Comments

Mango, Orange, Pineapple, Apple & Passion Fruit Smoothie

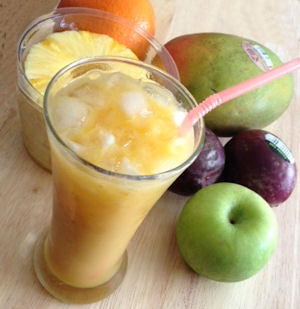
So refreshing and even tempts my little one to drink some goodness in a glass.  He likes it to come out a bit like how Costco smoothies do, and I think McDonalds do a fruit smoothie with mango and one with strawberry and banana that seems to be getting more popular with kids nowadays.

Mango, Orange & Pineable Smoothie 4

Orange, Mango, Pineapple and Passion Fruit Smootie

Lesley Smith
Prep Time 5 minutes
Total Time 5 minutes
Course Smoothies
Servings 4

Ingredients
  

  • 3 Oranges
  • 2 Mango
  • 4 Passion Fruits
  • 500 g Pineapple
  • 500 g Crushed ice

Instructions
 

  • Peel and chop the fruit roughy.
  • Put all the fruit and crushed ice into a blender until smooth.
  • Add some ice into a glass and pour the smootie on top to keep it extra cold.


Posted on 9 Comments

Why and How to Steam Vegetables

Although we can create steaming recipes which also include meat, poultry and fish, I am going to concentrate on vegetables for this post.

It has taken me a long time to be convinced of the goodness that steaming vegetables gives.  We can steam in our microwaves, in our specialised pots, or with our stand alone steamers, but the results are all the same.
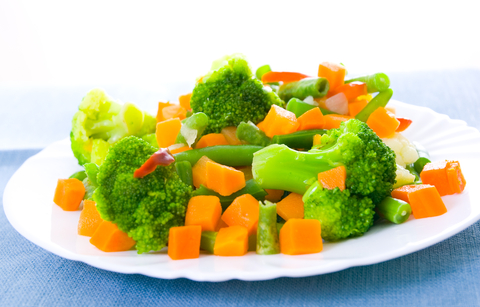
Steamed Vegetables

What is Steaming?

The goodness of our fresh vegetables for our growing families is kept intact, and compliments any meal.

Steamed vegetables are full of nutrition, and quick and easy to get to our tables as accompaniments to our meals.

Learning how to steam vegetables is sensible.  I wish I had cottoned onto this method in my twenties and not my late 30’s.  There’s no fat used, no added calories, and the vegetables can remain crispy and crunchy if that’s how you prefer yours to be.

Basically, it is really using steam to cook vegetables and not actually putting the vegetables into water to cook.

Blanching retains more nutrients than basket steaming, but at home here we have a steamer that has 3 separate compartments.

Vegetables take different times to cook, so I find myself putting on the root vegetables first and adding ones that take less time to cook, ie broccoli, cauliflower, asparagus spears etc much later.

How to Steam Vegetables

Blanching

If you are blanching in a pan, it is most suited to green vegetables and needs the water heated with a good amount of water first.  Approximately 1.5 – 2 litres of water for enough greens for about 6 people.    Add some salt and bring to the boil.  The salt helps the vegetables in the blanching process by helping raise the water temperature and keeping those vegetables delicious and nutritious.  Most green vegetables will be ready in 30 – 60 seconds with this method.

Steamer Appliance

This specially made kitchen appliance is made just to steam food of all sorts.   It can cook fish, chicken and much more and using it makes steaming vegetables really easy.  We can buy steamers for a pittance nowadays so I’d probably say having one is a good addition to any kitchen.  I have traditional steaming pots, but I have never, ever used them.

Steamers have a bottom section that contains a heating element.  We fill that with water and that is where the steam is generated.   The steaming baskets fit over the base and allow you to put your vegetables in for steaming.

My steamer has 3 baskets that can stack one on top of the other.    With the steamer, you don’t have to worry about cooking your vegetables.

They tend to come with cooking instructions for different vegetables, with their times and suggestions to get the most out of your machine.
Steamer 150

Pan Method

With the double boiler set up (ie a pan within a pan) you add water in the lower layers and bring that to a boil.   The steam builds up pressure and cooks the vegetables in a pot that sits above the actual water.  This isn’t how I would steam my vegetables as I’d not trust myself to have unburned veges, but it’s how my grandmother used to do them.

If we don’t have a steamer, and we want steamed vegetables, it does do the job, so read on if you want to know how to steam vegetables in a pot.

You need a nice big pot and it needs to be bigger than the vegetables that you plan to steam in it.  Add a little water in the bottom, approximately an inch and boil the water.  Add the vegetables when the water is boiled and most of them will be above the water line.

Make sure the water does not boil off, and add more boiling water from a kettle if you have to.    Put on a tight fitting lid for the top to keep the steam in the pan, but preferably one with a little escape hole in the top.

Microwave

There are some very cheap steaming dishes for our microwaves these days.  I got a fantastic one from lakeland.  It works along the premise of a few tablespoons of water in the bottom, and the vegetables in the insert, that doesn’t sit in the water.

Microwaved vegetables done this way take around 5 minutes but the microwave is also cooking the vegetables along with the steaming, so the end result will be slightly different from using a pan or a steaming appliance.


Posted on 8 Comments

Haddock & Mange Tout Fish Pie Recipe

Haddock is a pretty reliable and easy fish to work with.  It would have been the dish that my grandparents and their parents mostly lived on as they grew up.

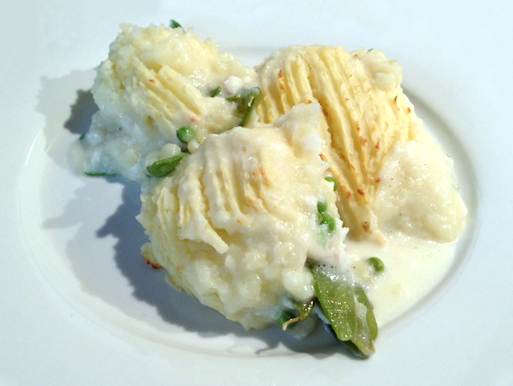
As versatile as it is, a fish pie is really an easy option to make with it.  I swithered between a fish pie and fishcakes, and this time round, the fish pie won for ease of simplicity.

This is another recipe for our Healthy Happy Hearts campaign with fish is the dish.

Haddock and Mange Tout Fish Pie Recipe

Lesley Smith
Prep Time 45 minutes
Cook Time 35 minutes
Total Time 1 hour 20 minutes
Course Mains
Servings 6

Ingredients
  

  • 5 lb Potatoes Peeled and suitable for mashing.
  • 5 Haddock Fillets Ours were quite large.
  • 1 Lemon
  • Salt & Pepper
  • Milk For the sauce.
  • Cornflour 3 Tablespoons mixed in a little cold milk.
  • Butter I use a knob of butter, but not too much to make the sauce and the same to mash the potatoes.
  • 500 g Mange Tout
  • 200 g Peas I like petit pois for the sweetness.
  • 1 pinch Nutmeg
  • Rapeseed Oil

Instructions
 

  • Put the potatoes on to boil before creating the fish and sauce for the pie. They need to be cooked in some salt and left to simmer for approximately 20 minutes to be suitable for mashing.
  • Wash and dry the fish. The fish can be dried in kitchen roll, or simply rolling in a little plain flour.
  • I put the fish in a pan on a low heat for a few minutes in rapeseed oil to allow it to slowly cook while I prepare the white sauce. Put the oven on to approximately 120 C.
  • In a pan, mix 1 - 2 pints of milk and a knob of butter. When the butter is almost fully melted and the mix is almost at boiling point, remove from the heat and stir in the cornflour and milk mixture. As it thickens, return it to the stove until you have a smooth white sauce. If it isn't thick enough for you, simply add a little more cornflour to it.
  • Add the sauce to the fish along with the mange tout and the peas. Allow the mix to simmer on a low heat with a pinch of salt and pepper to taste, and add the nutmeg.
  • Mash the potatoes using a little butter and milk. You want the texture to be manageable without being slimy or runny.
  • In a large dish, put your fish in sauce, and cover fully with your mashed potatoes.
  • Put your fish pie in the oven, and cook for approximately 30 minutes, or until the potatoes turn golden on top.
  • Serve and enjoy.

Notes

For this recipe, I use rule of thumb quantities to go with how much fish I have.  I've not put dedicated amounts as that depends on what you are cooking with your fish pie.  Almost anything goes, so make it up as you go along.


Posted on 9 Comments

Do you like your chips baked or fried?

McCain Oven Chips

Waking up coughing, I looked on as the door of my bedroom opened and the most gorgeous man I have ever seen in my life walked in through the door.  Dressed all in his fireman togs, I was then completely unaware of the rancid black smoke that wafted around him.  The hero of my ten-year old future dreams always played out with a macho fireman whisking me away from my dangerous foes.

Looking back, well before the days of oven chips in their dozens stocking supermarket shelves, we used to have to fry anything that needed chip style cooking.   My mother can make a mean roast, but she’s never been an adventurous cook, so all I learned from her was the basics.

We used to have a big ordinary pan as a chip pan, 16-year-old brother managed to come home steaming drunk and fall asleep while he heated up the fat for a late night feast.  Needless to say, both occasions ended up in a visit from the fireman and a grounded teen, but only one ended up with the macho fireman at my bedroom door.

We had no chip pan from then on and even though I do have one now, and it has a thermometer and a lid, it only ever comes out for Xmas Day and the Tattie Balls that my family refuse to do without.  I even do my roasties in the oven.

McCain Oven Chips 1

The rest of the year, we make do with oven chips, or just plain old regular potatoes.  The man keeps threatening to pull out the fryer and use it more often, but that means he would also have to clean it, so it’s never actually happened despite the threats.    The kids do like chips though and we go through a fair few bags over the space of a year.

The kids current favourite is McCain Oven Chips, so I was happy when they asked us to sample some of their Healthier Chip Range and the 5% fat, straight cut oven ready chips, made with just a dash of sunflower oil.  It was a bit of a no brainer here as they’re the popular ones anyway.

With 6 people to feed, the big bags are what we need and we were happy with the level of crispness from the oven that all chips should have.  I really dislike soggy chips.   I did have to cook them for longer than it said in the instructions in my oven, but it was no big deal.

I’d like to give the 3% fat rustic chips a go, so I’ll have to keep an eye out for those next time I am in the supermarket.

Thanks McCain, the chips got the thumbs up from the kids.


Posted on 16 Comments

Kangaroo and Buffalo Burgers

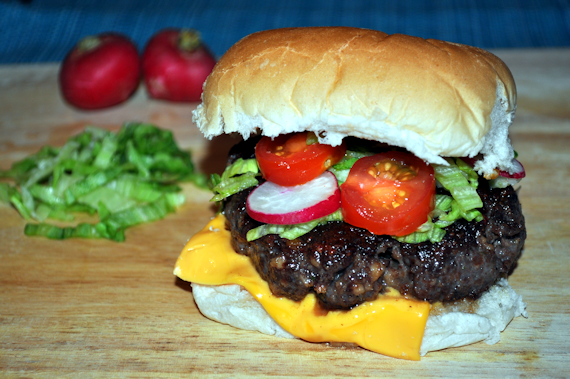
Buffalo Burger Cooked 570

My favourite online butcher, Andrew Gordon Butchery and Fine Foods has taken in some wonderfully unusual meat for burger making.

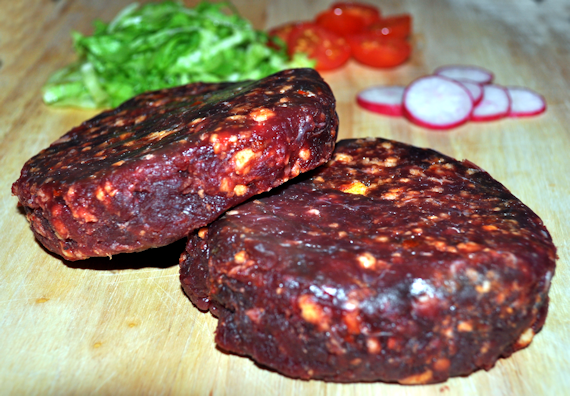
He now frequently has Kangaroo, Waygu, Buffalo and Zebra burgers, as well as a few Springbok ones in stock.   I was in past and came away with some Kangaroo and Buffalo burgers.

Buffalo Burger 570

The man seemed initially skeptical of the contents or taste of the burgers, but once cooked, he was highly delighted and ate two whole massive 200g Buffalo Burgers to himself.

A quick shallow fry in a frying pan in some rapeseed oil, popped in a bun with a cheese slice, lettuce, tomatoes and radish.

Buffalo and Kangaroo Burgers Cooked

Fabulous.


Posted on 2 Comments

Retro Prawn Cocktail Recipe

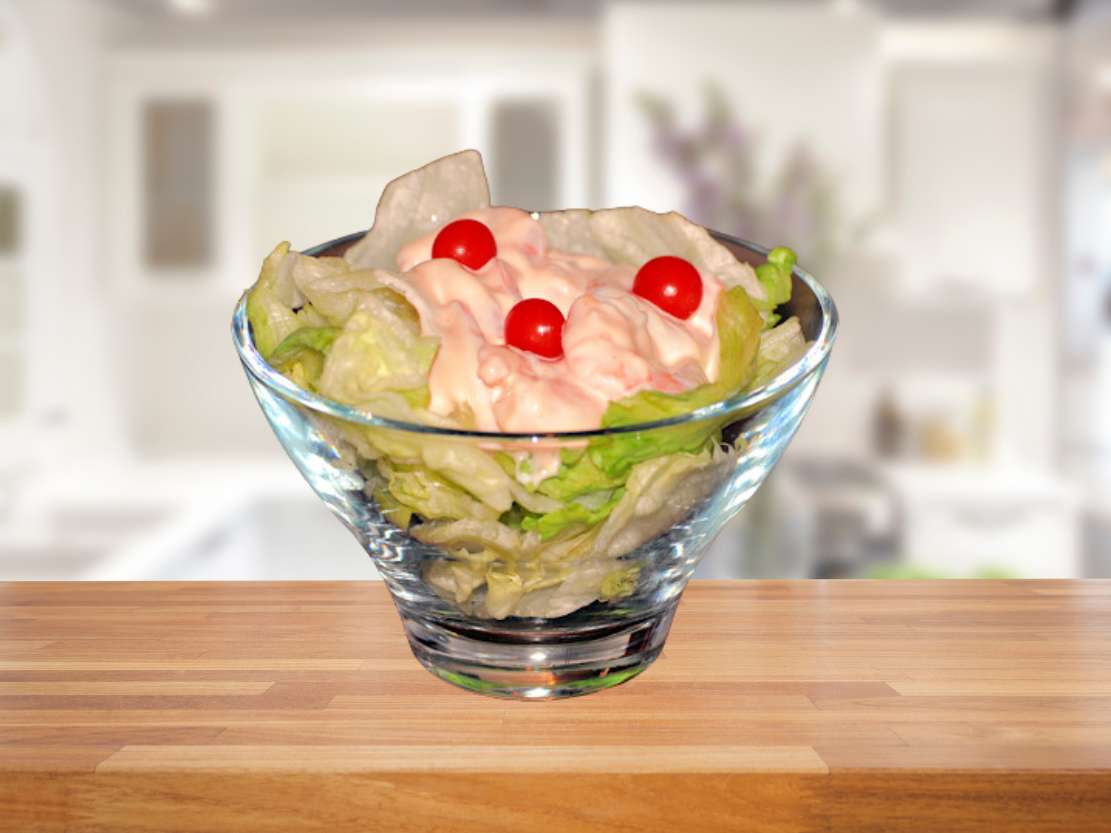
Making a prawn cocktail is something that the man of the house does quite often.    We had king prawns to hand and since we are doing the Healthy Hearts campaign with Fish is the Dish, it seemed a good idea to make a King Prawn Cocktail in the old-fashioned way.  We don’t use Worcester sauce so ours misses that out.

King Prawn Cocktail Recipe

Lesley Smith
Prep Time 10 minutes
Total Time 10 minutes
Course Starter
Servings 6

Ingredients
  

  • 800 g King Prawns
  • 270 g Mayonnaise
  • 150 g Tomato Ketchup
  • 1 Iceberg Lettuce To Serve
  • Salt & Pepper
  • Tomberries To Serve
  • 10 ml Lemon Juice

Instructions
 

  • Mix the tomato sauce, mayonnaise, lemon juice and a very small pinch of salt and pepper in a bowl to create a Marie Rose Sauce.
  • Wash the King Prawns, dry them (I used kitchen roll) and add them to the mix. Ensure are fully covered with the Marie Rose Sauce you made.
  • With your serving dishes, decide whether to shred your lettuce, or layer it in your dish. I layered this version.
  • Serve on top of the lettuce, add tomberries and a little seasoning if desired.


Posted on 4 Comments

Chicken Mayonnaise Panini with Lettuce

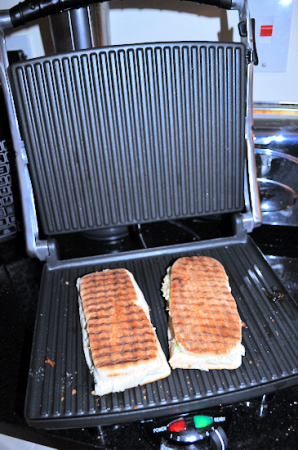
One of the pieces of equipment that does live in a drawer in our house and gets used fairly frequently with growing boys is our panini press.  We tend to get our chicken from our local butcher Andrew Gordon Butchery and Fine Foods nowadays, so I know it’s all good stuff.  I buy the lighter mayonnaise and add some herbs to make it more interesting, and a favourite standby food is always a panini.

My Kenwood panini maker actually reminds me a lot of a George Foreman grill, and if I had one of those, I’d be tempted to try making paninis with one of those.

I often make my own bread, but in emergencies, it has been known to be a shop bought loaf, or even the ready made panini bread from Costco, which I’ve used for this chicken and mayonnaise panini.

We were out of much in the way of vegetables, and with only a sad lettuce in the salad drawer, it just had to be added for the health option.

Chicken and Mayonnaise Panini with Lettuce

Lesley Smith
Prep Time 15 minutes
Cook Time 15 minutes
Total Time 30 minutes
Course Panini, Snack, Toastie
Servings 6

Ingredients
  

  • 4 Chicken Breast Fillets
  • 3 heaped tablespoons Mayonnaise
  • Lettuce
  • Butter
  • Salt and Pepper

Instructions
 

  • Set the panini maker on to heat up.
  • Simply cut open the panini bread and butter the inside. You don't need to butter the outside of the bread with a panini maker, but I know some people still do. My eldest doesn't like butter, so his is made without any butter at all.
  • Dice the chicken breasts and cook them fully, whether in a frying pan, in the oven, or steamed. This is also a good recipe for left over chicken from the previous day.
  • Mix the cooked chicken breast with the mayonnaise and fill the opened panini. Add salt and pepper if you wish. Top it with the lettuce and close as you would a sandwich.
  • Pop into the panini maker, close the lid and leave for approximately 5 - 10 minutes.
  • Garnish and serve.


Posted on 13 Comments

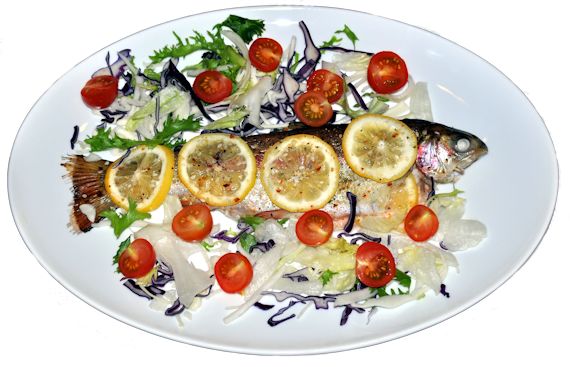
Roasted Whole Rainbow Trout Recipe (Lemon & Parsley)

Roasted Rainbow Trout

Roasted Rainbow Trout was a mixed bag for us.   More commonly known as Baked Trout, it’s actually so simple that any recipe can be used for it.  All we are doing is taking the rainbow trout and baking it whole in the oven.  I flavour with lemon and parsley on top of salt and pepper – and that is really it – simple baked rainbow trout.

The kids washed their hands to touch the rainbow trout before it was cooked.   Don’t ask me why, I have no idea.

Rainbow Trout 1

I wasn’t too sure how the kids would take having it to eat for tea, especially cooked with the head on, but it really looks impressive served on a platter.  My kids were a little squeamish at seeing the eyes cooked as they go from having a black pupil to going white like our blind dog.

Here’s how we made it.

Whole Baked Rainbow Trout with Lemon and Parsley

Lesley Smith
Prep Time 20 minutes
Cook Time 30 minutes
Total Time 50 minutes
Course Mains

Ingredients
  

  • 1 Rainbow Trout Per Person The bones easily separate once cooked.
  • 1 Lemon Per Person
  • Cherry Tomatoes To Serve
  • Parsley To Garnish and Serve
  • Salt
  • Pepper
  • Salad To Serve

Instructions
 

  • If your rainbow trout are shop bought, they'll already be gutted and opened along the belly. If you catch them while fishing, you will have to perform that task. Make sure you rinse them well under the tap, inside and out. When you open the trout to wash it, you'll see a blood line along the backbone. Scrape that off before cooking, or it might affect the taste. Set your oven to approximately 130 C / 250 F.
  • Fill a large dish with tin foil, enough to make a parcel shape for your baked trout. You don't want your fish tightly bound. Lay your fish on the tin foil and fill with thinly cut lemon slices, salt, pepper and parsley.
  • Loosely enclose the parcel with the tinfoil and bake for 30 minutes.
  • Remove from oven, serve whole with salad or vegetables, garnish on plate with lemon and parsley.

Middler was the one who chose the Rainbow Trout as a meal option, so I think he felt he had to give it a go, so he had a nice big plateful and wanted more.   I really wish I was as healthy an eater as he is.