Posted on 7 Comments

Meatballs and Vegetable Stir Fry Recipe

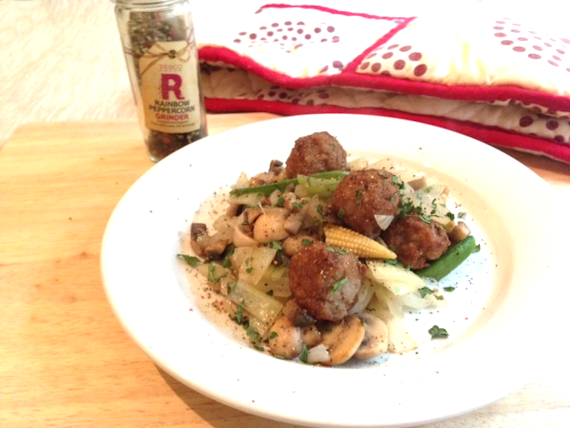
My mum arrived home with a wee pack of Swedish meatballs at the request of my youngest and I had loads of vegetables from the plot to use up, so they were put to good use in a simple vegetable stir fry.

I had lots of onions from the plot, with sugar snap peas and added mushrooms and baby sweetcorn from the supermarket.  I’ll serve this with baby potatoes from the plot for the kids who thankfully all love their potatoes.

Meatballs and Vegetable Stir Fry Recipe

Lesley Smith
Course Mains

Ingredients
  

  • Meatballs
  • 2 Onions Chopped
  • Sugar Snap Peas
  • Baby Sweetcorn
  • Mushrooms
  • Chives
  • Parsley
  • Salt
  • Pepper

Instructions
 

  • Wash all the vegetables, chop the onions and put them all in a wok or frying pan with a little rapeseed oil, a pinch of salt and a sprinkling of pepper. We used rainbow peppercorns.
  • Lightly fry until the onions are soft and the mushrooms are cooked.
  • Add in the meatballs and lightly fry until fully cooked and hot.
  • Serve, garnish with chives, parsley and pepper.

Notes

This recipe doesn't have specific weight amounts added to it.  It's all dependent on the vegetables available in your fridge, or ones you've grown.


Posted on 3 Comments

Toffee Popcorn Cup Cake Recipe – withTruvia (Stevia)

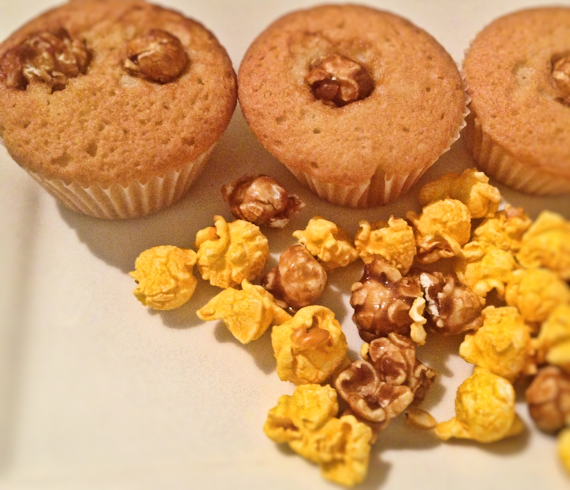
I’ve wanted to use Stevia in cooking more for a while, after my successful sorbet recipe, so I’ve begun by mixing sugar and Truvia half and half for this recipe.  I’ve cut out an egg to counter for the reduced amount of sugar and it worked just perfectly.  The cakes had a slightly caramelly taste which I put down to the Truvia and matched the Toffee Popcorn very well.

I had the popcorn as Garrett Popcorn from Chicago are opening a new shop in the UK after summer and they sent us a preview of their popcorn to try and send them feedback.  We loved the toffee, but the cheese wasn’t popular here at all.  If the can had been all toffee popcorn I’d have had very happy boys indeed.  I wanted to try something different from just eating it, so we had a taste and then used the rest in our cooking.

With hindsight, I’d break down some toffee popcorn in future to put through the cake mix and use one to top the cakes, but it was our first foray into cooking popcorn into something else and we’re really pleased with how it turned out.  Garrett didn’t ask for a write up on my blog, but just asked for some feedback.  The toffee popcorn was just too good to eat in one sitting as my boys would have finished it quick smart.

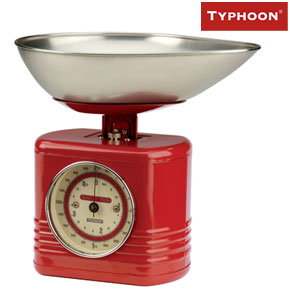
I’d also been sent the Typhoon Vintage Scales from Red Candy and have been itching to use them as my old set broke down.  They remind me very much of the scales my grandmother used to have in her shop.  I used to work there when I was 12 and they were on the sweetie counter, which I absolutely loved having to serve from.  Red Candy has some amazing red pieces for kitchens, and they really brighten up a room.  They’re worth a look.

typhoon-vintage-scales


Onto the recipe.

Toffee Popcorn Cup Cake Recipe – with Truvia (Stevia)

Lesley Smith
This is a large recipe batch that makes us 36 cakes, but you can cut the quantities if you need smaller amounts.
Prep Time 15 minutes
Cook Time 25 minutes
Total Time 40 minutes
Course Baking
Servings 36

Ingredients
  

  • 12 oz Butter
  • 12 oz Plain Flour
  • 3.5 teaspoons Baking Powder
  • 6 oz Sugar
  • 2 oz Truvia Stevia
  • 5 Medium Eggs
  • 72 Garrett Toffee Popcorn

Instructions
 

  • Put oven on at 180 degrees to heat up.
  • Cream butter and sugar.
  • Add eggs and beat until creamy,
  • Add flour and baking powder, and fold it in until the mixture is light and airy.
  • Pop the cake mix into cake cases, put pieces of popcorn into the top and bake for 15 - 25 minutes depending on your oven.


Posted on 7 Comments

Grow Your Own Garden Goodies

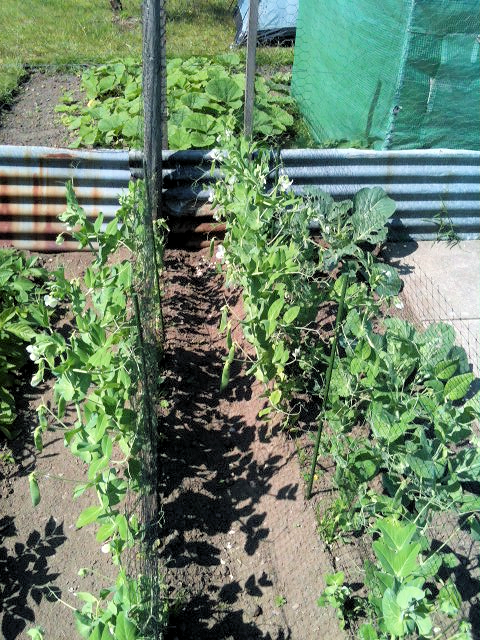
Getting goodies from the garden is always a fab thing to get.  We’ve got a plot and it’s great to get fresh stuff.  Our plot has grown and grown and grown and although it’s the first year, there should hopefully be many years after this to enjoy the goodies.

Plot Strawberry Plants

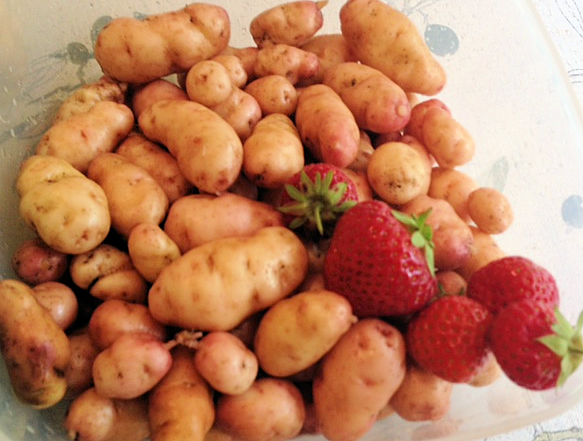
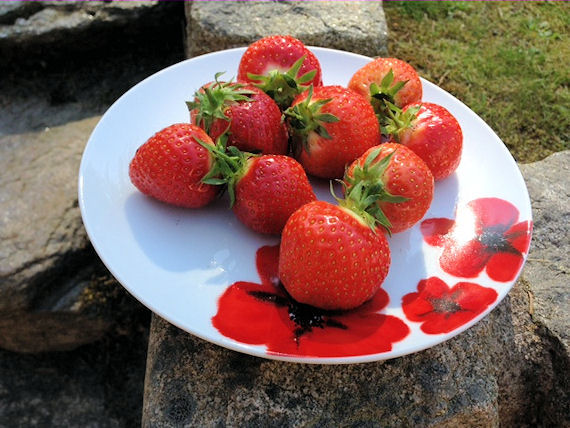
The strawberries looked and tasted great.  Pity they’re all done already as we only got a few dozen and they don’t last long in this house.

Plot Plants

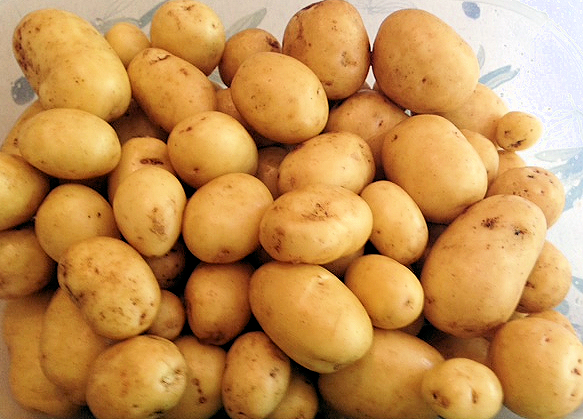
The potatoes are a different story.  We’ve been eating them for a week and loads more to come.  Fresh and absolutely lovely when they’re cooked.

Plot Potatoes 1

Plot Potatoes 2

Sadly the cauliflowers are taking longer to ripen than we thought so they might not be goers this year, fingers crossed.

Cauliflower

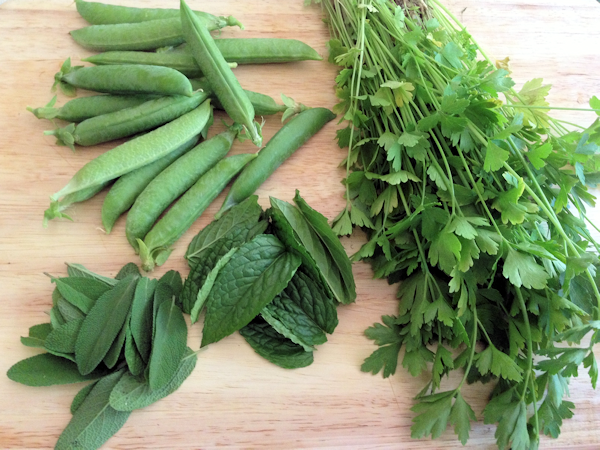
The peas have done well, but it’s just a pity there isn’t really that much when they pea pods are shelled.  I forgot to tell them to keep the shells for stir fry, but they’ll remember next year I hope.

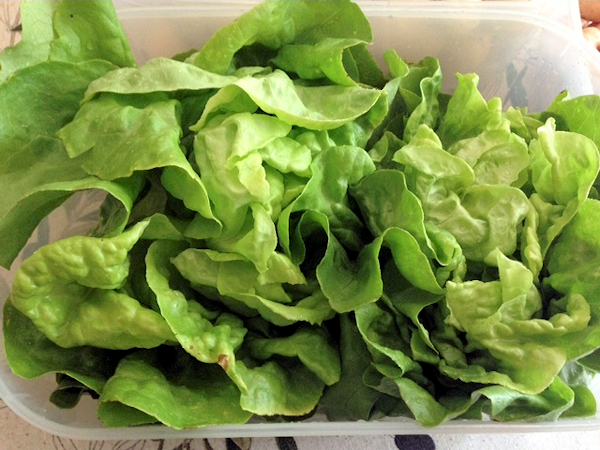
Plot Lettuce

Loads of lovely lettuce.

Herbs

Some mint, two types of basil and some parsley made up the total amount of herbs we pulled up.  Somehow I’ve not managed to get a photo of the parsley.

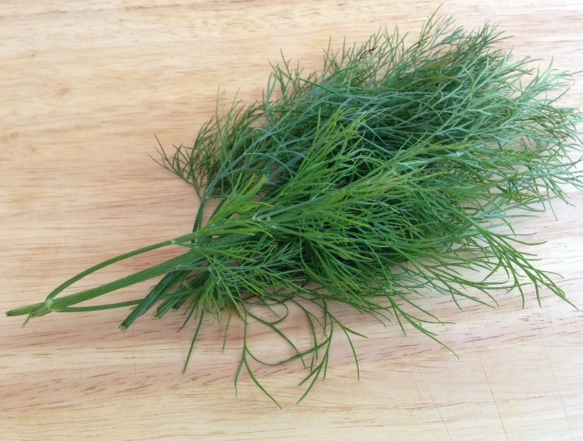
Plot Dill

Last but not least this week was the dill.

Posted on 3 Comments

Quick and Easy Mince & Baby Sweetcorn Lasagne

We don’t always have time to make lots of different sauces to finish a popular dish at home.  Some great meat from a local butcher can be eked out really well to ensure there’s enough food for a whole family.

I made this lasagne with good meat and cheap sauce.  It’s delicious and you can vary it as much as you want by adding herbs and spices.  This recipe gave me enough for one night fresh, and I froze the rest for another night.

Quick and Easy Mince and Baby Sweetcorn Lasagne

Lesley S Smith
Prep Time 15 minutes
Cook Time 45 minutes
Total Time 1 hour
Course Mains
Servings 8

Ingredients
  

  • 1 kg Mince
  • 200 g Baby Sweetcorn Cut into thirds.
  • 200 g Petit Pois
  • 1 Large Onion Chopped.
  • 2 Jars Dolmio Bolognaise Sauce
  • 2 Jars Lasagne White Sauce
  • Lasagne Sheets
  • Olive Oil

Instructions
 

  • Add a little olive oil to a frying pan or thick bottomed pan. Fry the onions gently until they are soft, but not brown.
  • Add the mince and use a wooden spoon to bash it down and separate it as it browns and cooks.
  • Add in the baby sweetcorn, peas and 2 jars of Bolognaise Sauce, simmer for 5 minutes.
  • Add half of your mince mix to the bottom of a baking tray or large dish.
  • Line the top of the mince with lasagne sheets and pour over the remainder of your mince mix.
  • Add another layer of lasagne sheets and simply pour over the jars of white sauce.
  • Cover with tin foil and bake at 180 degrees for 35 minutes.
  • Check to see if your lasagne sheets have gone soft, if they have, remove the tin foil and bake for a further 10 minutes to begin browning the top. This is an optional choice.
  • Serve and garnish.


Posted on 16 Comments

The “Packed Lunch” Debate. Pro-Choice.

I saw and read some of the comments and opinions on packed lunches, and those who are both for and against. I have to say that there is a world of difference between the quality and content of packed lunches from school to school and I’ve heard of  really good ones and some really awful ones.

With the price of a dinner ticket increasing to £2.20 per child a day, it’s not an option every parent can afford.  A friend of mine has 6 children and the costs for her for packed lunches every day would be £66 a week, or £264 a month. Not everyone can afford to pay that out every month when they could fill a lunch box with food from the fridge every day with a little planning.

I am lucky enough that if I wanted to, I could send my kids for a school dinner every day, but the big point is that they don’t always want a school dinner.  Some school dinners are ok and they are happy to eat them, but others they find awful, without taste, and complain about how disgusting they are.

I imagine it’s a bit like an NHS hospital versus a Private one, or actually, even in Aberdeen, the quality of food in the main hospital always seems to be lacking in comparison to the food at an offshoot site.

I know my kids sometimes ask for a packed lunch at Primary and sometimes ask for a school lunch.  It’s very dependent on what is on offer and what they think of how it’s cooked.

  • My kids love fish, but won’t eat the Primary school version which they complain has hardly any fish in it and looks like a sliver of grey backed dingy stuff.  I’ve not seen it so I can’t comment personally.
  • The puddings are “fine,” says my youngest.
  • Working with some children at the school, they said that most of their friends take packed lunches as the school ones are often disgusting.

If a school banned packed lunches, I think they will have overstepped the mark into parenting and choice of food for their children.

Yes, I agree that some parents might put things into school lunches that others don’t agree with, but in a few short years, they’ll head to secondary school and then just eat chips from the nearest bakery or junk food store anyway.

I don’t see the point in meeting nutritional guidelines for food that is served up if the food is poor quality and kids don’t want to eat it.  I really would grudge spending £2.20 a day for my child to eat a piece of bread and a pudding as there wasn’t anything else they wanted on that day.

I’m against school lunches being mandatory and I am for pro-parental choice.

I have no problem with guidelines and help for parents to make better packed lunch choices than some people make, but if I had a child who would only eat rice krispies and simply put their school lunch in the bin, I’d rather they ate rice krispies from a packed lunch than ate nothing at all.   Most parents can make up the difference with an evening meal and headteachers being given the option of helicoptering the parents decisions is just plain wrong.

We don’t live in a nanny state that takes decisions away from the parents in other aspects of school life, so why for food?  Why is food important to tackle, but behaviour left to the parents to cope with?  I know which one I’d rather the school took responsibility for.  Blaming all poor behaviour on diet is just plain wrong.

If our local school made school lunches mandatory, I’d move my kids to one where it wasn’t.  I have children who don’t wait in line well, and there are some days that my child just knows he can’t cope with losing 10 minutes of his lunch break standing queuing for his dinner, as it takes too much time away from getting outside and running around for exercise.
 

Posted on 9 Comments

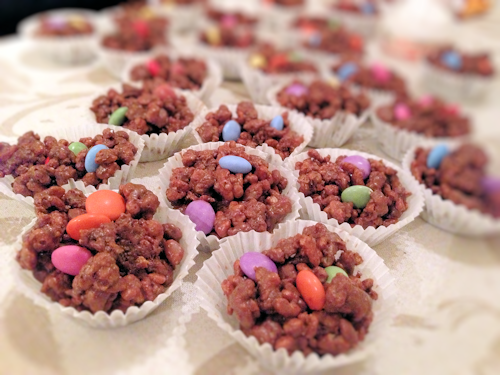
Mars Bar Chocolate Crispies Recipe

We made these for our local school fundraiser.  Kids take in things we’ve made and they sell them to each other to reduce the price of a big trip away with their year group.  I did worry at first about how these would turn out and they did end up chewy and more for a child’s taste buds than mine, but none came home again which must tell it’s own tale.

We used larger quantites as they were for selling, but I’ve cut them down for this post.  We decorated with smarties, but you could use any sweeties, or equally not add any in at all.

Mars Bar Chocolate Crispies

Prep Time 10 minutes
Cook Time 10 minutes
Total Time 20 minutes
Servings 12

Ingredients
  

  • 60 g Butter Preferrably unsalted, but we've used salted and there was no difference to the taste.
  • 2 tablespoons Golden Syrup
  • 100 g Rice Krispies
  • 2 Mars Bars Chop up into tiny pieces.
  • 100 g Chocolate
  • Sweeties to decorate.

Instructions
 

  • Melt the chocolate in the microwave or over a bain marie (bowl laid on top of a pan of simmering water). If you're using a microwave, do it in short bursts or depending on the chocolate you use, it could separate or burn.
  • Add the butter and stir it into the chocolate until it is melted. Then add the golden syrup.
  • Add the rice krispies and stir them on gently enough so as not to damage or break the krispies.
  • Fold in the tiny pieces of mars bar. They will semi melt into the mix as it will still be hot at this stage.
  • Pour into 20 cake cases and top with sweeties to decorate, leave to cool and then just eat.


Posted on 1 Comment

Cake In A Cup Recipe, with Flaked Almonds

I’m not really a cake hand though my kids and the man love their cakes.  I’d rather have a bar of Dairy Milk personally, or maybe a Green & Blacks if I feel flush.

Finding simple and easy ways to give the kids a cake led me to trying a cake in a cup a while back.  I couldn’t say I liked it, but the kids did and that’s all that matters.

Cake In A Cup – Flaked Almonds

Lesley Smith
Prep Time 5 minutes
Cook Time 3 minutes
Total Time 8 minutes
Course Baking
Servings 1

Ingredients
  

  • 3 tablespoons Self Raising Flour
  • 3 tablespoons Brown Sugar
  • 3 tablespoons Butter Margarine or Vegetable Oil
  • 1 Egg
  • 3 tablespoons Flaked Almonds

Instructions
 

  • Crack the egg and put it into the bottom of your cup.
  • Add in the sugar, softened butter and flour.
  • Mix it all together with a fork until it gets to the consistency you expect for cake mix.
  • Fold in the flaked almonds.
  • Microwave for 2 + minutes (until the centre is fully cooked - a skewer is good to test the centre)
  • Top with icing and sprinkles of your choice.


Posted on 4 Comments

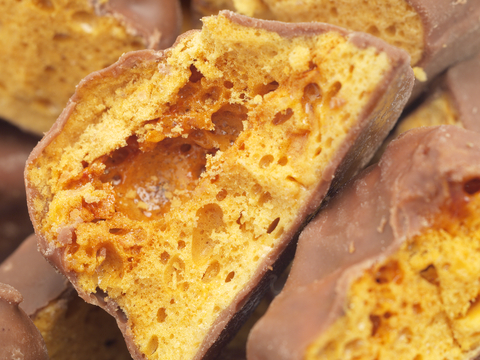
Cinder Toffee, Smothered in Chocolate

Cinder toffee is similar to the Crunchie bar we have in the UK, but also quite different in texture.  It’s quite messy to make and you really have to be quick with it or it solidifies so quickly that you can’t get it out of the pan.   Be prepared to work quickly.

There is a lot of science involved in cinder toffee, or honeycomb toffee as it is also sometimes known.  Sugar can be the ultimate comfort food with zero calories that are good for us, but still we enjoy eating it while our teeth suffer with the potential for future cavities.

Making cinder toffee is a little like the experiments we did at school, or the ones we buy our kids to show the volcano erupting when bicarbonate of soda is added to the mix.  This is made using high heat, so it’s not good for children to make it, but they can have lots of fun watching it being made.

I adapted this from a Nigella recipe that I found online, but added a little butter to make it slightly easier to work with.

Nigella calls it hokey pokey, but I guess we can all call it what we like.  There are hundreds of variations of the same recipe for cinder toffee, honeycomb and fizz in the mouth candy.

We know it more as the type of sweet that is like a Cadbury Crunchie.

It’s easy to make, though you might find some trouble in cleaning your pan afterwards, but soaking in water and washing up liquid should help with that.  Make sure you grease the cooking pan for your cinder toffee very very well, or it will stick like glue and you might need to cut it out.

Have your bicarb out and ready to be used.  There’s no time for weighing once your hot sugary mess is ready to use.

Cinder Toffee / Honeycomb

Lesley Smith
Course Baking

Ingredients
  

  • 200 g Caster Sugar
  • 4 tablespoons Golden Syrup
  • 2 tablespoons Bicarbonate of Soda
  • 30 g Butter
  • 200 g Chocolate Bar

Instructions
 

  • Weigh out your bicarb of soda and keep it separate. Make sure your tray is greased before you start to cook. Use a fairly large pan as when the mixture swells up, you could be surprised just how far it comes up the side of your pan.
  • Put butter, caster sugar and syrup into a very thick bottomed pan and heat it gently until the sugar dissolves completely. Turn up the heat at this point and boil it without stirring for a quick boil so that the mix goes darker while it simmers and just for a few minutes. Don't let the mixture go too dark or it will begin to burn. Don't take your eyes off the pan, or let children come near it as it is boiling sugar and sugar hurts if it comes into contact with any living thing.
  • Now for the science bit. Take it off the heat, put the bicarbonate of soda in and quickly but calmly stir the mixture. Don't be too vigorous or you might end up with a few sugar burns, and those hurt, believe me. The mix will swell up as the chemical reaction takes place. At this point, you'll be glad you didn't use a small pan. Keep children at a safe distance.
  • Pour the mixture into your pre-greased tin and leave it to set for a few hours. Depending on the size of tin you use, your cinder toffee could be ready to eat in minutes. If the layer in your tin is thick, it will take a fair while to cool.
  • Once it's cool, melt your chocolate in a microwave or double pan method (or just put a heat proof plate on the top of simmering water in a pan, and put the chocolate in the plate). Dip your cut up pieces of cinder toffee into the chocolate and leave to cool.


Posted on 7 Comments

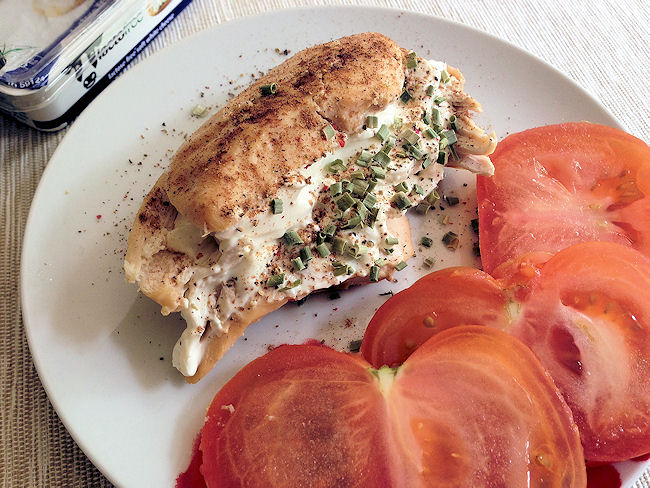
Lactofree Cream Cheese Stuffed Chicken Breast – (Bag Roasted)

This is one of the ultimate easy fast foods.  Perfect for a lunch or just for a treat.  This lactofree cream cheese stuffed chicken breast is make by using a simple roasting bag and then adding some herbs on the top.  I think this will be served up next time I have others to cook for at a lunchtime.

Lactofree Cream Cheese Stuffed Chicken Breast – (Bag Roasted)

Lesley Smith
Prep Time 5 minutes
Total Time 5 minutes
Course Mains

Ingredients
  

  • Chicken Breast Fillets 1 Per Person
  • Chives
  • Rainbow Peppercorns
  • Nutmeg
  • 2 tablespoons Cream Cheese I used Lactofree Cream Cheese
  • Tomatoes To serve
  • Roasting Bag

Instructions
 

  • Put your chicken breasts into a roasting bag and into the oven at 200 degrees for approximately 40 minutes for large chicken breasts, or 25 minutes for small ones. Ensure they are fully cooked.
  • Simply take the chicken breasts out of the roasting bag and spoon a teaspoon or two of juices over the top of your chicken breast to keep it moist. Save the rest of the juices if there are enough to make stock, or freeze for another day.
  • Slice the chicken breast down the middle and simply spoon in the cream cheese.
  • Grate peppercorns over the top of the cream cheese, close the chicken breast and sprinkle with chopped chives.
  • Lastly, a half teaspoon of nutmeg sprinkled across the top of the chicken gives the look of barbequed or fried chicken. Garnish and serve.

Notes

Be free with this recipe and don't hold to the ingredient amounts. Just add enough of whichever spice or herb you like to taste and enjoy.


Posted on 3 Comments

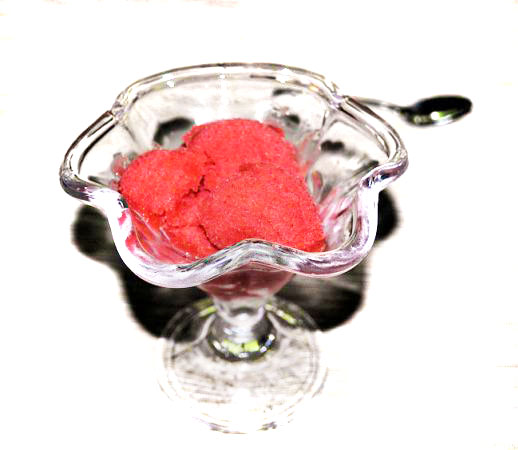
How to make a quick uncooked strawberry sorbet with stevia.

A sorbet recipe gives a lovely and light ice cream substitute and doesn’t show that it only a blend of strawberries and sugar or sweetner.   I believe they used to be used to cleanse the palate between courses in earlier centuries, but sorbet now tends to be used in place of ice-cream, or as a gorgeously light and tasty alternative on a hot day to cool us down.

To make them, it just involves freezing fruit, water, sugar and on occasion lemon juice to help it keep for longer.   Recipes tend to recommend frozen strawberries, but I prefer mine fresh as the sweetner takes care of any lack of sweetness in them.

Strawberries

I decided to give my new stevia sweetner a try out in this version as I wanted the calories to come only from the strawberries themselves.  Stevia is quite expensive so it’s something we have to think about carefully before adding to our food as a cooking ingredient.  I used an ice-cream maker and the consistency was perfect for us.

When you freeze this, it will take a while but because the sugar isn’t cooked, the consistency if it is frozen too long or overnight will be like an ice pole with the water content forming larger crystals.   If you are using it after a long time in the freezer, take it out so that it can defrost enough to be pliable.  If you want a smoother, creamier version of sorbet, you will need to cook the sweetner into a syrup, but this did the trick for me.  It all depends how you like your sorbet.

Strawberry Sorbet Recipe with Stevia Instead of Sugar (Simple, Uncooked Version)

Lesley S Smith
If you add an egg white, the sorbet will be slightly creamier. I prefer the slushy strawberry ice without the egg.
Prep Time 10 minutes
Cook Time 30 minutes
Total Time 40 minutes
Course Appetizer
Servings 6 - 8
Calories 31000 kcal

Ingredients
  

  • 3 heaped tablespoons Stevia I used Tesco Sweet
  • 750 g Strawberries Hulled
  • 2 tablespoons Lime Juice
  • 150 ml Water
  • 2 tablespoons Vodka/Wine or Gin Optional

Instructions
 

  • I used the very fine stevia which didn't need heating up, but if you use the granulated kind you would need to melt the sugar in the water and bubble it for a few minutes and then leave it to cool down.


  • With the fine stevia, I added it with the water and lime juice to the strawberries which were pureed. Mix it up in a blender for several minutes until you have a smooth mix. Some might prefer it to be put through a sieve at this point, but I just use mine as it comes out of the blender.

  • You can taste the mix here to see if it is sweet enough for you. If it isn't sweet enough, simply add a little more stevia, whizz it around for a while, then taste once again.


  • Chill the pureed mix in the fridge for an hour and put it in the ice-cream maker for 20 - 30 minutes, or until it turns to a thickening slushy consistency.

  • Simply add it to a container and put it in the freezer for a couple of hours before serving.


  • If you make it without an ice cream maker, put your mix into a container and put it in the freezer for a couple of hours, then take it out and put it back into the blender to whizz it up again. Then simply put it back into it's container and to the freezer once again for another couple of hours.


Posted on 7 Comments

How to Cook Quails Eggs: Hard and Soft Boiled

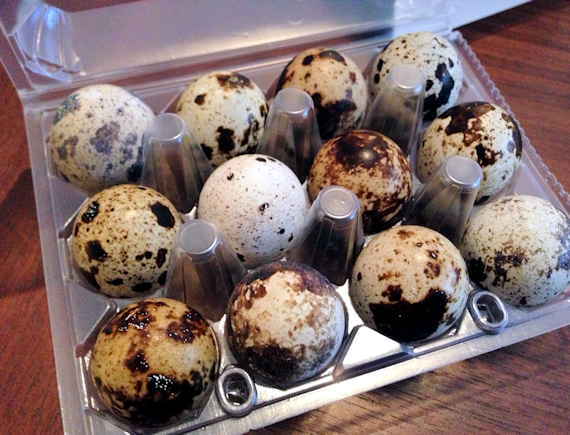
Quails eggs are easier to cook than we think, and because they are so small, the cook very fast.  They make the perfect sized eggs to go with salads and side dishes and taste creamy and light.

Quails Eggs – Soft and Hard Boiled

Lesley Smith
Cook Time 3 minutes
Total Time 3 minutes
Course Snack

Ingredients
  

  • Quails Eggs
  • Boiling Water

Instructions
 

  • For Hard Boiled Quails Eggs: Place Quails Eggs in boiling water for 4 minutes. Drain, rinse under cold tap and peel off shells to serve.
  • For Soft Boiled Quails Eggs: Place Quails Eggs in boiling water for 2.5 - 3 minutes. Drain, rinse under cold tap, and peel off shells to serve.

Notes

Don't overcrowd the pan, though 12 quail eggs will happily sit on a medium sized pan with enough water to cover all the eggs.    Make sure your eggs go into boiling water and a slotted spoon is best for putting them in and taking them out with the least damage to the eggs.
Cool the eggs down under water to be able to peel the shells off.  The shells can be tricky to remove, so take your time with them.


Posted on 6 Comments

Fresh Home Made Strawberry Ice Cream Recipe

When I walked into Lidl and spotted their ice-cream maker, I did think about it.  I’ve had ones before that people have given me as presents, but usually such a faff to use that I end up just passing them off to other people. This one was electric and after the huge success I had with their slow cooker, it wasn’t such a thought to buy another machine from them.

The bowl should go into the freezer for 24 hours before, but I got away with putting mine in the freezer and putting on the super freeze function.  It says to put the mix when made up into the fridge for 4 hours too, but if all the ingredients come straight from the fridge, I don’t see the need to do that apart from keeping it to have the ice cream completely freshly made for an evening meal.

If you do buy one, don’t do what I did and put your ice cream back in the freezer while it’s still in the machine bowl, or if you do, use a soft scraper for the sides as I put mine in our freezer and scraped the side of mine with the ice cream scoop.  I used a three yolk mix but it was too much.  The 2 yolk mix is definitely enough for the 1 litre tub the maker comes with.

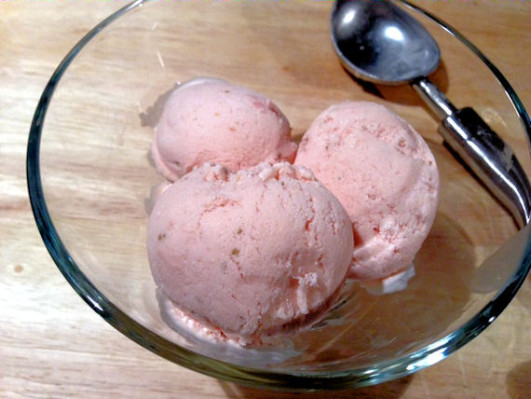
It was delicious and absolutely zero nasties or unpronouncable ingredients in it.

Fresh Home Made Strawberry Ice Cream Recipe

This recipe is adapted from the Silvercrest Ice Cream Maker Recipe Handbook.
Prep Time 15 minutes
Cook Time 40 minutes
Total Time 55 minutes
Servings 6

Ingredients
  

  • 2 Egg yolks
  • 7 fl oz Low Fat Milk I used semi-skimmed.
  • 7 fl oz Whipping Cream I used double cream and whipped it.
  • 1.5 oz Icing Sugar
  • 300 gg Strawberries

Instructions
 

  • The egg yolk and icing sugar needs to be mixed together. Don't be temped to use a balloon whisk as the egg yolk will stick to it. The mixture will be bright yellow when it is properly beaten together.
  • Add the cold milk to the egg and icing sugar and mix it together. It will look like a buttermilk mix when it's done.
  • Whip the cream until it forms stiff peaks and add it to the egg yolk and icing sugar mix. It took so long to mix to smooth for me, that I put it through a sieve to finish it off.
  • Puree the strawberries and stir it in until it looks evenly mixed.
  • Save the mix until about 45 minutes before you want to serve it, or use the ice cream maker to pre-make it and then freeze for later. It will take approximately 40 minutes for the ice cream to be ready and then it is simply serve, or freeze for later.