Posted on 5 Comments

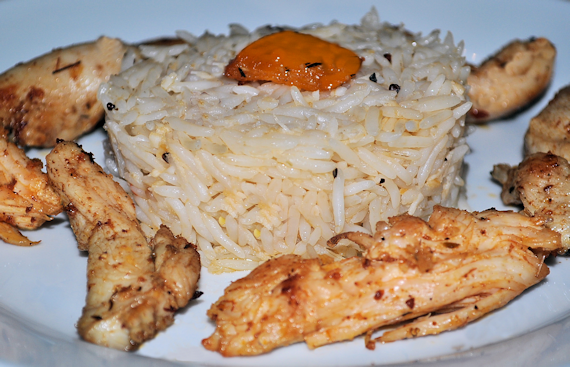
Greek Chicken Stir Fry with Chilli and Peppercorn Rice

A simple and quite easy main meal to make, but be warned, it does have a bit of a kick in the rice.

If you are slightly worried by spicy food, simply leave out the chilli and use some herbs or fruit instead.

Greek Chicken Stir Fry with Chilli and Peppercorn Rice

Lesley S Smith
Prep Time 10 minutes
Cook Time 25 minutes
Total Time 35 minutes
Course Mains
Servings 4

Ingredients
  

Rice

  • 500 g Basmati Rice Steamed or Boiled
  • 1 Red Chilli Finely Chopped
  • 1 teaspoon Black Peppers
  • 2 heaped tablespoons Coconut Oil

Stir Fry

  • 800 g Greek Chicken Stir Fry
  • For cooking chicken. For cooking chicken.

Instructions
 

Stir Fry

  • Using a thick bottomed saute pan, or a roomy wok, shallow fry the Greek Chicken Stir Fry for about 10 - 15 minutes in coconut oil, or until the chicken is thoroughly cooked.


Rice

  • Place freshly steamed or boiled Basmati Rice, Peppercorns and Chopped Chilli in a thick bottomed pan or wok. Lightly fry with 2 tablespoons of coconut oil on a low heat for 5 minutes, turning frequently.

  • Decorate the plate, and serve hot.


Notes

The ready marinaded Greek Chicken Stir Fry is from the counters of Andrew Gordon, Butchery and Fine Foods


Posted on 3 Comments

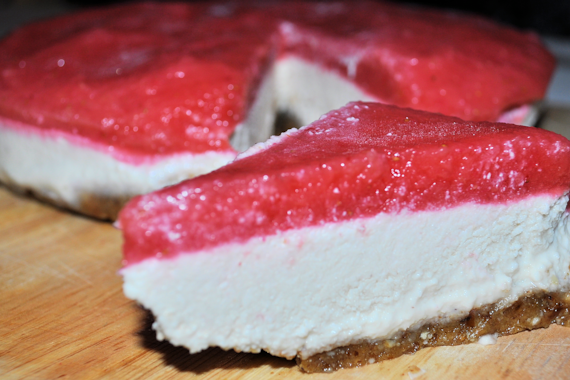
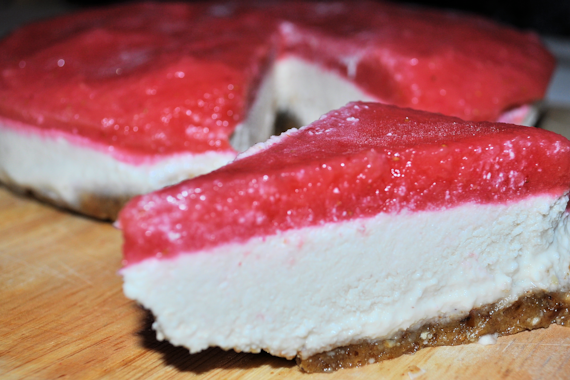
Raw Food Cheesecake – Suitable for Vegans

Was raw food cheesecake a sensible idea?  I’m not really sure to be honest.  I’m glad I made it, but a very small slice is enough to eat.  I loved the base and the topping, but I can’t say the same for the filling.  None of the kids liked it, but they are more used to dairy.

I do think that if I’d used a dairy filling, they’d really have liked it.  With this size of cheesecake, you could easily get about 15 – 20 small portions.

Looks pretty easyish to make, but a bit disappointing for us.  I’d say that you would have to be a die-hard vegan / vegetarian to go for this a lot, and the calories must be immense, but it does make a dessert for people who might not otherwise be able to have one.

Adding some more tartness to the filling might have made it a bigger hit here, but I’m not sure I would ever try it again.

Raw Food Cheesecake Recipe

Lesley Smith
Prep Time 1 hour
Total Time 1 hour
Servings 15 - 20

Ingredients
  

Base

  • 1.5 cups Walnuts
  • 1 cup Dates
  • 2 tablespoons Agave / Syrup or Honey If needed.
  • 0.5 cup Dessicated Coconut

Filling

  • 3 cups Cashews Soaked for at least 8 hours.
  • 3/4 cups Lemon Juice
  • 3/4 cups Coconut Oil The solid at room temp kind.
  • 3/4 cups Agave / Syrup or Honey
  • 1 tablespoon Vanilla Essence
  • 1 cup Water

Topping

  • 2 cups Strawberries

Instructions
 

Cheesecake Base

  • Put walnuts and dates into a food processor. I have to use my steel blade to get this to work and it can take several minutes to get the base to a place where it looks and feels like a cheesecake base. You can keep it with big chunks or wait a little longer to have a more finely processed base. I added a little agave syrup to help blend the nuts, but it really wasn't needed.


  • Sprinkle the coconut onto the pan you'll use for your cheesecake to set in. It makes the first layer to stop your cheesecake from sticking.

  • Press the walnut mix down on top of the coconut and your base is ready for the filling.


Filling

  • Put all the filling ingredients, apart from the water into a mixer / processer at the same time. You can add water bit by bit, and keep processing until you have a smooth creamy mix. It may take a few minutes to happen.

  • Put filling on top of the base and freeze it for about an hour to let it harden. At this point, it really is looking like a regular dairy cheesecake.


Topping

  • Blend the strawberries until they are smooth. Put them on top of the base and filling.


  • Put it all back in the freezer until the topping slightly hardens. Then all you have to do, is remove from freezer and serve immediately.

Notes

The coconut oil is to help the filling stay in shape. Coconut oil that is solid at room temperature works well. If you leave out the coconut oil, you may have to add in some gelatine to keep it in shape, or serve straight from the freezer instead. You can also use gelatine for the topping of strawberries to allow it to set without using the freezer.


Posted on 1 Comment

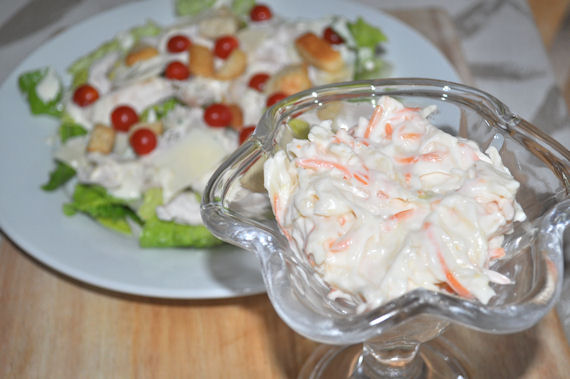
Coleslaw Salad

I don’t think there is really much to say about coleslaw, other than to say it makes a fabulous accompaniment to salads, sandwiches, paninis, baked potatoes and much much more.

Coleslaw Salad

Lesley S Smith
Perfect as a side dish with most main meals, or to use in a salad.
Prep Time 10 minutes
Total Time 10 minutes
Course Side Dish
Servings 6

Ingredients
  

  • 200 g Carrot Grated
  • 150 g Cabbage Shredded into strips.
  • 150 g Onion Shredded into strips.
  • 2 - 3 tablespoons Mayonnaise or Thousand Island Dressing

Instructions
 

  • Simply shred the cabbage, onion and carrot.

  • Mix with mayonnaise or thousand island dressing.

  • Serve.


Posted on 7 Comments

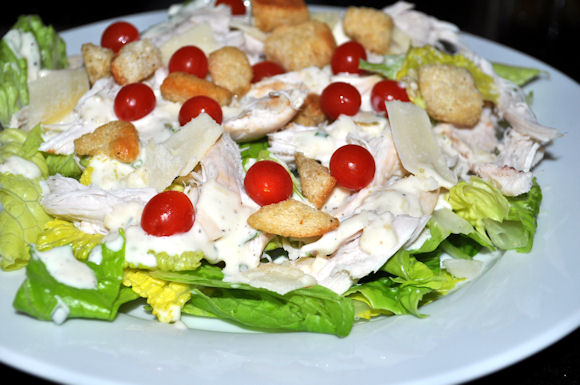
Chicken Caesar Salad Recipe, with Tomberries

Caesar salad is a popular dish in my house.  The lovely chicken with different dressings and vegetables give it different ways to eat.  Anchovies are not popular in this house, so I never use them, and I tend to use the same sort of things to make it.  I think there are dozens of caesar salad recipes, and I am convinced they all depend on the type of caesar salad dressing recipe.

Chicken Caesar Salad Recipe, with Tomberries

Prep Time 20 minutes
Total Time 20 minutes
Course Salad
Servings 6

Ingredients
  

Salad

  • 1 Medium Lettuce Washed.
  • 500 g Tomberries or Cherry Tomatoes Washed
  • 200 g Croutons Home Made, or Bought
  • 20 g Parmesan For shavings, or you can buy them ready to use.
  • 1 Medium Chicken. Pre- Cooked, with chicken diced.

Caesar Salad Dressing

  • 1 clove Garlic Crushed
  • 2 teaspoons Parmesan Ground or grated.
  • 4 - 5 tablespoons Mayonnaise
  • 1-2 tablespoon White wine vinegar Use if the dressing is too thick to pour.
  • 1 Medium Chive Finely chopped.
  • 1 teaspoon Peppercorn Ground, to taste.

Instructions
 

Salad

  • Wash and make a bed with the lettuce.

  • Simply sprinkle on the chicken, croutons and parmesan shavings.

Caesar Salad Dressing

  • I was lazy and used a pre-bought, but if you don’t have a dressing to hand, make one. I wish I had made mine as the bought one was too vinegary for my taste.

  • Crush a garlic clove (or use ground garlic if you don’t have any).

  • Add two teaspoons of ground parmesan or 10g grated parmesan. If you like strong cheese, you can up this to double.

  • Mix it into 4 – 5 tablespoons of mayonnaise.

  • Add the finely chopped chives.

  • Grind a teaspoon of peppercorns into the dressing.

  • Add 1 – 2 tablespoons of white wine vinegar until the dressing is pourable.

  • Pour dressing over salad.

Salad

  • Add tomatoes or tomberries to the top of the salad.

Notes

Home made or bought dressing is fine.
It’s also nice with a few bits of cooked bacon added.
Tesco sell parmesan shavings in small pots which are perfect, but they do work out expensive that way I think


Posted on 4 Comments

Noodle Chowder Recipe for an Emergency Meal in a Bowl

You could be forgiven for thinking that the picture with frozen veg in it looked like something that should have hit the bin as soon as it emerged from the freezer.   A chowder recipe was far from my mind as I raked the freezer for instant food.

Coming home from holiday, going shopping was the last thing on my mind, but there wasn’t anything fresh in the house.  The kids had eaten at Maccy D’s and others far too often over the last fortnight and I couldn’t be bothered to drive anywhere.  I made this up on the spot, and I was surprised how popular it was, considering how unappetising it looked when it hit the pot on top of the stove.

From the depths of the big freezer in the garage, out came some frozen mixed veg, frozen leeks, frozen onions, frozen peas and frozen cauliflower.  I imagine fresh would do just as nicely, but for this recipe, it’s an emergency meal in a bowl.

The idea of chowder is really to have  just a very thick soup, so it’s both warming and filling.

My heart was in my mouth when I first served it up, but the kids came back for seconds and even thirds.  I think a version of chowder will be in the Scottish Mum house a few times a year now.

Noodle Chowder for an Emergency Meal in a Bowl

Lesley S Smith
Prep Time 2 minutes
Cook Time 1 hour 30 minutes
Total Time 1 hour 32 minutes
Course Soup

Ingredients
  

  • 1 bag Frozen veg Fill your pot to approximately half way. I used frozen cauliflower, leek, onions, peas and mixed veg
  • Boiled water To cover.
  • Stock Vegetable, Chicken or Beef
  • 1 l Litre long life cream Fabulous standby for cooking.
  • 250 - 500 g Vermicelli or noodles
  • pinch Salt / pepper To taste.

Instructions
 

  • Add the frozen veg to your pot in simmering stock liquid for approximately an hour. To decide how much water you need, just fill the pot up to the top of the veges, as the idea is to have a very thick soup.


  • I only had little chicken stock pots available, so 3 of those were added to boiling water to start off the chowder.

  • Once the vegetables are soft, blend the mix in the pot. I use a stick blender that just goes into the pot. Mine had an unappetising muddy green colour at this stage.

  • Add your noodles depending on how many you would prefer. I broke my vermicelli into small pieces, so that it didn’t end up being like spaghetti in a dish.

  • When the noodles are cooked, add the cream slowly, folding it into the chowder.

  • Add salt and pepper to taste and serve with warm bread.


Posted on 14 Comments

Slow Cooked Haggis in a Baked Potato & served with Coleslaw

We catch the wee beasties that are the haggis family, on the heathery hills in the highlands of Scotland, where we pluck them mercilessly from their lovely life of gay abandon.

Are you buying this?

Ok, haggis is a lovely, and slightly spicy delicacy that is often said to the national dish of Scotland.

I do frequently get asked the best way to cook haggis.  That could be because I often blog about food, and, being Scottish, there is probably an assumption that we all eat haggis quite often.  A bit like the rumour mill about the deep fried mars bar that only the tourists ever try.

We  normally experience haggis as part of Burns night celebrations, to celebrate the poet Rabbie Burns, so in our family it has usually been restricted to being supplied by other people.  On Burns night, people would traditionally have haggis neeps and tatties (turnips and potatoes).

Macsween sent us one of their haggises to slow cook as a few of us had been talking about it on Twitter.  I did go out and buy another one to go with it, as I thought the 3/4 person haggis was a tad too small for us all as there are 6 of us.   In the end, I think one haggis for about 4 – 5 people would be perfect for us.

On to slow cooking the haggis.

I probably would try cooking it in the slow cooker, but inside some tinfoil next time, but the slow cooked way did work nicely and made the haggis not as dry as skirlie, which is my past experiences of it.  I have to admit, I do struggle with the contents, and as I don’t eat lamb, it’s not for me, but the man, 2 kids and grannie wolfed it down.

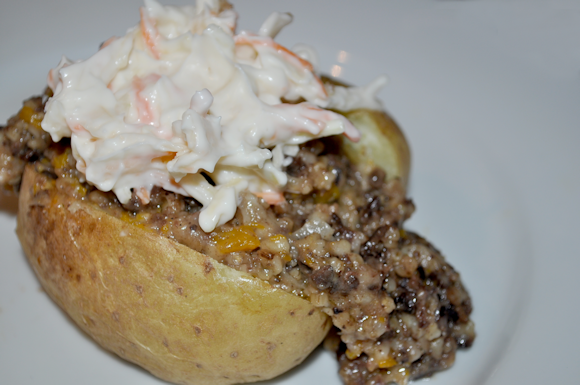
Here’s a nice slow cooker haggis recipe for using with a store-bought haggis that has already been cooked.  I’ve added the coleslaw recipe under the haggis one.

Slow Cooked Haggis with Butternut Squash and Baked Potatoes

Lesley S Smith
4 from 2 votes
Prep Time 10 minutes
Cook Time 3 hours
Total Time 3 hours 10 minutes
Course Lunch
Servings 3 - 4

Ingredients
  

  • 1 Medium Macsween Haggis For 3 – 4 people
  • 1 Medium Butternut Squash or a turnip (Chopped)
  • 1 Medium Onion Finely chopped
  • 1 pint Boiled Water
  • 50 g Coleslaw To serve

Instructions
 

Haggis

  • Take off the outer skin of the haggis and the metal clip.


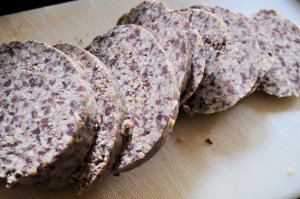
  • Cut the haggis into slices or chunks.


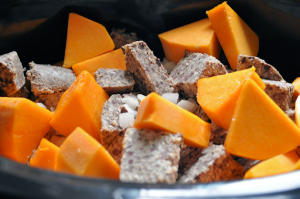
  • Put the haggis, squash, onion and water into a slow cooker and cook on high for 3 hours.


Baked Potatoes

  • Put baked potatoes in tinfoil and cook in oven at 180c

Haggis

  • Serve as filling for the baked potatoes.

  • Garnish with coleslaw on the top.

Notes

Your haggis will come already cooked, so the goal is to thoroughly reheat it, while cooking the vegetables.


Coleslaw Salad

Lesley S Smith
Perfect as a side dish with most main meals, or to use in a salad.
4 from 2 votes
Prep Time 10 minutes
Total Time 10 minutes
Course Side Dish
Servings 6

Ingredients
  

  • 200 g Carrot Grated
  • 150 g Cabbage Shredded into strips.
  • 150 g Onion Shredded into strips.
  • 2 - 3 tablespoons Mayonnaise or Thousand Island Dressing

Instructions
 

  • Simply shred the cabbage, onion and carrot.


  • Mix with mayonnaise or thousand island dressing.

  • Serve.


Posted on 8 Comments

School Lunches – “Healthy” versus “Unhealthy”

With grinning faces, the kids love it if there’s pizza, or burgers and chips on the school menu.  Granted, the days of lumpy custard have hopefully spent their last ever days gracing the plates of our growing future generation, but for my kids, stodge is what they want from a school dinner in Aberdeen City.

Making faces that would sour milk, they turn their noses up at school dinner fish, as I’m told it tends to be grey with “bits” on it.   Similarly the soft veg and tasteless fruit seem to be pretty low on the agenda of my hungry horaces at feeding time.

Portion sizes are teensy, and on the one day I was able to join the lunch time rabble, I was shocked how little kids were eating of their meals once they tasted them, and made faces at each other.

I really don’t see the point of meeting Governmental Nutritional Guidelines, or claiming to serve a balanced meal if the food looks and tastes like shoe leather.  And what about the 11 year olds getting the same portion sizes as the 4 year olds?  How is that going to keep them alert during afternoon classes, bellies not full enough from their £2 meal?

So, given the “reasonably low” standard of food on offer in many lunch canteens, why oh why do the schools insist on telling kids they shouldn’t be taking cans of fizzy pop, or sweeties in their lunch boxes?

I’m told by the kids that the staff take cans of pop away from children who have taken them to school.  If it happens, it’s thieving of the lowest proportions from kids, and seems to set double standards that rankle.  All it creates is the sweetie mob and the non sweetie mob hierarchy as lots of parents put sweets in lunch boxes, even when they’re asked not to.

The short story is, that as a health promoting school, we’re not supposed to give them any sweeties to school, but the tables are turned when they sanction teachers using sweets to bribe the kids into better behaviour.

Little children’s brains try to absorb the contents of the healthy living world and come home full of facts and figures on how bad some foods are, yet when the same kids go to secondary schools, (or academy, or whatever else schools at 12 + are) they are suddenly faced with canteen style food of epic fast food proportions, and expecting around £5 a day to gorge themselves on whichever food tasty of the day catches their eye.

I’ve been “reliably” informed by an excitedly animated face, that the food in secondary is as good as Pizza Hut, McDonalds and Kentucky Fried Chicken.

“That’s good for me mum,” came the  high pitched happy chappie who starts there next Tuesday.   “I need to put on a few pounds,” says the skinny football mad lad.

A response of “Ye’ll get a packed and like it, with a school lunch on special occasions,”  leads to folded arms and a pout worthy of One Direction.

So, after all of this, I have yet to see what the point was of making such a fuss of “healthy” versus “unhealthy” food at primary, if at secondary, they can choose to just get stuffed full of junk and want £5 a day for lunch.  Ok, so senior school moves to a cafeteria style service with healthy choices,  but with many kids, the only choice they will make is the junk, as they often have to eat the healthy stuff at home.

Aside from the fact I am not spending £15 a DAY on kids lunches when they reach secondary, am I the only one who thinks it’s a ridiculous double standard?
Posted on 4 Comments

Chicken Sauté with Leek on a Bed of Mashed Potato

There’s nothing new about sauté methods to cook our food with.  All it means is to cook on a high heat with little oil, but moving the food around so that it doesn’t burn while it cooks.  We could do it by tossing the pan or moving around the food with an implement.

Mashed potatoes are easy, and can make a lovely accompaniment to some dishes we’d usually eat with rice, cous cous or pasta.

Chicken-with-Leek-and-Mashed-Potato

Chicken Sauté with Leek on a Bed of Mashed Potato

Lesley S Smith
Prep Time 15 minutes
Cook Time 20 minutes
Total Time 35 minutes
Course Main Dish
Servings 6

Ingredients
  

  • 5 lb King Edward Maris Pipers or other potatoes that are suitable for mashing.
  • 3 medium slices Leeks
  • 1 Medium Onion
  • 200 g Sock or 1 stock pot.
  • 1 pinch Salt & pepper.

Instructions
 

  • Peel the potatoes and set them on to simmer with a couple of teaspoons of salt to cook with.

  • Cut the chicken breast into small strips, slice the leeks and chop the onion.

  • Use a thick bottomed saucepan or a wok, or cast iron sauté pan. Heat the pan up to very hot and use a little oil in the pan.

  • Add the chicken for the first 5 minutes and then add the onion, leek and stock, moving the food all the time. The chicken must be cooked all the way through.


  • Cooking for a further 10 minutes, ensure all the ingredients are fully cooked, add salt and pepper to taste and set aside with a lid on the pan. The heat will be retained for the few minutes it takes to prepare your potatoes.

  • When potatoes are fully cooked, drain and mash. Don’t be tempted to add butter or milk, or the potatoes will go too smooth and be the wrong consistency to make into a potato pie shape.

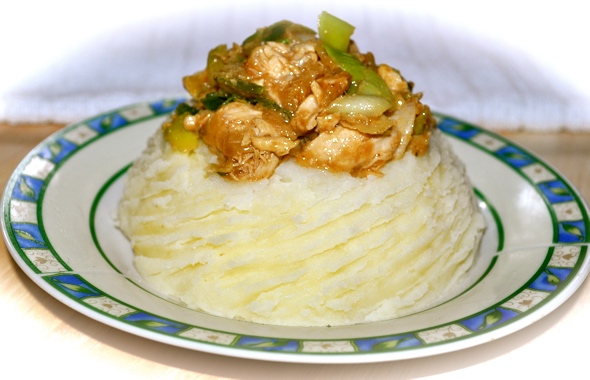
  • Place a patty sized heap of potatoes onto a plate and simply serve the sautéed chicken and leek on the top.

  • Decorate the sides of the mashed potatoes using a fork, and serve immediately.


Posted on 32 Comments

Scottish Tablet (crumbly, melt in the mouth toffee) in the microwave.

tablet

Lots of people have asked for a recipe for Scottish tablet, so I think it’s about time I posted the simplest version of one online.  Home made Scottish tablet is wickedly sinful, but delicious.  It’s also quite difficult to make, and there are lots and lots of different ways to make it.  This version is in the microwave.

Please read all the comments below, before you decide to make this version of tablet.  Some people struggle with it.

If you only have a very small microwave, I’d be tempted to go for half these quantities.

I prefer to microwave to the melted stage as every time I try to do it in a pot, I burn it before the sugar is melted.

Microwave Scottish Tablet Recipe

Lesley S Smith
Very sweet, and you do need to keep an eye on this. The cooking time does vary by microwave. Some people have not found success with this, but if you can make it work, it's fabulous.
3.17 from 6 votes
Prep Time 10 minutes
Total Time 10 minutes

Ingredients
  

  • 200 ml whole milk
  • 180 g butter
  • 800 g sugar preferably caster but I have used Demerara
  • 1 tin condensed milk - approx 400g

Instructions
 

  • You need a large bowl that fits into your microwave. Some people may prefer to transfer into a thick bottomed pot to finish the tablet after the sugar is completely melted.
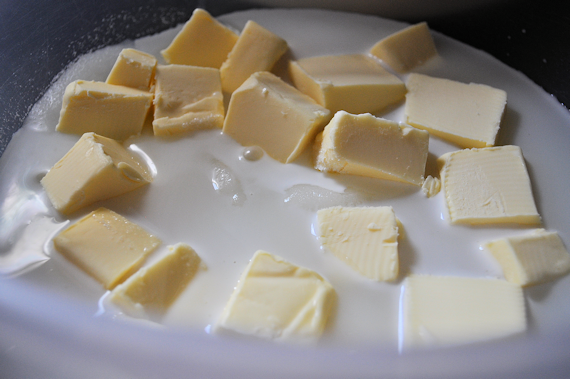
  • With the butter, condensed milk, whole milk and sugar in the bowl, put in your microwave and melt the sugar at 1 minute intervals, while stirring in between. You don't want the mix to boil as it will rise up in the dish and spill over if you're not careful.
  • When you think the sugar is completely boiled, use your finger on the back of your stirring spatula as it cools, to see if there are no sugar crystals left. You want the mix to be smooth.
  • From the melting point, the mix will boil very quickly. I do mine in 30 second bursts as I have a high wattage microwave. If you have a lower wattage one, you might get away with 1 minute + bursts. Remember to keep an eye out for the mix rising up the bowl as if it spills you will have a gooey, hot and sticky mess. Stir quite vigorously each time you take the mix out for a few seconds.
  • Keep going until the mix begins to turn from light brown to a darker brown. It could take 10 - 15 minutes to change.
  • To find out if it is ready, use a cup of water and take a teaspoon of mix from the bowl. Leave it for a couple of minutes and if it forms a soft ball between your fingers if you roll it, then it is ready. With a very soft ball, the tablet will be softer. If you take a bit longer and have a slightly firmer ball, your tablet will have the traditional hard and crumbly texture that makes it so popular.
  • This is the bit that makes the difference to how well it works. Take the mix out of the microwave and either use a hand whisk or a wooden spoon to beat the mix until it begins to cool and go slightly grainy. It takes anything from 5 - 10 minutes, depending on how large a batch you are making.
  • Once the tablet begins to thicken, move it quickly into a pre foiled tray and spread it out.
  • Put into the freezer for about 1 - 2 hours.
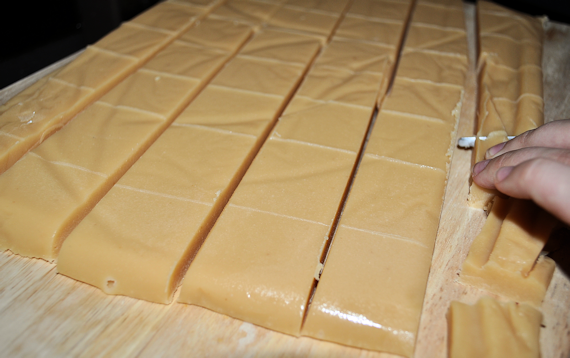
  • Turn upside down on a chopping board and score the tablet with a knife.
  • Cut or break the tablet into pieces.

Notes

I prefer to microwave to the melted stage as every time I try to do it in a pot, I burn it before the sugar is melted.
If you only have a very small microwave, I'd be tempted to go for half these quantities.
Cooking time will vary depending on the power of your microwave but could be anything from 15 - 30 minutes.
Posted on 12 Comments

Tattie, Cheese & Onion Rumpledethumps

Rumpledethumps

Traditionally in Scotland, Rumpledethumps recipes tend to be potatoes, turnip and other left over veg form the day before.  It can actually be used to use up any leftovers at all, in a similar way to the English Bubble and Squeak Recipe, or the Irish Colcannon.  There are a few times that I’ve wondered what Colcannon is, and now I know.

The one biggest ingredient tends to be left overs mashed up, but mashed tatties (potatoes) tends to make up the bulk of the dish, with vegetables and sometimes meats making up some of the rest.  It can be used as a side potato dish or on its own as a full meal.   For this recipe, I used our favourite Black Bomber Cheese, courtesy of @aberdeenbutcher on Twitter.

Tattie, Cheese & Onion Rumpledethumps

Lesley S Smith
An easily made dish and a fantastic way to use up leftovers from the previous day, or from a Sunday Roast. I made it as a stand alone dish for the kids supper.
Servings 6

Ingredients
  

  • 5 lbs Tatties Potatoes They must be mashable potatoes, similar to king Edwards, Kestrels, Maris Pipers etc.
  • 2 Onions
  • Salt & Pepper
  • 200 g Grated Black Bomber Cheese
  • Rapeseed or Sunflower Oil

Instructions
 

  • Mash boiled potatoes and do not add milk or butter, or the mash will become too soft to work with.
  • Chop up the onions and lightly fry.
  • Add the fried onions, salt, pepper, and the grated cheese to the potatoes.
  • Make round patties with the potatoes.
  • Add them to a pan with hot oil and shallow fry for 5 minutes each side, or until golden brown. If you are using leftovers, the goal is to reheat thoroughly all the way through.
  • Serve as a side dish, an accompaniment, or even as a main dish with salad as a side.

Little Black Bomber Cheese courtesy of:


Posted on 5 Comments

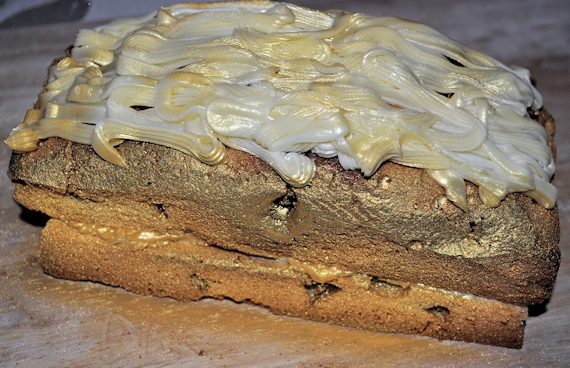
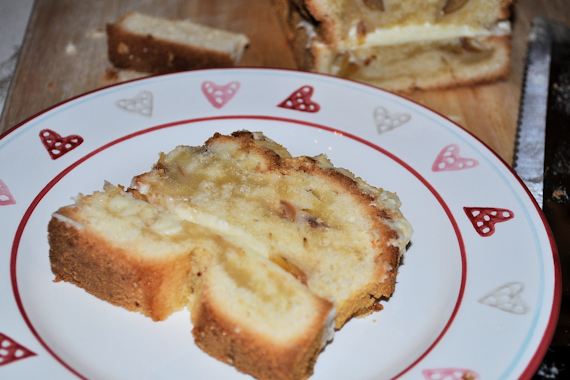
Rainier Cherry Loaf Cake

The kids wanted to make a cake, so Cherry cake it was.

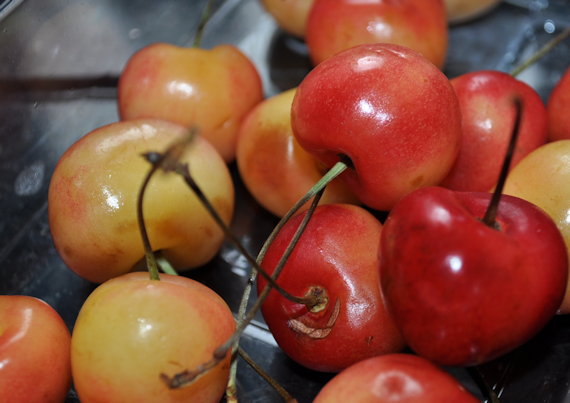
Initially, I thought this was a waste of my lovely (expensive) rainier cherries.  Nothing beats those for the look and taste.  I only buy them very rarely as a treat, but to keep the kids amused, I sacrificed my lovely fruit.

cherry-cake-4


Rainier Cherry Loaf Cake

Lesley S Smith
Gorgeously decadent Rainier cherries in a rich cake.
Servings 10 servings

Ingredients
  

  • Cake
  • 4 oz Rainier Cherries
  • 8 oz butter
  • 8 oz caster sugar
  • 8 oz self-raising flour
  • 4 medium eggs
  • 2 tablespoons condensed milk
  • 1 teaspoon vanilla essence
  • Buttercream Icing
  • 6 oz butter
  • 12 oz icing sugar

Instructions
 

  • I know I don't make cakes the way most do, as I never seem to have the time to potter. I use my mixer and throw it all in. The recipe below is the right way.
  • I soften my butter in a microwave to make it easier to mix. Add the sugar and butter, cream together.
  • Add eggs, vanilla essence and condensed milk, mix together until mix becomes smooth.
  • Sift in flour and mix throughly.
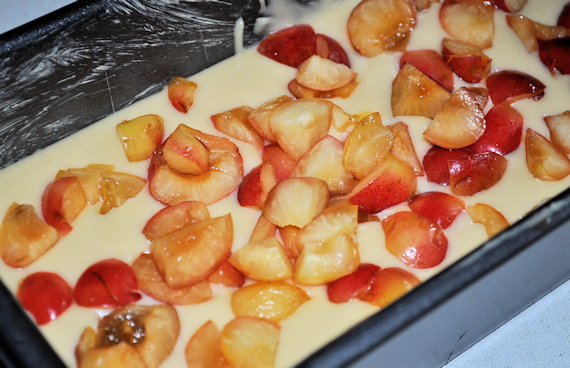
  • Wash, dry, and take out the pits of the cherries, chop them up and add them to the cake mix.
  • Add mixture to a pre-greased cake tin.
  • Bake at 160 for approximately 40 minutes. Your baking time may depend on the heat in your oven. I use a skewer to find out if my cake is ready. When you put the skewer into the centre of the cake and it comes out clean, with no cake mix on it, it's ready.
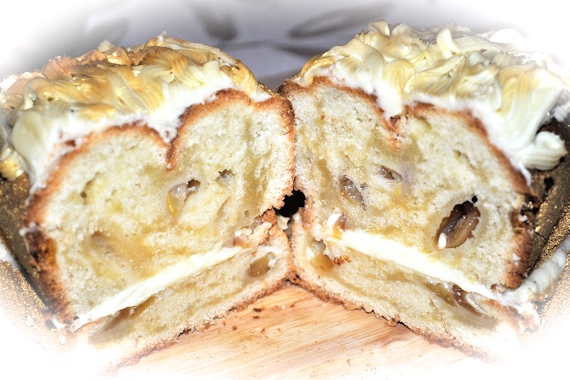
  • When cake is cooked, allow it to cool, and then slice it through the middle.
  • Cream the icing sugar with the butter, spread some on the middle of the cake (you could also add jam or cream instead).
  • When the cake is ready, pipe some of the buttercream icing on the top and serve.

Notes

When my back was turned, my kids turned the cake gold with food spray. Sadly, I have no picture of it while it was pre-gold...

Posted on 6 Comments

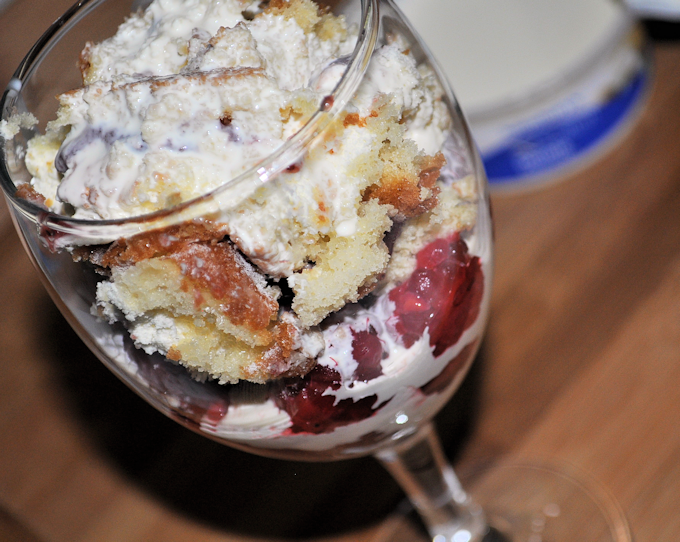
Scotty Brand Raspberries in a Raspberry Trifle with Double Cream

A delivery of Scotty Brand raspberries arrived and the raspberry making machine had to begin turning it’s wheel.  With some sponge cake left over from another day, I decided to make a lovely little glass of fast and delicious raspberry trifle.

The raspberry cheesecake from the Scotty Brand website looks amazing, and I think I will need to try that next.  Look at this…

Follow Scotty Brand on Facebook or Twitter to keep up with their newest recipes and news.

http://www.facebook.com/scottybrandltd

@scottybrand_ab

For now, my deceptively delicious raspberry trifle it is.

Scotty Brand Raspberries in a Raspberry Trifle with Double Cream

Lesley Smith
You don't have to be precise with this recipe, as it really is a simply cheats way to make a gorgeously tasty dessert in a few minutes.
Servings 2

Ingredients
  

  • 200 g raspberries.
  • 200 g double cream. Half for whipping and half for use as pouring cream.
  • 200 g left over sponge cake.
  • 2 tablespoons jam

Instructions
 

  • Add washed raspberries to the bottom of the glass.
  • Slice sponge down the middle and spread with whipped cream and jam.
  • Cut the sponge into chunks and place on top of the raspberries.
  • Pour the remaining pouring cream over the top of the dessert, to allow it to soak into the sponge and the raspberries.
  • Serve immediately.