Posted on 7 Comments

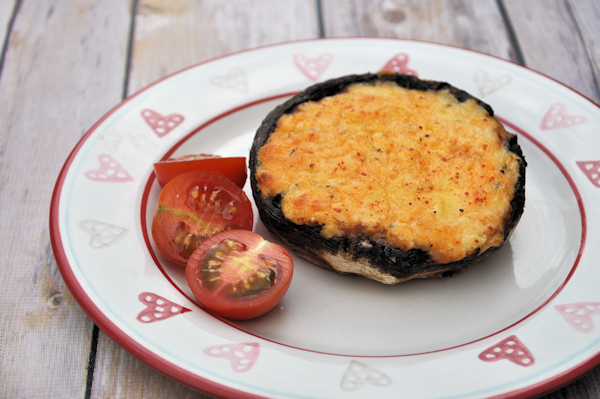
Garlic and Cheese Stuffed Mushrooms

Three of the six of us who live here eat mushrooms regularly.  To make a change, I thought some stuffed mushrooms would go down well when we had family round and not much time to prepare anything nutritious, filling, and enough for us all to eat.

Cue, the stuffed mushrooms, stuffed just with what I had in my fridge.

They were delicious.

Enjoy.

Stuffed Mushrooms: Garlic and Cheese

Lesley S Smith
Prep Time 15 minutes
Cook Time 15 minutes
Total Time 30 minutes
Course Appetizer
Servings 8

Ingredients
  

  • 8 Large Flat Mushrooms
  • 150 g Mozarella Cheese Grated
  • 250 g Cheddar Grated
  • 150 g Philadelphia Cheese
  • 45 g Garlic Butter
  • Sprinkling OXO Shake & Flavour Italian Seasoning

Instructions
 

  • Take the mushrooms, wash them thoroughly and cut off any stalks, before placing them on a baking tray covered with a tin foil sheet. You could also take out the inside of the mushroom to make it a bigger hollow if you wish.
  • Grate the cheese into a bowl, or break it into small pieces. Mix with the garlic and herbs and philidelphia.
  • Put the mixture into the microwave for a minute or two if the butter and cheese is not mixing properly.
  • Roll dollops of the cheese mixture together and place them on top of the washed mushrooms. Pat down the mixture gently so that it flattens into the mushroom. Sprinkle the OXO Italian Shake & Flavour over the top of the mushrooms.
  • Pop in pre-heated oven at 200C for around 15 - 20 minutes.


Posted on 8 Comments

Soup Maker: Potato and Onion Soup Recipe – 1.6 Litre

Another soup maker recipe for you, but remember, you can also make this in a pan.

I love potato and onion soup, but my boys find it harder to take with the onion taste.   When serving this up, you can serve with a little cream on top, creme fraise, or even some natural yoghurt to make it easier for children to eat.

This literally is just potatoes and onions with some stock, so it might not be for everyone.   I find soups fill me up when I hit a tempting binge cycle, so I make a lot of them as an emergency stand by.

Soup Maker: Potato and Onion Soup

Lesley S Smith
Prep Time 5 minutes
Cook Time 21 minutes
Total Time 26 minutes
Course Soup
Servings 4 - 6

Ingredients
  

  • 3 Onions Diced
  • 4 Large Potatoes Diced
  • 2 Chicken Stock Pots or Stock
  • 700 ml Boiling Water (Or fill soupmaker up to 1600ml mark on kettle.)

Instructions
 

  • Pop all the ingredients into the kettle. Set to smooth setting.
  • Simmer for 21 minutes in the kettle. If you make the soup manually, you will have to blend it after cooking.
  • Serve with fresh bread and parsley.


Posted on 44 Comments

Breadmaker Softies Recipe – or Bread Rolls, Baps, Burger Buns, Morning Rolls – Whatever you call them.

I think there are very few people who don’t like fresh bread at any time.

I think it’s why the French bread sticks are so popular in shops, as they seem to be baked fresh for your visit.   I kept meaning to add these to the website, but just never got round to photographing ours as they tend to be eaten as soon as they come out of the oven.

I know some of you will be wondering how you make softies or buns in a breadmaker, but it’s easy enough as the breadmaker does almost all the work.

All you have to do is shift the dough from breadmaker to baking tray and then finally the oven.

Breadmaker Softies Recipe – or Bread Rolls, Baps, Burger Buns, Morning Rolls – Whatever you call them.

5 from 15 votes
Prep Time 3 hours
Cook Time 15 minutes
Total Time 3 hours 15 minutes
Course Bread
Servings 6 - 12

Ingredients
  

  • 320 ml Water
  • 2 teaspoons Caster Sugar
  • 2 teaspoons Salt
  • 25 g Fat - Rapeseed or Olive Oil
  • 550 g Strong Bread Flour
  • 1.75 teaspoons Breadmaker Yeast

Instructions
 

  • Using a breadmaker, you are going to choose the dough setting which normally takes a couple of hours. If you use a pizza dough setting, you will have to do two proves, not the one used for this recipe.
  • Add the water in first to the bowl. Then add the oil and layer the flour on the top, so that it covers all the water completely.
  • I add the salt and sugar to one side of the bowl so that it is kept dry on top of the flour.
  • Add the yeast, again, making sure to keep it dry at this stage by adding it to the top of the flour, but away from the sugar and salt.
  • Leave your dough until it has finished its setting and simply shape into balls on a greased tin. I'm never precise with this, so my softies come out all shapes and sizes which is fine for us. I use a little flour to coat my hands as the dough is often very sticky otherwise. Leave your dough to prove on the greased tin, until it has at least doubled in size. I tend to either use cake release spray or the one cal oil sprays to grease my baking trays.
  • Simply bake in an oven around 200C for approximately 15 minutes. Keep a check on your softies and if you think they are cooked earlier, simply insert a skewer into the side of one to see if it comes out clean.
  • Ours never seem to go cold before they are used. This size of batch makes about 6 - 8 large softies, or up to 12 small ones.


Posted on 8 Comments

OXO Shake & Flavour: Chinese & Garlic Rib Eye Steaks

OXO Chinese Rib Eye Steaks 3

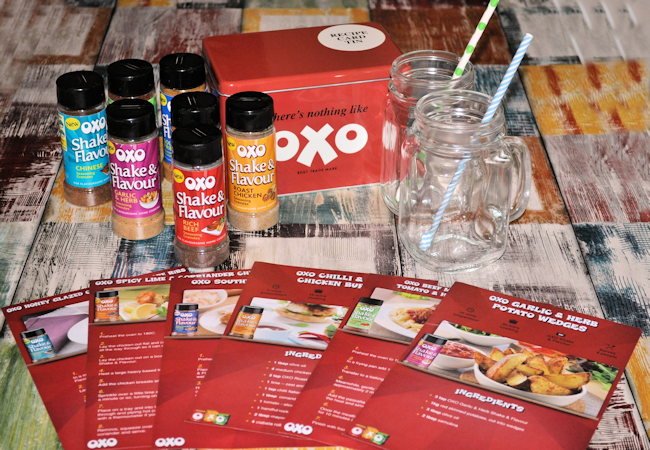
Thanks go to OXO for the lovely OXO Shake & Flavour Summer Starter Kit, packed full of summer seasonings for cooking great meals.

Oxo 4

I took inspiration from one of the included OXO recipe cards and modified it to suit how my family prefers to eat.  We’re not big on chilli here, so for the OXO Chilli, Garlic and Thyme Steaks, I changed some of the ingredients.

When the weather starts warming up, it’s hard to make big and heavy stews and casseroles, but simply cooking meat on its own can leave food boring very quickly.  I often use spices, herbs and sauces when I’m cooking as it makes the meat more interesting and much more tasty for our family meals.

I wanted our lovely summer food to be quick, easy and fast to do and a marinade seems to be one of the easiest ways to achieve that.  Who doesn’t want good tasty food that is finished quickly and tastes amazing with a massive flavour transformation.

I wouldn’t have thought of using the Shake and Flavours in a marinade, so the recipe cards have been very welcome indeed.   OXO also gave us some lovely cards with a tin to keep new recipes, and that is one thing that I am really lacking.  If I don’t put recipes online very quickly, I tend to forget what I’ve put in them and they’re lost.  I always think I’ll remember what I put in them, but I never do.

Sadly, we seem to have lost the summer connection and the day I made my marinaded dish, the sky clouded over and we had rolling mist, so the pictures I’d imagined outside didn’t happen.

I found the Shake and Flavour seasoning really easy to use, and I can see me sprinkling some over all kinds of dishes, even when just grilling bacon, to add a neat twist to the flavour.

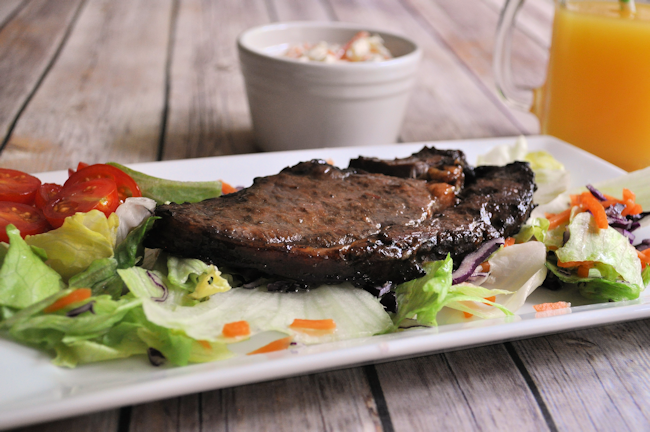
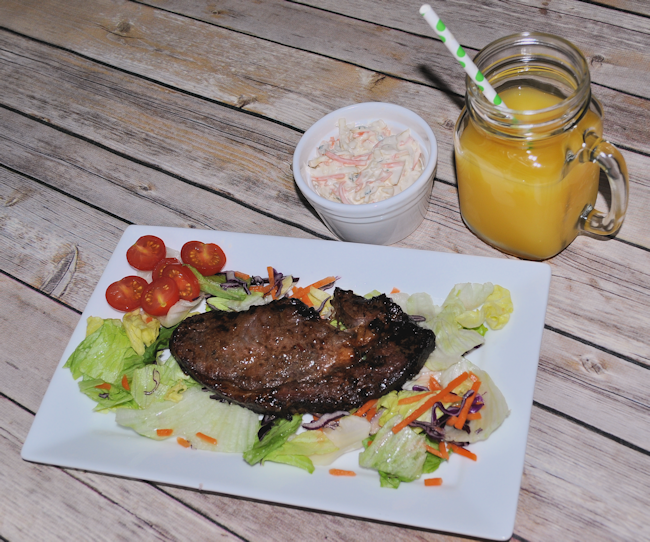
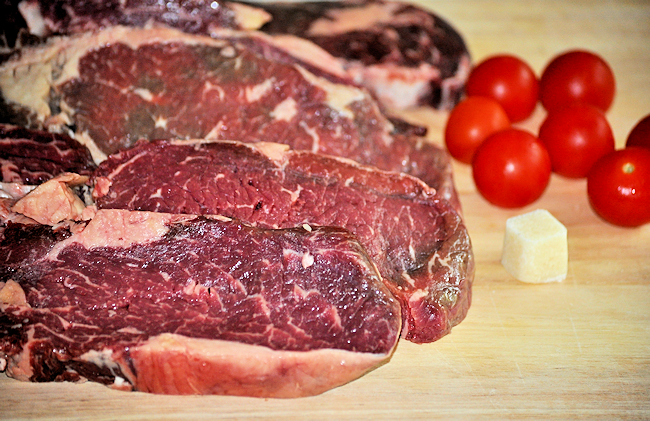
For my recipe, we had some lovely rib eye steaks from my local butcher that I was planning cooking for Sunday dinner and as the steak recipe mentioned rib eye steaks, it was the perfect way to try out the Rich Beef Shake and Flavour.   I like the fact that we can use Shake and Flavour before or after cooking.  I’d just have looked at the pots and assumed they were just for cooking.

Oxo Rib Eye Steaks 2

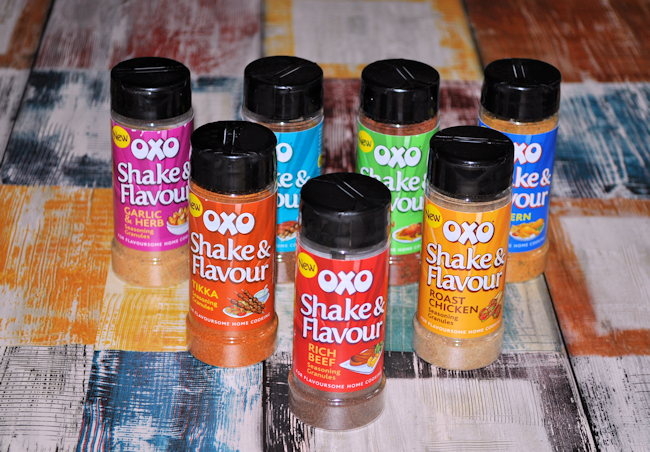
There are seven different varieties of OXO Shake & Flavour, and they’re all MSG free.

  • Garlic & Herb
  • Rich Beef
  • Roast Chicken
  • Southern Fried Chicken
  • Chinese Tikka
  • Italian (Asda Only)

Oxo 3

We have some lovely chicken burgers from my favourite butcher in the fridge, and those will be treated to a mix of Southern Fried Chicken with some Garlic & Herb tomorrow 🙂

OXO Chinese Garlic Rib Eye Steaks

Lesley Smith
Course Mains

Ingredients
  

  • 4 teaspoons OXO Rich Beef Shake & Flavour
  • 4 teaspoons OXO Chinese Shake & Flavour
  • 2 tablespoons Olive Oil
  • 5 - 6 Rib Eye Steaks
  • 1 clove Garlic
  • Salad To Serve
  • 150 g Soy Sauce

Instructions
 

  • Mix all the ingredients, apart from the salad to serve and the steaks into a bowl big enough to hold everything when it's being cooked. I prefer to use a glass or steel dish rather than plastic. Mix the ingredients until smooth.
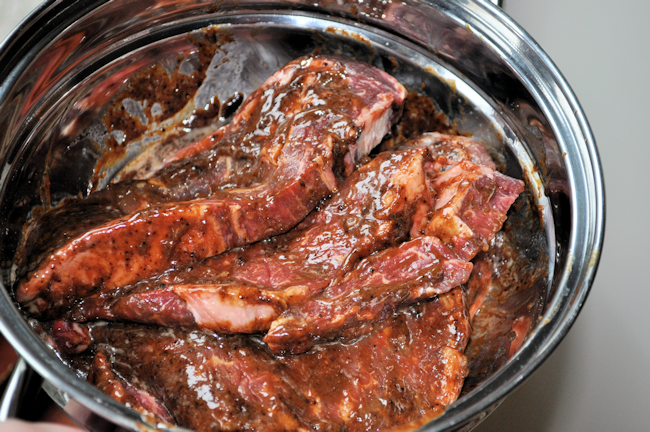
  • Add the steaks and make sure the marinade covers them completely.
  • Pop the steaks into the fridge for at least an hour, or overnight which would be even better.
  • Take them out of the fridge at least 20 minutes before cooking them. They can be grilled or barbecued. Spoon over any of the marinade that is left in the bowl before you cook them.
  • Cook on the grill for approximately 3 or 4 minutes on each side, or until your steak reaches the consistency that you prefer. I like my steak well done, so it's a longer cooking time in the Scottish Mum Household. For this version, I oven cooked mine for fifteen minutes each side on a moderate heat and it was perfect for us. You know your own meat tastes and can adjust that to suit.
  • Let the meat rest before serving and enjoy.

This post is part of a BritMums project with OXO Shake & Flavour. Shake & Flavour seasoning granules can be sprinkled into food during cooking or before serving. Find out more about the Shake & Flavour varieties.  

If you’re a Twitter fan, heading over to the #OXOMealtimeMagic will give you some good ideas for cooking from @OXOFamily and the OXO Shake & Flavour bloggers.


Posted on 4 Comments

In sickness and health, the bruised apple.

Could the Wicked Stepmother have saved herself a lot of heartache and just given Cinderella lots of bruised apples?

Perhaps rotten fruit hasn’t crossed your horizon yet, but it’s the one that stood out for me at university many moons ago.  I think I have written about it once before, but it merits a reminder I think.

It wasn’t the botulism, salmonela or listeria that most people know about that stood out for me.  Parents can often be paranoidically fastidious about avoiding the well known food rot, but patulin seems to have fallen under the radar.

Rotten Apples

What Is Patulin?

Quite simply, its a chemical – a toxic chemical fungal matter that is produced from some moulds, for example penicillium and aspergillus.   Does that mean anything to you?  Well, to be honest, it didn’t to me either.   It’s safe to say that although the apple is the fruit that I associate it with in my mind the most, it’s not the ONLY source of patulin.

Why is Patulin Dangerous?

It shows as toxic effects in animals and it should be avoided in foodstuffs as far as is possible.  As it is soluble in water, it is easily absorbed and can grow quickly.  Although there isn’t much research on humans, there has been a lot of testing on how it affects animals.  It shows significant damage to the stomach and lower intestines.

Which Foods is Patulin Found On?

Apples stick in my mind, but there is the possibility of it affecting apple juices, jams and pies.  It has been found on cherries, vegetables and other fruits too.  Cereals and cheese have shown to contain some patulin, but apples and apple products seems to be the biggest threat to our human diet.

How does it affect human health?

Most of the information on the toxicity of patulin is derived from animal studies and there is little or no experimental, or epidemiological, data on acute or chronic toxicity in humans if it is eaten in large quantities.   There is the possible worry about the long term effects of eating patulin regularly and it seems sensible to take precautions and stay away from patulin where it is at all possible.

Should We Stop Eating Apples?

Patulin isn’t something that is going to stand up, wave its arms and induce vomiting and diaorrhea – well okay, it might if someone is intolerant or allergic to the apples or any toxins present, but in general, it might not do more than the odd slightly upset tummy.

Should we ban apples because of its future potential?

Of course not, that would be silly.  Apples seem to be very good for us, and I wouldn’t stop my children eating apples just because of the possibility that a poison might affect their body a few decades down the line, but I do take care that the fruit I give them is bruise free.

Can Patulin Be Cooked Out?

Cooking or pasteurisation does NOT kill patulin.  There could be some evidence, that in juices, with some preservatives, it could be mitigated.

How To Avoid Patulin?

My lecturer simply told us to avoid all apples with bruises.  You could minimise the risk by cutting out the bruised portions of apples where the bruises are small, or simply discard all bruised apples in the same way that it is recommended to discard all green potatoes.  Discard any apples you cut open that have insect burrows and buy good quality apple juice.

Physical damage can help promote the rot, so over handling of fruit can also be a problem.   To keep your fruit in as good a condition as possible, I put mine in the fridge and cut off any bruised parts if I plan to make juice.

I don’t overly worry about it, but I hate seeing little ones being given apples with brown bits on it.  It’s NOT the same as a banana….
 

Posted on 4 Comments

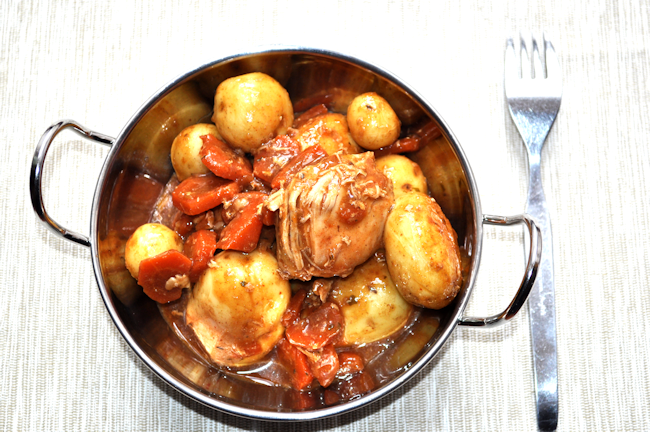
Recipe: Bag Roasted Rustic Chicken Stew

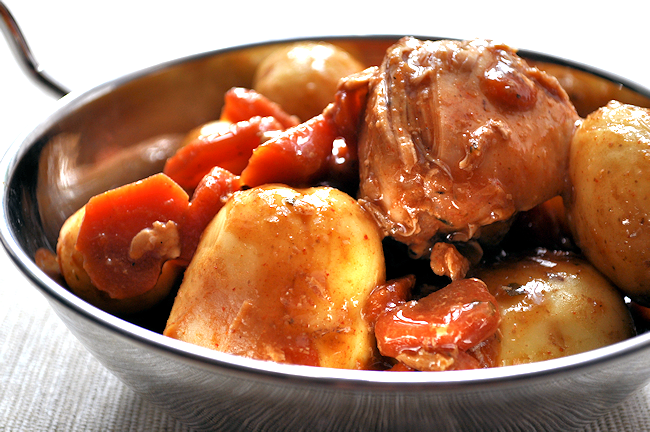
This is one of the dishes I make when time is failing me badly.  It’s simply a case of popping all the veg, meat and flavours into a bag, putting it in the oven, and taking out a fully cooked meal an hour or two later.  It has a slightly smokey BBQ flavour so be prepared for that when you cook it.

Rustic Chicken 3

I am a massive fan of quick cooking,  so bag roasting is up there with slow cooking for me, but without the day long torment of gorgeous smelling food in the kitchen when I’m trying to concentrate.  Chicken is always popular with all of my kids and I’m lucky enough to get mine from a great butcher, the Fresh Food Guru, so it always tastes great.

Consider splitting this over two bags with one sachet of seasoning for each bag if your oven is small.

Bag Roasting: Rustic Chicken Stew

Lesley Smith
Prep Time 10 minutes
Cook Time 1 hour 30 minutes
Total Time 1 hour 40 minutes
Course Mains
Servings 5 - 6

Ingredients
  

  • 6 Chicken Breasts
  • 4 Large Carrots
  • 2 kg Baby Potatoes
  • 2 Rustic Chicken Knorr Season and Shake Packs
  • 300 ml Water
  • 1 Turkey Roasting Bag

Instructions
 

  • Pop the oven on to around 190 - 200°C. Open the roasting bag and pop in the chicken breasts. You could cut these into quarters to cook them more quickly. Be careful when you put ingredients in as you really don't want the bag splitting.
  • You can do the vegetables separately, and I suspect I'd do that next time as my bag was absolutely huge. I put my baby potatoes in whole, but I suspect slicing them would lead to a faster cooking time. Add the sliced carrots and the potatoes to the bag.
  • I add the seasoning mix from the Knorr Rustic Chicken Pack and then add two small glasses of water. A gentle mix around of all the ingredients is a good idea to help spread the seasoning around.
  • Close the bag with the fastener but make sure you leave some expansion room in the bag. If your bag is very full, it would be a better idea to use two bags. Put your bag on an oven tray with plenty of room above the bag. If you have several oven shelves, it would be a good idea to remove upper ones to give the bag some expansion room as it will fill out as it fills with steam. The bad shouldn't touch the sides or top of the oven when cooking.

    The recommendations are to put the bag sideways, but I've had some of the liquid run out on me on large bags so I put the tied end upwards on larger bags and lie them on their side with smaller ones.
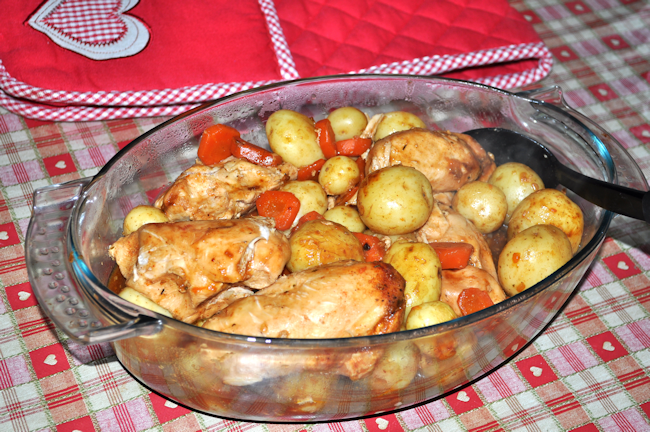
  • I cook this dish for approximately one and a half hours, but it will depend on your oven. Smaller pieces might well cook faster. When you open the bag, beware of the escaping steam as it can easily burn. I transfer my cooked food into a casserole dish and pop it back into the oven for five minutes to heat the dish.

    We serve the dish by placing it in the middle of the table for everyone to help themselves to. Make sure the meat is fully cooked before serving it up.

Posted on 2 Comments

Macaroni Cheese Recipe

Apologies, the photos are a bit rubbish, I just snapped them with my phone.

This recipe is one that I came up with to make macaroni cheese just that little bit better, and with more taste than my older versions. Adding the garlic brings out a fabulously strong taste that is just enough for me to taste but not as much as will put the kids off eating it.

I tend to make macaroni and cheese when I don’t have much time and the kids are saying they’re ravenous. I always have some grated cheese in the freezer and just put it in the microwave on defrost for a few minutes before putting it into my white sauce.

If you don’t have the traditional shaped macaroni, you can use almost any other pasta that you have for a similar effect. I also used to use mozarella, but have now moved to a stronger cheddar, which the kids seem to prefer.

Go on, experiment with your pasta.

Macaroni Cheese Recipe

Lesley S Smith
Prep Time 20 minutes
Cook Time 30 minutes
Total Time 50 minutes
Course Lunch
Servings 6 - 8

Ingredients
  

  • 500 g Macaroni Pasta
  • 400 g Mature Cheddar Cheese Grated
  • 1 Onion Peeled and Chopped
  • 8 Cherry Tomatoes Halved
  • 1 clove Garlic Peeled and Chopped
  • 1 l Semi Skimmed Milk
  • 50 g Butter
  • 2 tablespoons Cornflour
  • Teaspoon Salt

Instructions
 

  • Pop the macaroni pasta into a pan to cook. Add salt, onion and garlic and let it simmer for 15 minutes. If you prefer, you can shallow fry your onions and garlic before adding them to your pasta. When your pasta is cooked, use a colander to drain it, and run at least two kettles full of boiling water through the pasta to take away all the starch.
  • You might prefer to make a roux to make your sauce (ie cook flour and butter until it forms and then add milk slowly until it is a smooth mixture). I tend to put my milk into a pan, pop in the butter and let it heat up to almost boiling, and then take it off the heat to add a mix of cornflour and a little cold milk to thicken my sauce, and put it back on the heat to cook in, just in the same way as I would do to thicken gravies etc.
  • Put the oven on to heat at around 190C and butter an ovenproof dish. For these quantities, I use a big stone dish that does the job well. you might find you need to split this over a couple of dishes to finish it off in the oven.
  • Take the white sauce off the heat and add in 300g of cheddar gradually. Put in a handful and stir until it is melted. You can put it back on a low heat while it is melting.
  • Once the cheddar is all melted, pop the macaroni into the sauce and mix well before pouring into the prepared dish for oven baking.
  • Sprinkle 100g Grated Cheddar Cheese on the top of your dish and place your halved cherry tomatoes.
  • Bake for 15 - 20 minutes, until the top begins to show a golden brown colour.


Posted on 48 Comments

Breadmaker Recipe: Basic White Loaf

Using a breadmaker is like coming home to warm slippers.  Yes, really.  It’s so handy to have if we run out of shop bread and means I don’t have to run out for extra supplies late at night for the next days packed lunches.

I have a Panasonic which is fairly aged now but it still churns out the bread beautifully.  It also means I can put some in the freezer too.

Breadmaker Bread: Basic Large Size White Loaf

4.35 from 20 votes
Prep Time 5 minutes
Total Time 5 minutes
Course Bread
Servings 11

Ingredients
  

  • 320 ml Water
  • 25 g Olive Oil
  • 1.5 teaspoons Sugar
  • 1.5 teaspoons Salt
  • 1.5 teaspoons Breadmaker Yeast I use Allinsons or Dove’s Farm
  • 500 g Strong White Bread Flour

Instructions
 

  • Breadmaker recipes tend to differ on how they explain using ingredients for bread. I tend to add in the water first as I really have not got the hang of putting in the dry ingredients first.
  • Add the water and olive oil.
  • Put the flour on top of the water until it completely coats the surface. If you’re not confident, make a little well in the middle of the flour for the yeast.
  • I put the salt and sugar on top of the flour into one side and then add the yeast in last, making sure that it is not in contact with the water or sugar at all.
  • Select a four hour or basic bread setting. You can also use this recipe for a thicker French crust effect by using a longer setting to get a thicker crust. I find this is the best recipe for making sandwich bread for school packed lunches.
  • Leaving your bread to cool fully means it will cut more easily, but if you’re like my boys and like some warm bread to use immediately it comes out of the breadmaker, then it tends to be more of a tear and share effort here. I can get up to 11 slices from this, but when I first started to cut a loaf, I was lucky if I got five or six. It does take practice.
Posted on 5 Comments

Making Chocolate Eggs For Easter

A wee while ago, the people from Stay In Devon sent us a wee kit for making your own easter eggs to try.  Middler, who has special needs decided he’d be the one making them with a little help from his brother.

As much as I tried to persuade him to use the fried eggs as eyes, he wanted to do it his way, so ours have a fried egg inside, and he ate the other two.  He put the lips and nose on to please him and he’s delighted with the result.  We left ours overnight before de-moulding which was perhaps the wrong thing to do as the chocolate speckled, but he’s happy with them 🙂

Making Chocolate Eggs 4

How did we do it?  Here’s how.   We used a chocolate easter egg kit.  You can buy moulds to make them from any good mould seller.

Chocolate Easter Egg Kit

He found it quite difficult to wait in-between layers so if I did this again, I’d let him do one and head off to school, then I’d do a couple more before he got home.  I had to heat up an oven tray and put some greaseproof on top of it to melt the edges so that they could be stuck together, but it all worked out fine.


Posted on 2 Comments

Basic Meringue Recipe – Great For Meringue Nests

Being able to make meringue nests is one of the jobs I wish I had learned years ago.

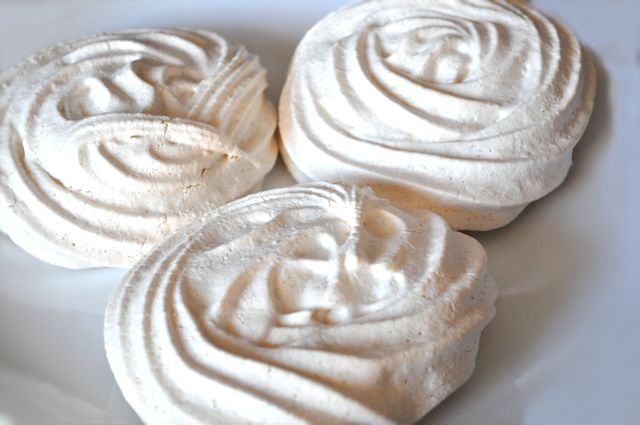
Now that I know how to do it, making all sorts of meringues is now quite easy.  For this recipe you can use a piping bag, or if you don’t have one, just pop your meringue mix onto your making paper and use the back of a spoon to form peaks.

This will take around 30 – 45 minutes to dry in the over if the nests are small, but one large pavlova size meringue will take up to an hour and a half to dry out in the oven, and then it has to be left to cool.

The vinegar is in all my meringue recipes and will be forever more.  It helps to stabilise it, and the chances of it collapsing are greatly reduced, although meringues are by their nature, crumbly and light.

Basic Meringe Recipe – Useful For Meringue Nests

Prep Time 20 minutes
Cook Time 45 minutes
Total Time 1 hour 5 minutes
Course Dessert
Servings 10

Ingredients
  

  • 5 Egg Whites
  • 250 g Caster Sugar I used golden sugar for the meringue in this picture.
  • Half teaspoon Vinegar
  • 1 teaspoon Vanilla Essence
  • 2 teaspoons Cornflour

Instructions
 

  • Put the oven on to approximately 130 C or Gas 1 - 2. Line a baking tray with baking paper.
  • Separate the egg yolk from the egg whites and put them into a mixer bowl. Whisk them for a few minutes until they form stiff peaks.
  • Add the sugar slowly, about 50g at a time and whisk again for a few minutes each time, until the sugar is all added.
  • Add the vinegar, cornflour and vanilla essence and continue to mix for up to 8 minutes, until the mix is smooth and glossy.
  • Line 2 baking trays with baking paper. Put your meringue mix into a piping bag with the nozzle of your choice. Starting from the middle, work out by going round in circles to create the meringue nest shape on your baking paper.
  • Pop your meringues into the oven for approximately 30 - 45 minutes. Let the meringues cool down in the oven if it's possible.


Posted on 6 Comments

Shortcrust Pastry Recipe

For almost every other pastry, I buy it in the shops as ready make blocks and sheets, but for the shortcrust pastry version, I usually make it as it is just so simple and quick to make.

It can also be frozen once it’s made for another day, so for example, if you were going to make 4 x 4″ flan case base size portions, I would use half this quantity.

What I often do is make the full batch and freeze half of the dough for another day.  This batch size will make up to 8 x 4″ flan case size bases.

Shortcrust Pastry

Lesley S Smith
Prep Time 45 minutes
Total Time 45 minutes
Course Baking

Ingredients
  

  • 500 g Plain Flour
  • 220 g Butter
  • 1 tablespoon Caster Sugar
  • pinch Salt
  • Water

Instructions
 

  • Put flour and butter into a bowl and either rub the butter into the flour, or mix it in the food processor until it is a breadcrumb consistency. Make sure that all the lumps of butter are rubbed in.
  • Add a couple of pinches of salt and caster sugar, and mix with the breadcrumb consistency ingredients.
  • Add a little water at a time and either mix by hand, or in the mixer / processor until the dough forms a ball. Stop when the dough has bound together. I add a tablespoon at a time until the ball begins to form.
  • Wrap the dough up with cling film and refrigerate for approximately half an hour before using it.


Posted on 1 Comment

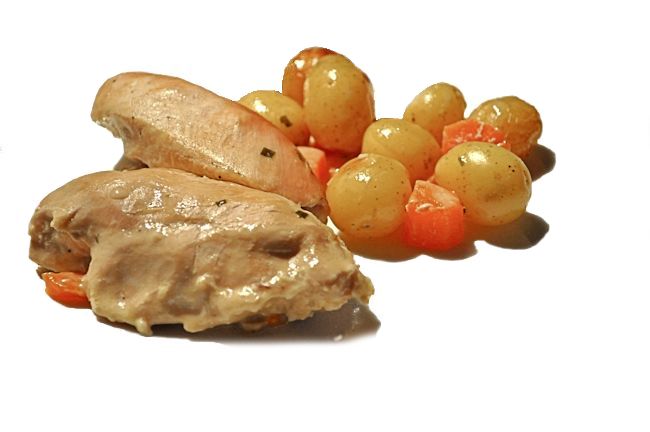
Roasting Bag: Chicken Breasts in Chicken Tonight Country French White Wine Sauce …With Cream & Chives

This is a speedy way to have a home cooked meal in a sauce.

Roasting bags are one of my favourite things to cook with, as the food really just never goes wrong.

I have made this recipe with 1 jar, which just gives the meat and vegetables a very nice coating with this level of ingredients.

This worked perfectly for us, but I suspect I might add 2 jars at my next attempt at using a jar of sauce for a roasting bag.

Roasting Bag: Chicken Breasts in Chicken Tonight Country French White Wine Sauce …With Cream & Chives

Prep Time 10 minutes
Cook Time 1 hour
Total Time 1 hour 10 minutes
Servings 6

Ingredients
  

  • 6 Chicken Breasts
  • 1 kg Baby or Mini Potatoes
  • 2 Large Carrots Chopped
  • 1 Large Roasting Bag
  • 1 jar Chicken Tonight in Country French White Wine Sauce

Instructions
 

  • Set oven to 180C . To make this dish easier, I used a dish to mix the chicken breasts, potatoes and carrots in while I coat them all with the jar of chicken tonight.
  • Pop all the ingredients into the roasting bag and seal it well.
  • Lay your chicken out so that each piece is separate and on the floor of your roasting tray. If they are piled on top of each other, they will not cook properly. This is why you need a large roasting bag. If you only have smaller ones, split your ingredients into smaller batches.
  • Cook in the oven for an hour, or until the chicken breasts are fully cooked. This could be more or less, depending on how large your chicken breasts are.
  • Just take out of the bag and serve. Easy Peasy.