Posted on 20 Comments

COMPETITION : A bloggy chance to win £100 from Appliances Online closes 6th April

——————————–

UPDATE:  The winner was @jaxbees with the caramel shortcake that my youngest chose as the winner.

——————————-

Coming home from school today, we decided to stop off past the local shop and buy a few treaty things for the boys.  Instead of buying sweeties, we bought some meringue nests, chocolate and fudge icing in a tub, and some mini chocolate Easter eggs.

To say that the boys enjoyed their messy making of things was an understatement and Appliances Online liked the idea so much, that they have offered a £100 prize for a blogger who enters the linkie on this blog and includes a recipe or a foodie picture of their own.   The rules are simple and are at the end of this post.

Back to the meringue nests:  the pictures tell the whole story on their own, with lots of mess to clean up afterwards.

Competition rules: A simple food picture or a recipe post will do the job.

  • Post a picture of a meal, or a recipe of your own and link it up to this blog below.
  • Pop the words and link in this sentence into your post.  “My entry for the Bosch Dishwasherlink up”
  • The competition will close on the 6th April 2012.
  • Leave a wee comment please to say how to contact, ie your email address in the comment or your Twitter id.

Good luck everyone, and if you struggle with the in-link, please just send me a message or a tweet.


Posted on 14 Comments

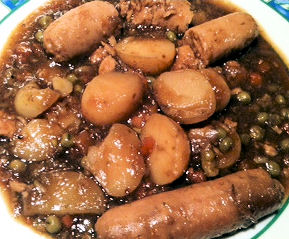
Slow Cooked Sausage & Onion Hotpot

Another slow cooker recipe.

Is it showing just how often that I actually use my slow cooker?  The food rarely looks pretty on the plate, unless it is a curry, risotto or a piece of meat for carving, but hotpot style food just never looks right although it tastes fantastic.

Saturdays are manic here with football matches and club sessions, so making a proper meal on a Saturday is a rare occurrence.  I had a pack of sausages in the fridge with a bag of potatoes in the cupboard and that makes for a perfect slow cooker meal.

Ingredients

12 Sausages
2 Onions
2 Tablespoons Caramelised Onions
500 Mixed Veg (I ran out of fresh, so the standby frozen had to do)
1 kg Baby Potatoes (any potatoes would do for this)
1 x Beef Stock Pot or 2 Stock Cubes
Pinch Salt

Method

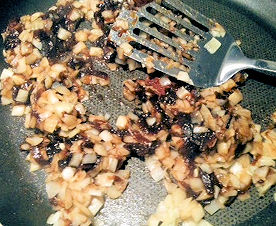
As usual, my slow cooking is just all thrown in.  I wanted to give the sausages the taste and aroma of the onions so I took the frying pan out and first let the chopped onions cook for a few minutes on low heat.

Turn up the heat a little and fry the onions until they are mixed in with the caramelised ones.

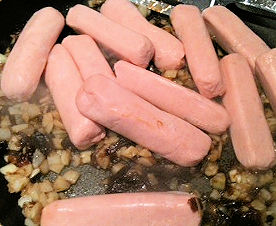
Add the sausages to the pot.

Lightly cook sausages in the pan with the onions.

Then put the sausages and onions into the slow cooker, along with the vegetables and fill with enough boiling water to cover the ingredients.  Add the stock pot or stock cubes and salt.

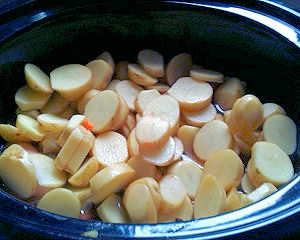
Place the sliced potatoes on the top of the ingredients in the slow cooker.  Don’t put any more water in the pot.

Put on the lid and cook for 8 hours on low setting, or 4 hours on high setting.  Thicken before serving with cornflour and hey presto.

I really, really wish I could get slow cooked pots of food to look prettier on the plate for photographing, but I don’t seem to be able to.  My sausages crumbled when my mother in her eagerness to help, had decided to take off the lid when I was out, and give the mix a good old brisk stir.

There was enough food in the pot to feed 6 of us.

That was a meal on a budget and a half.


Posted on 21 Comments

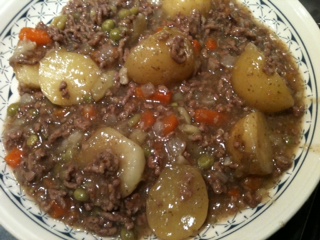
Slow Cooked Mince & Tatties

Two things got made in the Scottish Mum household today and they were complete opposite ends of the spectrum.  I made apple muffins and a hodgepodge of rubbish and odds and sods that were lying around the fridge for supper.

The apple muffins are a pretty standard recipe so I won’t do them.  I did the muffin type recipe that I just substitute different fruit for.  I learned how to make nice muffins when I did the post for Prince’s fruit.

Onto the Slow Cooked Mince & Tatties

Now this is not the Scottish way, and it is probably not anybody’s way of making mince and potatoes, but if we don’t try different ways now and again, we never find out newer and quicker ways to feed our families without slaving over a hot stove.

I do a lot of cooking, but I really dislike it with an enormous passion.   My dislike for cooking is probably the reason I love my slow cooker so much.

So rather than proper mince and tatties, this is more of a  Hodgepodge 

Here we go.

1kg of Mince, browned in a pan with 2 smallish onions.

With the kettle boiled for the slow cooker, I decided that I was going to be lazy today and throw it in the pot for later.

I rustled up about 1 kg of different vegetables and 2 kg of baby potatoes which I cut into halves and some into slices.

Along with a couple of stock cubes, about 25 ml of lemon juice and a pinch or two of salt, I threw it all in the pot and added water – and then proceeded to ignore it for the next 4 hours while it cooked.

When we were ready to eat, some cornflour to thicken and bobs your uncle.

Part of me was slightly worried about how this would turn out, but I have learned that the only thing that ingredients in food have to be precise for is actually everything to do with baking and pastry.  With anything else, pretty much anything goes with trial and error.

Sundays big meal cost me less than £10 with masses of food for everyone and enough left over for tomorrow, so that will be two big meals for £5 each.

Ok, slow cooked mince and tatties doesn’t look fabulous on the plate, but it tasted amazing and no slaving over a hot stove.   There is just something delicious about potatoes cooked hot pot style.

I had forgotten to make a loaf so we used apple muffins to soak up the gravy.  What a combination..


Posted on 8 Comments

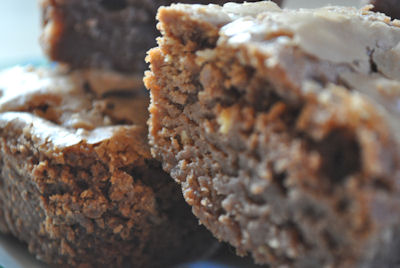
Chocolate Brownie – Blind Bakeathon – Scottish Mum Style

I couldn’t get the internet to work, so I decided to bake a batch of brownies.  The only problem was that I didn’t have all the right ingredients for it, so I compromised – Do you think it worked?

Ingredients

  • 190g unsalted butter
  • 185g chocolate  (I had half Galaxy and half cooking chocolate)
  • 130g plain flour
  • 100g chocolate spread (I used Nutella)
  • 3 large eggs
  • 275g caster sugar
  • 40g chopped hazlenuts or choc chunks or fudge pieces etc.  (I had chopped hazlenuts)
Before you start – put your oven on at approx 150c or 140c for fan asssisted.

Step 1
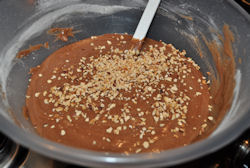
Easy to do, just put the chocolate and the butter into separate bowls and microwave until melted.   With cooking chocolate you have to do it 20 seconds at a time or the chocolate might curdle.  Mix the butter and chocolate together and leave to cool.


Step 2
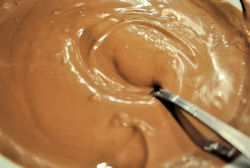
Put the eggs and sugar into a mixer and whisk.  It may take up to 10 minutes depending on your mixer for it to go light and fluffy in colour and texture.  When the mix leaves a trail if you dip a spoon in, it is ready.

Step 3
Fold the butter/chocolate mix into the eggy mix until completely mixed.

Step 4
Put the chocolate spread / Nutella into the microwave for 1 minute

Step 5

Sift the plain flour into the bowl and fold into the mixture.  Try using a figure of eight in alternation with a regular fold.

Step 6
Fold the nutella into your mixture.

Step 7
Fold the hazlenuts, or chocolate chunks into the mix.  When it is ready the mix will look like a treackly gooey mix.

Step 8
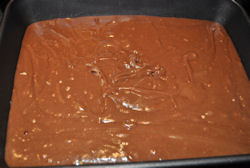
Pour the mix into a greased baking tray.  Mine is a rectangle shape about 20cms long.

Step 9
Bake for approx 45 minutes until the side begin to shrink and the middle doesn’t wobble when you shake the tin.

Step 10
Wait until the brownie is completely cool, cut and turn out of baking tray.

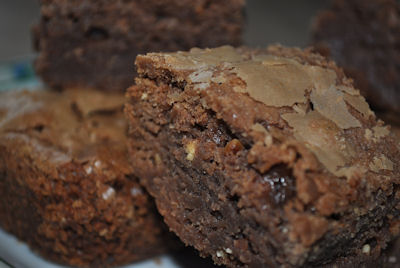
Voila – Verdict – They were too nice to leave lying around.  Sadly I will have to make them again.

Posted on 13 Comments

Making Soy Milk (Dairy Free) at Home Is this a Fabulous Food Find ??

Looking at the title of this post, I can imagine some of you are making some strange assumptions.

On Twitter, when I first mentioned it, there was a comment or two that arrived joking about cows in the garden.  The milk is dairy free so suitable for those who are lactose intolerant, but it is really the bees knees?

I buy a lot of shop bought soy milk so I reasoned to myself that making it out of the soy beans would be infinitely cheaper than buying ready-made soy milk every couple of days.

A dedicated milk making machine costs upwards of £100, so I attempted to make it by hand – which was easier than I first thought to do.

I am not kidding when I say that it is actually very easy to make the soy milk.  This is what I did, and I will share my thoughts at the end.

INGREDIENTS

125g white dried soy beans for “approximately” 1 litre of milk.   I bought Tesco soy beans to practice with.

METHOD

1 –  Soak the beans

The beans are dried, and they really need soaking overnight so that they are soft and pliable.  Cover the beans in a container with water.  Change  the water a couple of times if you can and then just leave them to do their magic.
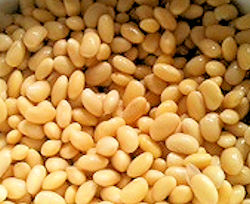
Some recipes seem to say that it would be good to dehull the beans after they are soaked, but considering they are going to be liquidised later, I don’t see the need to do that.

Make sure you take out any discoloured or damaged beans as you don’t want to spoil the quality of your soy milk.  Soaking can probably be done from 6 – 24 hours to be able to use the beans, and they are ready when they are soft to the bite or soft and pliable when you squeeze them.

2 – Microwave the soy beans

Some recipes recommend heating up the soy beans before using them for milk as it takes away the beany taste.  I was not sure about that, but I did micro mine for about 2 minutes before doing anything else with them.

3 – Liquidise / Blend the Soy Beans

In a blender or liquidiser (or a coffee bean grinder which I used) put the beans AND 1 litre of water in if you can.  I had to do  mine little by little as I used the small grinder to do mine, but I would root out the blender next time and do it in one go.

     

4 – Boil the Liquid

As with any heated milk, it has the potential to froth up very quickly when you get it to boiling point.  Anyone who has heated milk in a pan for slightly too long will know what I mean by that.   It is a good idea to use a fairly big pan so that the milk doesn’t boil over the top as you will need to boil the mixture for about 5 – 10 minutes to get it right.

Stir the liquid while it is cooking all the way through.  I did not stop stirring with mine, just in case, but I imagine you could get away with some time away from the pot at a time, but I wouldn’t risk it.
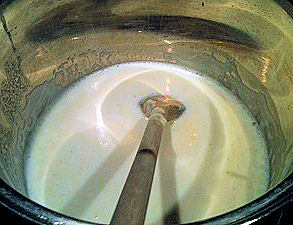
As with any milk that you boil, if you are taken by surprise and it looks like it is going to boil over, add some cold water and the foam should shrink back into the pot.  If you don’t take care at this stage, you could end up with a right mess on your cooker top.

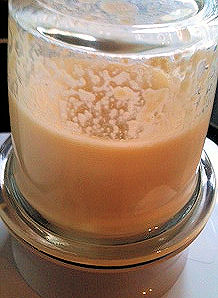
When it is ready, the milk will have separated from the curds and the mixture will look slightly grainy.

5 – Separating the curds from the milk.

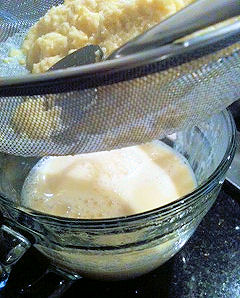
To separate the curds (ochra) from the milk, use a fine sieve, or a cloth bag and strain the mixture.  A bit of squeezing of the mix, or using a spatula might get every last drop out of the mix.  The ochra can be used for soup, stews as a filler, but I just threw mine away.  In future, I might be tempted to give it a try to see what it tastes like and how it cooks.
     

——————————————————————————————————————————————

To end with it, I forgot to take a pretty picture of it in a glass to make it pretty – sorry.    Next time.  There will have to be a next time as I really did not get much milk out of my recipe.  I would guess that I needed much more water than I used and on my next attempt, I will add 2 litres of water to the mix.
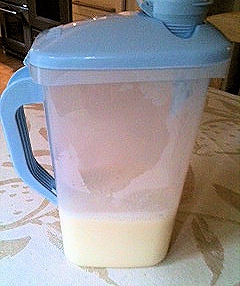
I might also microwave it for much longer at my next attempt, as it tasted very very beany to me which I really didn’t like.  I’ve read that cows milk has a lot of salt added so I might try adding some sugar or salt to see if I can get to a taste that I find palatable for using in coffee, which is what I really use it for.  It looks idea for making tofu, so that might be an idea for the next time as well.   I definitely left mine too long and too much water boiled off.

Have a go yourself it really is quite easy.


Posted on 5 Comments

Fabulous Food Find – HUGE Watermelon from Costco

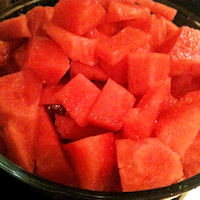
Fabulous food find today was a HUGE – SEEDLESS watermelon from Costo in Aberdeen at £2.99.       Absolutely fabulous and the kids are hugely impressed with how much there is in the bowl after I sliced it all up to put it in the fridge for nibbles.

Watermelon works out at about 30 calories per 100g (according to my iphone diet calorie checker).    A whole kg worth of water melon would only set me back 300 calories.  Now that is a stomach filling prospect.


Posted on 1 Comment

Quick and Easy Chocolate Fudge

This is the easy recipe for chocolate fudge that I got off of a tin of Nestle Condensed milk.  I don’t usually do much in the way of  potted recipes and this one is VERY sweet, but I thought I would share the results of how it came out.

Ingredients

400g chocolate
397g tin condensed milk
25g butter
100g icing sugar
55g sugar strands / chopped nuts etc for decoration

Put chocolate, condensed milk and butter into a bowl and microwave until all melted.  Take out of micro at 10 – 20 second intervals and stir well until it is very smooth.

When nice and smooth, beat in sieved icing sugar (if you don’t sieve it, it will go into lumps).

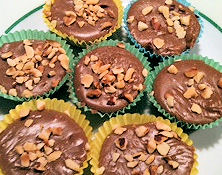
I used little cake cases, but the recipe calls for a tray bake.  I got 40 little sweets in the cases.  When the mixture is in, sprinkle on the sugar strands or chopped nuts.

Put in fridge for about an hour.

Hey presto.


Posted on 2 Comments

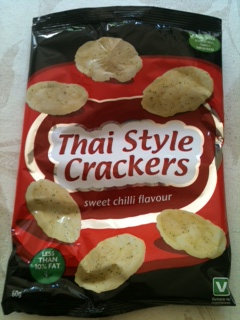
Thai Style Crackers – Sweet Chilli Flavour from Asda 60g

Now these are just a little bit of heaven.  Quite spicy and like prawn crackers without the ickiness for me.    Although I absolutely love prawn cocktail flavoured Walkers crisps, I am not a fan of any brand prawn crackers.   They just seem too fishy for me.

I know, I know, I can hear you all laugh as me saying prawns taste a bit fishy to me.

These Sweet Chilli crackers are really spicy, and I am someone who is not usually into things that are too hot, and I do need a drink of water or juice beside me to eat these, but I really did enjoy them.

The best bit for me has to be that it is quite a big bag of crackers, and at 60g, it’s not too shoddy an amount to sit and actually eat.

Per 20g
Calories 82 – so that makes it a reasonable 246 calories for the WHOLE bag.

As a crisp addict, these are just perfect for me.


Posted on 7 Comments

Jam and Cream Roulade (Roly Poly) – No Oil or Fat – Modify for Dairy / Lactose Free

 I just have to share the recipe for this one.  I didn’t build it from any recipe that was in any book.  It is simply trial and error, and I finally hit on a masterpiece that my children absolutely adore. 

I bake – a lot.  I bake blind – a lot.  I throw things in, measure how much they are and judge from the mixture, and how it looks, to tell me if it is enough or not. 

This recipe for the roulade is one that is very popular with my kids and there is NO fat in it at all. 

Are you listening – None at all.  Sugar, eggs and flour, yes, but NO fat, butter, marg, or oil.  

 The cake does still come out lovely and moist.  My boys love the fact that I also use sugar strands to add a little decoration to the mix.

Ingredients
4 oz caster sugar
3 whole eggs, and 1 extra egg white
2.5/3 oz plain flour
1 oz sugar strands
1 teaspoon vanilla flavouring, or 5 drops vanilla essence
Jam and Cream (or custard / marmalade / butter icing) for filling

Method
Put caster sugar and eggs into a mixing bowl, or mixer and whisk until it begins to thicken.   When the mixture turns almost totally white and lt leaves a trail, similar to yoghurt, it is ready. 

Simply add in the vanilla flavouring, and fold in the flour and sugar strands.

Use a baking tray about 8″ x 10″ and line with baking paper.  Tip mixture into the tin.

Bake at 200 C/400F/Gas 6  for approximately10 – 15 minutes.  While baking, the sugar strands should sink to the bottom of the mixture.   When the roulade is lightly golden brown and feels cakey to the touch, remove it from the oven.

Place a piece of baking paper onto a table, sprinkle caster sugar all over the paper and tip your cooked mix out onto the paper.  Press lightly onto the caster sugar and peel off the backing baking paper.  Turn over the piece of roulade and repeat for the other side (which should be coloured with the sugar strands, and coated in the caster sugar). 

Leave the roulade on the baking paper.  Roll it up while hot, and close both ends to stop it unrolling.  I use elastic bands on either end.

Leave it to cool until it is completely cool. 

If you unroll while it is still warm, it will fall apart. 

When it is completely cool, unroll it, spread on whipped cream and jam, and roll it back up again. 

 I had to cut mine into two pieces, as one piece was too big for the one plate.

Then, simply slice and eat. 

This roll must be kept in the fridge after making as it is fresh cream, and there is no fat in the recipe.

I used a lot of cream for my recipe, about 6 oz double cream whipped would give a more  perfect looking roll. 

 I used more than that, and added jam so not so much room to have a perfect swirl.  It all depends on how perfect you like your roll to look.  If you want to remove fat totally, or have dairy free, you could use cream alternatives, or make different fillings, eg lemon curd, butter icing using dairy free spreads etc etc.

Posted on 1 Comment

Eating Out – Childrens’ Portions

I am guessing that you are all sitting waiting for some huge revelation into the type of food (or packet gunk) that they might be serving up, but no, that is not what has me champing at the bit when we eat out.

Picture this

Small fingers, trying to manipulate knives and forks that are not fully compatible with the small hands that are trying to hold them the same way that mum and dad do. 

The plate is small, and the food is tightly packed onto the plate.  With no room for manoeuvre, the food spins out of control, whirrs off the plate and invariably ends up on someones’ clothes.

How difficult is it to give a young child a plate that is big enough for them to use their cutlery.

I’d love to tell the PR and media types who deal with restaurant chains, hotel kitchen outlets and supermarket food courts that they are not fooling anyone into thinking there is more on the plate, simply because it is miniature sized.