Posted on 2 Comments

Spinning Chicken – Ekeing out Quality Meat to avoid buying Mechanically Processed Meat – Part 2

From the mango chicken I made in my first post about ekeing out quality meat, the second half of the batch went straight into being a Chicken and Mango Tikka Masala.

I think the very real after effect of the horsemeat scandal is that we really don’t know what’s in processed food, even if it tells us the ingredients on the wrapper.

This was the second half of my intention to feed a family of 6 twice with each half of the batch.  One portion for eating, and one for freezing for another day.

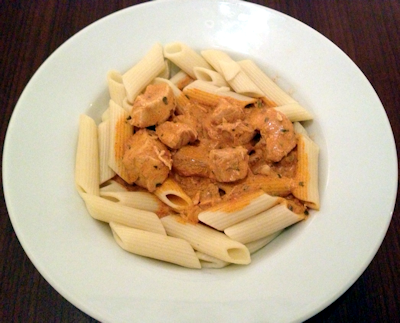
Step two. Chicken and Mango Tikka Masala.  Again, accessories spun out the meat, with a filling pasta and nan bread accompaniment.

Chicken and Mango Tikka Masala Pasta

Servings 6 -12

Ingredients
  

  • HalfMango Chicken Batch http://scottishmum.com/mango-chicken-wrap/
  • 1 Clove Garlic
  • 0.5 Jar Pataks Tikka Masala Paste
  • 1 Teaspoon Sugar
  • 500 g Pasta Tubes
  • 250 g Tub Mascapone or fresh cream (You will need 250g more when you defrost the portion destined for the freezer.)
  • 500 g Carton or Jar of Tomato Passata
  • 100 ml Water
  • 1 Teaspoon of Mixed Herbs
  • 2 Onions

Instructions
 

  • Lightly fry your two chopped onions in the oil, add the garlic and don't allow the onions to brown. You want them to be a lovely soft texture.
  • Mix the Mango Chicken with the cooked onions and garlic.
  • Add half a jar of the Tikka Masala Paste, the tub of passata and sugar and mixed herbs. Bring to a very low simmer for 5 minutes. Your chicken is already cooked, so it is just a case of combining the ingredients and flavours until they are mixed in. Add water slowly until it becomes a texture similar to a very thick pasta sauce.
  • Split your batch into half. Put the half for freezing to one side to cool. With the batch you will be eating, add the cream or mascapone and finish the meal. If you freeze the portion for another day with the cream or cheese in, it may separate on defrosting. Leave adding the dairy to that portion until you are ready to eat it.
  • Cook between 500g and 1kg of pasta, depending on whether you plan to freeze cooked pasta with your Chicken and Mango Tikka Masala. If you do plan to freeze some pasta, I would be tempted to combine the pasta and Mango Chicken Tikka Masala. I prefer defrosting cooked pasta that has been combined with a sauce, but it would be just as simple to use rice, or cous cous when you eat your frozen batch.
  • Add your cream or mascapone to your Tikka Masala. If you want your sauce thinner, simply add a little more water until it reaches the right consistency.


Posted on 3 Comments

Spinning Chicken – Ekeing out Quality Meat to avoid buying Mechanically Processed Meat – Part 1

My challenge for a lot of this year is to find ways to make quality meat affordable and a good purchase for everyone.

Bearing in mind that my family would wolf down a big pack of chicken nuggets in one go, it would work out about a fiver a meal just for those, which is likely to have e-numbers, additives, sugar, added salt and much more depending on the manufacturers.

I think the very real after effect of the horsemeat scandal is that we really don’t know what’s in processed food, even if it tells us the ingredients on the wrapper.

I get chicken from the Andrew Gordon Butchery in Aberdeen.  It costs on average £25 for 10 very large chicken breasts.

To buy the same in a supermarket, I’d probably have to get 15 – 20 breasts weight wise, and at todays prices, that seems to work out quite high to me.   I live happier knowing that the meat I eat has had a good life before it hit my plate.

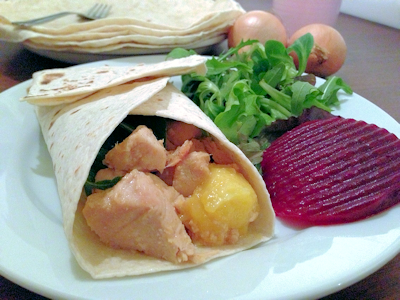
I used all 10 chicken breasts to make mango chicken for wraps, with the intention of splitting the batch down the middle as soon as it was cooked.  To spin it out even further, a cook could add vegetables, lentils, noodles or much more to the cooking process.

The intention was to feed a family of 6 twice with each half of the batch.  One portion for eating, and one for freezing for another day.

That would give me the equivalent of a full belly x 24 for the £25 worth of good meat by adding cheap and healthy ingredients to bulk it out.

I cooked the second half of the batch on the same day, with one portion in the fridge for the next night, and another one in the freezer for another day.

Come back tomorrow to see what I turned the Mango Chicken into.

First step, the Mango Chicken.  I added salad vegetables, wraps and sauces to make the meat spin out.

[gmc_recipe 10534]

Posted on 19 Comments

Why are we so upset about eating horse meat?

Burger

With lots of jokes about the horse meat issue facing many of the suppliers of meat in our country, I’ve found myself mentally checking off the Dalepack, Findus, Tesco, Lidl and Aldi brands of any sort of meat.  I know that is actually completely ridiculous, but how many people feel the same way as I do about the horse meat scandal?

The Food Standards Agency seem to be more involved now and I hope they do decide to do mandatory tests on hospital and school meals as many of those are done on such a low price point per person when admin costs are taken off.

Those who can afford to buy proper meat from a good butcher will go and do exactly that.  Those who can’t afford to do that have no choice but to eat the cheap meat on supermarket shelves.  It always makes me cringe when I read the ingredients lists and the thought of the “pink slime” made me rightly or wrongly shy away from lots of meat products.  In my opinion cheap beefburgers probably seem to be a good place to hide undesirable ingredients.

People really don’t want to have to think that they could have eaten a former pet, discarded thoroughbred or seaside pony.  As a nation, we see horses as pets in the same way that we see dogs, cats, gerbils, rabbits, hamsters and guinea pigs.  In France, they do eat lots of horse, but I’d bet with the current state of play, they’d also be annoyed as it really isn’t about the horses.

It’s about not knowing what’s in our food.  If I knew horse or pink slime was in food, I’d rather feed my kids veggie.  The whole point is that we’ve been scammed as a nation, and that’s the most horrible thing about it all.

I want to know what is in my food, in my kids food, and in my animals food.  Criminal activity or not, someone somewhere put people at risk.

It’s been stated as not being a food health issue as if that makes it okay.  What if it hadn’t been horse?  What if it had been arsenic or poison, or something else?  Somewhere in the process and procedures, testing and quality assurance failed.

I hate the thought of mechanically processed food.  A chef once showed me the contents of a cheap commercial value pack of mince.  He rolled it out in his hand and showed me a bit of cheek and an eyelash.  I’ve never bought value mince products since that day.  He described it as the head stuck on a centrifuge and the contents forced off at speed.  Whether it was true or  false, it put me off for life.   I don’t think cheap meat is worth buying when we have no idea what it is that is actually in it.

If I couldn’t afford decent mince, I’d rather make lentil casserole instead – and I’m intolerant of lentils.  We all make our own choices, but I’d love to know how much cheap meat products have suffered this last week or so.

A dozen burgers for £1 are never going to be great quality, but the people buying them deserve to know exactly what’s in them.


Posted on 28 Comments

Slow Cooker Rice Pudding Recipe

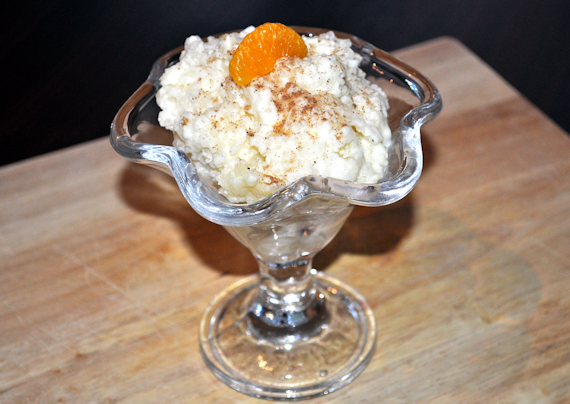
I’ve always wondered how to make rice pudding in a slow cooker.  The slow cooker recipes I had come across all seemed to look very sweet, so I reduced the sugar in mine compared to most people, and I added my favourite cinnamon to the mix.  You need to use the proper rice pudding rice – if that makes sense.  It is shorter and dumpier than our regular meal accompaniment rice.  Short grain rice has the benefit of more starch which makes the pudding thicker, and supermarkets often sell it as pudding rice.

With this recipe, it’s all cooked in the pot, so there is no need to cook the rice separately.  My mother was here when pudding was served, and although the rest of us all ate our rice pudding from the slow cooker, she wanted hers browned in the oven.

Homemade rice pudding can be as creamy or as plain as you choose.  Just replace some of the milk with condensed milk or cream if you like your slow cooker puddings extra creamy.

Serving hot or cold, rice pudding is a very versatile dish.  To add the healthy touch to the dessert, just top it with some fruit to make the most of it.

Slow Cooker Rice Pudding

Lesley Smith
4 from 1 vote
Prep Time 2 minutes
Cook Time 4 hours
Total Time 4 hours 2 minutes
Course Dessert
Servings 6 -8

Ingredients
  

  • 200 g Pudding Rice
  • 60 g Sugar
  • 50 g Butter
  • 1.5 l Milk
  • 1 teaspoon Nutmeg
  • 1 teaspoon Cinnamon

Instructions
 

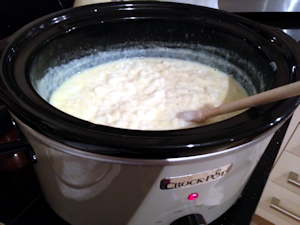
  • This has got to be one of the simplest things to make, anywhere. Pop all the ingredients into a pre-heated slow cooker.
  • Cook for 8 hours on low, or 4 hours on high. Give it a little stir after an hour or so, to mix the sugar and butter. Keep an eye on it, and add a little more milk if needed.
  • Serve with a sprinkling of nutmeg, cinnamon or chocolate powder.


Posted on 7 Comments

Fresh Limeade Recipe

Crisp and refreshing.

Fresh Limeade Recipe

Lesley S Smith
Prep Time 2 minutes
Cook Time 3 minutes
Total Time 5 minutes
Course Beverage
Servings 4

Ingredients
  

  • 2.5 Fresh Limes Quartered
  • 0.5 Fresh Lime Slicing
  • 1 l Water
  • 250 ml Crushed Ice
  • 250 g Sugar or equivalent sweetner (I used Stevia alternative sweetner)

Instructions
 

  • Wash the skin of the limes for the lime juice. We're adding everything to the blender, so don't worry about peeling. Cut the limes into quarters and take out any seeds.
  • Put the limes, water and crushed ice into the blender. Blend for at least a couple of minutes. Taste the liquid and if it's too tart for you, add in sugar or sweetener to taste - up to 250g of sugar and equivalents of sweeteners.
  • Strain the lime juice mix to get a lovely coloured lime juice.
  • Optionally, use a soda charger, or a sodastream to give your lime juice a little fizz and turn it into limeade.


Posted on 4 Comments

An alternative Burns Night Supper – Slow cooked mince, neeps and tatties.

In Scotland, we all know it’s the birthday of the Bard coming up.  If you don’t know who – it’s Rabbie Burns, and we celebrate it on the 25th January every year, so Friday night will be haggis night in many  households around the world.   Robert Burns was a poet who is now looked upon as being the national poet of Scotland.   His birthday is celebrated by both Scots and Non Scots worldwide.

Our children will have Burns celebrations at schools, and many a charity function will be held in his name on Friday night.  I’ll never forget a local poet giving a lament to the haggis a few years ago at a special school, where the lady poet was swinging huge kitchen knives above her head before she ripped the haggis open ceremonially.

A logistical nightmare, our knives had to all be locked away forever after that one.  At least with me being there, I knew where the new-found fascination for knives came from.  I pity the parents of other kids who had no idea why their kids would suddenly have taken to brandishing knives above their heads like daggers with a swagger!

Back to the cooking…

The traditional dish is haggis, neeps (turnips) and tatties.

There are vegetarian versions of haggis, but not everyone likes the meat or the vegetarian options as they can be quite spicy.

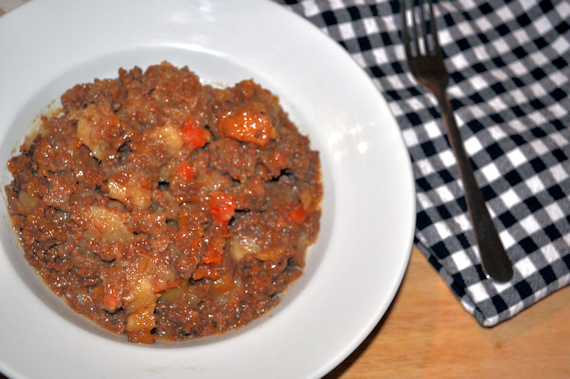
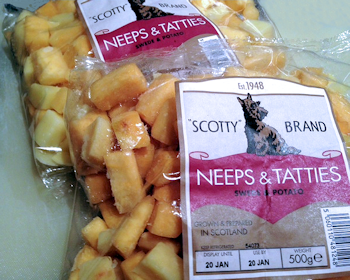
As an alternative, this weekend, we did a trial run of slow cooked mince with meat from Andrew Gordon Butchery and Fine Foods and the new Neeps & Tatties from the Scotty Brand range.

As always in our house – anything from the slow cooker gets the thumbs up from me for ease – and always tastes fabulous.

Scotty Brand Neeps & Tatties

Slow Cooked Mince, Neeps & Tatties. Alternative Burns Night Supper

Lesley S Smith
Prep Time 10 minutes
Cook Time 8 hours
Total Time 8 hours 10 minutes
Course Mains
Servings 6 - 8

Ingredients
  

  • 1 kg Lean Steak Mince
  • 1 Large Onion Chopped
  • 1 kg Neeps & Tatties
  • Stock Pot
  • 500 g Carrots Washed, scraped and chopped or sliced.
  • Salt
  • Pepper
  • Cornflour

Instructions
 

  • Switch on the slow cooker to high to warm up.
  • Brown the mince with the chopped onion on a thick bottomed pan.
  • Add the mince and onion to the slow cooker. Add in the neeps, tatties and carrots. Add boiling water to almost the top of your ingredients.
  • Add a teaspoon of salt and a pinch of pepper and a stock cube, or stock pot if you prefer a stronger taste.
  • Put the lid on and leave for 8 hours on low, or 4 hours on high.
  • If you want to thicken your hotpot, half an hour before the end of cooking, mix up cornflour with cold water and mix to a smooth paste. Add to your hotpot and fold in until it thickens. If you over thicken, add a little boiling water to fix it.
  • Serve.


Posted on 8 Comments

Top Tips for Baking the Perfect Cupcakes

Cupcakes

1. Use the minimum of utensils and keep your ingredients list reasonable.

I have a habit of making a huge mess of the kitchen when I am cooking, and with 6 mouths to feed, the kitchen can look like a bomb site quite easily.  I have got cup cake making down to a fine art with only my mixer, a cup, a dessert spoon and a knife at the ready.  I use no bowls whatsoever and just put everything straight into the mixer.

2 – Choosing Ingredients

Use the best ingredients you can afford.  It does make a difference.  The quality of flours can be quite different when you have your finished cup cakes.   If you’re using chocolate, use real chocolate and not the cooking kind that nobody really likes.  For chocolate powder, splash out on something like Green and Blacks Cocoa powder and not cheaper versions with fillers, and you’ll be very glad you did.

Use unsalted butter instead of margarine.  I really don’t understand the margarine or spread brigade as I’d rather have a little less of the real stuff than a heap of manufactured fats full of additives and other difficult to pronounce ingredients.

Baking really is a case of getting the mix of ingredients right.  As long as you add butter, sugar and flour at the same proportions and 1 egg for each 120g of any one of the other ingredients, you should be fine.

3 – The Mixing Moments

How much to mix is always a big issue with cup cake chefs.   I do have my mixer on at a fairly low-speed for a couple of minutes and then I turn it up high for the last little while at the sugar and butter stage to try to blast some air into the mix.

4 – When to Add the Ingredients

I’m going to go completely against the grain here.

Sifting the flour in can add extra air, but I suspect most home bakers don’t bother.  I am not telling you that I actually follow the rule for sifting flour into the mixer, as there are times when I don’t.  I’ve never had complaints from not sifting and my cakes seem to be as light as when I do sift, but I can often hear my grandmother in the background nipping my ears for not doing it right.  Guilt will sometimes make me reach for the sieve.

If you’re really brave like my sister-in-law, you can throw everything in the mixer at the same time and just mix until it’s ready to spoon into cases.

5 – Get the mix even in the cases.

This one is common sense.  If some cases have more mix than others, some will be cooked more quickly than the rest.  Try using a standard sized spoon or scoop to get the same amount of cake mix in each cup cake case.

6 – How to know if it’s mixed.

The consistency should be creamy and not like Scottish Tablet with a grainy consistency.

7 – Work your oven.

It takes a while to get to understand a new oven.  Each one works differently and gives different results.  If you know your oven tends to run hotter or colder than recipes usually ask for, change your baking time.   Use a skewer to know when they are ready.  If a skewer comes out clean, then the cakes are ready.

Resist the temptation to open the oven part of the way through cooking.  Your cakes may well just fall flat as a pancake…

8 – It’s disaster time..

Cakes that don’t look perfect are rarely a disaster.  Make a form of Eton Mess using the sponge, or change a bread and butter pudding recipe, or cover it all up with icing.  If it tastes great, then it doesn’t matter what it looks like.


Posted on 5 Comments

Baxters Beetroot – Stir Fry and Chocolate Brownies.

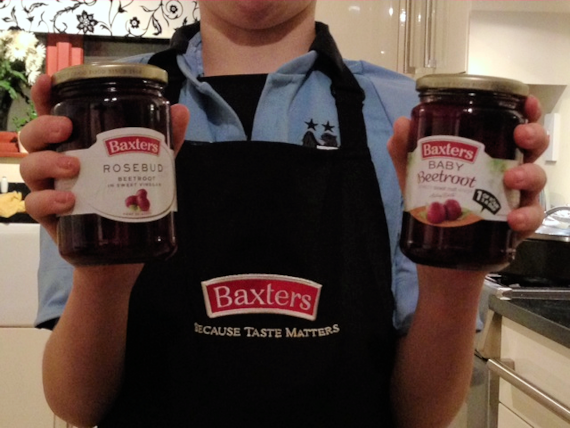
Baxters sent a gorgeous hamper with a lovely Baxters apron and a selection of Beetroot from their range.  Baxters are reasonably local to us, and I’ve often bought their beetroot as it tends to be a nice sweet vinegary taste.

Their products have been in my life as far back as I can remember, so we’re regular customers in this house.

Baxters have been going in the UK for several generations and the make soups, preserves, condiments, beetroot and chutneys among other thing.   Baxters create their own recipes and showcase some of the them on their website.  They even have the opportunity for you to add your own recipe to their website, and if they like it, they might feature it online.

They have a visitors centre that is based around a highland village experience in Fochabers, Aberdeen.  I’ve driven past it several times, but have not stopped off as yet, but after this challenge, I may well give their Highland Village a visit in the near future.

They challenged me to come up with a recipe for their Beetroot so I used it as an alternative to rumpledethumps for leftovers in a Chicken, Bacon and Beetroot Stir Fry which went down a treat.

I opted for another recipe for one of the jars of beetroot in making the Beetroot and Chocolate Brownies from their website.  I had to tailor the recipe as I didn’t have quite enough beetroot for their version, and it went down well with the kids.

Baxters Beetroot 1

I can’t say that it was my favourite and I much preferred the savoury stir fry to the sweet versions, but the kids loved the brownies.  I think I just have more of a savoury tooth.

Here we go with my two recipes from the challenge.

Baxters Beetroot and Chocolate Brownies

Baxters
Prep Time 10 minutes
Cook Time 45 minutes
Total Time 55 minutes
Course Baking - Brownies
Servings 24

Ingredients
  

  • 1 x 340g Tin Baxters Baby Beetroot
  • 150 g Softened Butter
  • 300 g Milk Chocolate
  • 375 g Brown Sugar
  • 4 Eggs
  • 150 g Plain Flour
  • 35 g Cocoa Powder

Instructions
 

  • Preheat your oven before you start and set it to 180ºC, or reduce it to 160ºC for a fan oven.


  • Grease a medium to large baking try or roasting tin.

  • Soften the chocolate by putting it into a microwave for a few minutes, or on the hob as a plate on top of a pan with water in it, similar to a bain marie method of softening the chocolate.

  • Add all the ingredients into a mixer if you have one, or a large bowl. Mix them all together for several minutes, until the mixture is smooth.


  • Pour the smooth mixture into the baking tray and bake for 40-45 minutes. The brownies should feel a little soft under he centre and might be a bit wobbly, but they'll harden up as they cool.

Notes

Baxters recommend that the beetroot is well drained. You can also rinse them in some water. The vinegary flavour will not be tasted when you eat the brownies.

Chicken, Bacon and Beetroot Stirfry

Lesley S Smith
Prep Time 10 minutes
Cook Time 25 minutes
Total Time 35 minutes
Course Mains
Servings 8

Ingredients
  

  • 10 Rashers Bacon
  • 2 Chicken Breasts Cut into strips.
  • 4 Eggs
  • 600 g Mixed Stir Fry Veg Beansprouts, pumpkin strips, shredded carrot, green leaf salad, mange tout.
  • 1 Onion Chopped.
  • 1 Jar Baxters Crinkle Cut Beetroot Chopped into smaller pieces. Wash, drain and dry the beetroot before adding to a stir fry.

Instructions
 

  • Use your pieces of meat, chicken or bacon and lightly fry in a wok or thick bottomed pan until fully cooked.

  • Add eggs to the pan and let them cook similar to scrambled eggs, stirring in with the meat as it cooks.


  • Add an onion to the pan and let the mixture slowly cook for a few minutes on low.

  • Stir in your stir fry vegetables and either spray cooking oil, or add a couple of tablespoons of oil to make the stir fry.

  • Add the beetroot towards the end of cooking if you are happy with the pinky shade that your meal till take on from cooking for a few minutes.

  • I had split my stir fry into two lots. For the kids, I gently folded the beetroot in with their finished stir fry to keep it sharp, bright and pleasant to the eye.


  • For my own, I stirred in the beetroot and let it cook with the stir fry for a few more minutes to take on the beetroot taste. I am happy to say this is one recipe that I am going to make several variations of.


Posted on 4 Comments

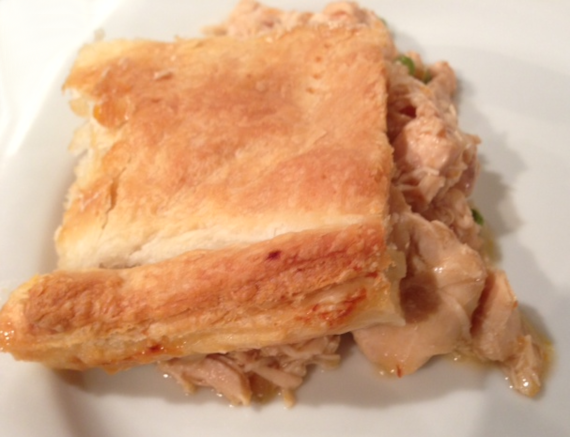
How to make a simple chicken pie with help from the slow cooker.

Chicken pie recipes are as many and varied as there are hot dinners in the year.  I wanted to have something no fuss, with full flavour, and easy to make.  Puff pastry is the one pastry that I cheat with.  It is such a faff to work with, that I always have some on standby in the freezer to make emergency pies or puff pizzas.  A little puff on the top of a dish can complete something that has been a bit of a disaster in the kitchen and needs a topping, or to finish a slow cooked recipe with fantastic flavour, by turning it into a pie.

The chicken is slow cooked, but the puff pastry has to really be popped into the oven with the pie filling to finish off the dish.  The filling is what makes the result spectacular in a pie.  Slow cooked food has a taste and aroma that I feel no other way of cooking can produce.

According to the kids, this was the best chicken pie ever, so how to make a chicken pie had to be turned into a blog post.  I get my meat, as always these days from Andrew Gordon Butchery and Fine Foods and the traceability, quality and texture never let me down.

Slow Cooked Chicken Pie Recipe

Lesley S Smith
Prep Time 30 minutes
Cook Time 8 hours
Total Time 8 hours 30 minutes
Course Mains

Ingredients
  

  • 1 Chicken Breast per person Cut into strips.
  • 2 Tablespoons Rapeseed Oil
  • 100 g Vegetables Per Person
  • Water Tailor to your recipe.
  • Salt Pinch
  • Pepper Pinch
  • Cornflour
  • Pack of Puff Pastry

Instructions
 

  • Switch on your slow cooker to high and add a couple of mm of water in the bottom. Look out a thick bottomed frying pan and your oil. This recipe is not cut and dried. There is very little that can go wrong, so choose how many people you will feed to decide how much you make ingredient wise. When you know your amounts, it is easy to judge how much of everything else that you need.

  • Lightly fry your chicken in a tablespoon of rapeseed oil, so that the edges all round have gone white. Once the meat has been sealed, it can be added to your slow cooker.

  • Choose which vegetables you use. I had 6 chicken breasts, and I added 2 chopped onions and 2 sliced carrots to my pan with the remaining rapeseed oil. I lightly fried those before adding them to the slow cooker.

  • I add another cup or two of water to half cover the ingredients, give it all a quick stir and pop on the lid. It can be left for 4 hours on high, or turn it down to low for approximately 7 - 8 hours.

  • When it's ready, you can thicken the gravy if you wish by using cornflour mixed in water, and adding it slowly until you reach the thickness of gravy that you prefer as a cook.

  • Spread the slow cooked chicken evenly along the bottom of a baking tray.

  • Roll the puff pastry out until it is the size you need to cover your baking tray. Lay it over the top, press the edges down and use a fork to make holes in the pastry at reglar intervals. You don't have to be perfect with the edges.


  • Some people will baste the top with egg or milk. For puff pastry, I never bother, and it always comes out fine. After being in the oven at approximately 220 degrees for 20 - 25 minutes, or until the pastry rises, take it out and score the top. The lovely flaky texture of the pastry makes a pie almost a whole meal in itself.


  • The lovely flaky texture of the pastry makes a pie almost a whole meal in itself.


Posted on 3 Comments

Mashed Potatoes with Chilli Pepper Topping using Scotty Brand Kestrel Potatoes

Scotty Brand sent us some lovely Kestrel potatoes before Christmas.  They are fabulous for using for lots of potato things, boiling, baking or roasting.  Mashing is just one of the ways that they can be used really well.

Potatoes are really quite good for us.  I read a lot of negativity around root vegetables, and I can never quite understand the reason for it.  They are high in folic acid which helps our immune system and our white blood cell production, so for that reason alone, I think they should stay part of a balanced diet to eat well.

With around 93 calories per 100 grams, it is easy to count them into a good meal plan,

I like some plain cooking with potatoes and for this recipe, I kept it very simple indeed.

Mashed Potatoes with Chilli Peppers

Lesley S Smith
4 from 1 vote
Prep Time 10 minutes
Cook Time 20 minutes
Total Time 30 minutes
Course Sides
Servings 6

Ingredients
  

  • 3 - 4 Kg Kestrel Potatoes Scotty Brand Potatoes
  • 2 Oz Butter
  • 100 Ml Fresh Milk
  • 2 - 3 Chillies or Peppers Choose brightly coloured options and chop finely

Instructions
 

  • Simply boil potatoes in a pan for 15 - 20 minutes until soft.
  • Drain potatoes and begin to mash. After a minute, add the butter and mash a few more times. Then add the milk to finish mashing your potatoes into a thick creamy consistency. I add my milk a tablespoon at a time, just in case. Too much milk will also spoil the consistency of the potatoes.
  • Serve and top with chopped chillies or peppers (or both)

scotty-brand-blogger-badge

Posted on Leave a comment

Ainsley Harriott Winter Warmer Hamper Review

A huge thank you to Ainsley Harriott for the lovely Winter Warmer hamper that arrived at the Scottish Mum Blog household for review.   The pack was just what we need up in the cold in the North East of Scotland.  It gets pretty chilly here and standard winter clobber usually involves multiple layers of anything that keeps us warm.  The hamper organisers must have known just how much a new set of winter cosies was needed in our home.

Who is Ainsley Harriott?

You know the one.  That chef off the TV.  The one who did Can’t Cook, Won’t Cook, and had us all glued to our TV screens.  If you don’t remember him, you really missed out and it might be a good idea to pop over and see some of his product ranges.

He’s also been on Ready Steady Cook, where he spent many years between chef and host.  Most of you will probably remember him from Good Morning with Anne and Nick.

Having moved to being an author and cracking the US, Ainsley has now launched a new product range of Cup Soups.    We’ve been happy to try them out.

Winter Warmer 3

We had the full Ainsley Harriott Cup Soup range to try, with a lovely mug to eat it in, and to add to it, they also sent some goodies to help keep us warm in winter.

Winter Warmer 6

A lovely hat, scarf, pair of gloves and cosy covered waterbottle with some packs of tissues by Emma Bridgewater filled up the hamper nicely, and finished it off with a gorgeous Lily-Flame Silent Night Sweet Dreams candle which has the kind of earthy but sweet smell that I really like.  As a chandler myself, I only like good quality candles and this one fits the bill perfectly.   I’d buy that fragrance oil if I knew what it was…..

The Cup Soups had to be tried before reporting back.  I’d have to say my favourite is the New England Style Vegetable Chowder.

Winter Warmer 5

We tried all of these:

  • New England, Style Vegetable Chowder – 97 calories
  • Italian Style Minestrone Soup – 85 calories
  • Bombay Potato, Pea & Spinach (my mums favourite) – 106 Calories
  • Tuscan Tomato Mozzarella & Chilli – 84 calories
  • Szechuan Hot & Sour (adored by two kids) – 62 calories
  • East Indian Mulligatawny – 110 calories

Cup Soups that I’ve tried before tend to be watery with some dried up croutons in them, so I am happy to report the lovely consistency of good soup which dissolves well into boiling water.

Ainsley has also launched products including cooking sauces, risotto, croutons and unusual rice accompaniments.  I really quite fancy trying the Chilli & Lime Flavoured Quinoa & Basmati Rice.

Winter Warmer 1

Posted on 2 Comments

Guest Recipe: Carol’s Caribbean Christmas Cake

This is a fabulous Guest Recipe, featured and supported by Country Products.

We all want to know how to make fabulous cake when Christmas comes around, and the Caribbean Christmas Cake looks and sounds like  a worth cake to try out for special days.  I hope you enjoy it.

Carol’s Caribbean Christmas Cake

Carolann

Ingredients
  

  • 300 ml Apple Juice
  • 100 ml Rum
  • 225 g Butter
  • 225 g Soft Brown Sugar
  • 1 tbls Treacle
  • 4 Large Eggs
  • 225 g Plain Flour
  • 1 tsp Mixed Spice
  • 1/2 tsp Ground Ginger
  • 1/2 tsp Nutmeg
  • 170 g Chopped Nuts
  • 900 g Mixed Fruit
  • 1 Orange Zest
  • 1 Lemon Zest
  • Assorted Glace Fruits
  • Brazil Nuts
  • Almonds Blanched
  • Apricot Glaze

Instructions
 

Cake

  • Soak all the fruit in a bowl the day before in the apple juice and rum. This plumps up your fruit and will make your cake wonderfully moist.
  • Grease and line a 20cm tin.
  • Weigh out your dry ingredients into a bowl (Flour, mixed spices) and set aside.
  • Cream butter and sugar and add treacle and mix well.

  • Add the orange and lemon zest.
  • Add the eggs a bit at a time. If you get curdling add some flour between pouring in your eggs.
  • Drain your fruit and add to the mix with the chopped nuts.
  • Pour mixture into your tin. And line the outside with brown paper or newspaper and secure with string. This stops the sides burning.

  • Bake at 150 degrees for about 4 hrs. After 3 hrs check by pricking with a skewer and if it comes out clean then it’s done. Leave to cool in the tin and then turn out, prick the base and drizzle rum over.
  • Wrap in baking paper and foil and store in a tin.

Icing and Decorating

  • Place cake on a cake board.


  • Arrange all of your glace fruits and nuts on top. Be creative!
  • In a pan place your apricot jam (about 4 tbsps) and a tbsp of water.
  • Bring to the boil stirring all the time until it is smooth then take off the heat. Add a tbsp of rum and stir well.
  • Using a pastry brush, brush over the fruit with the glaze. The glaze helps preserve your fruit, nuts and cake.
  • Brush the sides of your cake with your glaze.
  • Now roll out your marzipan in a long roll and make a collar to go around your cake making sure it goes about ¼” above the top of the cake.
  • Roll out your fondant icing and again make a collar to go around the cake to cover the marzipan. Be sure to dampen the marzipan before adding the icing so that it sticks to the marzipan. I always use a measure when doing this procedure so as to get the right size of collar around.
  • With the extra ¼” push down towards the cake. This is the lip where you will add your holly leaves.
  • Make a small amount of royal icing for piping your leaves on.
  • Cut out your holly leaves. Make sure you cut out plenty in large and small size.

Notes

Depending on when you make your cake feed it with rum but if you make it 2 or 3 months before Christmas then just feed it once or twice a month. Too much feeding and your cake will become soggy.