


I decided to take blogging mobile, and tried a nexus 7 from Argos.
I’ve used a Nexus before as my youngest has one for games and reading, but I’d never tried to blog using one.

I didn’t have long to wait for my box and I had to be careful as I plan this to be a Christmas present for my eldest.
The box is small, strong and actually quite tricky to get open. It’s very closely packed so there seems to be no room for movement within the box which is a good thing. Google tends to make for good computer programmes, so it isn’t really a shock to find that their tablet version has been such a hit with it’s reasonable price tag and fast responsive screen.
The 7″ screen is lovely and shiny and the weight of the Nexus is actually quite reassuring in your hand. In the box is the Nexus and a charger cable and plug.

When I switched on, I was greeted by several very easy to follow screens that talked through how to set up and create a Google Account. When it loads up, the apps and possibilities to put widgets with changing and updating information on the home screen is fairy easy to navigate.
Google has made the set up pretty intuitive so there really wasn’t much to worry about at all and most Internet savvy kids would manage to do it without much problem at all.

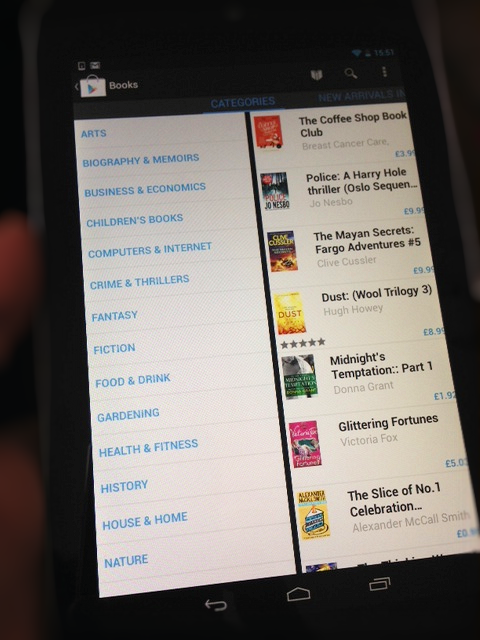
I hadn’t had a chance to look through the book store on Android so it gave me a good opportunity to have a good look around and there seems to be plenty of choice, and also the ability to download a Kindle app which is always a must on any device that I ever use. I have a fair few books from Amazon that I’d like to keep hold of.
Settings are fairly comprehensive, as are the parental options. We can set up a different account for each member of the family on one Nexus 7 which impressed me very much. That means I can have my apps on one account and kids can have a different account with their own apps on the same wee machine. That’s fairly impressive to me.
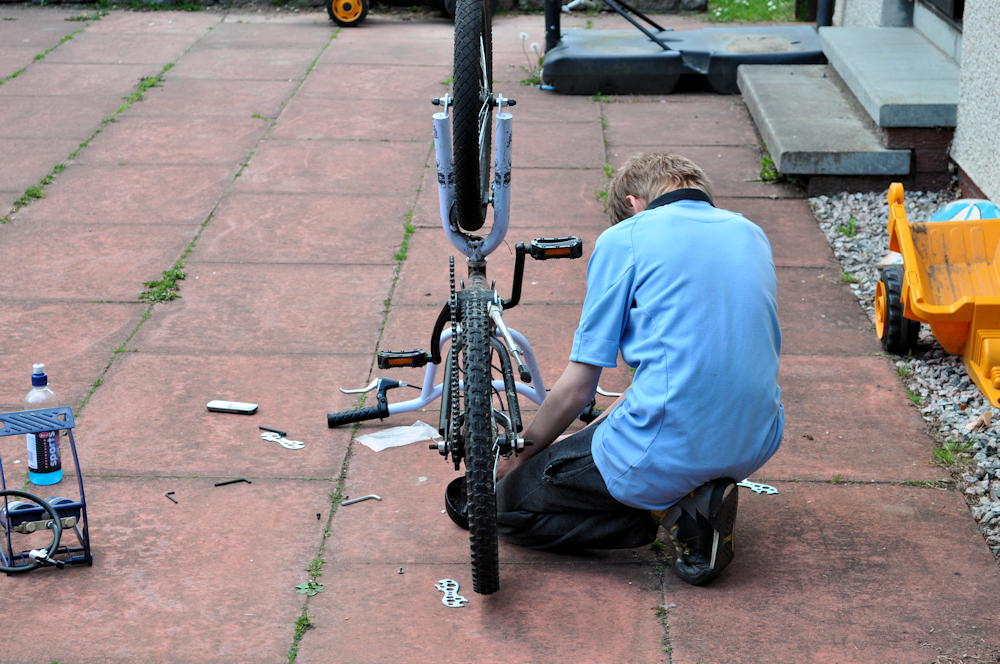
More new territory for me was downloading the WordPress app. It’s simplified on Android, but it’s also more than enough to be putting some blog posts on. The Nexus I have has the front facing camera which is basic, but it’s fine for doing things like Skype. Kids can use it for taking pics of other things and an app download really helps to make using the camera easier.
I believe the new Nexus 7 has a back facing camera for regular style pictures, but for my kids, I’ve found the one on my version perfectly adequate as they mostly just want to take selfies anyway.

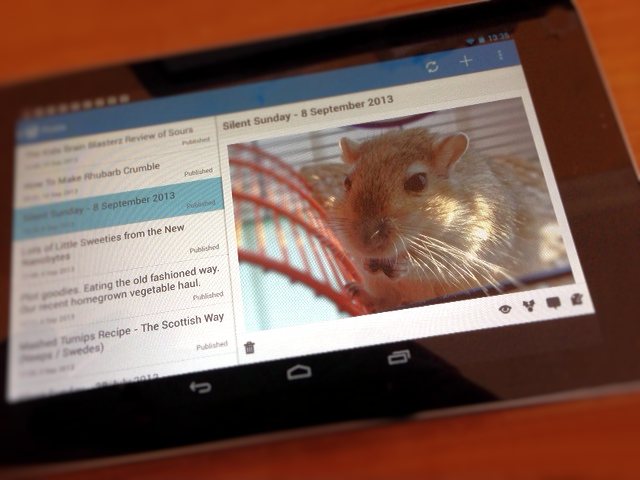
I did a fairly simple blog post for a first one on the Nexus. A simple silent sunday one where one picture is posted with no words to tell its own tale. To get a better quality picture, I sent one from my phone to the Nexus by e-mail and simply picked it from the options on the WordPress write new post menus.
For typing, I found the keyboard actually fairly good and easier to master than the Apple one when I first tried that. The screen is very responsive, very very clear and pleasant on the eye to look at. It really is easy to see why it took the tablet computing market by storm when it came out and has had such rave reviews.
I’m going to potter with the Nexus for a couple more days and then wipe it clean and set it up again with my eldests information and e-mail. He is going to be one happy bunny indeed. I can’t justify the price of iPads for all my kids and these do the job pretty nicely at £159.
My Nexus 7 is a Wi-Fi version which hooks up quite nicely to my O2 phone as a hotspot when out and about and when there isn’t any Wi-Fi available.
With one Christmas present secured, please say it’s really not too early to talk about Christmas, Santa and Elves.
We gratefully received a Nexus 7 from Argos?
A new book has been published that provides a lasting tribute to a fantastically courageous schoolboy who lived in Aberdeen.
Sadly, Max lost his life at the very young age of 11, which is the same age as my middle special needs child. I didn’t know Max, but I can understand that it would be so difficult to think of something that would provide a future memory, so I applaud Max’s family for finding a special and personal way to share his life in a fun and happy way.
Max had a serious heart infection that led to a aneurysm after being diagnosed with DiGeorge syndrome as a child.
Despite surgery within a few weeks of birth, Max Lechner lived a full and happy life. He attended Cults Primary School where he was a popular pupil and friend.
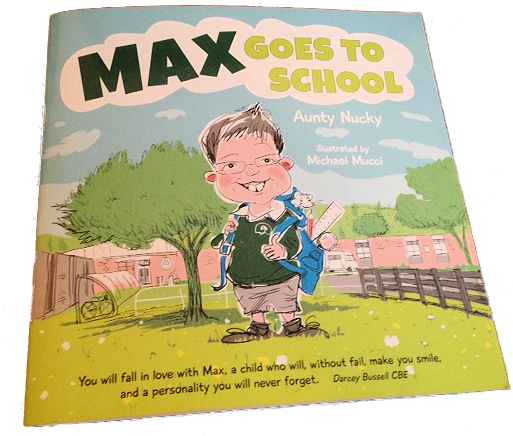
The book is called “Max Goes To School.”

When it arrived, my youngest child immediately picked it up, read it and chuckled all the way through. The book was written by Max’s aunt Nicky Bakonyi and the pictures were created by Michael Mucci.
Darcy Bussel CBE, said “You will fall in love with Max, a child who will, without fail, make you smile, and a personality you will never forget.
The book was launched on the 28th August by family and friends of Max and is a very light hearted story of a typical day with Max playing the leading role.
It is a children’s book and is a really good read and is very appropriate for all children as it is really a lovely, funny and heartwarming tale all the way through, from Max chasing his pet mouse Bertie to wolfing down a huge stack of pancakes. I wonder who Mr Smithereens is, and if he is happy with his cartoon character !!

The book is funny, it’s clever and it’s a great story that will appeal to all children.
The proceeds from the book will be divided among four good causes.
With all our support and buying a book that would be a great Christmas stocking filler, the book will support children in the chosen charities.
The book is available at Waterstones and John Lewis in Aberdeen and can be easily sourced in the North East and Glasgow.
To buy online, the book is available from e-bay for £5.99, or find out more information about Max at www.maxgoestoschool.com
It’s really really good and hopefully it is the start of a whole series for our kids to enjoy.
Disclaimer: We were provided with a copy of Max Goes To School but were under no obligation to write about it. I’d like to thank the PR for the book as it is actually very lovely and it is well appreciated by us.

Sloppy Joes food is actually quite simple and easy to make. We don’t have to be expert cooks to rustle up something as quick and easy as this. It’s more known as Sloppy Joe from America and usually involves some kind of ground beef, vegetables and tomato ketchup type sauce bases.

I was lucky enough to try some of the lower fat than chicken beef which is Piedmontese.
I had 500g of mince and a plan to feed all 6 of us with it. It was exceptionally easy.
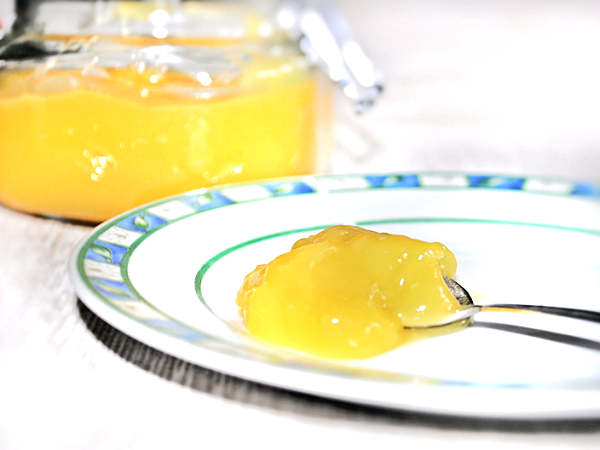
Making recipes easy and quick to do always sits well with me. Toffee is quite hard to make in the microwave, but lemon curd is as easy as saying 1.2.3. To cook lemon curd (lemon cheese) on a stove, you need to do a pan within a pan of water method as the curd can’t sit directly on the heat unless you want it to curdle.

Buy lemons fresh. Lemon juice in a bottle won’t cut it for this unless you want a very tart curd. This made a fair bit and in the microwave you need a good-sized jug or bowl as it does expand a lot while you heat it up. I’d be tempted to go down to quantities of 3 eggs, 200g caster sugar and 100 or so grams of butter at my next attempt as I ended up with rather a lot. I started off basing mine on the recipe at BBC Food and their quantities probably are good to follow if you want less than we had.
You will need a couple of small jars to put your curd into. Make sure they’re washed and dried before using them and your curd will keep for up to 3 or 4 weeks in the fridge.
Littlest received his Brain Blasterz for review and the box had his name on it. He was intrigued, in awe and it put a right smile on his face to get something in the post that was actually for him.
The sours craze seems to be going through lots of kids at the moment. I’ve no idea if girls are so into pulling faces as they eat sweets, but having boys who have boy friends, they seem to outdo each other with who can actually eat a sour without pulling a sour face.
With the spray candy, the kids had a competition for who could keep a straight face while having a scoosh sprayed into their mouths. I tried one and I couldn’t stop myself making a face, so I have no idea how they managed 2 and three sprays and to stand there unmoving. Brave children that they are.

These didn’t last long I have to say. I could just about manage the Brain Bitz mini bonbons which weren’t overly sour and were more like regular candy, although I didn’t try the apple ones. I suspect they were more sour than the rest.

The mega sour lolly dippers were much like I remember sherbet dippers from when I was little, but the kids wouldn’t spare one for me to try.

Over on the website, there are games and downloads for fans and they are giving away free sweets online on their Facebook account in weekly competitions. On Fridays, one member will be picked for prizes like sour sweets, travel mugs and t-shirts.

The kids review of Brain Blasterz bubbled down to one word “awesome.”
Disclaimer: We were sent a selection of Brain Blasterz sweets to review.
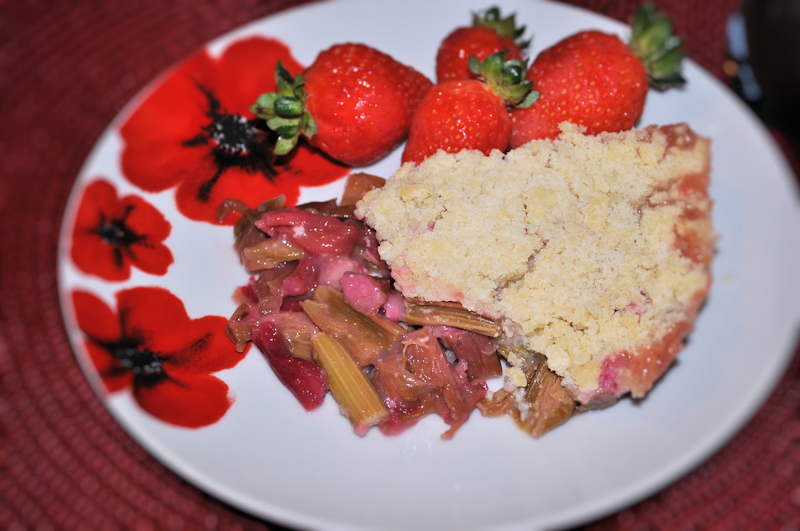
I have not great memories of rhubarb as a child. We had masses of the stuff growing in our garden and I could be sure of endless puddings and being made to eat horribly sour and tasteless desserts. It wasn’t until I was an adult I realised that the rhubarb we had wasn’t really suitable for dessert, and that it should have had sugar added to make the rhubarb crumble recipe more palatable.

I needed to revisit the rhubarb as we’ve had some from our plot. It’s not the greatest looking rhubarb around, but it worked just fine.
While you can reduce the sugar in this recipe, I needed it to entice my kids to eat it. I made a smaller version for myself with Truvia which made it totally sugar-free & it came out ok so I think I’d make the bigger one with that next time.


My kids had the pleasure of testing out all three new flavours of Nanobytes recently. They’re out in the shops this month and my kids will be eagerly keeping an eye out for them arriving.
Nanobytes says:
Some time ago, far far away in space… The sky was filled with edible planets drifting dangerously close to the stars. Planet Nano was made up of 3 earth-shattering flavours. Strawberry, Bubblegum & Cola. When Planet Nano collided with a star it exploded; Filling the sky with lots and lots of little sweets.
Project-Nano Astronauts were sent out to collect these rare and delicious chewy sweets, and now they’ve brought them back home to Earth, for you to enjoy the delicious flavours too.
It was nice for youngest who tends to find himself last in the queue for things as he rarely ever is lucky enough to be picked, or win, or be singled out for anything.
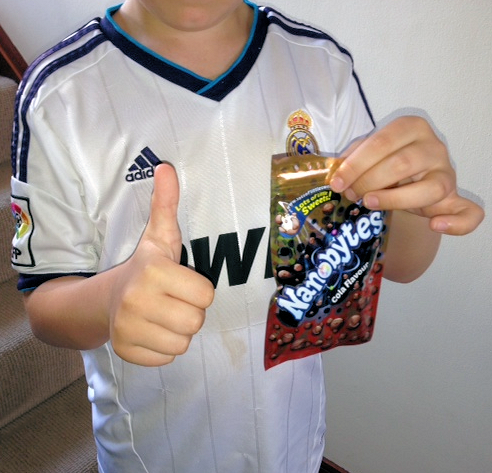
Nanobytes are new, they are gluten free and have a fab closure detail that means they won’t spill all over the floor, or car, or even their beds if they sneak some sweeties upstairs.

Some people have compared them to Millions, but they are different. The candy is softer and in different flavours.
They’ll come in Strawberry, Cola and Bubblegum. My favourite was the Strawberry, but the kids liked Cola the best.

The packs are 65g and there is also a smaller 25g pocket size.
I suspect there’ll be a few pennies spent from pocket money on these in the near future and littlest will be able to proudly say “see, I told you I was one of the first in the UK to try these.”
The Nanobytes website has games and downloads for kids to experiment with and a Nanonauts area where completed applications will be entered to win some free sweeties.
Disclaimer: We were sent Nanobytes to try out before they reach shop shelves.
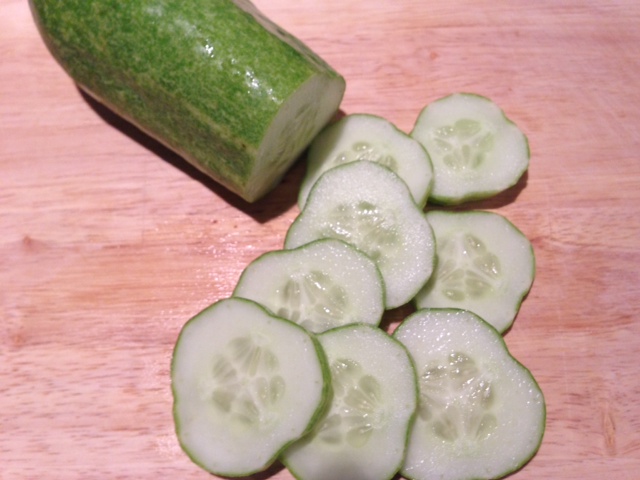
Last Sunday, we had the pleasure of eating lots and lots of green vegetables with our evening meal.
Every last one of them had been grown in our plot and were prepared and cooked for our Sunday Lunch. The pictures are not the best as it was really dull and not the best light to take pix, but you get the general idea.
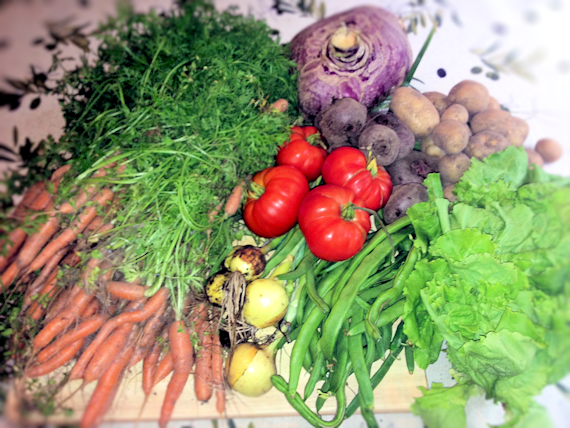
We had beetroot, carrots, red and white potatoes, onions, green beans, lettuce, turnip and fresh peas.
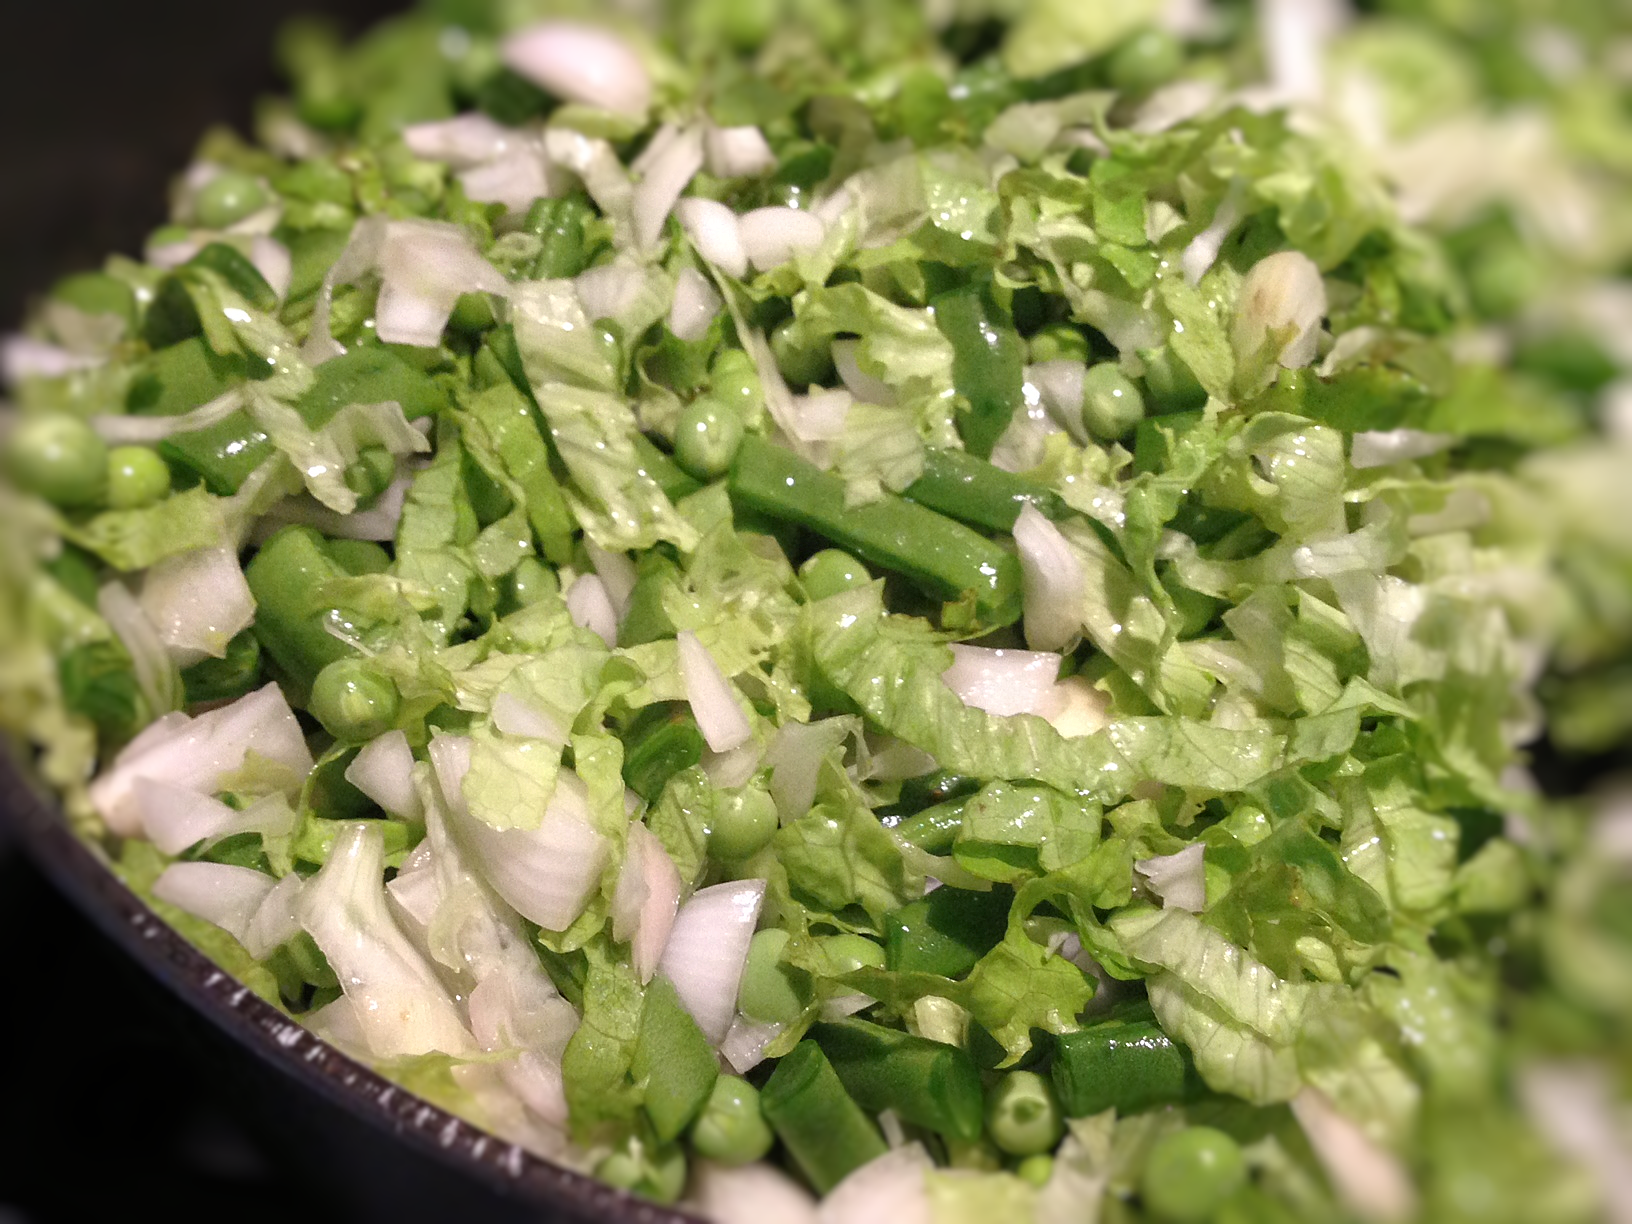
I lightly stir fried the onions with the lettuce chopped up small and the green beans.
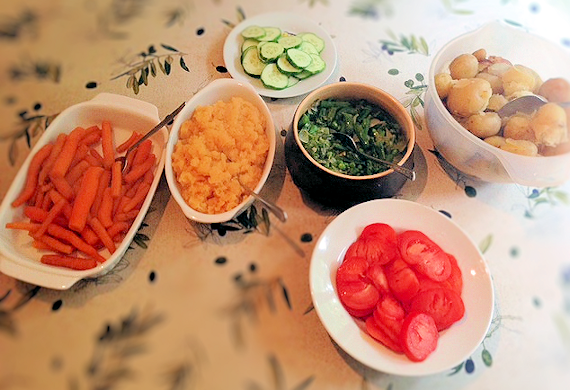
Tomatoes were just sliced and tasted awesome.

Sliced cucumber didn’t last long with eldest on the go.

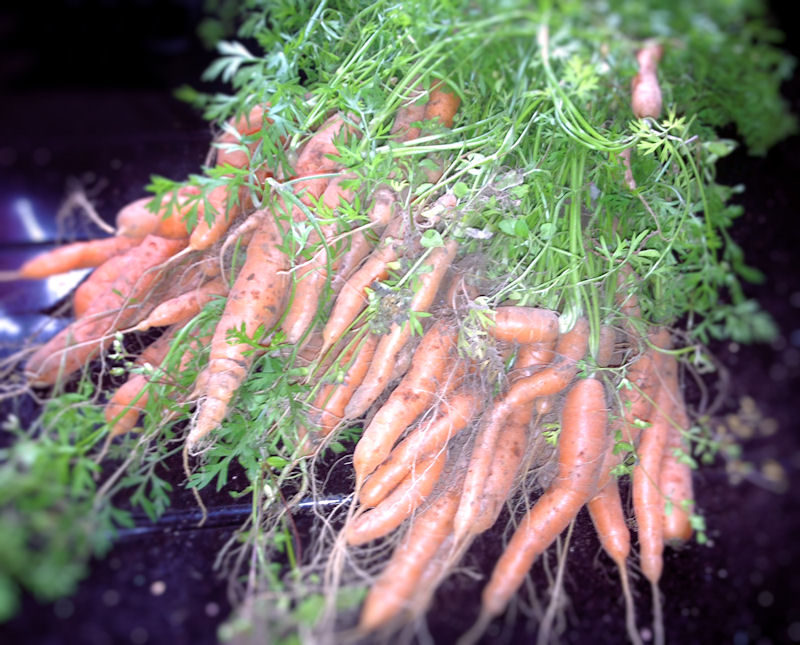
The carrots I steamed and the potatoes just plain boiled although their skins shed slightly, but it didn’t change the fact that they all tasted completely awesome at the table. The picture is rubbish, but you get a good feeling for just how much veg was cooked.
We’ve had to start pulling up young veg as the plot raiders have been out in force and seem to be stealing to order. Some plot owners have lost whole crops of some veg and the thieves even cut the tops off some carrots and put the tops back in the ground to make it look like they were still there.
It looks like they are stolen to sell at some market or in some community somewhere on Sundays, as most veg seems to sadly disappear on a Saturday night. We’ll never manage to grow prized and huge veggies with pulling them out young, but what we do get tastes amazing.

This is how my grandmother made her turnips. I know the supermarkets call them swedes, and in England they may be just that, but up here they’re more widely known as neeps or turnips.
We grew our own this year in the plot and have been pleasantly surprised at how well they turned out. I like them simmered for up to 2 hours which makes the flavour more intense and darkens the vegetables. I didn’t have long enough for this recipe, so they’ve only been simmered for about 40 minutes and are quite light in colour.

I was surprised at how easy it was to peel and chop our own fresh turnip straight from the ground in comparison to the bought ones from the shops. The taste is also much sweeter and more attractive to the kids. I know the picture doesn’t show them as how nice they look, but you get the idea of how they work. They’re fabulous alongside the vegetables for roast dinners, haggis and chicken meals. One of my boys just likes potatoes with his.
Our neeps from the plot are fairly big. I only needed one for 6 of us. I usually have to use 2 or 3 from the supermarkets for us all.


My old machine said hot or cold water. No way cold water cooks the veggies in my old machine. Actually…
[…] liquid. Using boiling water for stock can speed up cooking, according to user tips published by Scottish Mum (Practical…
Quick, creamy, and packed with zing this is my kind of lunch Thanks for the easy, nourishing recipe, Scottish Mum.