Update: Inserting the sim on Osprey 2.
This seems to trouble some people. I can only show you how mine is inserted. Locate the little cover with the sim image on the side and gently pull it open. With the sticker on the back of the Osprey, I’ve taken a picture of which way to put in the sim. If your Osprey is sitting with the EE logo on the top, contacts will face up, and if it’s sitting with the smooth back of the Osprey upwards, it’s the EE sticker on the sim on the top. Hope this helps a bit. Your sim needs to be exactly in the middle, so pop it in gently so that you can remove it if you miss the centre slot. When it slides in easily, use your nail, or a pin to push it in until it feels like it’s clicked.


——————————————————————————————————
Our broadband is dire. I don’t like to shout too loudly, as some of my neighbours have it even worse than we do, but if there’s more than one person hooked up to the WiFi, there’s no hope of  getting much of anything done.
At times, our speed isn’t much more than the old dial-up. To make matters worse, if the broadband goes down, there have been no 3G or 4G connections to fall back on with a phone. I’d tried 3, Vodafone and O2, but at least with O2, we get calls. We couldn’t even get that with Vodafone.
I know some of you probably think we live out in the sticks, but although we’re a village on the outskirts, we’re still actually classed as being in Aberdeen, and not the Shire. Yes, that’s right, we’re in a City and the broadband needs a good talking to.
We’ve been promised faster internet for years, but after an extended slo-mo outage, I decided to get myself a hold of one of the EE Mobile WiFi units. To be honest, I expected very little from it, as our trials for other networks have been so poor. I switched it on, fully expecting it to have to go back, then I sat it on a window ledge, and what do you know – I got three bars of 4G! I think my neighbour heard me whooop…

I can’t move it around too much, as there only seems to be a few spots where the signal is this good, but I can join it, just like any other hub.
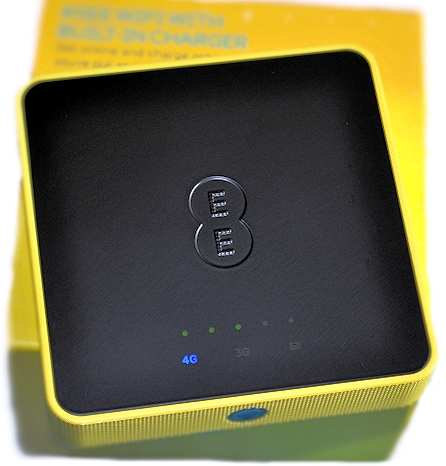
I’ve seen the reviews that said the unit was quite large. I don’t know what they’re reviewing, but I don’t find it large at all.
There is a mini version of the Osprey 2, but that does not allow you to charge a phone if you’re out and about. I can see my youngest wanting a mini for Xmas though.
As for the data plans… I do find them slightly on the expensive side, so I’ll be restricting my useage on the gadget, but it’s finally reassuring to know, that when my internet dies totally, I can still actually use my phone to get online….or turn off automatic updates on my computer, to save data.
Anyway, you can choose pay as you go, or sign up for monthly payments. If you’re using it a lot, then monthly would be the way to go. This is the first time I’ve tried a mobile WiFi gadget in my house, and there isn’t an alternative. I’m just happy to see a light flashing anywhere, on any gadget that connects to the internet.
Easily pleased aren’t I? Perhaps I should just get a life outside the internet….

In the box:
- EE4GEE Osprey 2 Unit.
- Quick start guide.
- Top up card.
- Sim card.
- Little carry pouch.
- Charging cable.
Disappointingly, the cable is ultra short and there is no plug. I found that a bit inconvenient.
For surfing the web, I have to say, it is much preferable to our BT Broadband at present.
In Use
I’ve popped it in my bedroom, where I’ll use it to check mail, surf a few web pages, social media, and some low data hungry things. Our WiFi doesn’t work well up there, even with a booster, so moving onto this for the evenings will make me very happy indeed. Now, I’ve just got to work out how long I can make my original 6GB of WiFi last for.
With one machine under our belts, I doubt I would actually swap this pay as you go sim for a monthly one, as the units are free on a monthly package. If I decided to tie myself down to a monthly payment, I’d simply get them to send me a new unit too. Possibly the mini as a Christmas present. It would be the same price overall.
Surfing on 4G is very much faster than with our broadband. I went for a walk, popped the Osprey into my pocket with my phone and was able to download messages and read the news on a local park bench when I stopped for a breather. It’s the first time ever, that I’ve had any connection in our village. I doubt I will do without this gadget in future, unless O2 get their finger out and give us 4G too.
Littlest is simply thinking about having WiFi on his travels. When we go away in the van, we tend to get zero signal wherever we go for data, but some people have been mentioning finding EE signals, so if we get WiFi in a place where our phones pick up nothing, I might just kiss the boots of whoever invented these little magic gadgets. We can connect up to 10 devices to these units, so they’re quite versatile. I just wish the data was cheaper.


My old machine said hot or cold water. No way cold water cooks the veggies in my old machine. Actually…
[…] liquid. Using boiling water for stock can speed up cooking, according to user tips published by Scottish Mum (Practical…
Quick, creamy, and packed with zing this is my kind of lunch Thanks for the easy, nourishing recipe, Scottish Mum.