Posted on 2 Comments

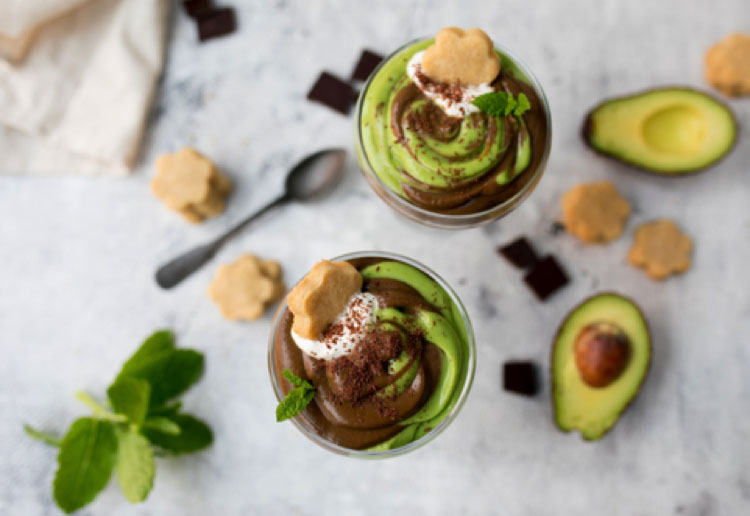
Sugar Free Chocolate Mint Avocado Mousse

Guest post with recipe developed by Nicky Corbishley, the founder of Kitchen Sanctuary blog.http://kitchensanctuary.com/

Nicky is also brand ambassador for NEFF, after winning the Cookaholic competition last year, and is currently helping gathering true and passionate cookaholics around the country to enter this year’s competition.

Neff is currently looking for new entrants to this years competition at: http://www.nextcookaholic.co.uk/

One of his fantastic recipes is included in this post.  Enjoy..

Refined sugar-free chocolate mint avocado mousse with shortbread bites

  Makes 4 servings of mousse and 28-30 shortbread bites

Chocolate Mint Mousse:

  • 4 ripe avocados, peeled and de-stoned
  • 2 very ripe bananas, peeled
  • 160ml unsweetened almond milk
  • 1 1/2 tsp vanilla bean paste
  • 1/8 tsp green food colouring gel (optional)
  • 3 tbsp honey
  • ½ tsp peppermint extract
  • 3 tbsp raw cacao powder
  • 2 tbsp Greek yogurt
  • 1 small square good quality, sugar-free dark chocolate, grated
  • Mint leaves to garnish

Shortbread Bites:

  • 100g unsalted butter, softened
  • 3 tbsp real maple syrup
  • 100g plain flour
  • 50g rice flour
  • pinch of salt

Instructions:

  1. Start with the shortbread. Using a stand mixer, or by hand, mix the butter and maple syrup until well incorporated. Add the two flours and the salt, and mix again until just incorporated (don’t over-mix as your cookies will be tough).
  2. Scoop out the dough and squash it together into a big ball. Place it onto a lightly floured surface and roll out to approx. 6mm thick. The dough is quite delicate and will try to crumble in places. Just push it back together if it crumbles.
  3. Using a small (approx. 3-4 cm) cookie cutter, cut out the cookie shapes – squashing and re-rolling the dough as needed. Dip your cookie cutter in flour before each cut, to prevent it sticking to the dough. Place the cookie shapes on a tray or chopping board, cover with clingfilm and refrigerate for 30 minutes (this will help the cookies to maintain a sharper shape once in the oven).
  4. When you’re ready to bake, preheat the oven to 170c CircoTherm. Take the biscuits out of the fridge and take off the clingfilm. Place baking parchment or a silicone mat onto a large baking tray and place the cookies on the tray. They shouldn’t spread, but leave at least 1.5cm space between each cookie. Place the tray in the oven and bake for 8-10 minutes, until the edges start to turn slightly golden. Remove from the oven and allow to cool on the tray.
  5. Now make the mousse. Place the avocados, banana, almond milk, vanilla bean paste, food colouring gel (if using) and honey into a food processer. Blend until smooth and creamy. Spoon half of the mixture out into a bowl and stir in the peppermint extract.
  6. Add the cacao powder to the remaining mixture in the food processer and pulse until well combined.
  7. Spoon the two mixtures into two separate piping bags with a large circular or semi-circular tip (alternatively use disposable piping bags with the tips cut off – no nozzle needed). Holding both bags at the same time, with the tips next to each other, pipe the mousse into serving glasses in a swirled pattern.
  8. Top each mousse with ½ tbsp Greek yogurt and a small sprinkling of grated dark chocolate. Push a shortbread biscuit into the blob of Greek yogurt and garnish with a few small mint leaves.
  9. Serve the mousse immediately, with extra shortbread bites for dipping.
 

Posted on 2 Comments

High Protein Rice – An Experiment

I’m into eating with high protein in my food these days.  The next logical step after trying the Konjac version of rice, which is pretty much zero calorie, and not really my cup of tea, was try the actual protein rice.  I got some from MyProtein, and gave it a whirl.

It’s made from vegetable proteins with durum wheat semolina, so unlike water noodles (konjac) which are slimy, rubbery, and have a bit of a fishy smell uncooked, actual protein rice looks more like regular rice.  The konjac rice and I didn’t get on at all.  Not one little iota…..

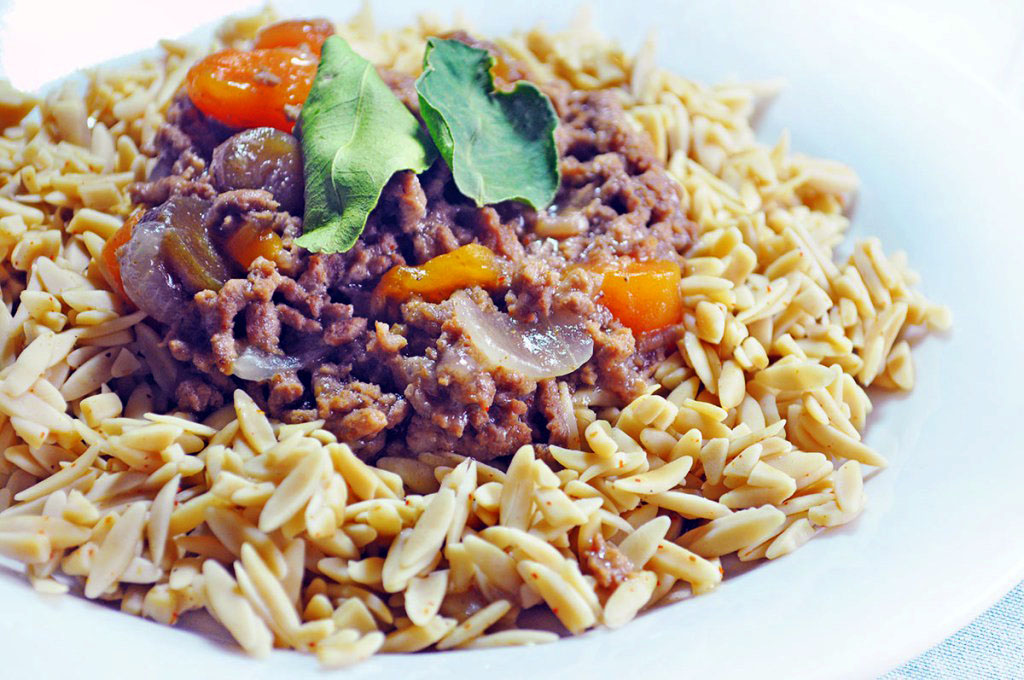
Protein rice isn’t quite like the rice you’re used to though, as it’s a different size and shape.  It’s a little shocking after being cooked too, but the taste and texture is very much like rice, so is much more pleasing to me as an additive to my food.

Per serving or 50g, there is 172 calories and a whopping 30g of protein.  Yes, it’s tempting to go the konjac route and have almost zero calories, but I just couldn’t sacrifice the rice texture for lack of calories. The picture above is uncooked, and yes, it does very much resemble rice, but with larger grains.

The cooked version does give you a bit of a surprise as it expands far more than I was expecting.  It looks like little grains of nuts, but the texture is very ricey.  I threw in a few pinches of chilli powder to the pot while my rice bubbled for the 9 minutes it takes to cook.

To make this a full meal, I cooked some mince with onions and carrots, added chilli powder and nutmeg to the cooking mince and served it up for supper. Full marks for a simple meal, and one that’s packed full of goodness.

I liked it so much, I just went and bought a few boxes…..

Posted on 2 Comments

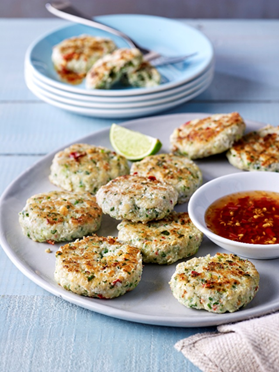
Thai Fishcakes with Chilli Dipping Sauce

Guest Recipe.  When it comes to healthy eating, home cooking is a great place to start. But when the reality of all that dicing, slicing, washing, chopping and prepping to make holier-than-thou fresh nutritious meals dawns, it’s easy to lose your way! Whether you’re going gluten-free, paleo, low-carb or FODMAP, the Very Lazy range of pre-chopped and ready-to-use essentials from chopped garlic, chillis and ginger to lemongrass paste and cooking concentrates will make it easy as pie (or pie’s much healthier cousin).
Thai Fishcakes with Chilli Dipping Sauce

Very Lazy
5 from 1 vote
Prep Time 10 minutes
Cook Time 10 minutes
Total Time 20 minutes
Servings 4

Ingredients
  

  • 450 g skinless and boneless cod or haddock fillets roughly chopped

  • 1 teaspoon Very Lazy Chopped Ginger

  • 1 tablespoon Thai fish sauce

  • 1 teaspoon Very Lazy Lemongrass Paste

  • 1 teaspoon Very Lazy Garlic Paste

  • 2 tablespoons freshly chopped coriander

  • 1 teaspoon Very Lazy Chopped Red Chillies

  • 1 egg white

  • 2 spring onions thinly sliced

  • 1 tablespoon oil for frying


  • FOR THE LIME CHILLI DIPPING SAUCE

  • 2 tablespoons rice wine vinegar

  • 1 teaspoon Very Lazy Chopped Red Chillies

  • finely grated zest and juice 1 lime

  • 2 teaspoons caster sugar

Instructions
 

  • Place all the ingredients for the fishcakes in a food processor and blend to a smooth paste. Put the mixture in a bowl and stir in the spring onions. With slightly wet hands, shape the mixture into 12 patties.

  • In a small bowl, whisk all the ingredients for the dipping sauce, until the sugar has dissolved.

  • Heat the oil in a large frying pan and cook the fishcakes for 4-5 minutes each side until golden brown and cooked through.

  • Serve immediately with the dipping sauce.


Posted on 2 Comments

Very High Protein Pork and Pear Stir Fry – Approx 40g Protein Per Serving

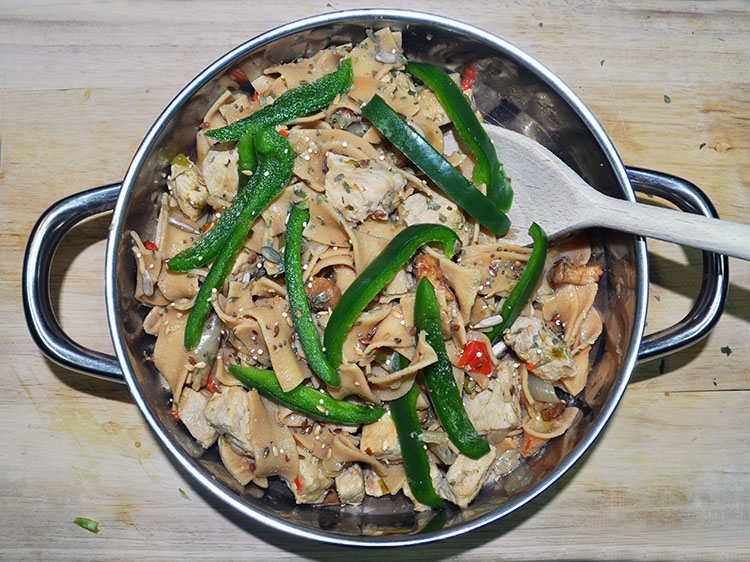
I made this in my Instant Pot 7 in 1, but you can make this by using a good old wok or stir fry too, you’d just need to adjust the times you cook the meat for, to ensure it is fully cooked throughout.

Very High Protein Pork and Pear Stir Fry

Lesley Smith
A whole meal in a bowl.
5 from 1 vote
Prep Time 10 minutes
Cook Time 1 hour
Total Time 1 hour 10 minutes
Course Mains
Cuisine High Protein
Servings 4
Calories 381 kcal

Ingredients
  

  • 500 g Pork cubed.
  • 50 g Mixed and sliced peppers.
  • 50 g Green Pepper sliced.
  • 75 g Onion chopped.
  • 50 g Wild Mushrooms.
  • 150 g Dr Zak's High Protein Pasta
  • 30 ml Rapeseed Oil.
  • 1 Conference Pear sliced.
  • Dried Parsley.
  • 1 Teaspoon Pink Himalayan Salt.
  • 1 Teaspoon Rainbow Peppercorns.
  • 1 Tablespoon Soy Sauce.
  • 1 Tablespoon Chia and Flaxseed Sprinkles.
  • 1 Teaspoon Parsley and Lemon Seasoning.

Instructions
 

  • Add your pork, onions, salt and pepper, parsley and lemon seasoning, along with half of your rapeseed oil to your pot, and switch on the saute function. Stir fry in the pot, until the pork is seared and the onions are soft. Remove from the pot and place in a trivet.

  • Add the remainder of your rapeseed oil to the pan and add the mushrooms, peppers and pear. Stir fry until the peppers are soft, for a minute or two.

  • Put the vegetables into the trivet with the pork and onions, and a cup of water, then pressure cook for 20 minutes. Remove from the pot and leave the stock in the bottom.

  • Add your pasta to the pot, and another cup of water. You want the stock to cover the pasta, but not drown it. Pressure cook for 15 minutes.

  • Drain the stock, or keep it to use for soup another day. Add the pork and vegetable mix to the pot, with the pasta, add in the soy sauce and stir fry for 1-2 minutes.

  • Serve with sliced green pepper and a sprinkling of parsley, then chia and flax sprinkles.

Nutritional values are estimates.

Posted on 2 Comments

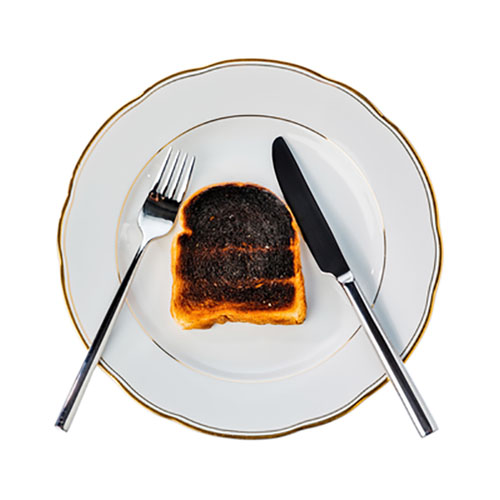
So, Can Burnt Toast Give You Cancer?

This topic smacks right back to earlier days, and the Edwina Currie scaremongering of eggs.  Poor eggs hadn’t done anything wrong, and I was pretty sure that slightly charred food was going to be in the same league….

No point in me just blustering though, as without any evidence, our ‘gut’ feeling isn’t ever going to be enough.  Most of us older people are probably not going to bat much of an eyelid at the claim, but for new mothers, or those with younger children, it probably did cause many of them a right worrying day or two.    And the news since, hasn’t toned it down much either.

And really, how on earth did burnt toast and poor roast potatoes, our Christmas staple, become linked with cancer?

If you read the Guardian, we find out about acrylamide and a 1997 happening in Sweden where cows dropped dead, fish floated lifeless and construction workers became ill.  A subsequent study later showed that the control group also had acrylamide in their systems and that it’s probably present in our environment in some way, despite the chemical being toxic and not found naturally in animals.  The link was eventually found to ‘probably’ be in processed food, more likely in starchy foods like bread and potatoes, cooked at high temperatures.

The Food Standards Agency

Acrylamide is a chemical substance formed by a reaction between amino acids and sugars. It typically occurs when foods with high starch content such as potatoes, root vegetables and bread, are cooked at high temperatures (over 120°C) in a process of frying, roasting or baking.

Acrylamide is not deliberately added to foods, it is a natural by-product of the cooking process and has always been present in our food.

The Food Standards Agency released their Go For Gold campaign.  You can read about it here, from the 27th January.   It aims to minimise harmful levels of acrylamide in our own cooking at home, by:

  1. Aiming for a light colour when frying, baking, toasting or roasting starchy foods.
  2. Checking the pack for cooking instructions and following them.
  3. Eating a balanced diet, with a mix of foods.
  4. Asking us not to keep raw potatoes in the fridge, as they say, keeping potatoes in a fridge can increase acrylamide levels.

Is There A Cancer Risk From Eating Burnt Starchy Foods?

How long is a piece of string?  I have no idea.  Everywhere I have looked, uses the words ‘possible,’ ‘probably,’ or ‘unlikely in daily living.’  Studies are likely to have been carried out at levels far above the consumption of humans, but we don’t know for certain.  Acrylamide could be classed as a possible carcinogen, but then again, so can many other things.

The advice not to burn toast, is likely just a help, to not compound any possible levels inside our bodies already.

Should We Stop Eating High Starchy Foods?

None of us can tell anyone else what they should or shouldn’t eat.  It’s very much a personal choice and we have to look at the potential, then weigh up the risks for ourselves and our families.  For me, that would be daft.  Bread and potatoes are almost a whole food group in our house.

What Do I Think?

Posted on 1 Comment

Simple Fruit Pasty Recipe

Have you ever wondered what to do with those leftover bits from tins of fruit?

How about this…

[fbvideo link=”https://www.facebook.com/ScottishMumBlog/videos/1279362062129739/” width=”500″ height=”400″ onlyvideo=”1″]

Fruit Pasty

Lesley Smith
5 from 1 vote
Prep Time 10 minutes
Cook Time 20 minutes
Total Time 30 minutes
Servings 4 Large

Ingredients
  

  • Half Tin Apples or 200g
  • 1-2 Pear Halves
  • 2 Peach Halves
  • 320 g Puff Pastry or 1 Puff Pastry Sheet
  • 1 Egg
  • 8 g Almond Butter
  • 2 Tablespoons Coconut Sugar

Instructions
 

  • Chop your fruit into smaller pieces, after draining as much fluid from them as possible. Sprinkle a tablespoon of coconut sugar on the top, spreading all over the fruit.

  • Roll your sheet out on a chopping board. I used a sheet. Slice into 4 portions.

  • Take each piece and roll it until it is a square.

  • Break an egg into a cup, add a tablespoon of coconut sugar and beat.

  • Mix the fruit and coconut sugar, which is likely to have broken down by now, until all mixed in, then add the almond butter and mix in.

  • Split your fruit into four sections. Put a quarter in the middle of each square, and then fold over, pressing at the edges to seal with your fingers.

  • Take a knife and slice some breathing holes into the top of each pasty.

  • Bake at 220C Oven, 220C Fan, Gas Mark 7, until brown on the top. Our ovens all vary, and for mine, it took around 20 minutes.


Posted on Leave a comment

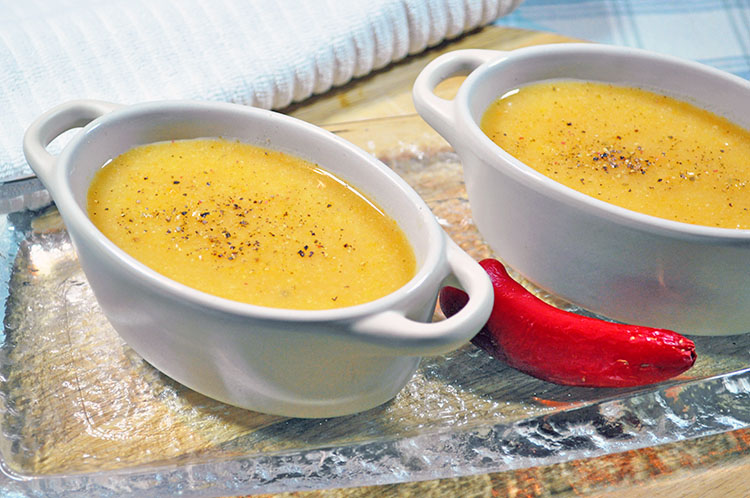
Pumpkin, Carrot and Leek Soup

I made this in my pressure cooker, but it could easily be made in a pot.  In a pot, you will have to remember to stir frequently, and add more fluid, should some boil off in the process.

The proportions are too large for a soupmaker, and I had many mouths to feed that day, so my pressure cooker had to stand in, with some of the lovely pumpkin I’d frozen from Halloween and just sitting waiting in the freezer for a new dish.

I was a little wary of how this would turn out, as it’s the first time I’d defrosted pumpkin, and it seemed a little watery, with a mushy consistency.  It wouldn’t have been any use for anything other than soup.

Pumpkin, Carrot and Leek Soup

Lesley Smith
Optional - Before adding the rest of your ingredients, lightly fry your leek with the rapessed oil, then add your pumpkin, carrot, leek and potato to the pot and allow it to shallow fry for a couple of minutes, while adding 3 tablespoons of water.
Prep Time 10 minutes
Cook Time 30 minutes
Total Time 40 minutes
Servings 6 -8 Bowls

Ingredients
  

  • 500 g Pumpkin, cubed.
  • 250 g Carrots, sliced.
  • 175 g Leek, sliced.
  • 200 g Potato, cubed.
  • 2 clove Garlic or 1 Garlic Cube
  • 1 ltr s, Water
  • 400 ml Semi Skimmed Milk
  • 4 Vegetable Stock Cubes
  • 1 Teaspoon Rapeseed Oil optional
  • Half Red Chilli deseeded and chopped. (optional)
  • Salt and pepper to taste.

Instructions
 

  • Add all your ingredients to the pot, mix well, and cook on high pressure for 30 minutes.

  • Blend with a hand blender.

  • Serve with some chopped chilli or ground peppercorns on top.


Posted on Leave a comment

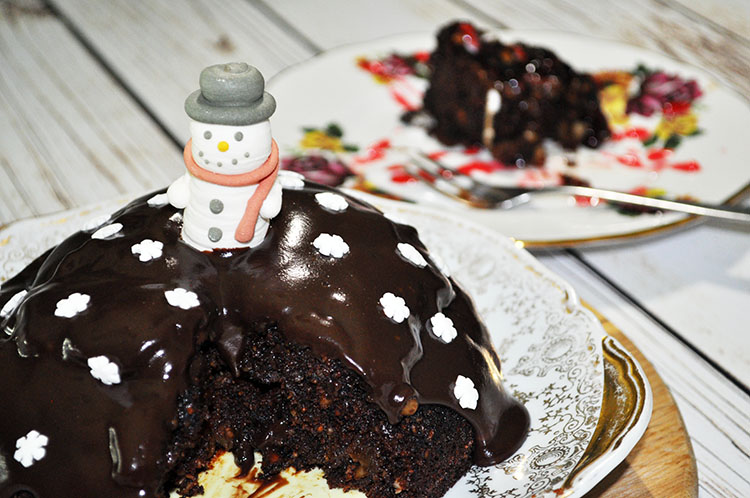
Christmas Sticky Pudding with Chocolate, Coconut, Apple & Cinnamon

This isn’t the version I’ll be using for Christmas Day, as I’ll be using the regular old full fat, toffee sauce version, but I wanted to try something different and see how it turned out, although on Christmas Day, we will have the apple and cinnamon added to the recipe here.

This came about, as I wanted to use something different from butter, and yes, I cheated in some bits for it…….  You’ll see where below.  Even cooled this is going to be very squidgy and lush, and also very coconutty.  Substitute with butter for a more traditional taste.  It could do with that squidgyness for the lack of soaking overnight in toffee sauce.  If you want a toffee sauce, go to my oaty sticky toffee pudding post.  I’ve said serves 6 – 12, as it all depends on your portion sizes. 🙂

Like all sticky puddings, this is much better on the day after it is made, or after it’s fully cooled, when you can re-heat.

[fbvideo link=”https://www.facebook.com/ScottishMumBlog/videos/1251809644884981/” width=”500″ height=”400″ onlyvideo=”1″]

Christmas Sticky Pudding with Chocolate, Coconut, Apple and Cinnamon

Lesley Smith
Prep Time 15 minutes
Cook Time 25 minutes
Total Time 40 minutes
Course Dessert, Puddings
Cuisine Christmas
Servings 6 - 12

Ingredients
  

  • 120 g Chopped Apple
  • 50 g Self Raising Flour
  • 50 g Coconut Sugar
  • 2 tsp Bicarbonate of Soda
  • 100 g Medjool Dates
  • 100 g Coconut Oil
  • 50 g Oatmeal
  • 1 Egg
  • 1 tbsp Black Treacle
  • 50 g Cream
  • 50 g Chopped Nuts
  • 1 tsp Cinnamon Powder
  • 1 Tin Chocolate Middle and Covering
  • Red Food Colouring

Instructions
 

  • Chop the dates into small pieces. Put them into a bowl and pour over a little boiling water and set them aside. Leave them to soak in until everything else is done or whizz them in a processor.

  • Put your oven on, to around 170C/160C (Fan).

  • In a mixing bowl, add your flour, oatmeal, bicarbonate of soda, apple, cinnamon, nuts and sugar, and stir it around. Melt your coconut oil, so that it’s easy to mix in, and add it, along with your beaten egg, and black treacle. Mix by hand, or use a low setting on a mixer, to ensure the mix isn’t handled too roughly. When the pudding mix looks slightly curdled, add in the cream and black treacle, and fold it in by hand. Don’t worry about the texture. At this point, it might resemble batter more than pudding mix. Just remember, that it isn’t a cake mix and doesn’t need lots of air added. Using a spatula to scrape the sides and bottom of your bowl is a good idea.

  • Add your whizzed dates, or mash the dates into the water, then pour it all into the bowl. Fold fold in by hand.

  • Grease your baking tins and pour the mixture in. I used two moulds initially, but transferred them into one for the oven.

  • Bake for 25-30 minutes, or until the pudding is cooked, and a skewer comes out clean.

  • I cheated by putting mine into a basin of cold water to cool mine quickly as the hordes were desperate to eat it, so mine came out mashed up a bit. Leave yours to cool fully, and it will co-operate much more nicely.

  • Add toppings and serve. I didn't make toffee sauce for this version, but cheated with a tin of chocolate Nestle, which I heated up before pouring on.

With the red food colouring added, it became a very very dark coloured pudding.

Drizzled with cream and raspberry sauce.  [fb_button]


Posted on Leave a comment

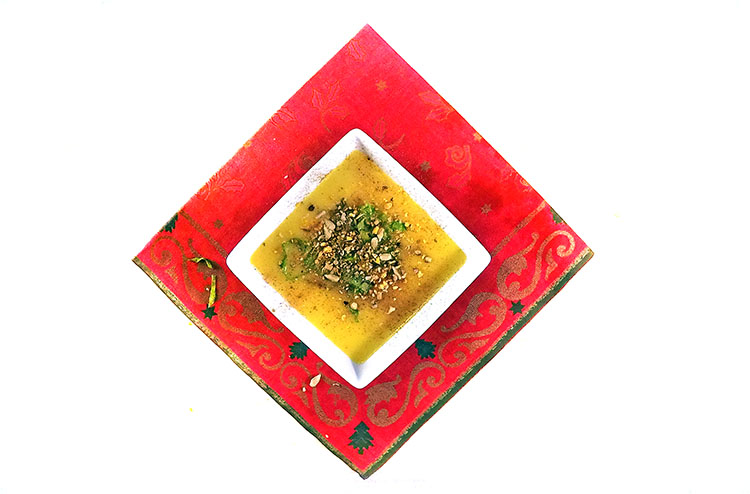
Soup Maker Recipe: Christmassy Leek and Potato Soup

Sometimes, it’s nice to have something warming to eat when it’s cold outside, and soup is always one of my go to things to make for anyone.  This recipe is nice and simple, and gives a slight twist on the traditional leek and potato soup…  Enjoy.

Of course, you don’t need a soupmaker to make this.  It makes just as well in a pan, but you need to watch it a lot more and add some more water if it looks like it’s boiling off.

DCIM100GOPROG0060204.JPG

[fbvideo link=”https://www.facebook.com/mysoupmakerclub/videos/1805440716377111/” width=”500″ height=”400″ onlyvideo=”1″]

Soup Maker Recipe: Christmassy Leek and Potato Soup

Lesley Smith
Prep Time 10 minutes
Cook Time 21 minutes
Total Time 31 minutes
Servings 4 -6 Bowls

Ingredients
  

  • 500 g Potato chopped.
  • 100 g Carrot chopped.
  • 100 g Leek chopped.
  • 2 Teaspoons Rapeseed Oil.
  • 1 Vegetable Stock Cube.
  • Half Teaspoon Ground Cinnamon.
  • Half Teaspoon Ground Nutmeg.
  • 2 Tablespoons Light Soft Cheese - I used Philadelphia.
  • Ground White Pepper & Salt to taste.
  • Water.
  • 1 Lettuce Leaf Half Teaspoon of Ground Cinnamon and a Teaspoon of Dukkah to serve.

Instructions
 

  • Chop your vegetables into smallish cube sized shapes.

  • Saute your chopped leek in the soupmaker with your rapeseed oil. After a minute or two, add the vegetable stock cube, your cinnamon and nutmeg, carrots, salt and pepper and continue to stir as they soften.

  • In another minute or so, add potatoes and continue to stir, to ensure they don't burn, then add a little water and your soft cheese.

  • Fill your soupmaker with water, and stir until the soft cheese has melted into your mix, making your water a cloudy white colour.

  • Ensure you top up with water, to below the maximum fill line and above the minimum.

  • Ensure you have mixed well.

  • Put the lid on properly.

  • Choose the smooth setting.

  • Serve as prettily as you like.
  • Serve with a chopped lettuce leave, a sprinkling of cinnamon and a pinch of Dukkah seeds.

Test

Posted on Leave a comment

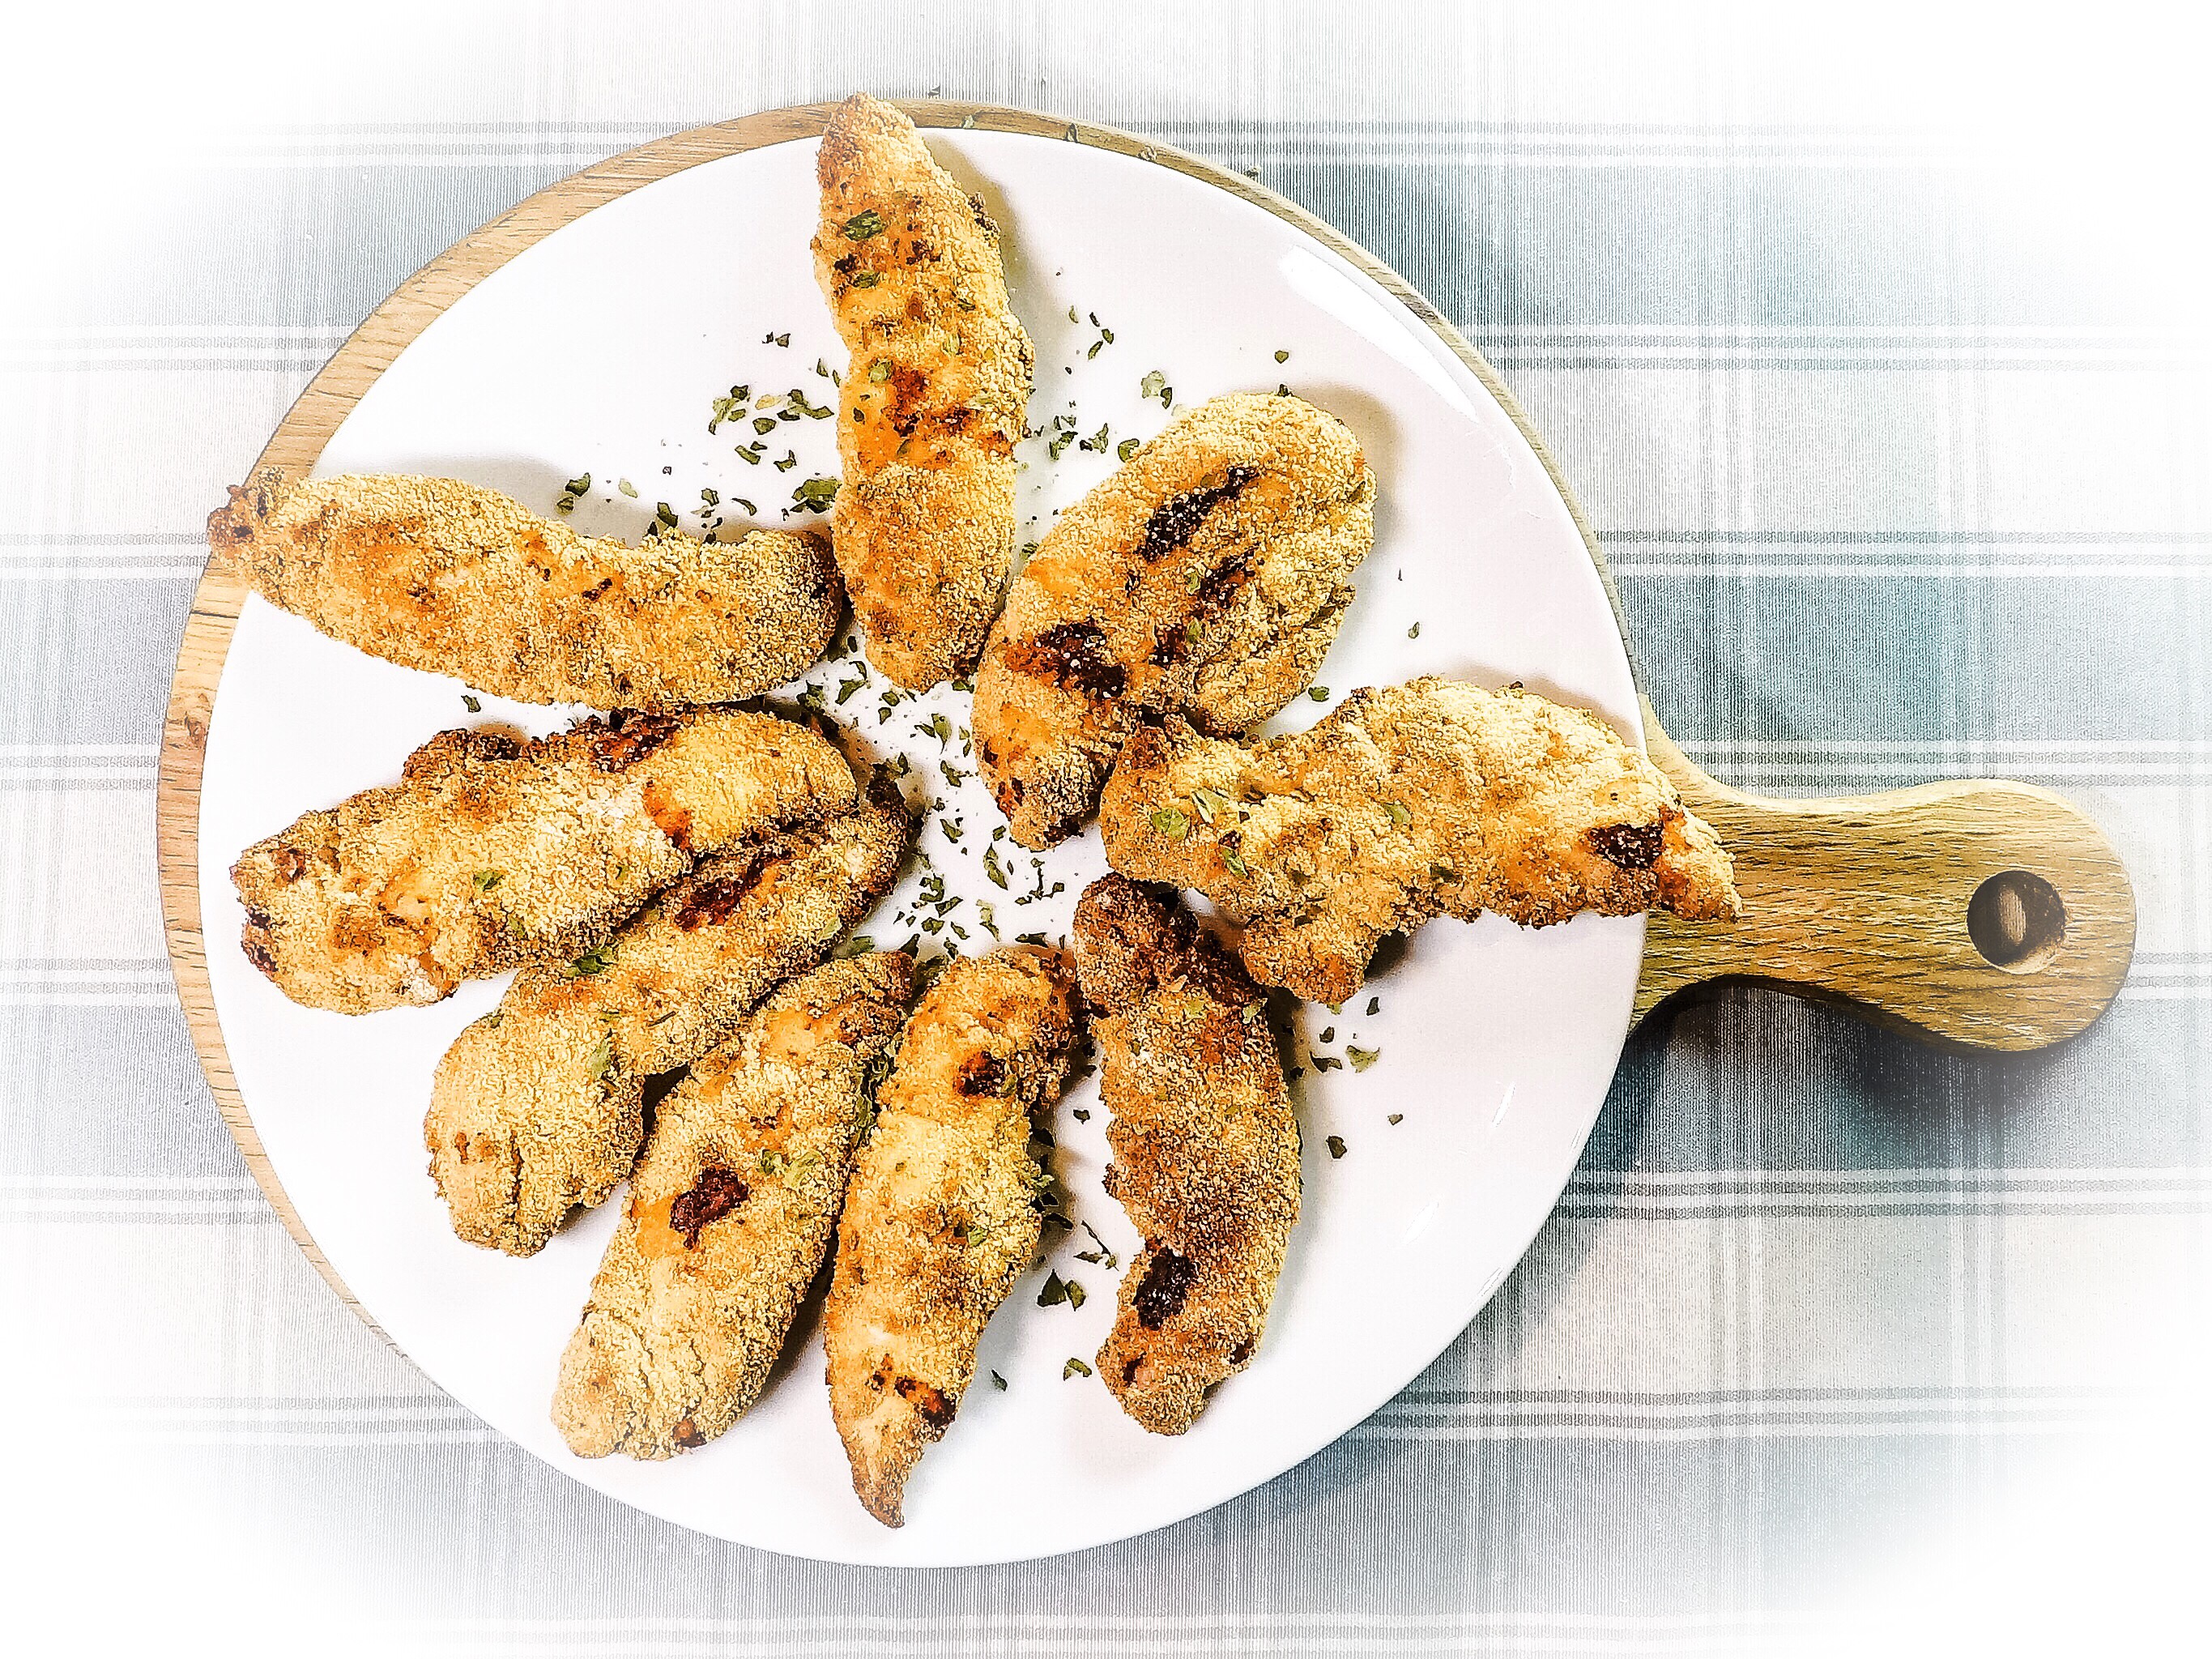
Chicken Dippers from Fresh Fillets

Making great chicken dippers at home is just so easy to do.  All it needs is a little flour, a couple of eggs, chicken fillets, or a few chicken breasts chopped up, and ending up with breadcrumbs or ruskoline to finish them off.

I haven’t added the actual method for this, as it’s pretty self-explanatory.  You can see it in the video, but simply crack the eggs, beat them, and dip the chicken first in the flour, then the egg and finally the crumb coating.

Cook how you prefer, either deep-fried, shallow fried, or oven baked, then sprinkle with chopped parsley.

img_4680

[fbvideo link=”https://www.facebook.com/ScottishMumBlog/videos/1219212011478078/” width=”500″ height=”400″ onlyvideo=”1″]

Posted on Leave a comment

High Protein Sweet Stuff

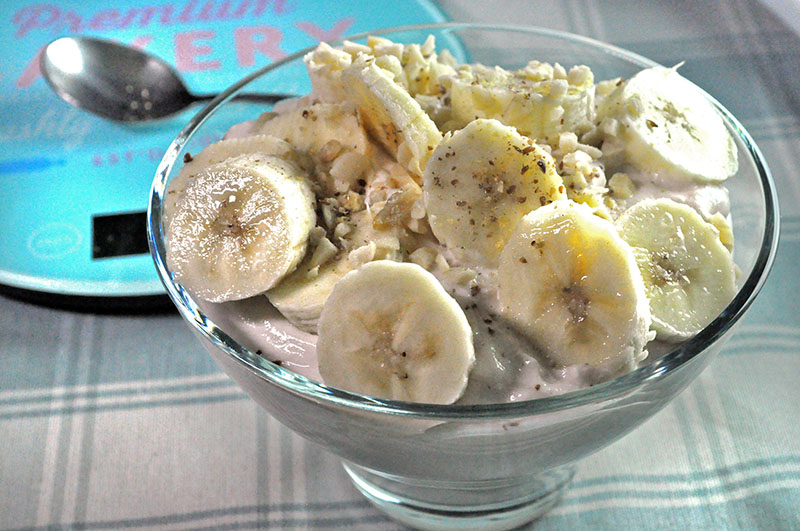
This came about from sheer desperation to get lots of protein in, with only 450 ish calories left for the day.  64g Protein for 487 Calories.  Eat it at once, or split into two, for two high protein desserts.  Lush.

high-protein-sweet-stuff

[fbvideo link=”https://www.facebook.com/ScottishMumBlog/videos/1218274918238454/” width=”500″ height=”400″ onlyvideo=”1″]

High Protein Sweet Stuff

Lesley Smith
Prep Time 2 minutes
Total Time 2 minutes
Course High Protein
Servings 1 -2
Calories 487 kcal

Ingredients
  

  • 200 g Skyr plain.
  • 200 g Skyr strawberry.
  • 25 g Vanilla protein whey.
  • 5 g Chopped nuts.
  • Pinch Flaxseed.

Instructions
 

  • Add the skyr, and whey to a bowl, and mix well. You'll need to mix to almost a whip for a while, to smooth out all those whey lumps for this to work.

  • Transfer to a pretty dish, slice the banana on top, sprinkle on the chopped nuts, and a pinch of flaxseed.


Posted on Leave a comment

High Protein, High Energy Balls

Making things ourselves, especially when it comes to protein bars is a no brainer.  Otherwise, they cost a fortune in the shops and your hard earned cash can disappear pretty fast.   Make these higher protein, by reducing the coconut flour and increasing the protein powder, or adding a little peanut butter.

I prefer the stronger coconut taste, and often take one of these, or some dried mango on a run with me, for energy over the 10k mark.

high-protein-high-energy-balls

[fbvideo link=”https://www.facebook.com/ScottishMumBlog/videos/1217978701601409/” width=”500″ height=”400″ onlyvideo=”1″]


No Cook, High Protein, High Energy Balls

Lesley Smith
Prep Time 10 minutes
Total Time 10 minutes
Course High Protein, Snacks
Servings 15
Calories 160 kcal

Ingredients
  

  • 150 g Coconut Flour.
  • 150 g Myprotein Chocolate Protein Powder.
  • 100 g Chopped Nuts.
  • Approx 250ml Milk.
  • 6, or 120g Medjool Dates stoned and crown removed.
  • Extra Coconut Flour for dusting.

Instructions
 

  • Put 150g coconut flour, and 150g protein powder into a bowl. Add the chopped nuts.

  • Stir the ingredients until well combined.

  • Put 100ml milk into a bowl, and shred the Medjool dates into the milk. Mash down with a fork until well mixed. You might need to add a little more milk.

  • Add the mushed date/milk mix to your dry ingredients and mix well. Add more milk, a tablespoon at a time, and get your hands into the bowl to pull it all together, a bit like scone batter. Add enough milk to have all the mix formed into a large ball.

  • Dust your surface with coconut flour and form small balls with the large one. Roll each one in the coconut flour to give a lovely white surface.

  • Pop in the freezer for an hour, then keep in the fridge until ready to eat.