Posted on 3 Comments

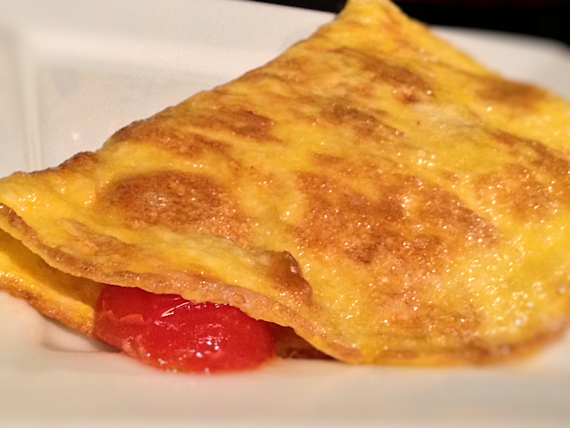
Simple 2 Egg Tomato Omelette Recipe

Omelettes in this house have arisen due to my mother who has been very ill for the last month or so.  There was very little she could eat, but she managed to hold down omelettes.

Big omelettes or ones full of cheese and vegetables were just to heavy for her, but this light omelette with a little tomato was perfect, and have been a staple in our house ever since.  If the kids are eating anything too heavy or is too meat based, she now won’t eat it and a quick omelette gets whipped up.

An omelette is pretty tasty and really quick to put together.  It’s perfect for breakfast, a light lunch or just a snack at any time of day.   We can add almost anything we want to them, so don’t feel restricted to just adding some tomatoes like we did.  A grating of cheese would be popular for many people too.

Here it is to share for you all, our 2 egg tomato omelette recipe.   A little butter does nobody any harm in moderation, so don’t be tempted to scrimp unless you can’t take dairy.  The effect simply doesn’t work, nor taste so well done with any other oil, so we’ve learned to stick to butter for her.
Simple 2 Egg Tomato Omelette

Lesley S Smith
Prep Time 5 minutes
Cook Time 8 minutes
Total Time 13 minutes
Course Lunch
Servings 1

Ingredients
  

  • 2 Eggs
  • knob Butter
  • pinch Salt
  • 4 Cherry Tomatoes

Instructions
 

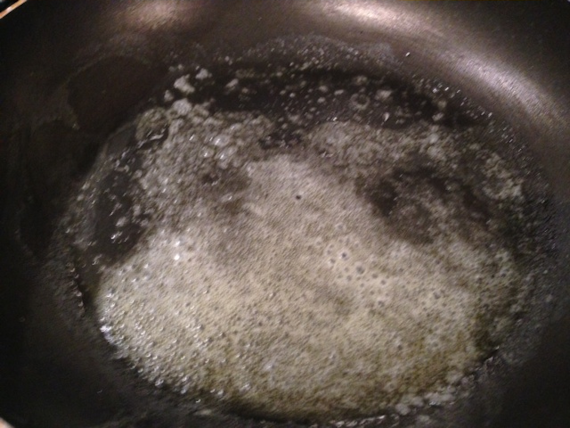
  • Put a knob of butter into a pan the size you want your omelette to be. I use a fairly small pan for a 2 egg omelette. Heat the butter until it is slightly bubbling and then turn down the heat to the lowest setting. There should be just enough butter to have a coating. In the past I didn't use quite enough and it turned more into scrambled eggs.
  • Break 2 eggs into a container and use a fork to beat them together.
  • Pour the beaten egg into the pan and move it around until the bottom of the pan is covered. Allow it to slowly cook on low for a few minutes until the centre begins to cook. If you use a spatula to slightly push the bottom of the omelette around, it should not stick to the bottom of the pan. Sprinkle a pinch of salt around the surface of the egg.
  • When the centre begins to look as if it is cooking, it looks as if it is setting. Place chopped tomatoes on one half of the omelette to allow it to be folded over more easily.
  • By this stage, you should be able to lift up your pan, shake it slightly and it should move around in the pan. Let it cook for a couple more minutes until you take a lifter and fold one half of the omelette over upon itself. I use a fork in one hand and the lifter in the other to get it more even.
  • Cooking for a further minute, turn it over and cook until the surface on both sides is a golden brown colour.
  • Serve.
 

Posted on 1 Comment

How To Cook Turkey Safely at Christmas

Roast Turkey Chestnut Stuffing


A family full of retching green faced, doubled over misery is just what we don’t want after a slap up xmas day meal, so here are my tips for cooking turkey.

Turkey is just like poultry isn’t it?  Basing an opinion on that, we know that we need to handle how to cook turkey carefully.

Our single best friend when it comes to using Turkey has got to be our thermometers.  If we add stuffing to the bird, it becomes even more essential.

In the Scottish Mum house, we always use stuffing as it’s sort of a family tradition and we use regular stuffling with sausage meat.  It makes the turkey more dense and does mean it will take longer to cook.

To be perfectly safe, we should be cooking our stuffing separetely, but we just do it how my mother and grandmother before her cooked food.  We don’t use frozen turkeys, but if you do, make sure they are completely defrosted.  It is dangerous to cook a turkey that is still partly frozen.

Roasting

      • Treat turkey like chicken when you are preparing it.   Keep surfaces scrupulously clean and do not use the same utensils for other purposes before a thorough cleaning.
      • A pre-heated oven set at 325 degrees F is our favourite way to go.
      • We baste our turkey with some fat and bacon, encase it in tin foil and put our turkey breast side down to begin cooking.   Foil can add to the cooking time but we like to keep our turkey quite pale until the last half hour of cooking.  A tinfoil covering isn’t necessary, but it can help you choose the end colour of your bird at the table.
      • I’ll say it again, use your thermometer.  About half an hour before the end of cooking time, we remove our turkey, turn it the right way up and leave the foil open at the top to brown it the way we prefer it.  We also take the juices off at this point to make the gravy for our meal.

Internal Temperature When Cooked

The internal temperature of a cooked turkey should be 165 degrees F.   It’s important to make sure the stuffing is also at this temperature.  While the legs or wings, or even the breast at the thickest part of the turkey have have reached 165, the stuffing might not have.  It means a little bit of extra care when you take the temperature of your bird and check the cavity with the stuffing as well as the thickest part of the bird.

If the stuffing doesn’t reach 165 degrees, there may still be bacteria that could be harmful to the eater.  I’d never buy a turkey that has been frozen and contains stuffing.  I know there would be cooking rules, but I’d not feel comfortable unless I know exactly the weight of the turkey without stuffing and the weight with it.

If you have to use stuffing in the bird and not cook it separately, try to follow these guidelines to keep you safe.

Use Quickly

Do not keep stuffing sitting around for days on end.  If you make fresh, use it as soon as you can.  Check the instructions on the pack of ingredients for the manufacturers recommendations.  If you do pre-prepare, store the mix in the fridge.

Stuff The Turkey Very Loosely

Stuffing should be moist and not bone dry.  In Scotland, we’d call the dry stuffing skirlie and it has a completely different texture to the stuffing we use in a turkey.  Don’t pack the cavity tightly with stuffing as it needs room for the heat to permeate and it works better with moist stuffing.  Don’t cook stuffing in a turkey if you plan to fry, grill or microwave it.  It’s a roast turkey deal only.

FOLLOW THE MANUFACTURERS INSTRUCTIONS WHEN COOKING TURKEY

Can I shout this loud enough…..  I’ll presume anyone reading this for guidance has bought their turkey from a retailer.  If someone has the skill, knowledge and availability of killing a turkey to cook, they’re going to know the rules to cook by.

DO NOT REMOVE stuffing from a turkey in the oven until it has reached the 165 degrees F temperature.

Rest, Rest, Rest

We rest our turkey for about 20 minutes, with tin foil covering it before we carve and remove the stuffing.  It adds to and improves the flavour.

Storing After Cooking

Don’t leave more than 2 hours between cooking and putting the leftovers in the fridge.  We use our turkey for up to 2 days after it has been cooked.  There is never any left after that, but if you have excess, you could leave it 3 or 4 days, though I’d not be comfortable personally at the 4 days afterwards.  There is also the option to freeze, but remember, that reheated leftovers also need to be cooked to the 165 degrees to make sure any bacteria are obliterated.

Posted on 3 Comments

Soup Maker: Broccoli, Cauliflower and Carrot Soup Recipe

Looking for quick ways to make soup is easy with a soup maker.  After my review, I’ve decided to keep making different soups to see how they work out.

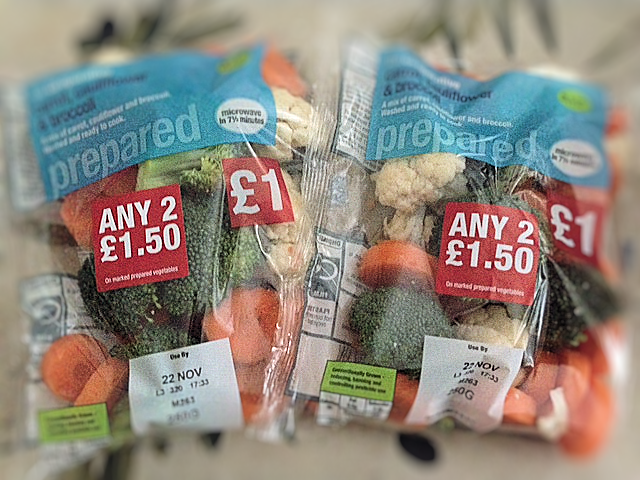
In the co-op, I found these small bags of washed and prepared broccoli, cauliflower and carrots.   It was really easy to make these into a fast and delicious soup which is perfect for a lunch, starter or even just a light snack.

Cauliflower Broccoli and Carrots

Soup Maker: Broccoli, Cauliflower and Carrot Soup 1.3 Litres

Lesley S Smith
Prep Time 2 minutes
Cook Time 21 minutes
Total Time 23 minutes
Course Soup
Servings 4

Ingredients
  

  • 500 g Carrot Cauliflower and Broccoli
  • Salt
  • Pepper
  • Stock Cube
  • Hot Water
  • Bay Leaves

Instructions
 

  • Put vegetables into the soup maker.
  • Add salt and pepper to taste & sprinkle on the stock cube.
  • Fill the soupmaker up to the 1.3 litre level and switch on to the smooth setting.
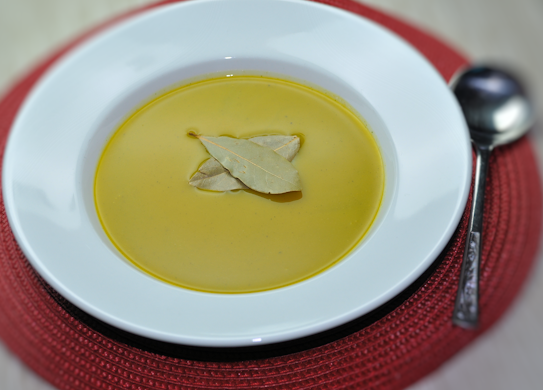
  • Serve with a 2 bay leaves for decoration.


Posted on 30 Comments

Review: Morphy Richards Soup Maker, with Squash Soup

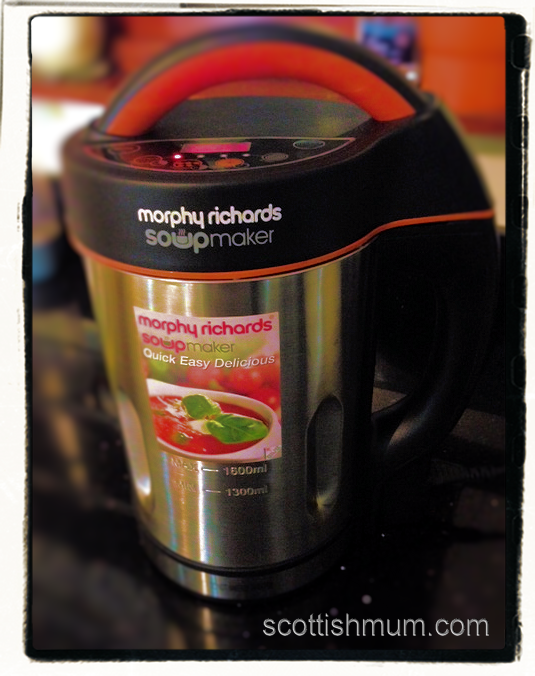
Morphy Richards Soup Maker 1

Morphy Richards let us have this Soup Maker to play with before Christmas.  It’s perfect timing for our household and I have been amazingly surprised just how fast it makes nice thick soup the way we like it.

Look out for later this week as I’ll be giving one away to my readers just in time for Christmas.

I don’t usually measure out ingredients for soup, I’m more of a judge it by eye person and after one use of this wee machine, I’m sure I’ll quickly go the same way with our new soup maker.

I had reservations about there being enough soup for all of us from it but we did all manage to have a plateful, even if there wasn’t any left for seconds.  My ideal size would be a 2 – 2.5 litre soup maker, but considering it only takes 21 minutes to make a pot of soup, I could just throw on some more veg and have another fresh batch.

I put the veg in the machine, made a mental note of how much veg I needed to make 800g, added water to the maximum level and set it to go.  It seemed to be such a short time later, it beeped to say it was done.   I hate to say it, but the end results were actually better than my regular soups.  Perhaps I overcook mine normally.

I could have chosen from chunky soup or smooth.  The smooth was very smooth and much more so than my smooth soups come out after using a hand blender.

In reality, there was one pot, one spoon that I used to stir the soup (unnecessarily) and no ladle: the soup maker has a lip to pour directly from.    Cleaning it was simply a quick rinse with soap under the tap, dry, and put away.  I’ve put the cable inside for storage but be careful with the blade if you do that too.

The Soup Maker also has a juice setting to make smoothies and fruit drinks.  I suspect less hassle and difficulty than washing my blender.

The Soup Maker is available from www.morphyrichards.co.uk as well as other leading retailers.

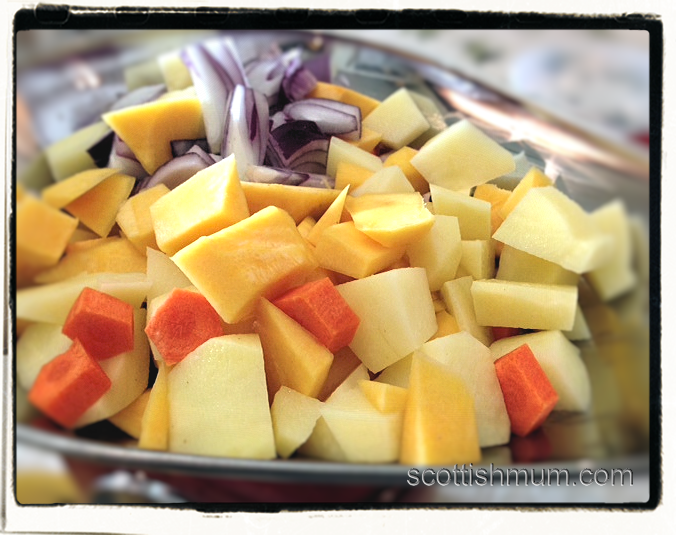
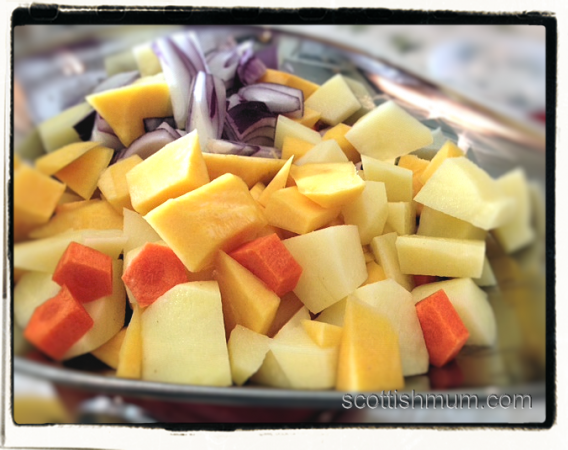
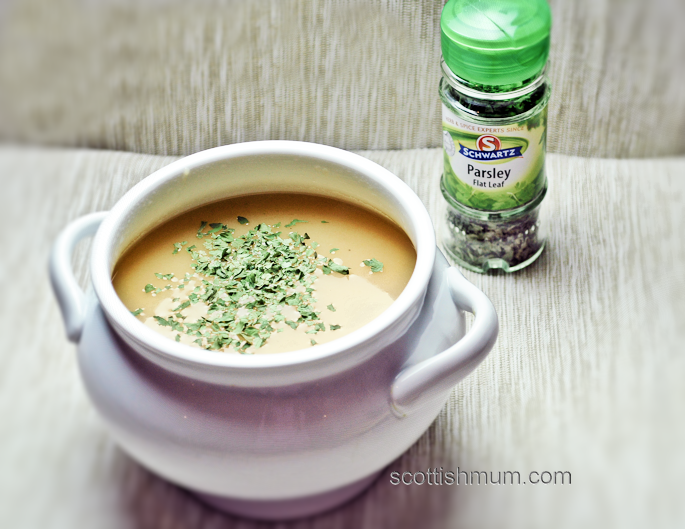
I had a lovely squash that I bought simply because of the colours, so the first soup I tried as a simple squash soup which I based loosely around quantities of vegetables used in the sample recipe book that comes with the soup maker.


Soup Maker: Squash Soup Recipe 1.6 Litres

Lesley S Smith
Prep Time 10 minutes
Cook Time 21 minutes
Total Time 31 minutes
Course Soup
Servings 6

Ingredients
  

  • 1 Onion
  • 3 Carrots
  • 3 Small Potatoes
  • 1 Small Squash
  • Hot Water
  • Salt
  • Pepper
  • 1 Chicken Stock Cube

Instructions
 

  • Prepare the vegetables and chop up into reasonably small pieces as they are going into a soup maker.
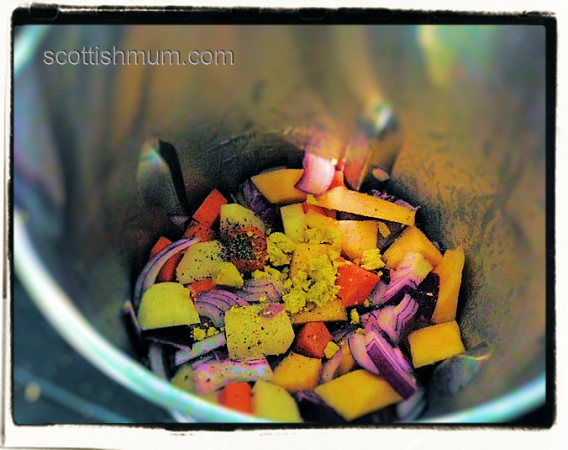
  • Pop the vegetables into the soup maker and add some salt and pepper to taste. I added one chicken stock cube and flaked it onto the vegetables.
  • Fill the soup maker up to the maximum 1.6 litre line, put on the top and select smooth or chunky. The smooth version will take 21 minutes to fully cook.
  • Serve with fresh bread.

Notes

All the ingredients for the 1.6 Litre output of soup need to total up to approximately 800g.  I simply add a few carrots, potatoes and the onion and then top up with the largest main ingredient to the 800 grammes.


Posted on 3 Comments

Making Sweet Microwave Popcorn – Like The Cinema

I bought popcorn kernels ages ago with the intention of putting them into a pan to make but really never got round to it.  I’d planned a Lakeland delivery as we needed some more sodastream gas canisters – so I added their microwave popcorn maker to the basket.

I thought it was the best of the options as it was £16.99 and would fit in a cupboard between uses.  My gadget count has been increasing lately and my kitchen counters are beginning to fill up with the load placed on them.

I’d tried just putting some kernels into a microwave container but most of them didn’t pop so this was my last attempt at finding something space-saving to make fresh popcorn with.  The biggest problem was that although I like plain popcorn, my the boys like sweet popcorn, just how it comes when we go to the pictures.  Actually, so do the gerbils.

We’ve managed to get it right and it was easier than I thought.   All we needed to do was simply add a few spoons of icing sugar to the kernels in the bowl and mix it all around. Don’t be tempted to try butter added to the sugar.  We did – and it tastes great, but the heat with the butter does unspeakable things to the microwave bowl.

Simply add enough popcorn kernels to fill the measuring scoop to the maximum line on the measuring cup.   Leave plain or stir in some icing sugar and just microwave until most kernels are popped.   It will take about 2.5 – 4 minutes depending on the strength of your microwave.  Our newer microwave sadly needs 4 minutes to make popcorn whereas our last one would have done it in the 2.5 minutes.

You can sprinkle sugar on after making popcorn, but we’ve found it didn’t imitate the cinema popcorn experience that way.

There will be some unpopped kernels in the bottom of the bowl.  Try to resist having another go at popping unpopped kernels.  They didn’t pop for a reason, and many are likely to burn and smell awful if you try again.

Microwave Popcorn 1

What we have now though is popcorn on tap whenever we want and without mess or having to have packets of the stuff in the cupboard at a fortune in comparison money wise.  It’s a win win for us.  I’m glad I bought it as we will get lots of use out of it.

The next time we go to the cinema, we may just squirrel some bags of it to take with us since it’s so expensive there, but shhh, that’s not really allowed is it?


Posted on 4 Comments

Fast Potato and Leek Vegetable Soup Recipe

Vegetable soup is just that.  It can be made from anything and absolutely everything that just happens to live in your fridge or kitchen cupboard.

This version was as a result of vegetables that would likely have been thrown out in a day or two so they needed to be used up and I’d no meat out of the freezer to make a casserole or meat dish.

Fast Potato and Leek Vegetable Soup Recipe

Scottish Mum Blog
Prep Time 10 minutes
Cook Time 20 minutes
Total Time 30 minutes
Course Soup
Servings 8

Ingredients
  

  • 1 Small Turnip
  • 4 Medium Carrots
  • 8 Medium to Large Potatoes
  • 2 Large Leeks
  • 1 Medium Onion
  • 1 Vegetable Stock Pot
  • 3 l Boiled Water
  • Salt and Pepper to Taste
  • Parsley to Garnish

Instructions
 

  • This type of soup is about as simple as it gets. Put a litre of the boiled water on to moderate heat with the vegetable stock added and simmer for 5 minutes.
  • While the stock is simmering, peel and chop the vegetables into smallish chunks. The smaller they are, the quicker the soup will be ready.
  • Pop the vegetables into your pot and fill up the water until there is a good covering of water around the vegetables. Add more water for a thinner soup and keep it less for a thicker version. You can always add more water later if you haven't added enough.
  • Sprinkle on salt and pepper to taste. Simmer for approximately 20 minutes, or until the vegetables are soft.
  • Blend for a smooth soup or if you have chopped your vegetables really small you might wish to have a more watery version with the vegetables in it. I prefer the blended version. Add more salt and pepper if needed and serve with home made bread.


Posted on 4 Comments

Custard Apple and Dragon Fruit Milkshake Recipe

I’d not tried custard apples before and thought it would be interesting to make something with them.  I was a little unprepared for how it actually needed to be prepared, but the taste was very custard/banana cross like.    Custard Apples need to sit until they become soft to the touch.  In most other fruit, the same effect would have me reaching to throw the fruit in the bin.   Don’t put them in the fridge as they don’t do well if they are too chilled.

The fruit seems squidgy and slimy as you remove the seeds and does look rather unappetising like that.  Don’t worry though, as putting it into milkshake makes for a perfect consistency.

Custard Apple

Dragon Fruit is one of my favourite fruits, so it was an easy choice to try adding that to a new shake style drink.

Dragon Fruit 2

Out of 5 of us, only littlest was not keen, so it was a success.  Littlest was put off by the seeds from the dragon fruit, though I suspect the milkshake would have been slightly more tart without it.  Some children might prefer a little syrup added to the milkshake to make it sweeter, but for us, it was fine simply with fruit and milk blended.

Custard Apple and Dragon Fruit Shake

Lesley S Smith
Prep Time 10 minutes
Total Time 10 minutes
Course Beverage
Servings 6

Ingredients
  

  • 4 Custard Apples
  • 2 Dragon Fruit
  • 3/4 Litre Cold Milk

Instructions
 

  • Peel and take out the seeds of the custard apples.
  • Peel and chop the dragon fruit.
  • Put the fruit into a blender with enough milk to make up to approximately 1.20 - 1.50 litres in your blender and blend until smooth.
  • Keep your milkshake in the fridge. We prefer to put ours in the freezer for half an hour before we drink it as the kids prefer the slightly thicker consistency.


Posted on 3 Comments

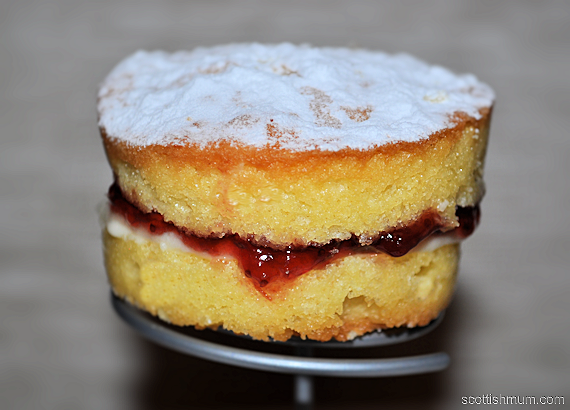
Mini Victoria Sponge Cakes with Buttercream & Jam

To make my small Victoria Sponge cakes, I use the red Pyrex Silicone Muffin Cases from Tesco which do the job brilliantly and are really easy to squish up in my kitchen cupboard.  Sometimes the kids don’t want a slice of cake, and if I put some into lunch boxes, it’s easier when the cakes are individual.  Kids also want to have things that look different from their friends who have their cakes in traditional paper cases, and I’m happy to oblige.

These fairly plain and standard cakes are firm favourites with my boys and so easy to make as well.

Individual Victoria Sponge Cakes with Buttercream and Jam

Prep Time 15 minutes
Cook Time 15 minutes
Total Time 30 minutes
Course Dessert
Servings 12

Ingredients
  

  • 8 oz Plain Flour
  • 8 oz Butter
  • 8 oz Caster Sugar
  • 4 Eggs
  • Icing Sugar

Icing

  • 5 oz Butter
  • 10 oz Icing Sugar
  • Jam

Instructions
 

  • Cream the sugar and butter and set the oven to 160 degrees c.
  • Add in the eggs and beat or mix until smooth.
  • Sift in the flour.
  • Divide into individual cake cases.
  • Bake for 15 - 20 minutes, or until a skewer tester comes out clean.
  • Turn out cakes and leave them to cools lightly before splitting them in half across the centre to give two cake halves.
  • Mix butter and icing to make the buttercream icing.
  • Spread the buttercream icing and jam on individual cake halves and then put them together and finish with a dusting of icing sugar.

Victoria Sponge 1


Posted on 5 Comments

Health Benefits of Eating Lamb

We all like to look for dishes that give us wholesome food for the family.

Lamb is meat from a young sheep and often available in different cuts to suit different methods of cooking.  It’s also possible to get lamb mince that we can use to make our own meatballs, burgers and patties.

In response to the question “I know that I should avoid fatty cuts of beef and pork, but what about lamb? Is it okay?” Oprahs resident doctor David L. Katz, MD responded that there is no good reason to avoid lamb.

He states:

“There’s no overriding health reason to stay away from lamb. Its nutritional value is influenced by the cut, and the leanest choices include loin, shank, and leg, all of which are often comparable to beef or pork in terms of calories and fat—about 150 to 170 calories per 3-ounce serving, and 2 to 3 grams of saturated fat. However, some cuts of lamb—blade as well as ground lamb—can be 20 to 30 calories per serving higher than their beef counterparts.”

While also mentioning knowing how the animal has been raised being important, he stresses that grass-fed animals have higher amounts of omega-3 fatty acids than grain fed.

Health Benefits of Eating Lamb and Other Meat Include:

  • A good source of high quality protein.
  • A good source of heart healthy omega-3 fatty acids.
  • A good source of iron.
  • A good source of vitamin B12.
  • A good source of zinc.
  • Reduced fat with good cooking practices.

Cooking with Lamb

Almost any dishes we cook with beef can be replicated with lamb.

  • Lamb has an almost gamey taste which is ideal for curry or for slow cooking.  Lamb shanks make ideal soup broths and do very well roasted but it’s important to know which cuts you are buying.   Lamb fillet and chops can be expensive to buy and your butcher can advise you on the best cut for the meal you plan to cook.
  • Cheaper cuts of lamb are ideal for slow cooking as the process tenderises the meat.
  • Shoulder cuts can be roasted as a joint with vegetables and is ideal for cooking in a roasting bag.  The juices will flavour the vegetables and with some herbs and spices it makes for a dish that can taste differently each time you prepare it.  As an alternative, shoulder is ideal for stews and casseroles and also does well in a slow cooker.
  • Scrag and neck really need to be cooked slowly to get the best out of them.   The best option would be to dice the pieces before cooking to maximise the cooking process.
  • Chump is a cut that can be treated like a steak and grilled, roasted or shallow fried.
  • The breast of the lamb can be fairly inexpensive and needs cooked slowly.  It is quite fatty but the fat can be cut off or poured off after the cooking process.
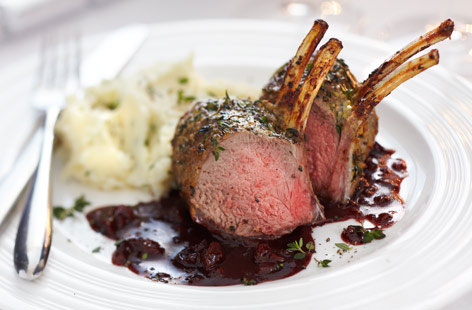
  • The most famous of lamb recipes has to be the lamb rack. It’s impressive and couldn’t fail to make a splash on the dinner table if you are entertaining in the holiday season this year.

Lamb Rack

What to do with leftovers is always something to think about.  Lamb curry is an idea way to use up leftover lamb and make a delicious and filling meal that will fill up the family.

Lamb Curry

This post was written in collaboration with Tesco

Posted on 10 Comments

Halloween Devils Food Cake Recipe

This recipe is one from Nigela Lawsons website (minus the decoration) that we decided we could make a great Halloween cake with.  Nigella carries a monthly cookalong which gives us a recipe to follow and post a picture of.

I couldn’t resist trying it out for ourselves as it just looked so rich.  The kids wanted involved so they did the weighing, measuring and preparing and I did the oven bit.  We used shop bought ready icing for the decoration, but I’m sure it would be easy enough to make.

The boys wanted a fab cake for Halloween night so it is now tucked up in a Tupperware tub to be brought out for THE night.  A real spooky home-made Halloween cake.

Nigella Lawson Recipe with a Halloween Twist – Devils Food Cake

Nigella
Course Dessert

Ingredients
  

Cake

  • 50 g Best Quality Cocoa Powder Sifted. I used Green and Blacks
  • 100 g Dark Brown Muscovado Sugar
  • 250 ml Boiling Water
  • 125 g Soft Unsalted Butter Plus some for greasing.
  • 150 g Caster Sugar
  • 225 g Plain Flour
  • Half teaspoon Baking Powder
  • Half teaspoon Bicarbonate of Soda
  • 2 teaspoons Vanilla Extract
  • 2 Large Eggs

Frosting

  • 125 ml Water
  • 30 g Dark Brown Muscovado Sugar
  • 175 g Unsalted Butter Cubed
  • 300 g Best Quality Dark Chocolate Finely Chopped

Instructions
 

  • Preheat the oven to around 180C/Gas 4/350F. Nigella recommends to line the bottom of two sandwich tins approximately 8 inches in size with baking parchment paper and butter the sides. I don't have baking paper, so I improvised with a few sprays of cake release in my tins.
  • In a large bowl, put a half cup of the muscovado sugar with the cocoa and the boiling water. Whisk it together until it is mixed and leave to the side.
  • Cream butter and caster sugar until pale and fluffy.
  • Mix the flour, baking powder and bicarb together in a bowl ready to use.
  • Drop the vanilla extract drop by drop into the butter and sugar while still mixing. Quickly add in one egg and then add a scoopful of the flour mix and then the second egg. This is a new way of doing it for me as I tend to just throw them all in together.
  • Add all the rest of the cake ingredients to the mixing bowl and finally fold in the cocoa mixture.
  • Put half the mixture into each baking tin and cook in the oven for approximately 30 minutes or until a cake skewer comes out clean.
  • When cooked, leave the tins to cook for a few minutes before turning out the cakes to cool.
  • While the cake is cooking, take the frosting ingredients, ie the water, muscovado sugar and the butter into a pan on low heat to melt. When the mixture begins to bubble, take the pan off the heat and add in the chopped chocolate. Nigella recommends swirling the pan to hit the chocolate with heat. I forgot that bit, and just used a spatula and it seemed to turn out ok. Once the chocolate is melted, whisk until glossy and smooth.
  • Leave the frosting for about an hour, but whisk it up a few times in that hour while the cakes are cooling and ready for the frosting.
  • Take one of the cake halves and turn it top side down. Spread with a third of the frosting and put the second cake half on the top and spread the remaining frosting over the top and sides. If you want to create a swirly effect use a spatula. Some people will try for a smooth effect.


Posted on 3 Comments

10 Ways To Add Hidden Vegetables and Fruit To Food

Adding vegetables to kids food is something that seems to present a massive challenge to a lot of parents of both young and slightly older children.  It’s not only my kids I have to persuade to eat more of the good stuff, as the man is known for avoiding much of it where he can.

With a child fussy eater emerging on my hands, it was getting to the point he was eating absolutely zero in the way of fruit or veg.  The only way to deal with it was to add it to foods that he’d not suspect.

It’s no mean feat to get veggies into a child that screws up their face and would rather do without them, but there are some fabulous cheats we can use to hoodwink our kiddies.  It’s normal for kids to go off and on their fruit and vegetables and the secret is not to make a big deal of it and let them come round in their own time.  I’ve found that if I make a huge deal out of it, the offending fruit or veg is looked upon with disdain forever more and mealtimes become a chore.

It really is worth experimenting to find things you can hide fruit and veges in.  It is easier to do fruit as it is naturally sweet and much more palatable but with a little work you could incorporate almost any vegetable that you could think of into something nutritious and healthy.

1. Bake It In

Carrot cake and beetroot brownies are among two types of cake I’ve made to tempt my kids into getting some of their five a day.   I’ve also made fruit into cake, eg peach and pear muffins and I’ve often added far more fruit and veg than recipes ask for.  It always gets chomped down in quick style by kids sure they are getting lots of not so good goodies into their bellies.  Why not try adding in other vegetables and fruits that can be chopped tiny.  There are endless options from banana bread to grated apple cookies, apple pancakes and much more.

2. Drink It Up With Smoothie

Mango, Orange & Pineable Smoothie 4

We make LOTS of smoothies and with good reason.  I keep mine fairly free-flowing where possible as they seem to prefer it like that and more like juice.  It’s amazing what you can make with fresh fruit and even better if you fizz it up with a sodastream to give it that fizzy effect.

 3.  Grate Them Up Small and Add Them To Stews And Casseroles

If you’re making a casserole and children won’t eat things like carrots, finely grate them in and they won’t notice them.

4. Sneak It Into A Burger

For a child who doesn’t want to eat fruit and veg, he’s happy enough to munch down a burger.  I often use mince to make up burger patties and just mix in finely chopped vegetables before forming the burger shape.

5. Hide It In A Pizza

The secret is always in how finely you grate them up.  If they’re the right colour, they can go in.   If I make cheese and tomato pizza, I add whizzed up fresh tomatoes just under the cheese and often just use passata instead of pizza sauce.  They can never tell the difference.  If I’m using dark cheese, I’ll finely grate carrots and pop that just under the cheese.

 6. Pop It In A Soup

Boyo loves chicken noodle soup but there isn’t much goodness in that so I make the stock for the soup with white coloured vegetables, mostly potatoes and a little cauliflower, blend it and then add the noodles.  Hey presto, some veggie goodness thrown in.

7.  Freeze It In

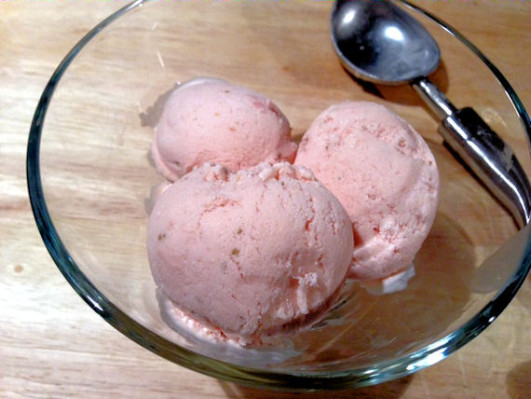
Strawberry-Ice-Cream9-531x3992

How easy is it to make frozen icicles.  Use the easily found icicle makers with popsicle sticks and just add pureed fruit to them.  They are delicious.   Make any flavour ice cream or sorbet you want with fresh vegetables and all the goodness is in the freezer for any time you need it.

8. Pasta With Veg

Macaroni is quite easy.  I add things like very finely chopped onions so that they disappear into the food if they are the same colour as the sauce.  Pasta with tomato sauce I usually make with passata as that can hide a multitude of fresh red coloured vegetables like tomatoes, red peppers, red onions and more.

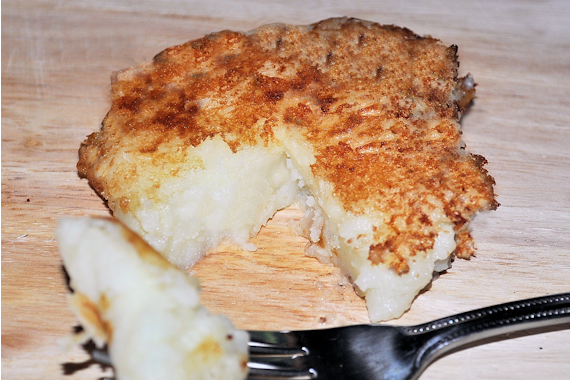
9. Bash It All Together Like Bubble and Squeak (Rumpledethumps in Scotland)

rumpledethumps 570 x 380

The leftover dish is perfect for adding veges.  I even get away with greens in these.  A little light frying of left over vegetables mixed in with mashed potatoes and shaped into a general burger shape.  I’ve managed to add squash, turnip, seaweed, spinach and more into this fabulous dish.   These tattie, onions and cheese ones were really popular here.

10.  Dessert Veges

Yes, you really can add vegetables into desserts and get away with it.   Chocolate covers a multitude of things as the taste covers up almost everything it is cooked with.  How about a Chocolate and Cinnamon mousse with a  little avocado and sweet potato.  Pumpkin pies can be loaded with beautiful pumpkin and why not try bread and butter pudding with added courgette or cucumber, or ginger, or parsnips.


Posted on 6 Comments

5 Myths of Drinking Alcohol

Alcohol 2Because I post so often about Foetal Alcohol Syndrome, people seem to think I am anti-alcohol all the time which simply isn’t true.

Anyone who wants to knock their livers into insensibility by drinking more than the average hippo could put away in a year only had themselves to blame if they’re not affecting anyone else, however everything in moderation as long as you’re not pregnant and I’m fine.

There are lots of myths about alcohol and although yes, it can lead to horrendously embarassing tweets and pictures on Facebook, it seems to be the drug of choice for many adults in our first world list of things to enjoy.

So – the myths:

1 – Drinking Coffee Will Sober You Up

I don’t know who invented this old chestnut.  I remember having the saying repeatedly drummed into my head as a late teen with a heavy hangover, but it just isn’t true at all. You can’t sober up any faster than it take for alcohol to leave your system.  You may feel more alert with the caffeine infusion, but you’ll still have to wait.

According to the NHS, it take approximately one hour for each unit of alcohol to leave your bloodstream but that can depends on things like weight, age, food eaten, liver function etc etc.

2 – You Sober Up Faster If You Are Sick

A well meaning friend once told me this as I hunched with my head over a toilet bowl in a nightclub.  “Put your fingers down your throat, you’ll feel better,”  Never able to achieve the magic formula that equals self induced vomiting, I carried on hugging the loo bowl while retching and watching the floor spin around faster than than a centrifuge on fast.

Again, you can’t sober up any faster than it takes for alcohol to leave your system.  Is this getting a little boring?  Yes, you might manage to lose a little of the liquid still in your stomach, but generally, it’s really not going to help at all if you try this as a cure all.

3 – Light Coloured Alcohol Keeps You More Sober Than Dark Coloured Alcohol

I have to laugh at this one.   Yes alcohol contents differ on the bottles when we check them, but it doesn’t mean that vodka could be any less hangover inducing than rum.  In this case, the lighter the colour doesn’t mean the less hardened drinker.

4 – Don’t Mix Wine, Spirits and Beer

I had this thrown at me by friends several times that mixing drinks makes you get more drunk, more quickly.  While I’ve not found any research statistics to back this one up, it stands to reason that it’s the alcohol content in each drink that makes the resulting hangover better or worse than you expected.  I’ve never drunk beer as just one sip has the effect of making me gag so I never had the opportunity to test this one out, but mixing wine and spirits is not going to make any difference if the alcohol content is the same.

5 – Lining Your Stomach With Food Will Stop You Getting Drunk So Quickly

Now this one I tended to believe as it was a good excuse to go for a meal before going for a night out.  It’s only recently that I realised it was a complete myth and totally untrue.   Yes, drinking on a full stomach might very well mean that it takes alcohol a little longer to be absorbed into our bloodstream, but it will still be absorbed.   It might be a good idea to have a meal inside you before drinking but it isn’t going to stop you getting drunk.