Posted on Leave a comment

Easy Peasy Jelly Squeezies

Looking for a way to get more water into kids or adults with dementia who have an aversion to drinking from a cup?

Sneaking fluid in through food is a great way to do things.  These are so easy, and can be calorific or zero calorie, depending on the type of jelly you use.

These are not like adding glycerine to make the firm jellies which are like the harder Haribo type sweets, and they’re simply a way to change up the diet and make jelly more appetising.

Using the usual concentration, jelly is too wobbly to set in moulds.

These are made in ice cube trays and are made in minutes.  They are about to become a staple part of mums diet in the sugar free form.  I may even splash out on a few nice moulds too.

For these, I have used two different strengths.

Green
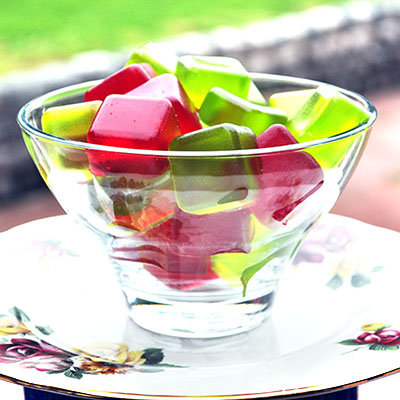
Simply a regular lime jelly at half the consistency, ie 1/4 pint of hot water to dissolve the jelly, then top up with 1/4 pint of cold water before pouring into the moulds.  These are still squeezable although slightly tacky to the touch.

Red
Made using the sugar free jelly option in powder form at half the above consistency.  I used 2 sachets here with 1/4 pint hot water, dissolved and added 1/4 pint cold before pouring into the moulds.

The red ones are far more firm than the green, and although both are squeezy, the red have a far firmer effect.

Water Content

250ml / Half Pint water per 18 jellies

Use

Leave these colourful ‘treats,’ out for someone who struggles to drink fluid, to sneak just that little extra in a day.   It’s far more attractive to eat something that looks like a sweetie than it is to eat a bowl of jelly.

Posted on 5 Comments

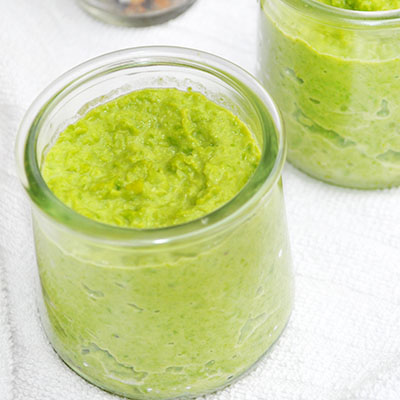
How to make mushy peas at home.

I used to buy mushy peas.  Tins of them, then one day I had none and the teens were moaning, I decided to have a go at making my own.  Marrowfat peas make the closest thing to the tins you buy in the shops, but marrowfat peas are not something I tend to have on hand.  I do, always, however, have bags of frozen peas or petit pois.  The taste is slightly different with the younger garden variety peas, rather then the more mature marrowfat ones, but to be honest, the taste with the younger peas is actually amazing and doesn’t take long to do.

I think it comes with the advent of kids needing fed quickly, and no time to go shopping, which is always my issue these days with mum requiring more soft meals and the teenagers always bringing friends home for food.  They don’t always eat what I make, but hey, at least they’ve been offered decent food.  Cook the peas in a microwave or use a hob on the pan.

This version is made so that my mum can eat them, so they are very well blended and are just made using petit pois.   These are also great for making mushy pea and ham soup.

Mushy Peas Recipe

Lesley Smith
5 from 2 votes
Prep Time 2 minutes
Cook Time 10 minutes
Total Time 12 minutes
Course Accompaniment, Vegetables
Servings 2 -4

Ingredients
  

  • 300 g Frozen Peas any kind Use marrowfat peas to get a similar effect to tinned mushy peas
  • 30 g Butter
  • Tablespoon Double Cream Optional
  • Water
  • Half Level Teaspoon Salt
  • Pinch Cracked & Ground Black Pepper

Instructions
 

  • Put your peas into a microwaveable bowl, sprinkle the salt and pepper and cover the peas with water. Cook on full power for between 6-10 minutes. Depending on the type of pea you have, it might take longer. I usually put mine on for 5 minutes, then check them to see if they've softened up. If they haven't, I just microwave them for a slightly longer.

  • When peas are softened, drain the water from the peas and add the butter and optional cream. Depending on your taste, you may want to add a little extra salt. .

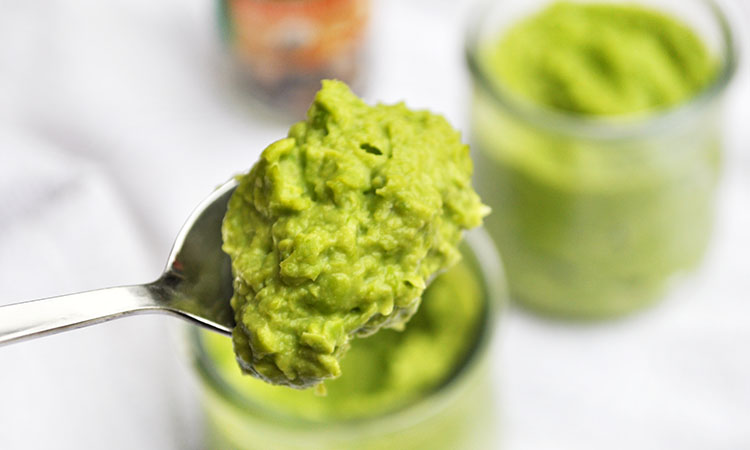
  • To keep a tinned style effect, use a potato masher to mash down the peas, or for a more pureed version, like the image here, just pop them into a blender for a few seconds. This can also be blitzed for longer, as a pure puree version for those who need it.


Posted on Leave a comment

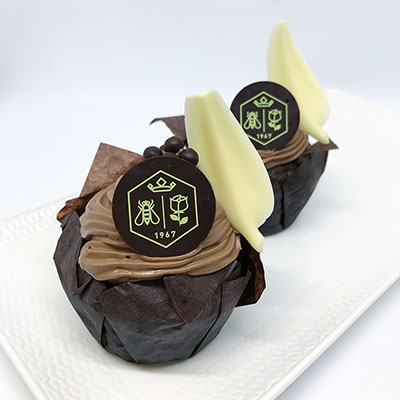
Recipe: Dulcey de Leche Chocolate Cupcakes

National Cupcake Week 2018

Bakers at the ready! National Cupcake Week returns to the UK from 18-24 September 2018. To celebrate the occasion, Royal Lancaster London will be serving up an exclusive cupcake-creation from Head Pastry Chef Steve Penny: Dark Chocolate and Dulcey de Leche Cupcakes.

The indulgent treat will be served in the hotel’s Hyde Lobby Bar throughout the week and is priced at £3 per cupcake. Steve Penny shares his recipe for a twist on a classic that’s sure to be the icing on top of a sweet week.

Dark Chocolate and Dulcey de Leche Cupcake by Steve Penny

Ingredients (10-12 cupcakes):

250g   Softened butter

150g   Caster sugar

100g   Light brown sugar

250g   Eggs

20ml   Milk

250g   Self-raising flour

30g     Cocoa powder

20g     Cocoa nibs

2 cans Condensed milk

100g   Dulcey de leche

Valrhona Dulcey pearls

Chocolate Butter Cream:

50g Dark chocolate (minimum 70% cocoa solids)

100g Unsalted butter, softened

200g Icing sugar

1 tsp Vanilla extract

Splash of Milk (to loosen)

Method

To make the Dulcey de Leche:

Step 1: Take two cans of condensed milk and place them unopened in a bain-marie in the oven. Set the oven temperature to 120 degrees for around 2-3 hours. Be careful when opening the cans as they will remain hot for a long time!

To make Chocolate Butter Cream:

Step 1: Melt the chocolate in a bowl set over a pan of simmering water. Allow to cool until the chocolate no longer feels hot to the touch.

Step 2: Beat the butter in a second bowl until soft then gradually add the icing sugar. Add the vanilla extract and beat again.

Step 3: Add the melted chocolate to the butter mixture until completely mixed, you can add a few drops of milk if the mixture is a little stiff.

To make the Cupcakes:

Step 1: In a bowl mix together the flour, cocoa and cocoa nibs.

Step 2: Cream the butter and sugars together until light and fluffy.

Step 3: Slowly add the milk, eggs and lastly the dried ingredients (flour, cocoa and cocoa nibs). Fold in the Dulcey de Leche into the mix.

Step 4: Fill 10-12 muffin tins. Don’t fill to the top, only ¾ of the cases should be full!

Step 5: Bake at 180 degrees for approximately 15-20 minutes (or until a knife inserted into one of the cakes comes out clean) and allow to cool.

Step 6: Once cool, carefully make a hole in the top of the cakes using a teaspoon and pipe in the dulcey de leche. Top with a spread of the milk chocolate butter cream to give a smooth velvety finish.

Step 7: Sprinkle Valrhona Dulcey pearls and drizzle more chocolate on top just for luck!

Royal Lancaster London, Lancaster Terrace, London W2 2TY
Reservations on 020 7551 6000 or visit wwww.royallancaster.com


Posted on 2 Comments

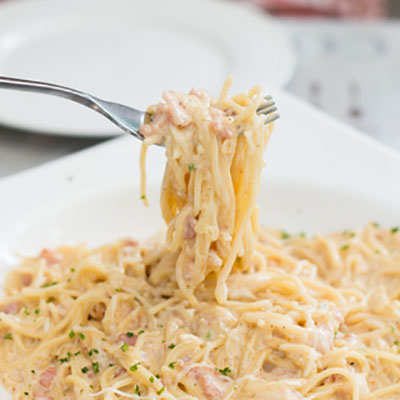
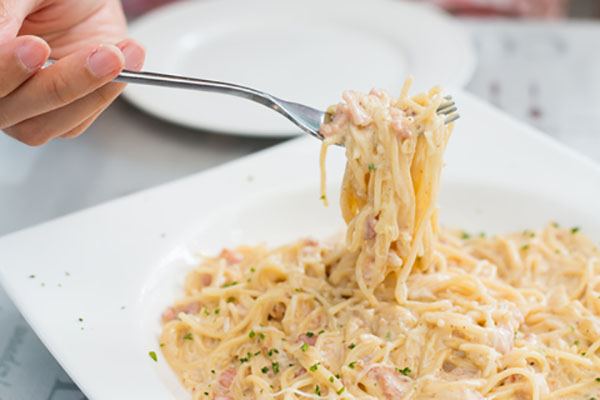
How to Make Easy Spaghetti Carbonara – Cheaply – £2.50 – Feed up to 8 People

My special needs boy needs help with making meals, and one day, he’ll likely have to try and make his own, and on a budget.  For this, I kept the ingredients light, and it was to feed 7 people, although we could easily manage 8 small to medium bowls with these ingredients.  The price…..   We kept it low.  20p for Tesco 500g spaghetti, £1.99 for 2 jars of Carbonara sauce from the Co-op, which fabulously, actually has real bits of ham in it, and a creamy sauce.  It’s the best version I have used for this.

Count the milk and butter, and we are at around:

  • £2.50 to feed 8 the basic carbonara.
  • Plus garlic bread from Tesco Hearty Food Range at 32p each x 3 = Optional 96p for three baguettes.
  • Total £3.46 for Spaghetti Carbonara and Three Garlic Baguettes.

Easy Spaghetti Carbonara

Lesley Smith
Prep Time 5 minutes
Cook Time 15 minutes
Total Time 20 minutes
Course Mains, Pasta
Cuisine Italian

Ingredients
  

  • 500 g Spaghetti
  • 30 g Butter
  • 2 Jars Carbonara Sauce Co-op
  • 2 Teaspoons Salt
  • 200 ml Milk

Instructions
 

  • Very simply, just bring the spaghetti and salt to the boil, and simmer until the right consistency for your palate. My boy likes it soft, and other like it al dente, so choose your favoured options by the instructions on the packet you buy.

  • Drain the pasta, rinse with boiling water and drain again.

  • Return the pasta to a pan and add the carbonara sauce. Heat and stir until thoroughly hot.

  • Add butter, stir, then add milk until your carbonara reaches your desired consistency.

  • Serve with garlic bread.
Posted on Leave a comment

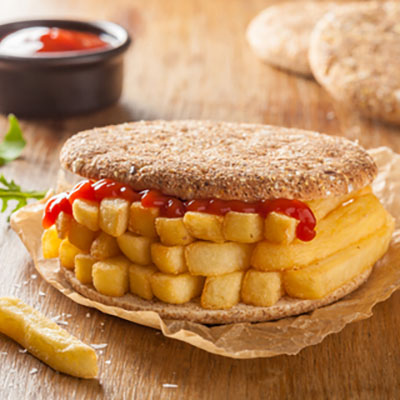
How to make the ultimate chip butty.

Collaborative Post

Winner winner, chip-butty dinner

“Daaad! What’s for dinner?”, the kids yell from the other room. It’s been a long, busy day and you’re just not up to cooking a full-on meal. You’ve no energy left. You’re up for something with minimal effort; a good measure of comfort food. Pizza? Nah. Stir fry? Nah. Chip butty? Now who could resist? Surely a winner for the whole family, right? And quite frankly, what tantalises the tastebuds more than a satisfying chip butty in crusty soft bread, coated with lashings of your favourite sauce? Your mouth is watering at the thought. And the best part is that it takes no more than 10 minutes to prepare and around half-an-hour to cook (depending on how well done you like your chips). Yes, winner winner, chip butty dinner it is.

Getting started

Okay, it’s time to get to work and dig out the spuds, get the oven on, track down those herbs and spices and that loaf of bread. Let’s make this a chip butty to remember.

Starting with the potatoes. Give them a good rinse and peel them. If the kids have a particularly sweet tooth (and which kids don’t?), throw a few sweet potatoes into the mix. As well as bringing some brightness to their butty, they’re brimming full of key vitamins, including A, C, E and K. They also cook faster than white potatoes too, which means you’ll be tucking in in no time.

Now, how do you like your chips – a little chunky? Chop them about a finger-width wide. Want a bit of fun? Chop them into shapes – the kids will love them. Or carve them into letters to spell out your kids’ names; they’ll love the personal touch. If the kids love veggies and you have some spare, carrot and parsnip chips taste great and will add an earthy, flavour-packed sweetness to the butty.

If French fries are more your style and you are short of time but are still craving a great butty, get yourself a pack of McCain’s French Fries and the kids will never know the difference. You can still add the herbs, garlic and spices to make the butty one to remember.

It’s now time to get the oven on and up to temperature. Gas Mark 6 or 200°C should do the trick.

Before they’re oven ready, you’ll need to par-boil the potatoes for around 5 minutes (slightly longer if chunky) in boiling water. Once the potatoes are par-boiled, strain and dab slightly with kitchen roll, then place on the tray and drizzle a little cooking oil over them. They’re now oven ready.

If chips are too bland for the kids, why not spice things up a little before popping in the oven? Those herbs in the cupboard? Give them a whirl. Sprinkle on mixed herbs – oregano, rosemary or garlic granules. Even a subtle shake of chilli powder will add extra heat and spice to give your butty an extra kick. Yummy.

Cooking the chips

Don’t forget to set the timer for 35 minutes because those beauties will cook quickly. Once in the oven, don’t forget to check your chips every 10 minutes or so. Give them a gentle shake a few times to ensure they cook well on all sides.

They’re almost done. The house is filled with the aroma of chips!

The butty

Now to the bread: some like it firm; some like it soft. Choose the kids’ favourite bread and mix things up a little. Try a half wholemeal and half white, or if adventurous try a baguette and see who has the longest bite. Tiger bread is great and chopping it into inch-thick slices makes the butty a monster meal ­ wait until you sink your teeth into that beauty!

Don’t forget the condiments; will it be ketchup, brown sauce, mayonnaise, or malt vinegar? Or a bit of everything? Have them close to hand and apply liberally.

It’s now time to butter the bread choosing your favourite spread; be generous and make sure it covers the bread. Or if you’re feeling creative, drizzle over a little olive oil instead, adding a delicious fresh, zingy flavour.

Scatter the chips on your bread, leaving the butty open to spell out the kids’ names in chips, this way you’ll be the best dad!

Winner winner, time for dinner!

Now time to tuck into your delicious feast. Enjoy the greatest chip butty ever made!

If your chips weren’t a winner, why not nip out and try McCain’s French Fries, cooked from frozen and oven ready in 14-16 minutes ­ your kids will never know the difference!
Posted on Leave a comment

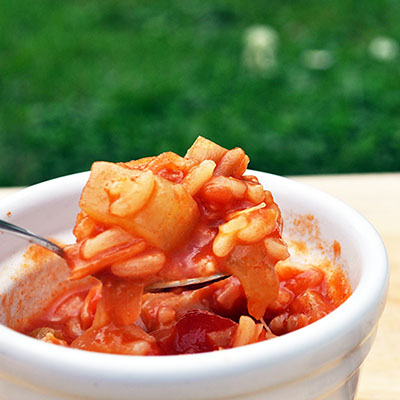
Pressure Cooker: Tomato, Cucumber and Rice Soup

Choose to have your soup chunky or smooth.  It’s all up to you.

Pressure Cooker: Tomato, Cucumber and Rice Soup

Lesley Smith
Prep Time 10 minutes
Cook Time 35 minutes
Total Time 45 minutes
Course Soup
Servings 4 -8

Ingredients
  

  • 200 g Leek chopped
  • 100 g Rice uncooked and washed
  • 300 g Cucumber peeled and chopped
  • 2 Teaspoons Salt
  • Tin Butter Beans drained
  • 2 Tins Tomatoes
  • 1 Teaspoon Ground Ginger
  • 2 Chicken Stock Pots or Stock Cubes
  • 2 Tablespoons Rapeseed or Vegetable Oil
  • 1 Litre Water
  • Optional for blending up to 300ml Semi Skimmed Milk

Instructions
 

  • Sauté the leek with the vegetable oil. I use an Instant Pot, so use the sauté function, however it cooks fairly quickly, so keep an eye to make sure the leeks don't burn.

  • Add salt, broad beans and chicken stock pots to the sautéed Leeks. Mix continually with a wooden spoon for about a minute.

  • Add the rest of the ingredients to the pressure cooker, and use the soup function, or cook on high pressure for 30 minutes.

  • When ready to serve, choose to leave chunky, or blend until smooth. The soup will become very thick as it is blended, and you can optionally add more water or semi skimmed milk, a little at a time until it reaches your desired consistency.

  • Serve with crustless bread and butter.


Posted on 2 Comments

High Protein Strawberry and Avocado Puree

High Protein Strawberry and Avocado Puree is suitable for those choosing a high protein diet, or the elderly where there is a need to get protein rich food in their diet, and where they cannot chew or swallow solid food. With 12g of carbs in each 120g recipe, there is also 163 calories per portion, and is a high calorie food.

Note:  This post contains an affiliate link.  These are marked by an asterisk next to them.  If you buy anything from using these links, I will receive an ambassador commission, which lets me keep this blog running.  The price is not altered for you in any way.  

As a Froothie Ambassador, I used my new Optimum VAC2 Air Vacuum Blender * to make this soup.  It does need a suitable blender for making soup this way, but with my one, the soup was smooth and very rich, despite being loaded with sweetcorn, which is usually very difficult to blend.  Read my review, or find out how to get one for yourself here. 

High Protein Strawberry and Avocado Puree

Lesley Smith
4 from 1 vote
Prep Time 5 minutes
Total Time 5 minutes
Course High Protein / Puree
Servings 4 x Servings
Calories 163 kcal

Ingredients
  

  • 400 g Strawberries hulled and chopped.
  • 200 g Avocado peeled and diced.
  • 2 Heaped Spoons Strawberry Protein Powder.
  • 1 Tablespoon Water.

Instructions
 

  • Add all your ingredients to the mixer.

  • Blend for 30 seconds.

  • Pour into small glasses or dishes and put into fridge for 2 hours.


Posted on 4 Comments

Blender Tomato & Sweetcorn Soup

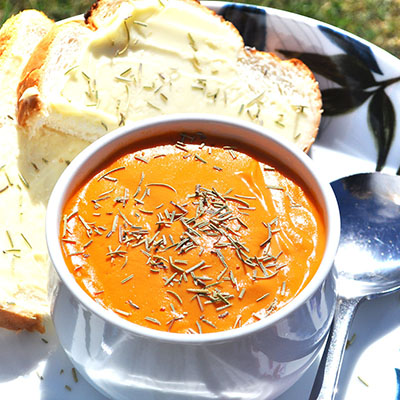
This tomato soup is speedy, fills all those tomato soup boxes, and with only a few minutes in the blender, there is a piping hot bowl of soup.  To make raw soup, it does need food that is suitable for blending and not leaving a bitter aftertaste in the way that the onion family does, but it makes for a fabulously speed option when needed, especially when you have someone like my mum living at home, who pretty much has soup every day, and sometimes multiple times a day.

Note:  This post contains an affiliate link.  These are marked by an asterisk next to them.  If you buy anything from using these links, I will receive an ambassador commission, which lets me keep this blog running.  The price is not altered for you in any way.  

As a Froothie Ambassador, I used my new Optimum VAC2 Air Vacuum Blender * to make this soup.  It does need a suitable blender for making soup this way, but with my one, the soup was smooth and very rich, despite being loaded with sweetcorn, which is usually very difficult to blend.  Read my review, or find out how to get one for yourself here. 

Raw Tomato and Sweetcorn Soup

Ingredients

  • 2 Tins Chopped Tomatoes (800g)
  • 1 Tin Sweetcorn (300g)
  • Teaspoon Salt
  • Teaspoon Ginger
  • Teaspoon Mixed Spice
  • Up to 200ml Double Cream (Optional)

Method

I use the Optimum VAC2 Air Vacuum Blender.  This is a very simple recipe that needs very little preparation at all.

Step 1

Add ingredients to the blender.

Step 2

Choose the soup setting which blends for around 6 minutes.

Step 3

Serve with fresh bread and butter.

Find out more about the Optimum VAC2 Air Vacuum Blender on the Froothie website *

Posted on 2 Comments

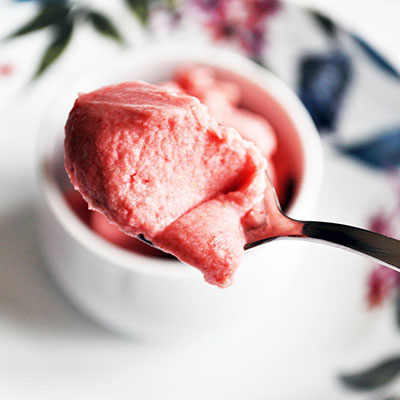
Raw Strawberry and Banana Ice Cream Recipe

Note:  This post contains an affiliate link.  These are marked by an asterisk next to them.  If you buy anything from using these links, I will receive an ambassador commission, which lets me keep this blog running.  The price is not altered for you in any way.  

As a Froothie Ambassador, I used my new Optimum VAC2 Air Vacuum Blender * to make this ice cream.  It does need a very efficient blender to be able to pound frozen fruit together well, in a way that leaves us with creamy ice cream.  Read my review, or find out how to get one for yourself here. 

I’ve tried making ice cream like this several times, and once had a wee gadget that did the job, but broke very quickly.  It just was not powerful enough to pulverise the frozen fruit on a regular basis.  I’ve found that adding banana to any fruit, gives it the taste of ice cream, and sometimes a little avocado thrown in can help as well.

Raw Strawberry and Banana Ice Cream Recipe 

Ingredients

  • 350g Frozen Strawberries (optional – remove the green stems before freezing)
  • 250g Frozen Banana (peel the banana, and slice before freezing)
  • Optional – 4 drops of Madagascan Vanilla Essence

Method

I use the Optimum VAC2 Air Vacuum Blender.  This is a very simple recipe that needs very little preparation at all.

Step 1

Mix the strawberries and bananas and add the optional vanilla essence if desired.

Step 2

Add the fruit to the blender jug.

Step 3

Do not choose a vacuum setting for this, as you will need to use the tamper tool to push the fruit down the jug while blending.  Use the pulse function for 30 second increments, until you achieve the consistency you desire.

Step 4

Add the ice cream to a bowl, or a tub for putting in the freezer.  To use from the freezer, leave out for 10 – 30 minutes, then stir well to achieve the ice-cream texture.

Step 5

Serve with chopped nuts, flaked almonds or chopped dates.

Find out more about the Optimum VAC2 Air Vacuum Blender on the Froothie website *

Posted on Leave a comment

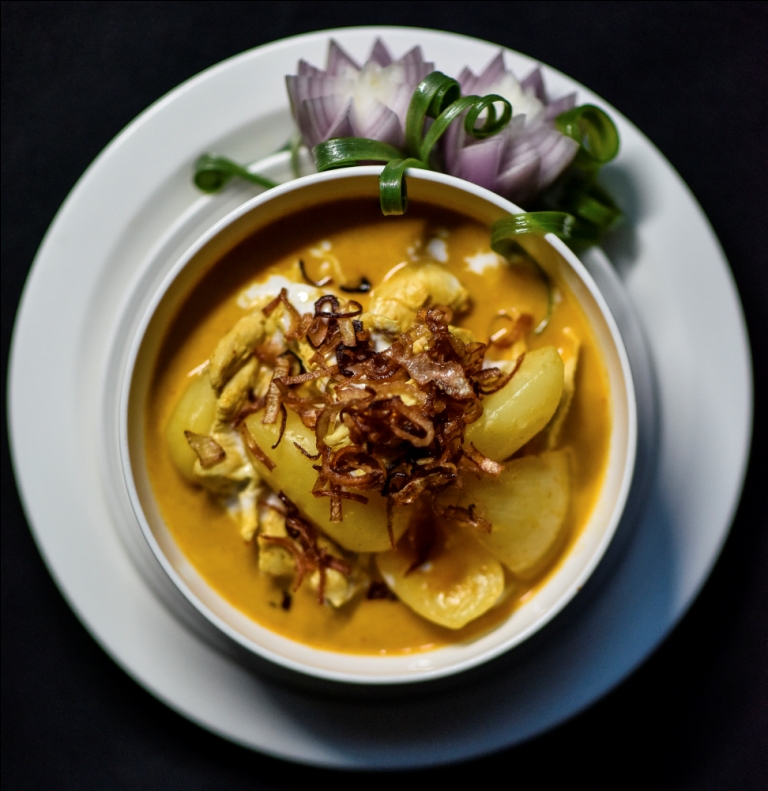
Authentic Massaman Thai Curry Recipe from Chef Sanguan Parr at Nipa Thai

Songkran is the annual festival which takes place over three days during the traditional Thai New Year, this year falling on Friday 13 – Sunday 15 April 2018.  Throughout Thailand there are celebrations, festivities and plenty of food; all culminating in a momentous country-wide water fight!

In the run up to Songkran, Sanguan Parr, Head Chef at Nipa Thai in London, has shared her recipe for Massaman Gai (Yellow Thai Chicken Curry). A popular but classic recipe from the Southern region of Thailand, the curry is simple to make but guaranteed to impress – the perfect dish for your Songkran celebrations!

Recipe: Authentic Massaman Thai Curry

Author: Head Chef Sanguan Parr at Nipa Thai

Ingredients (to serve four):

  • 2 Chicken breasts
  • 600ml Coconut Milk
  • 2 tbsp Roasted Peanuts
  • 5 Small Onions; sliced
  • 4 Medium Potatoes; cubed
  • 3 tbsp Massaman Curry Paste
  • 2 tbsp Fish Sauce
  • 3 tbsp Palm Sugar
  • 3 tbsp Tamarind Juice
  • 3 Bay Leaves
  • 1 piece Roasted Cinnamon; 1cm long
  • 5 Roasted Cardamom Pods
  • 1 tbsp Vegetable Oil

Method:

Step 1: Cut the chicken into chunks, around 2 inches in length.

Step 2: In a wok, heat the vegetable oil, curry paste and 200ml of coconut milk. Keep stirring over a low heat until fragrant.

Step 3: Add the chicken to the wok, turning frequently so all the meat is covered in sauce.

Step 4: Pour in the remaining 400ml of coconut milk and simmer gently for 5 minutes.

Step 5: Add the cubed potatoes, roasted peanuts, onions, fish sauce, palm sugar, tamarind juice, bay leaves, cardamom and cinnamon. Keep over a low heat to simmer until all the ingredients are tender.

Step 6: Remove from the heat and serve with steamed white rice.

Throughout Songkran 2018, Nipa Thai will be offering its traditional menu. Nipa Thai is open from 5pm-10.30pm, Monday-Sunday.

Nipa Thai, Royal Lancaster London, Lancaster Terrace, London W2 2TY

Tel: 020 7551 6000 or www.niparestaurant.co.uk

Posted on 1 Comment

Roasted Spiralised Carrot & Feta Salad

Now we’re past the most depressing day of the year, why not have a look at one of the recipes from Aldi, to brighten up the rest of the month.  In the past, I’ve never been much for spiralising, but it does look very good in pictures and on plates.  Happy January.


Roasted Spiralised Carrot & Feta Salad

Aldi
Prep Time 10 minutes
Cook Time 8 minutes
Total Time 18 minutes
Course Mains

Ingredients
  

  • 2 Courgettes washed and trimmed
  • 2 Carrots trimmed and peeled
  • 2 tbsp Olive Oil
  • 1 tbsp Balsamic Vinegar
  • Freshly ground Salt and Black Pepper
  • 100 g Feta Cheese crumbled
  • 50 g Walnut Pieces
  • 1 tbsp Fresh Parsley chopped

Instructions
 

  • Pre-heat the oven to 200°C/Fan 180°C/425°/Gas Mark 6.

  • Spiralise the courgettes and carrots using the ‘thin spiral cone’.

  • Place in a bowl and add the oil, vinegar and seasoning and mix well.

  • Spread the vegetables onto a large (or 2 smaller) baking tray and roast for around 7-8 minutes, stirring a couple of times.

  • Meanwhile, toast the walnuts in a dry pan, stirring frequently to prevent burning, then tip onto a plate to cool.

  • Remove the vegetables from the oven and place in a serving bowl.

  • Sprinkle over the cheese, walnuts and finally the parsley.

  • Delicious served as a light lunch or as an accompaniment to grilled meats or fish.


Posted on 1 Comment

Olive Oil Buyers Guide by Jamie’s Italian

This is a Collaborative Post.

Deciding which olive oil to buy isn’t always an easy thing to do.  I know I’ve spent time looking at labels and trying to decide which is the best option for me.  In the past, I’ve always tended to go with Extra Virgin Olive Oil, just because it sounded better, but even I know that’s a naive way to make a decision on food ingredients.  I found this infographic intriguing, mostly because it is giving us the information we need, to check on the quality of an oil for ourselves.

I now know that for baking and frying, I’ve been using the wrong oil….which I knew for myself, as I wasn’t happy with it and had switched to Rapeseed for frying, but Extra Virgin for salad dressings, but now I’m keen to try Light Olive Oil for myself for bread making and Pure Olive Oil for frying.  If I’m honest, I had no idea, at all, that Oils had such a large range of flavour options.  I’d be keen to know which brands sit at which taste level.

I’d always presumed that Italy was the largest producer of Olive Oil for us, here in the UK, so it was a bit of a surprise to find out that it’s actually Spain.

Enjoy, and I hope this helps you as much as it has me.

The full infographic which was created by Jamie’s Italian, is a beautifully crafted visual guide to Olive Oil, that not only gives the different types of oil, but also suggestions on cooking and doing the tasting for ourselves.


From Visually.