Posted on Leave a comment

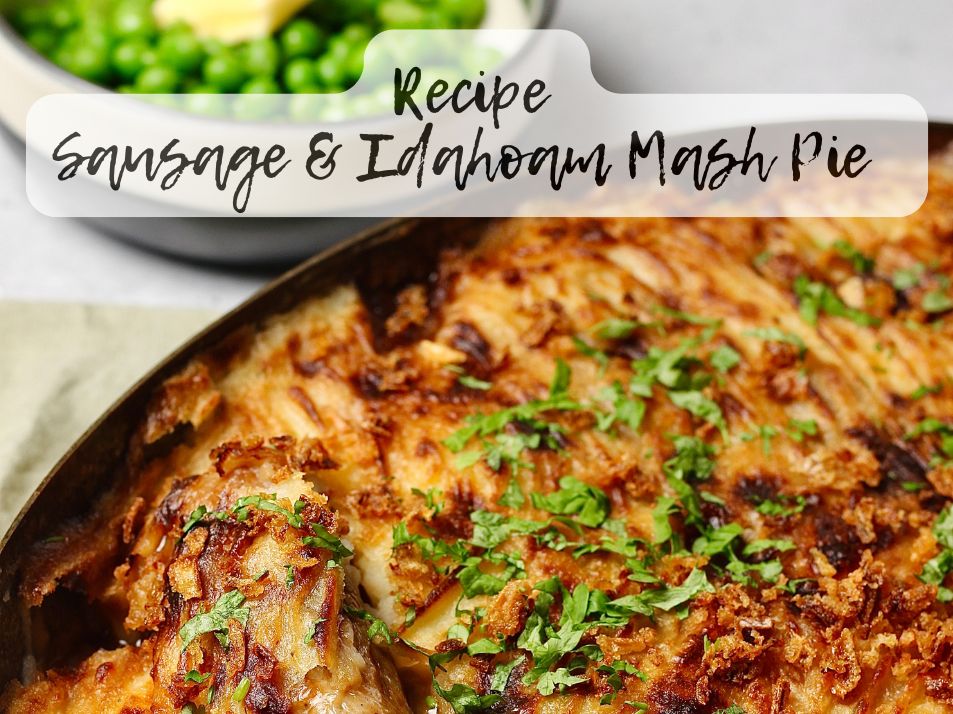
Feel Good Easy & Speedy Sausage & Idahoan Mash Pie Recipe

I’m actually ok with quick ways to make tasty meals. Not everything needs to be fresh cooked from scratch to be nutritious or healthy. I absolutely plan to have this as a Christmas week recipe this year . I think we’ll all completely enjoy it. This is a quick recipe to make a full meal in minutes.

Sausage and Idahoan Mash Pie

Fabulous and speedy mash pie from Idahoan Mash
Course Main Course
Servings 3 People

Ingredients
  

  • 6 Sausages Any Brand
  • 1 White Onion Finely Sliced
  • 2 tbsp Vegetable Oil
  • 200 ml Instant or Ready Made Beef Gravy
  • 1 pack Idahoan Butter & Herb Instant Mash
  • 3-4 tbso Crispy Onions

Instructions
 

  • Preheat the oven to 200°C. 
  • Place the sausages and onions into an ovenproof dish, drizzle with the vegetable oil and place in the oven until the sausages are cooked and the onions are soft. This should take about 20-25 minutes. 
  • Make up the gravy if using instant, and prepare the Idahoan mash according to package instructions. 
  • Pour the gravy over the sausages and onions, then top evenly with the mash, using a fork to create some texture. 
  • Sprinkle with crispy onions the return to the oven for 10-15 minutes to brown the mash before serving. 
Keyword Idahoan mash, Idahoan mash pie, idahoan mash,, idahoan perfect mash, sausage and mash pie, sausage pie

Idahoan Mash was formed when a group of local growers from Lewisville, Idaho decided to join forces to start a potato dehydration plant, leading to the Idahoan Brand. I’ll be posting some recipes soon as I try making it myself, although you can have a look here at some recipes that might work for you.

Posted on Leave a comment

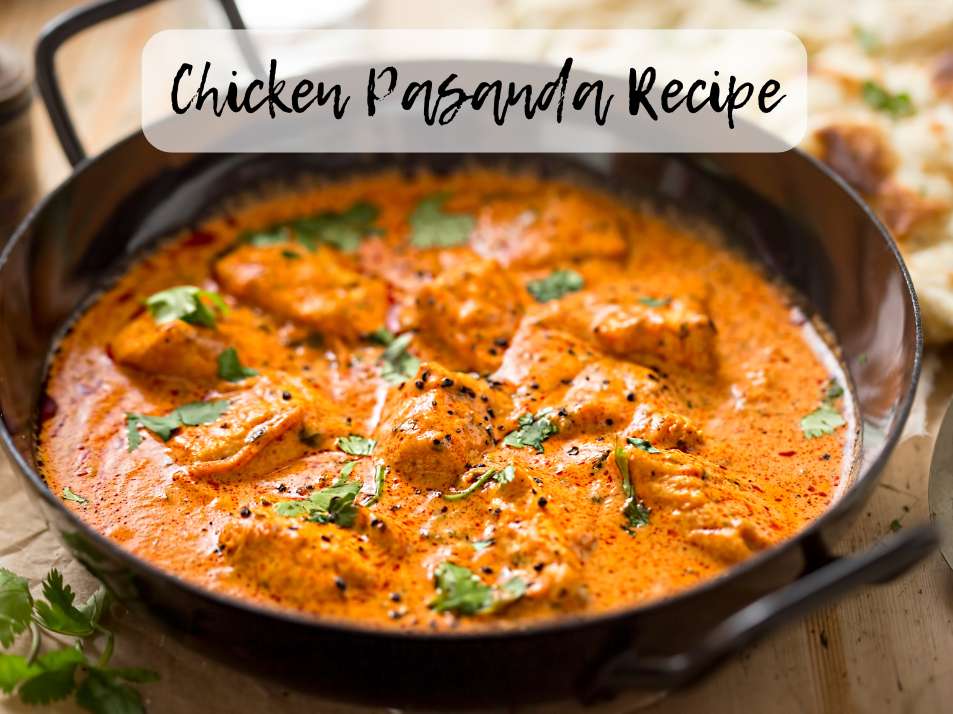
How To Quickly Make Chicken Pasanda Recipes

A favourite of mine, and an easy dish to make for all the family. We tend to make this type of dish without very spicy ingredients, so ours is quite a cool and easy to eat for all the family dish. Although it’s not recommended to add tomatoes to this dish, I actually often do, as I like that extra tastebud zing.

This is one of those one pot curries, where all you need to do is add some rice and seasoning to go from creation to eating in less than 30 minutes. If you have a fussy eater or one of the family who likes more spices than everyone else, just make a little dish alongside in a mini sized pan. This is a great curry if you’re cooking for kids or grown ups who like and also don’t like spicy-hot food.

Chicken Pasanda Recipe

Prep Time 10 minutes
Course Main
Cuisine Indian
Servings 6

Equipment

  • 1 Frying Pan Large

Ingredients
  

  • 750 g Chicken Chopped
  • 400 g Plain Yoghurt – Full Fat
  • 250 g Onion Finely Chopped
  • 80 g Double Cream
  • 40 g Ghee or Sunflower Oil or Rapeseed Oil
  • 40 g Almonds or Cashews Ground
  • 20 g Ginger – Minced (or 10g Powdered)
  • 20 g Garam Masala Ground
  • 10 g Cumin Powdered
  • 10 g Coriander Ground
  • 10 g Turmeric Ground
  • 10 g Chilli Powder / Curry Powder / Ground (Optional)
  • 3 g Salt
  • 3 g Pepper Finely Ground
  • 3 cloves Garlic – Minced (or 10g Powdered)

Instructions
 

  • Add your ghee/oil of choice to a frying pan over a medium heat for one minute or until hot. Add your chopped onion and stir frequently until soft.
  • Add chicken breast and cardamon. Cook the chicken until it is fully sealed, turning often in the pan.
  • Add the garlic, cumin, ginger, garam masala, coriander, turmeric, salt and pepper. Also add any spices if you plan to make the curry a spicy one. Cook, turning the chicken often, until the chicken is fully coated with the spice mixture.
  • Add the ground almonds or cashews, the yoghurt and cream and bring to a gentle simmer until the chicken is fully cooked. (this will depend on the size you have chopped your chicken into – usually anything from 5-10 minutes). Stir well to ensure your curry does not stick to the pan.
  • Stir in the coriander and serve. Popular serving suggestions are nan bread, chapati, rice and mango chutney.

Notes

Serve Hot.  Not suitable for freezing.
Keyword chicken curry, chicken pasanda, curry recipe, indian recipe

Although I would be tempted to freeze this recipe, I’d prefer to pop it in the fridge as soon as it’s cooled and eat within 3 days as I tend to use a low fat yogurt. The higher the fat count, the better chance it has of looking better. In saying that, food that is defrosted still tastes amazing, but just doesn’t have the same look as cooked from fresh.

Posted on 1 Comment

Recipe: Rice and Leek Pilaf with Wild Mushrooms

This pairing of leeks and tasty wild mushrooms with Indica Rice and aged cheese makes this rice and leek pilaf a hearty and filling dish. Quick and easy to make, ideal for a quick supper or a Saturday
lunch with friends. Use highly versatile European Rice, grown in Greece, to ensure quality
and flavour.

There are few meals as easy as making a sauteed rice dish, and as a rice fan, I’m happy to post this. It’s a type of meal that we make in the Scottish Mum household frequently although we use regular mushrooms rather than dried.

Rice and Leek Pilaf with Wild Mushrooms

Prep Time 15 minutes
Cook Time 20 minutes
Course Main
Cuisine greek, Italian
Servings 4 Servings

Ingredients
  

  • 300 grams European Indica Rice
  • 500 grams Dried Mushrooms Porcini, Trumpets and Morels
  • 500 ml Lukewarm Water
  • 500 grams Leeks Finely Chopped
  • 100 grams Aged Graviera Cheese or Vegan Parmesan Cheese Optional
  • 60 grams Butter or Vegan Alternative
  • 20 ml Cognac
  • 1 tsp Sugar
  • Salt and Pepper To Taste
  • Tarragon Pinch

Instructions
 

  • Soak the dried mushrooms in the lukewarm water.
  • Place a pot of water, with a teaspoon of sugar and pinch of salt, over a medium-high heat and simmer the leeks until they soften. Drain the water.
  • Place a saucepan over a medium-high heat, melt half the butter, and sauté the rice and partially cooked leeks with the pinch of tarragon, salt and pepper.
  • Add the mushroom, the cognac and then slowly stir in the mushroom water.
  • Simmer the mixture for about 20 minutes until cooked.
  • Grate the cheese.
  • When ready, remove from the heat, stir in the remaining butter, add the grated cheese, and serve hot.

ABOUT EUROPEAN RICE

European Rice is high quality rice grown in Greece since the 1950s and other European countries. There are two varieties: Indica Rice (long rain) and Japonica Rice (medium grain). European Rice has a high nutritional value, being rich in B vitamins, such as Niacin, Thiamine, Riboflavin and Selenium. The EU is both self-sufficient and a net exporter of Japonica rice. All European rice complies with the Integrated Quality Management System for the Agricultural Production of Rice, which is based on good agricultural practices which respect the environment, protect the producer-grower’s health and offer a healthy and safe product for consumers. For more information see: https://www.europeanrice.eu/ 

Disclaimer: Funded by the European Union. Views and opinions expressed are however those of the author(s) only and do not necessarily reflect those of the European Union or the European Research Executive Agency (REA). Neither the European Union nor the granting authority can be held responsible for them. 

Scottish Mum Blog Additional Disclaimer:  No payment was received for the publication of this Rice and Leek Pilaf Recipe with Wild Mushrooms.


Posted on Leave a comment

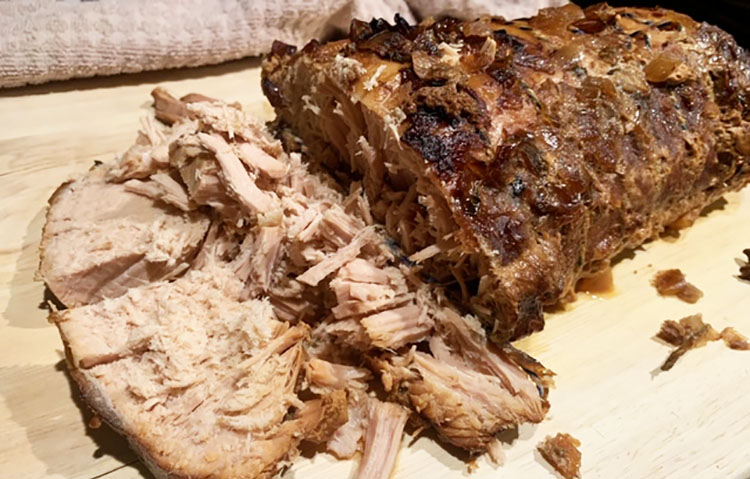
Slow Cooked Pulled Pork – in Zero Sugar Fizzy Orange

I had no idea how this would turn out.  I wanted to try in coke, but couldn’t get any.  I couldn’t get irn bru either, so zero sugar fizzy orange was all I could buy.  I wanted a fruity flavour, but without the excess sweetness that can come from using actual fruit or full sugar drinks.

Even getting meat at the moment is difficult, with the way the shop shelves are, so I count myself lucky to have bagged this beautiful piece of meat that sat alone and forlorn on the shelf.  I tend not to buy many joints of meat, as the price tends to be more than I’m willing to often pay to feed us all, but in this time of shortages, whatever is there, is what ends up in the shopping basket.  My fridge currently looks decidedly bare, which is unusual for me, as I always tend to have lots of fruit and veg in there, but I think I must be shopping at the wrong times these days.  I really must make an effort to be more adventurous about the times I try to get shopping, and with no online deliveries in the supermarkets, I’ve had to resort to a butcher delivery for the next few weeks.  Needs must.

It worked out great.  I cooked it on the low slow cooker setting overnight, for around 8-9 hours, and let it rest for half an hour.  I usually sear the meat before adding to the slow cooker, but this time, I just wanted to throw all the ingredients in and go to bed, as I was absolutely whacked.

I used a fairly large joint of meat, and wouldn’t use the high setting for this type of cooking, as I suspect it would toughen the meat somewhat.

I did soften the onions for a few minutes in pan, with a little butter, and mixed with a vegetable stock cube for a bit of salty flavouring.

About half a litre of zero sugar orange fizzy drink, and a little top of up of water and this was on the way.

When I got up in the morning, I simply transferred to a chopping board to rest, then sliced it so the boys could have pulled pork sandwiches for brekkie.  They were so hungry, I didn’t get any pictures of their sandwiches, but the meat was fabulous, not to salty, not fruity, and definitely not boring.

What unusual combinations, but oh so tasty.


Posted on 1 Comment

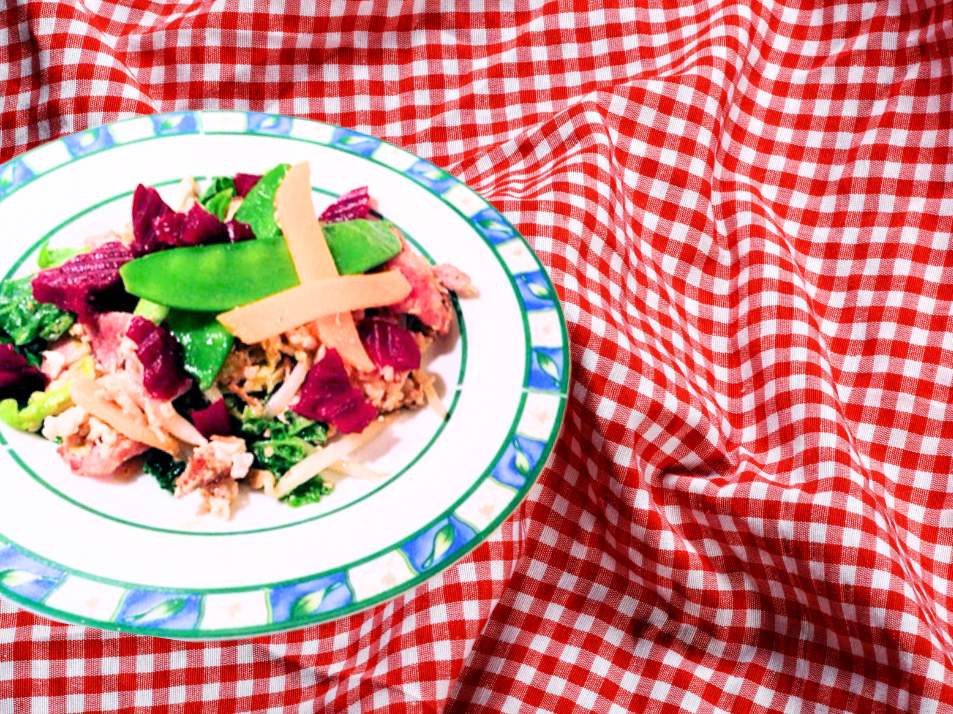
Chicken, Bacon and Beetroot Stir Fry

Chicken, Bacon and Beetroot Stirfry

Lesley S Smith
4 from 1 vote
Prep Time 10 minutes
Cook Time 25 minutes
Total Time 35 minutes
Course Lunch
Servings 8

Ingredients
  

  • 10 Rashers Bacon
  • 2 Chicken Breasts Cut into strips.
  • 4 Eggs
  • 600 g Mixed Stir Fry Veg Beansprouts, pumpkin strips, shredded carrot, green leaf salad, mange tout.
  • 1 Onion Chopped.
  • 1 Jar Baxters Crinkle Cut Beetroot Chopped into smaller pieces. Wash, drain and dry the beetroot before adding to a stir fry.

Instructions
 

  • Use your pieces of meat, chicken or bacon and lightly fry in a wok or thick bottomed pan until fully cooked.

  • Add eggs to the pan and let them cook similar to scrambled eggs, stirring in with the meat as it cooks.


  • Add an onion to the pan and let the mixture slowly cook for a few minutes on low.

  • Stir in your stir fry vegetables and either spray cooking oil, or add a couple of tablespoons of oil to make the stir fry.

  • Add the beetroot towards the end of cooking if you are happy with the pinky shade that your meal till take on from cooking for a few minutes.

  • I had split my stir fry into two lots. For the kids, I gently folded the beetroot in with their finished stir fry to keep it sharp, bright and pleasant to the eye.

  • For my own, I stirred in the beetroot and let it cook with the stir fry for a few more minutes to take on the beetroot taste. I am happy to say this is one recipe that I am going to make several variations of.


Posted on 2 Comments

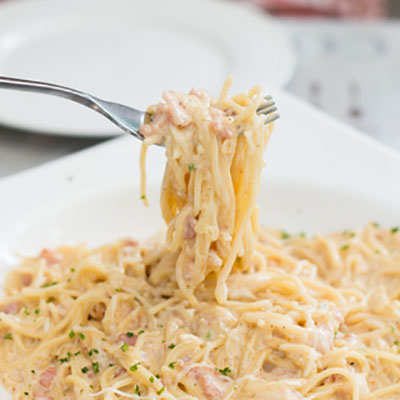
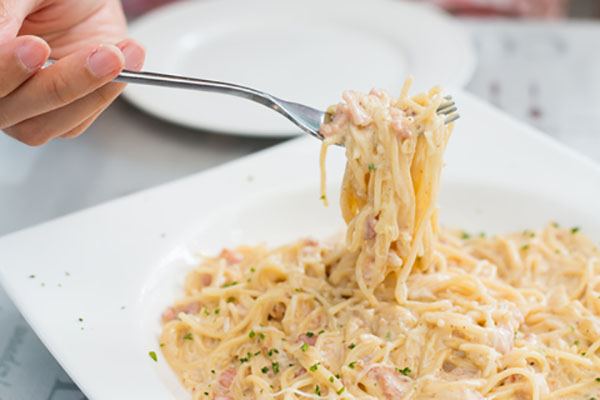
How to Make Easy Spaghetti Carbonara – Cheaply – £2.50 – Feed up to 8 People

My special needs boy needs help with making meals, and one day, he’ll likely have to try and make his own, and on a budget.  For this, I kept the ingredients light, and it was to feed 7 people, although we could easily manage 8 small to medium bowls with these ingredients.  The price…..   We kept it low.  20p for Tesco 500g spaghetti, £1.99 for 2 jars of Carbonara sauce from the Co-op, which fabulously, actually has real bits of ham in it, and a creamy sauce.  It’s the best version I have used for this.

Count the milk and butter, and we are at around:

  • £2.50 to feed 8 the basic carbonara.
  • Plus garlic bread from Tesco Hearty Food Range at 32p each x 3 = Optional 96p for three baguettes.
  • Total £3.46 for Spaghetti Carbonara and Three Garlic Baguettes.

Easy Spaghetti Carbonara

Lesley Smith
Prep Time 5 minutes
Cook Time 15 minutes
Total Time 20 minutes
Course Mains, Pasta
Cuisine Italian

Ingredients
  

  • 500 g Spaghetti
  • 30 g Butter
  • 2 Jars Carbonara Sauce Co-op
  • 2 Teaspoons Salt
  • 200 ml Milk

Instructions
 

  • Very simply, just bring the spaghetti and salt to the boil, and simmer until the right consistency for your palate. My boy likes it soft, and other like it al dente, so choose your favoured options by the instructions on the packet you buy.

  • Drain the pasta, rinse with boiling water and drain again.

  • Return the pasta to a pan and add the carbonara sauce. Heat and stir until thoroughly hot.

  • Add butter, stir, then add milk until your carbonara reaches your desired consistency.

  • Serve with garlic bread.
Posted on Leave a comment

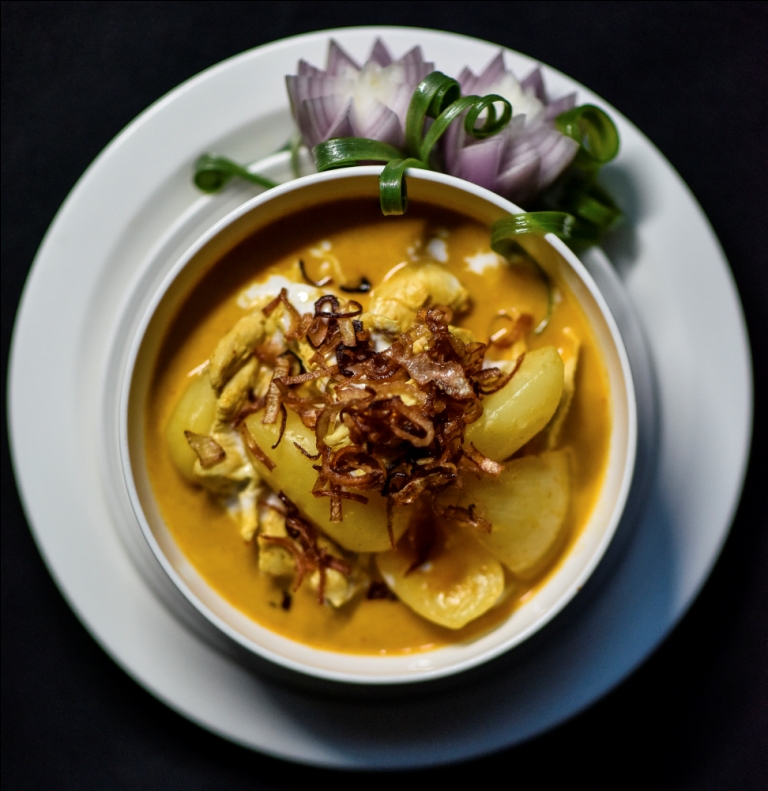
Authentic Massaman Thai Curry Recipe from Chef Sanguan Parr at Nipa Thai

Songkran is the annual festival which takes place over three days during the traditional Thai New Year, this year falling on Friday 13 – Sunday 15 April 2018.  Throughout Thailand there are celebrations, festivities and plenty of food; all culminating in a momentous country-wide water fight!

In the run up to Songkran, Sanguan Parr, Head Chef at Nipa Thai in London, has shared her recipe for Massaman Gai (Yellow Thai Chicken Curry). A popular but classic recipe from the Southern region of Thailand, the curry is simple to make but guaranteed to impress – the perfect dish for your Songkran celebrations!

Recipe: Authentic Massaman Thai Curry

Author: Head Chef Sanguan Parr at Nipa Thai

Ingredients (to serve four):

  • 2 Chicken breasts
  • 600ml Coconut Milk
  • 2 tbsp Roasted Peanuts
  • 5 Small Onions; sliced
  • 4 Medium Potatoes; cubed
  • 3 tbsp Massaman Curry Paste
  • 2 tbsp Fish Sauce
  • 3 tbsp Palm Sugar
  • 3 tbsp Tamarind Juice
  • 3 Bay Leaves
  • 1 piece Roasted Cinnamon; 1cm long
  • 5 Roasted Cardamom Pods
  • 1 tbsp Vegetable Oil

Method:

Step 1: Cut the chicken into chunks, around 2 inches in length.

Step 2: In a wok, heat the vegetable oil, curry paste and 200ml of coconut milk. Keep stirring over a low heat until fragrant.

Step 3: Add the chicken to the wok, turning frequently so all the meat is covered in sauce.

Step 4: Pour in the remaining 400ml of coconut milk and simmer gently for 5 minutes.

Step 5: Add the cubed potatoes, roasted peanuts, onions, fish sauce, palm sugar, tamarind juice, bay leaves, cardamom and cinnamon. Keep over a low heat to simmer until all the ingredients are tender.

Step 6: Remove from the heat and serve with steamed white rice.

Throughout Songkran 2018, Nipa Thai will be offering its traditional menu. Nipa Thai is open from 5pm-10.30pm, Monday-Sunday.

Nipa Thai, Royal Lancaster London, Lancaster Terrace, London W2 2TY

Tel: 020 7551 6000 or www.niparestaurant.co.uk

Posted on 1 Comment

Roasted Spiralised Carrot & Feta Salad

Now we’re past the most depressing day of the year, why not have a look at one of the recipes from Aldi, to brighten up the rest of the month.  In the past, I’ve never been much for spiralising, but it does look very good in pictures and on plates.  Happy January.


Roasted Spiralised Carrot & Feta Salad

Aldi
Prep Time 10 minutes
Cook Time 8 minutes
Total Time 18 minutes
Course Mains

Ingredients
  

  • 2 Courgettes washed and trimmed
  • 2 Carrots trimmed and peeled
  • 2 tbsp Olive Oil
  • 1 tbsp Balsamic Vinegar
  • Freshly ground Salt and Black Pepper
  • 100 g Feta Cheese crumbled
  • 50 g Walnut Pieces
  • 1 tbsp Fresh Parsley chopped

Instructions
 

  • Pre-heat the oven to 200°C/Fan 180°C/425°/Gas Mark 6.

  • Spiralise the courgettes and carrots using the ‘thin spiral cone’.

  • Place in a bowl and add the oil, vinegar and seasoning and mix well.

  • Spread the vegetables onto a large (or 2 smaller) baking tray and roast for around 7-8 minutes, stirring a couple of times.

  • Meanwhile, toast the walnuts in a dry pan, stirring frequently to prevent burning, then tip onto a plate to cool.

  • Remove the vegetables from the oven and place in a serving bowl.

  • Sprinkle over the cheese, walnuts and finally the parsley.

  • Delicious served as a light lunch or as an accompaniment to grilled meats or fish.


Posted on 2 Comments

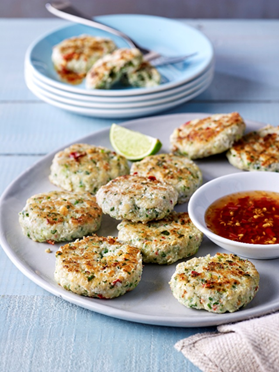
Thai Fishcakes with Chilli Dipping Sauce

Guest Recipe.  When it comes to healthy eating, home cooking is a great place to start. But when the reality of all that dicing, slicing, washing, chopping and prepping to make holier-than-thou fresh nutritious meals dawns, it’s easy to lose your way! Whether you’re going gluten-free, paleo, low-carb or FODMAP, the Very Lazy range of pre-chopped and ready-to-use essentials from chopped garlic, chillis and ginger to lemongrass paste and cooking concentrates will make it easy as pie (or pie’s much healthier cousin).
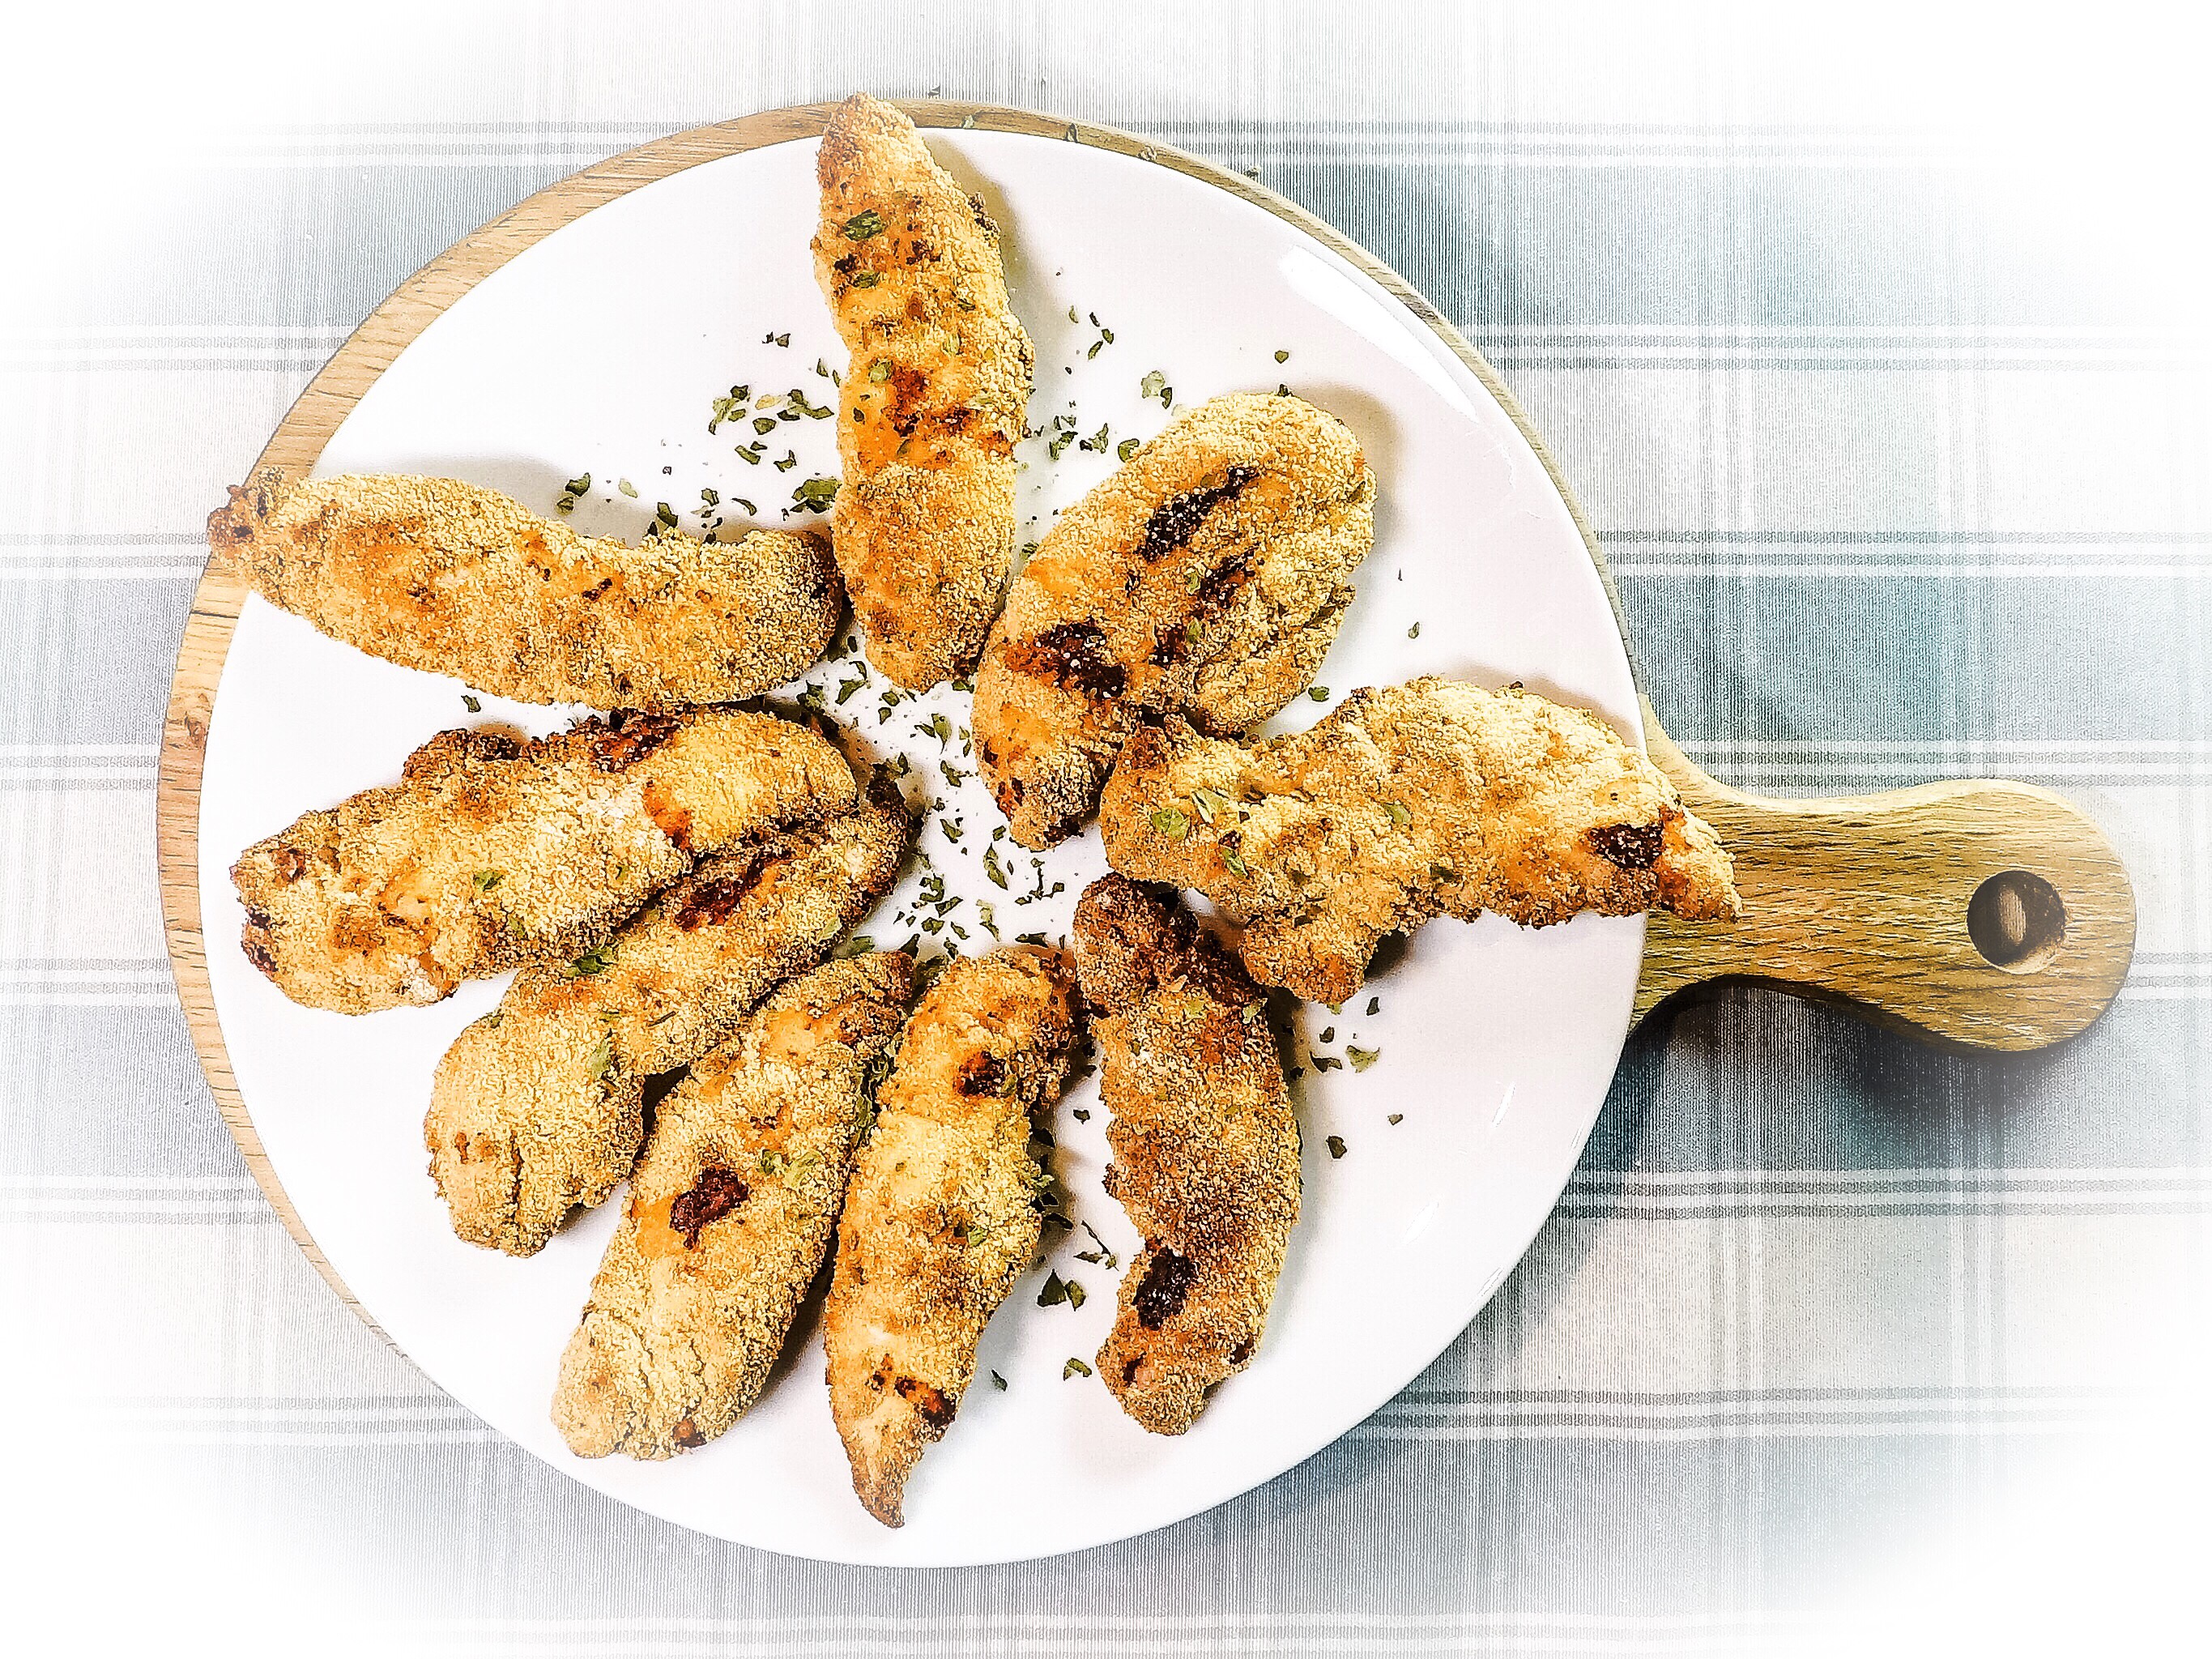
Thai Fishcakes with Chilli Dipping Sauce

Very Lazy
5 from 1 vote
Prep Time 10 minutes
Cook Time 10 minutes
Total Time 20 minutes
Servings 4

Ingredients
  

  • 450 g skinless and boneless cod or haddock fillets roughly chopped

  • 1 teaspoon Very Lazy Chopped Ginger

  • 1 tablespoon Thai fish sauce

  • 1 teaspoon Very Lazy Lemongrass Paste

  • 1 teaspoon Very Lazy Garlic Paste

  • 2 tablespoons freshly chopped coriander

  • 1 teaspoon Very Lazy Chopped Red Chillies

  • 1 egg white

  • 2 spring onions thinly sliced

  • 1 tablespoon oil for frying


  • FOR THE LIME CHILLI DIPPING SAUCE

  • 2 tablespoons rice wine vinegar

  • 1 teaspoon Very Lazy Chopped Red Chillies

  • finely grated zest and juice 1 lime

  • 2 teaspoons caster sugar

Instructions
 

  • Place all the ingredients for the fishcakes in a food processor and blend to a smooth paste. Put the mixture in a bowl and stir in the spring onions. With slightly wet hands, shape the mixture into 12 patties.

  • In a small bowl, whisk all the ingredients for the dipping sauce, until the sugar has dissolved.

  • Heat the oil in a large frying pan and cook the fishcakes for 4-5 minutes each side until golden brown and cooked through.

  • Serve immediately with the dipping sauce.


Posted on Leave a comment

Chicken Dippers from Fresh Fillets

Making great chicken dippers at home is just so easy to do.  All it needs is a little flour, a couple of eggs, chicken fillets, or a few chicken breasts chopped up, and ending up with breadcrumbs or ruskoline to finish them off.

I haven’t added the actual method for this, as it’s pretty self-explanatory.  You can see it in the video, but simply crack the eggs, beat them, and dip the chicken first in the flour, then the egg and finally the crumb coating.

Cook how you prefer, either deep-fried, shallow fried, or oven baked, then sprinkle with chopped parsley.

img_4680

[fbvideo link=”https://www.facebook.com/ScottishMumBlog/videos/1219212011478078/” width=”500″ height=”400″ onlyvideo=”1″]

Posted on Leave a comment

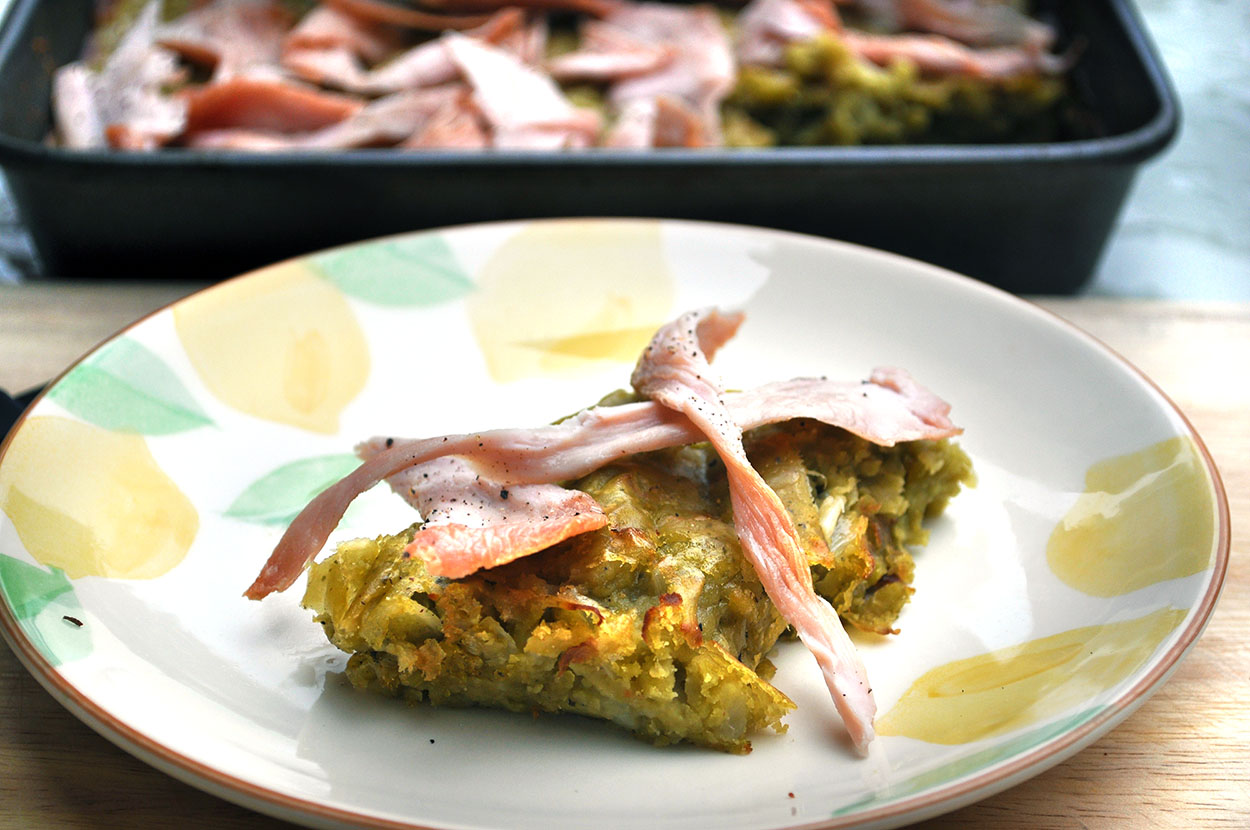
Budget Meals: Peas Pudding Recipe

A lot of us are watching the pennies right now, so making meals that are both healthy and filling can be challenging on a budget.  With few ingredients, and whatever is in your cupboard, adding things to split green peas is fairly simple.

This makes a fairly large batch, so unless your diners don’t eat large portions, halving the quantities might be a good idea.

peas-pudding-2-1250

Peas Pudding Recipe

Lesley Smith
Prep Time 15 minutes
Cook Time 1 hour 25 minutes
Total Time 1 hour 40 minutes
Course Mains
Servings 10

Ingredients
  

  • 250 g Green Split Peas Dried
  • 150 g Onion chopped.
  • 150 g Leek chopped.
  • 50 g Butter.
  • Water.
  • 3 Vegetable Stock Cubes.
  • Salt and Pepper.
  • Herbs of Your Choice.
  • 1 Crushed Clove of Garlic or 1 Cube of Frozen Garlic.
  • 200 g Bacon Turkey or Chicken Strips.

Instructions
 

  • Put the green split peas into a fairly large pan, with around 1.5 litres of water. Bring to the boil and let simmer for around 40 minutes. You need to keep a close eye, as the water can boil off pretty quickly. You may need to top up the water levels.

  • Drain the green split peas, then pop them back into the pan, add all the other ingredients and adding 1.5 litres of water again. Mix well, and bring to the boil, letting this simmer until the water reduces by about two thirds. Be careful you don't leave this alone as it will burn quickly if you do. I added a good measure of salt and pepper at this stage. Some people add basil and thyme, and even rosemary, but I know my boys wouldn't eat that, so I leave it out.

  • Add your slushy peas mix to a baking tray, and let it set in the oven for around 25 minutes, at 180 degrees C. Your oven might take slightly less time, or more. It won't set firmly at all, but will be easy to cut when it's ready.

  • I cook my meat separately, and add it to the top of the peas pudding in the last five minutes, before removing from the oven. Some people add it when it first goes into the oven, and cook it as part of the dish.

peas-pudding-1-2000

Posted on Leave a comment

Home Made Burgers with Red & Orange Peppers

Making our own burgers is incredibly easy, and we then know what’s actually in them.  I don’t expect to have to mince slabs of meat, but I do like getting bags of mince, that I can use to make my own burgers, meatballs and more, as it’s just so easy to do, and saves me having to decide on different things when I’m shopping.

It takes very little time to actually throw some ingredients together, and it’s a bit of a no brainer to me.  Yes, the kids sometimes go to buy a sweetie and come back with a pack of sausages (yes, I know they’re strange) but I like to have choices when I’m using ingredients in my kitchen.  I used mince from The Lean Butcher, which is always fabulous, as it can come delivered straight to my door.

This is so simple and just thrown together with some mince and chopped veg.  It’s all fresh, it’s all ours, and I don’t have to worry what’s been added to it in the forming process.

I only had some peppers and onion left over from soup, so they were a perfect go together for these burgers.

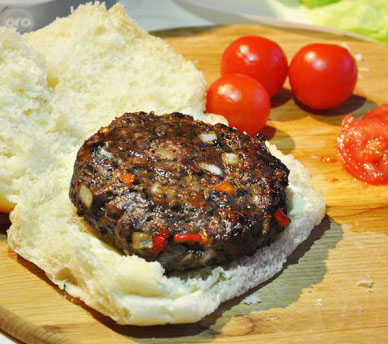
Burger With Red and Orange Peppers

Burger With Red and Orange Peppers 5 Ora TowelsWe used our samples of the new Ora Stack to eat our burgers with, as they’re a perfect size.   They’re a super absorbent and ultra strong kitchen roll, that comes in a circular shape on a stack, which means it’s a one handed lift off, simply by using a thumb.

As they’re a one hand grab, I’ve found myself reaching for these before using my regular kitchen rolls, so mine disappeared pretty quickly.  I’ve not seen them in shops here yet, but I’ll be picking some up when I do.

There’s nothing worse than having to rip off a piece of kitchen roll with two hands, when one is covered in food while I’m cooking.  I found them very absorbent and one piece went a long way.

Burgers with Red and Orange Peppers Recipe

Burger With Red and Orange Peppers

Home Made Burgers with Red and Orange Peppers

Lesley Smith
4 from 1 vote
Prep Time 10 minutes
Cook Time 20 minutes
Total Time 30 minutes
Course Mains / Burgers
Cuisine British
Servings 5 -10

Ingredients
  

  • 800 g Lean Minced Beef.
  • 60 g Red Pepper chopped.
  • 60 g Orange Pepper chopped.
  • 50 g Onion finely chopped.
  • Half Teaspoon Salt.
  • Half Teaspoon Pepper.

Instructions
 

  • Put your mince into a bowl, and then pour in the chopped vegetables.

  • Add in the salt and pepper.

  • I use my hands for best effect with this, as I find that a wooden spoon takes too long, and just doesn't allow the peppers and onion to be fully mixed with the mince. It takes a couple of minutes to thoroughly mix the food together until it is in a loosely bound state.

  • I use a cheap burger press I bought from Lakeland that makes burgers around 180g each, but before that, I used to make mine by hand, simply taking a dollop of the mixture and shaping it into a patty with my hands.

  • For smaller burgers, you could easily get around 10 from this mix, but I made 5 larger burgers.

  • Everyone had different requirements for how they like their burgers cooked, ie red in the middle, fully cooked, or almost burned black. I like mine well done, so gauge your own timings for cooking in a moderate oven for as long as you need to.