Posted on 2 Comments

Making Burgers & the Quarter Pounder Burger Press

If you know where your mince has come from, then you can be sure that it isn’t full of additives or processed foods.  As a low-carb person these days, I also want to know exactly what is in my food, so that I can count it.

Burgers 1

Lakeland Quarter Pounder Burger Press.  Ref-10481-£8.99.
Lakeland Quarter Pounder Burger Press. Ref-10481-£8.99.

I’d been tempted by the Lakeland Burger Press for a while, but to be honest, I hadn’t got round to it before now.

In the past, I tended to simply make a ball with my hands and then flatten it, but the burgers were usually pretty misshapen, and thinner at the ends than in the middle, so I thought it was worth a go.

While I was online for an order, I had to pop this beauty into my shopping basket.  It’s simple, yes, but also brilliant at getting regular shapes.

Burgers & Fillers

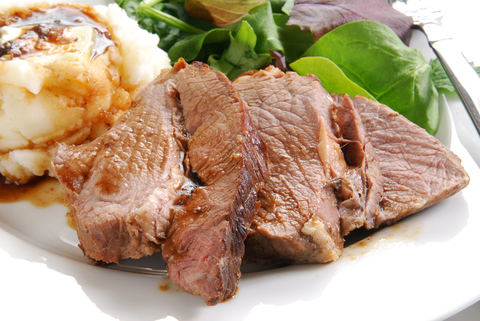
For my mince, I chose the food from my local butcher, Andrew Gordon, of the The Lean Butcher, who has recently rebranded (previously known as the Fresh Food Guru, online).  He has a lean steak mince deal which is perfect for 3KG of mince.

There are 153 calories per 100g and less than 0.1g of carbohydrate.  Perfect in my book.

To make my burgers, I simply chopped up some onion, then added a chunk of garlic from our plot.  It’s the first time I’ve tried our own garlic, and it beat the shop version hands down.

Onion and Garlic Burgers

Lesley Smith
Prep Time 10 minutes
Total Time 10 minutes
Course Burgers, Mains
Cuisine Main Meal
Servings 5

Ingredients
  

  • 1.5 kg Mince.
  • 150 g Onion chopped how you like it.
  • 1 Clover Garlic finely chopped.
  • Salt to taste
  • Pepper to taste.

Instructions
 

  • This is actually really simple. I did not add breadcrumbs, as I wanted a burger without the added carbs. I put my mince and onions in a bowl, along with the chopped up garlic. Don't be scared to get your hands into the bowl, and really work the onions into the mince. I like large chunks of onions, but everyone is different.
  • Stir in salt and pepper. We all know how much we prefer, so I just add a level teaspoon of both and mix that in too. You might prefer to do without, or add more.
  • I split my mix into six even sized portions, ie rolling into a ball, then pressed each one into my burger press and push it down with a spoon, to make it firm.
  • I've heard people worrying about getting their burgers out of the burger press, but I find it quite simple. When I push the top to release the burger from the base, I simply slide a long and narrow bladed knife into the place where the burger press and the burger meets. I've never had a failure yet, even though I don't use additional binders.
  • Cook any way you like. I bake mine in a moderate heat for twenty minutes as my children like their meat well done, but you could flash fry or grill.


Posted on 6 Comments

Egg Pizza with Ham & Tomatoes (Low Carb)

For me, this is just a throw it all in kind of meal.  Fast, simple, and fills hungry bellies.

It’s a favourite of my eldest in the evening if he’s peckish.

This Egg Pizza is a five minute low carb meal.  Yes, it’s fairly high in fat, but if you’re eating low carbs, then you’re fine.  This comes in around 7.3 carbs for the whole thing, which is low for a fairly hefty meal and most people will eat half a portion.  It really does count if you’re keeping to very low carb levels, ie around 30 a day.  Also a perfect meal for diabetics doing LCHF (Low Carb, High Fat)

For everyone else, it’s a luxurious meal that you can use lower fat alternatives for fewer calories.


Egg Pizza - Ham and Tomato


Egg Pizza with Ham & Tomatoes (Low Carb)

Lesley Smith
Prep Time 5 minutes
Cook Time 10 minutes
Total Time 15 minutes
Course Main Meal
Cuisine Low Carb
Calories 371 kcal

Ingredients
  

  • 3 Medium Eggs
  • 40 g Cheddar Cheese Grated
  • 100 g Ham Shredded (I used Ham Hock for this recipe)
  • 4 Cherry Tomatoes Halved
  • 2 Pats of Butter

Instructions
 

  • Add the butter to your frying pan and let it gently heat up.
  • Crack the eggs into a bowl and give them a good whisk with a fork.
  • Turn down the heat of your pan and tip the egg into the frying pan, on a low heat.
  • Leave the egg to cook for a minute, then put your ham, tomatoes and cheese on the top.
  • Leave the Egg Pizza to cook for a couple of minutes, until all the egg is fully done.


Posted on 4 Comments

No Base – Low Sugar & Virtually Fat Free Cheesecake

Using up the Quark I bought as a tester was easier than I thought.  As a diabetic, I don’t want the sugar that is usually added to cheesecake, but I also didn’t want the calories from some of the other options, nor the carbs from a stodgy base.

This is a light and different way to make a type of cheesecake that I think I will go back to, again and again with different flavours to disguise the taste of the quark.  It’s almost fat free and has a very low sugar content.  It’s magic stuff for cheesecake.  It’s mixed well to add air into the cheesecake.  Be warned.  When you get this right, you might never want to go back to horrifically high calorie content cheesecake again in your life.

I ate a whopping serving and a half of this and broke neither my diet nor my carb count.

Quark Cheesecake 2

Baseless Virtually Fat Free Cheesecake

Lesley Smith
Prep Time 10 minutes
Total Time 10 minutes
Course Dessert
Cuisine Dessert
Servings 6 - 8 Servings
Calories 116 kcal

Ingredients
  

  • Quark Soft Cheese - 2 x 500ml Tubs
  • Stevia - Powdered - To Taste
  • Vannila Essence - To Taste
  • Strawberry Freeze Dried Pieces - 6g - I got from Sainsburys
  • Gelatine - 1 Sachet or 4 Leaf Sheets

Instructions
 

  • In your mixer, put your quark, along with four teaspoons of the Stevia, then add in some drops of vanilla. Set your mixer to whip up the cheese.
  • While the cheese is mixing, dissolve your gelatine in a small amount of hot water.
  • Add the gelatine to the cheese and do a taste test. If it is not sweet enough, add a little more stevia until you are happy with it. My kids did the taste test and we used 8 teaspoons of Stevia and five capfuls of Madagascar Vanilla.
  • Put your mixer on high for a couple of minutes, to whip some air into the mixture.
  • Pour into dishes and leave for an hour to set.
  • Serve with fresh fruit on top, or use another sachet of gelatine to create a jelly like fruit topping.

Notes

Nutrition count is approximate. I couldn't find the right information for the vanilla extract or the gelatine.


Posted on 1 Comment

Actifry Recipe: Fried Garlic Mushrooms

This is so simple in an Actifry that it’s shameful, well fast and easy anyway with no burning from this end either.

Actifry Recipe - Garlic Mushrooms

Actifry Recipe: Garlic Mushrooms

Lesley Smith
Prep Time 5 minutes
Cook Time 10 minutes
Total Time 15 minutes
Course Actifry Recipe
Cuisine Accompaniments
Servings 6

Ingredients
  

  • 400 g Mushrooms Washed, Chopped and Dried
  • 2 Teaspoons Rapeseed Oil
  • 1 Clove of Garlic Chopped

Instructions
 

  • Pop your washed, chopped and dried mushrooms and garlic into the fryer.
  • Add your Rapeseed oil.
  • Select 10 Minutes.
  • Enjoy.


Posted on 4 Comments

How to make stock in a Soup Maker

We’re all put off making stock on occasion, by the sheer need to be around as the pot simmers those old bones and bits left over from any roast we’ve had for dinner, but there is another way.

Chicken Stock 2

Determined to use my Soup Maker to its full extent, I tried making stock as a test, to see if it was really possible to do.  Any soups always taste fabulous with fresh stock, so it’s a no brainer for me.  I put the carcass or bones into a pot as soon as it’s cooked, so that I can freeze any leftovers for another day.  I don’t let it cool, as I’ve always lived by the rule of only one reheat after meat is cooked.

It’s fairly simple.  I add nothing as I prefer to add my extra ingredients at the cooking stage, but you could add different options.

Ingredients:  Carcass, Bones or Leftover Meat

Optional:  

– Salt & Pepper

– Stock Pot

– Garlic

– Onions etc

Add any bones, or chopped up pieces of leftover meat to your soup maker.  You do need to ensure there is enough room to put on your lid if you use a kettle version.

Method:

Step 1

Add your ingredients to the soup maker, choose the chunky option and run through the cycle.

Step 2

Chicken Stock 1

If you like your stock to be stronger, run it through a second cycle.

Step 3

Sieve your liquid, to separate the bones & meat from the liquid stock, and now it’s ready for use.  You can freeze the stock if it’s freshly made, but if you’ve let the meat or the carcass cool, I’d use it straight away.

IMG_8817


Posted on 3 Comments

Simple 2 Egg Tomato Omelette Recipe

Omelettes in this house have arisen due to my mother who has been very ill for the last month or so.  There was very little she could eat, but she managed to hold down omelettes.

Big omelettes or ones full of cheese and vegetables were just to heavy for her, but this light omelette with a little tomato was perfect, and have been a staple in our house ever since.  If the kids are eating anything too heavy or is too meat based, she now won’t eat it and a quick omelette gets whipped up.

An omelette is pretty tasty and really quick to put together.  It’s perfect for breakfast, a light lunch or just a snack at any time of day.   We can add almost anything we want to them, so don’t feel restricted to just adding some tomatoes like we did.  A grating of cheese would be popular for many people too.

Here it is to share for you all, our 2 egg tomato omelette recipe.   A little butter does nobody any harm in moderation, so don’t be tempted to scrimp unless you can’t take dairy.  The effect simply doesn’t work, nor taste so well done with any other oil, so we’ve learned to stick to butter for her.

Simple 2 Egg Tomato Omelette

Lesley S Smith
Prep Time 5 minutes
Cook Time 8 minutes
Total Time 13 minutes
Course Lunch
Servings 1

Ingredients
  

  • 2 Eggs
  • knob Butter
  • pinch Salt
  • 4 Cherry Tomatoes

Instructions
 

  • Put a knob of butter into a pan the size you want your omelette to be. I use a fairly small pan for a 2 egg omelette. Heat the butter until it is slightly bubbling and then turn down the heat to the lowest setting. There should be just enough butter to have a coating. In the past I didn't use quite enough and it turned more into scrambled eggs.
  • Break 2 eggs into a container and use a fork to beat them together.
  • Pour the beaten egg into the pan and move it around until the bottom of the pan is covered. Allow it to slowly cook on low for a few minutes until the centre begins to cook. If you use a spatula to slightly push the bottom of the omelette around, it should not stick to the bottom of the pan. Sprinkle a pinch of salt around the surface of the egg.
  • When the centre begins to look as if it is cooking, it looks as if it is setting. Place chopped tomatoes on one half of the omelette to allow it to be folded over more easily.
  • By this stage, you should be able to lift up your pan, shake it slightly and it should move around in the pan. Let it cook for a couple more minutes until you take a lifter and fold one half of the omelette over upon itself. I use a fork in one hand and the lifter in the other to get it more even.
  • Cooking for a further minute, turn it over and cook until the surface on both sides is a golden brown colour.
  • Serve.


Posted on 4 Comments

How to Cook Roast Beef

Roast BeefWhen it comes to late Autumn and the cold weather starts to bite, lots of us start to move to comfort food to keep our kids warm on cold days and put some good solid food into their bellies.

Making roast beef and then later adding all the trimmings is something that we can all do easily and make as healthy or as unhealthy as we want it to be.

Even adding something as simple as a Yorkshire Pudding can make it a dish that everyone would love to sit down to.

Getting roast beef cooked properly is actually easier than most people think it is.

Once it’s cooked, it can be used for a full meal, with salad, mashed, roast or boiled potatoes, or even sliced and added to sandwiches for a fabulous packed lunch.

Choose a Good Cut of Beef

I’d personally choose a rib of beef or a fillet to roast, but there are other options.

  • Beef should look mature and have been well hung.
  • There should be some fat to allow for flavour and to keep the roast moist while it’s cooking.  It can be cut off before it is served up.
  • There should be some marbling through the roast to help keep the roast moist.

Cooking Times

I’d recommend going by the times of your cooker as they can change, or be different from cooker to cooker.  As a general rule of thumb, a very hot oven around 220C to start off with for the first 30 minutes in a pre-heated oven.

Lower the temperature of the oven for the rest of the cooking time to about 190 – 200C.

I check my meat by using a thermometer and put it right into the thickest part of the meat.

Options are approximately:

  • Rare –  (130-140F) The middle of the meat is a bright red hue and pinky towards the outside.
  • Medium – (145-150F).   The outside of the meat will be brown  with a pinky centre and the roast will be hot.
  • Well Done –  (160-175F) As we prefer our meat well done here, I am usually looking for my roast to be brown throughout.

These cooking times and heats are a guide for example only.  Guide temperatures can change depending on who is cooking and the roast you have picked.  Make sure you follow manufacturers and suppliers instructions to make sure your meat is safely stored, cooked and eaten.

How to Cook Roast Beef

  • Rest your beef for an hour before cooking it.
  • It should be roasted in a tin big enough to catch any juice drip that might happen.  Completely encase the roast in tin foil and loosely close it.
  • Once the meat is cooked, it again needs to rest.   Use the aluminium foil and make a loose parcel shape over the top and leave the roast to rest for about 15-20 minutes to get the most out of the meat.
  • Pour off any excess juice for making gravy and your roast is ready to carve and serve with your accompaniments.


Posted on 3 Comments

How to make a quick uncooked strawberry sorbet with stevia.

A sorbet recipe gives a lovely and light ice cream substitute and doesn’t show that it only a blend of strawberries and sugar or sweetner.   I believe they used to be used to cleanse the palate between courses in earlier centuries, but sorbet now tends to be used in place of ice-cream, or as a gorgeously light and tasty alternative on a hot day to cool us down.

To make them, it just involves freezing fruit, water, sugar and on occasion lemon juice to help it keep for longer.   Recipes tend to recommend frozen strawberries, but I prefer mine fresh as the sweetner takes care of any lack of sweetness in them.

Strawberries

I decided to give my new stevia sweetner a try out in this version as I wanted the calories to come only from the strawberries themselves.  Stevia is quite expensive so it’s something we have to think about carefully before adding to our food as a cooking ingredient.  I used an ice-cream maker and the consistency was perfect for us.

When you freeze this, it will take a while but because the sugar isn’t cooked, the consistency if it is frozen too long or overnight will be like an ice pole with the water content forming larger crystals.   If you are using it after a long time in the freezer, take it out so that it can defrost enough to be pliable.  If you want a smoother, creamier version of sorbet, you will need to cook the sweetner into a syrup, but this did the trick for me.  It all depends how you like your sorbet.

Strawberry Sorbet Recipe with Stevia Instead of Sugar (Simple, Uncooked Version)

Lesley S Smith
If you add an egg white, the sorbet will be slightly creamier. I prefer the slushy strawberry ice without the egg.
Prep Time 10 minutes
Cook Time 30 minutes
Total Time 40 minutes
Course Appetizer
Servings 6 - 8
Calories 31000 kcal

Ingredients
  

  • 3 heaped tablespoons Stevia I used Tesco Sweet
  • 750 g Strawberries Hulled
  • 2 tablespoons Lime Juice
  • 150 ml Water
  • 2 tablespoons Vodka/Wine or Gin Optional

Instructions
 

  • I used the very fine stevia which didn't need heating up, but if you use the granulated kind you would need to melt the sugar in the water and bubble it for a few minutes and then leave it to cool down.


  • With the fine stevia, I added it with the water and lime juice to the strawberries which were pureed. Mix it up in a blender for several minutes until you have a smooth mix. Some might prefer it to be put through a sieve at this point, but I just use mine as it comes out of the blender.

  • You can taste the mix here to see if it is sweet enough for you. If it isn't sweet enough, simply add a little more stevia, whizz it around for a while, then taste once again.


  • Chill the pureed mix in the fridge for an hour and put it in the ice-cream maker for 20 - 30 minutes, or until it turns to a thickening slushy consistency.

  • Simply add it to a container and put it in the freezer for a couple of hours before serving.


  • If you make it without an ice cream maker, put your mix into a container and put it in the freezer for a couple of hours, then take it out and put it back into the blender to whizz it up again. Then simply put it back into it's container and to the freezer once again for another couple of hours.