
Collaborative Post
As a mom, you have a lot of responsibility. Your little ones are your life and they rely on you 24/7. Most of the time, you’re so focused on doing what’s best for them that you forget about looking after yourself. In this day and age, most moms go above and beyond trying to maintain some sort of career (either at home or in the office) as well as bringing up a family, looking after the home, etc. For a lot of ladies, to feel good you need to look good, but a busy, non-stop schedule can leave you a bit worn out. So, here are six easy to implement fashion tips for a busy mom to make you feel human once again.
Most of the time, you’re so focused on doing what’s best for them that you forget about looking after yourself. In this day and age, most moms go above and beyond trying to maintain some sort of career (either at home or in the office) as well as bringing up a family, looking after the home, etc. For a lot of ladies, to feel good you need to look good, but a busy, non-stop schedule can leave you a bit worn out. So, here are six easy to implement fashion tips for a busy mom to make you feel human once again.
As a mom, you have a lot of responsibility. Your little ones are your life and they rely on you 24/7. Most of the time, you’re so focused on doing what’s best for them that you forget about looking after yourself. In this day and age, most moms go above and beyond trying to maintain some sort of career (either at home or in the office) as well as bringing up a family, looking after the home, etc. For a lot of ladies, to feel good you need to look good, but a busy, non-stop schedule can leave you a bit worn out. So, here are six easy to implement fashion tips for a busy mom to make you feel human once again.
Tasteful Tunics
Casual wear sometimes gives the wrong impression as some people just assume it will be a shabby look and give off a sluggish appearance. But it does not have to be this way. If baggy T-shirts are your go-to piece on a casual day, change your look up by going for a tasteful tunic. Tunics can come in short or long varieties. Their lengthy shape is designed to glide over your body which is very flattering towards your figure. They can come in a wide range of lovely colors with beautifications like lace trim, ribbons and scalloping. If it’s for everyday wear, a tunic can be worn over a pair of shorts or jeans. If you want a more dressed up look, you can add a stylish pencil skirt or a pair of slacks.
Shapelier Shirtdresses
A shirtdress can get away with being both casual and smart. Whatever you use one for, they are definitely a comfortable choice. They have a simple style to them and are both easy to wear and flattering for your figure. To make them easier to clean and care for, it would be best to choose a shirtdress in a machine washable fabric such as cotton. Wearing a bright and colorful shirtdress accompanied by a pair of ballet flats can give a suitable look to go anywhere from the grocery store to a PTA meeting.
Terrific Tanks
When it begins to get warmer, many moms tend to go for the basic tank with shorts look. The novelty of tank tops can begin to wear off after a while and the same, plain look can easily become boring. To change it up, try selecting different styles such as a ruffled top or a top that has an embellished neckline for a little more panache.
Simple Shoes
Getting the right pair of shoes can be tricky as there is a fine line between comfort and scruffy. Old tennis shoes or a pair of flip flops can be an easy thing to put on when you’re in a rush and on your feet for a long time, but this doesn’t have to be the case. So, get rid of the tatty footwear and get a cute (but comfy) pair instead. You can get a wide range of high end, fashionable Balenciaga sneakers from SSENSE who have fantastic looking shoes which are suitable for anything from casual to formal wear. They have a selection of comfortable Balenciaga sneakers for morning exercise or the school run as well as a beautiful variety of heals perfect for the office or a classy night out with the girls.
Hot Hair
It is important to take care of your hair. It is something that people see every day, so it is advised to keep it fresh and fabulous. If you have any grays, go ahead and dye them away. To keep your hair looking as best as it can, it’s advised that you should dye your roots every 6-8 weeks. If you’re in a hurry in the mornings, don’t ever miss out on conditioning your hair. Either invest in a 2 in 1 product to keep your hair in good health and hydrated or wash your hair the night before. When you wake up in the morning, make sure you don’t miss out on brushing your hair. Put it up in a ponytail or twist to keep it looking neat if you don’t have time to style it. Using gel or pomade to slick it back, then adding a headband can quickly avoid a messy look. Having an easy to maintain haircut can also save a lot of time.
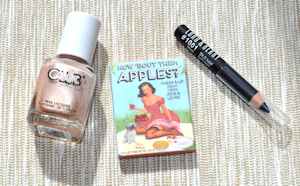
No Fuss Natural Makeup
It is easier than you think to be a stylish mum. Self-care is just as important as caring for your family. Don’t forget to treat yourself and don’t be afraid to try a new style because at the end of the day, you are worth it.
You may also be interested in:


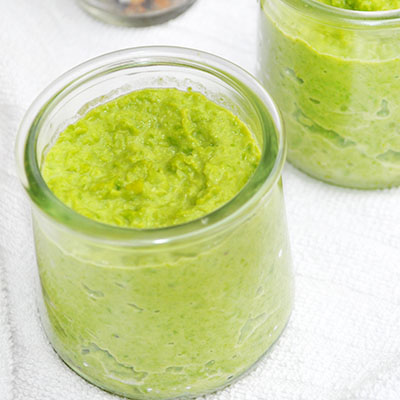

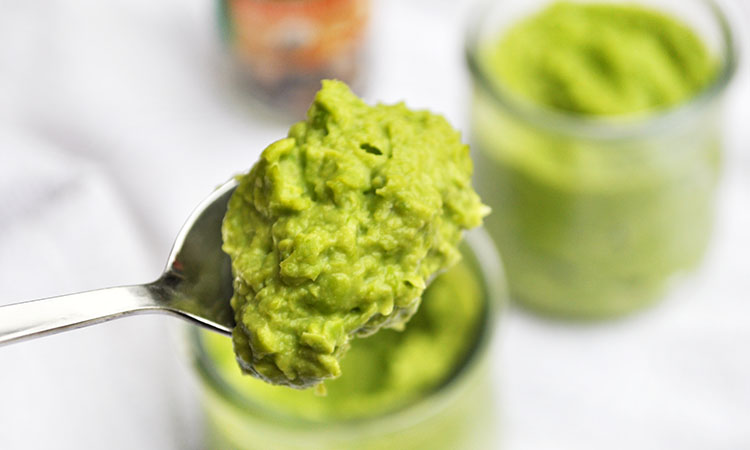
 I used to buy mushy peas. Tins of them, then one day I had none and the teens were moaning, I decided to have a go at making my own. Marrowfat peas make the closest thing to the tins you buy in the shops, but marrowfat peas are not something I tend to have on hand. I do, always, however, have bags of frozen peas or petit pois. The taste is slightly different with the younger garden variety peas, rather then the more mature marrowfat ones, but to be honest, the taste with the younger peas is actually amazing and doesn’t take long to do.


Quick, creamy, and packed with zing this is my kind of lunch Thanks for the easy, nourishing recipe, Scottish Mum.
I just googled this saying and this thread came up I'm neither Scottish or a mum, I'm a Geordie and…
As an 88 year old American, after reading the article(s) and all of the comments, I say "nothing is now…