Posted on 11 Comments

The Caffeine Effect

Coffee-Beans-2Sweating and with a heavy headache, coming off caffeine was no easy feat.  I hadn’t realised I was so addicted until I tried to stop drinking diet fizzy drinks.  It wasn’t the aspartame that people tend to attribute as the biggest problem, as that was still in the diluting juices I fizzed with my soda stream instead.

I must have been taking caffeine in large doses although I really had no idea just how much it took to end up with withdrawal.  I was obviously sipping enough of it as the withdrawal was very obvious.

I’ve heard people saying that caffeine isn’t addictive, but if you have ever ingested lots of it over  a long time frame and tried to stop, you’ll probably get some of the symptoms I suffered with it.  I believe caffeine is a mild painkiller, so perhaps lots of us self medicate by using it.  Boots tells us that caffeine helps other pain relievers to work better, and is often in over-the-counter pain relievers, cold medications and diet pills.

I know that coffee and tea are the ones we know most about, but where I took most caffeine in was with my Diet Irn Bru and Diet Coke.  My kids were also all imbibing it in larger quantities by wanting Pepsi Max which seems to be Diet Pepsi with added extra caffeine.  Cocoa beans contain some caffeine, and Pro-Plus tablets / Energy Drinks contain quite high levels.

We all know people who take caffeine to keep them awake or to appear brighter, but where should we draw the limit?  On the Diet Coke bottle beside me, I can’t even find how much caffeine is actually in it so keeping tabs on how much we eat/drink isn’t the easiest of tasks.

There is actually less caffeine in Coca-Cola and Coke Zero than in Diet Coke which surprised me.

In 500ml of fluids, there are approximately:

  • Coca-Cola 48mg
  • Coke Zero 48mg
  • Diet Coke  64mg
  • Pepsi 50mg
  • Diet Pepsi 48mg
  • Pepsi Max 92mg
  • Instant Tea 48 – 62mg
  • Instant Coffee 120 – 170mg
  • Diet Irn Bru – (Approximately 50mg.  I couldn’t find the exact amount anywhere)

Caffeine stimulates the central nervous system and although we do end up with a dependence, it isn’t thought that it would affect our physical health.

Symptoms of withdrawal usually go away after a few days, and may include:

  • Headaches
  • Tiredness
  • Irritability
  • Brain fog (difficult concentrating)
  • Anxiety
  • Shakes
  • Increased heart rate

Daily limits for health are not easily found.

I’ve seen it spoken about that levels around 500mg + of caffeine a day may cause some problems.  Although caffeine is a well studied substance, each persons tolerances are different.

I used to drink about 4 litres of diet irn bru a day which would take me to around 200mg of caffeine a day.  That’s not a massive amount in the terms of caffeine intake, yet I did suffer incredible headaches and used to get stressed if I thought I was about to run out of my liquid nectar which seems totally daft to me now.  I didn’t suffer the other symptoms of withdrawal, but the headache was enough for me.  There are times when I drink a Diet Coke that I can have indigestion, so I do think that caffeine has an effect on me.

Is caffeine safe?  

Who knows, but the effects certainly seem to have been well studied.  I think this is one additive to products we really all have to take our own responsibility for.

Posted on 4 Comments

How to Cook Roast Beef

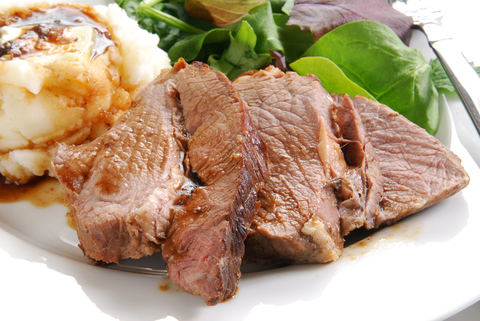
Roast BeefWhen it comes to late Autumn and the cold weather starts to bite, lots of us start to move to comfort food to keep our kids warm on cold days and put some good solid food into their bellies.

Making roast beef and then later adding all the trimmings is something that we can all do easily and make as healthy or as unhealthy as we want it to be.

Even adding something as simple as a Yorkshire Pudding can make it a dish that everyone would love to sit down to.

Getting roast beef cooked properly is actually easier than most people think it is.

Once it’s cooked, it can be used for a full meal, with salad, mashed, roast or boiled potatoes, or even sliced and added to sandwiches for a fabulous packed lunch.

Choose a Good Cut of Beef

I’d personally choose a rib of beef or a fillet to roast, but there are other options.

  • Beef should look mature and have been well hung.
  • There should be some fat to allow for flavour and to keep the roast moist while it’s cooking.  It can be cut off before it is served up.
  • There should be some marbling through the roast to help keep the roast moist.

Cooking Times

I’d recommend going by the times of your cooker as they can change, or be different from cooker to cooker.  As a general rule of thumb, a very hot oven around 220C to start off with for the first 30 minutes in a pre-heated oven.

Lower the temperature of the oven for the rest of the cooking time to about 190 – 200C.

I check my meat by using a thermometer and put it right into the thickest part of the meat.

Options are approximately:

  • Rare –  (130-140F) The middle of the meat is a bright red hue and pinky towards the outside.
  • Medium – (145-150F).   The outside of the meat will be brown  with a pinky centre and the roast will be hot.
  • Well Done –  (160-175F) As we prefer our meat well done here, I am usually looking for my roast to be brown throughout.

These cooking times and heats are a guide for example only.  Guide temperatures can change depending on who is cooking and the roast you have picked.  Make sure you follow manufacturers and suppliers instructions to make sure your meat is safely stored, cooked and eaten.

How to Cook Roast Beef

  • Rest your beef for an hour before cooking it.
  • It should be roasted in a tin big enough to catch any juice drip that might happen.  Completely encase the roast in tin foil and loosely close it.
  • Once the meat is cooked, it again needs to rest.   Use the aluminium foil and make a loose parcel shape over the top and leave the roast to rest for about 15-20 minutes to get the most out of the meat.
  • Pour off any excess juice for making gravy and your roast is ready to carve and serve with your accompaniments.


Posted on 8 Comments

Are Artificial Food Colourings REALLY Bad?

Food Colouring

Looking at the ingredients labels on bottles tins and cans when my kids were little would have me literally scream inside and look around carefully for the bad mother halo replacement to be plonked on my head if I chose to feed them something with horrific artificial content.

I’d plonk the offending food items back on the shelves and carry on sanctimoniously with my shopping.

Food additives seemed almost impossible to avoid unless we made everything from scratch.

All of my boys suffer from ADHD along with the other things they live with daily.  I’d spent a lot of time and effort researching what is good and what isn’t for them, and still I got it wrong.

Giving the boys a Fruit Shoot would have them bouncing off the walls and heading for the roof.

At one time, Haribos being fed to my boys would see me looking for the nearest bolt hole to sit out the impending devastation that someone else’s mother has wreaked on my home in the aftermath of their feeding my kids things I’d asked them not to.

I really didn’t give a monkeys about sugar.  A sugar rush was NOTHING in comparison to some of the effects of other foods their bodies seemed to send them begging on their hands and knees for.
Additives have to be assessed for safety before they can be used in our food and drink, but that doesn’t necessarily mean that they’re all ok for every person.   Due to EU laws, all food must be labelled clearly in the ingredients section, but here too, I found it difficult to tell the difference when there are several terms that can be used for the same thing.

I quickly learned that there were ingredients to avoid, and others that didn’t matter too much.

The Food Standards Agency has also said that consumption of mixes of some artificial colourings with the preservative called sodium benzoate could also lead to an increase in hyperactivity in some children.

The artificial colours they identified were:

  • sunset yellow FCF (E110)
  • quinoline yellow (E104)
  • carmoisine (E122)
  • allura red (E129)
  • tartrazine (E102)
  • ponceau 4R (E124)

The FSA states

“A European Union-wide mandatory warning must be put on any food and drink (except drinks with more than 1.2% alcohol) that contains any of the six colours. The label must carry the warning ‘may have an adverse effect on activity and attention in children’.”

As a family, we’ve noticed a big difference with sunset yellow and sodium benzoate.  It rules out a lot of orangey / yellow coloured drinks, but the kids are glad now that some of the things they used to be banned from, they can now eat.

  • Eating smarties – or rather not eating them was a major upset when my boys were little, but now they can.
  • I believe Fruit Shoots have made their drinks more child friendly, but as we’ve not used them for years, I have no idea how much better they actually are.
  • Haribos seem to have new labels on their sweets too, but I’ve not checked closely enough to see just how many additives they’ve removed.

I’ve a lot of respect for the companies actually making the effort to provide good substitutes for artificial colorings in food.  I wish more would do the same, and consider doing away with monosodium glutimate too as that gives me a headache.

Research was also undertaken by Southampton University which suggested eating or drinking some artificial food colourings could be linked to a negative effect on childrens’ behaviour.

The FSA has amended their advice to state:

” If a child shows signs of hyperactivity or Attention Deficit Hyperactivity Disorder (ADHD), eliminating the colours considered in the Southampton study from their diet might have some beneficial effects on their behaviour.”

Nobody knows more about the effects of some additives and foods on our individual children, but if you need to find out more about the research, it’s available on the FSA website.

Chronic and acute effects of artificial colourings and preservatives on children’s behaviour


Posted on 3 Comments

Basic Sponge Cake Recipe

Making a sponge cake is the easiest thing there is to bake.  Don’t let anyone tell you that it’s difficult, hard, or in any way something that only bakers can do.

The quantities and proportions for a basic cake never change.  For the filling on this cake, I don’t bother to weigh as butter icing is just so easy.

If you want an absolutely perfect looking cake, you can use a sharp knife to trim round the edges and make it look perfect before sprinkling icing sugar or adding your filling.

Sponge Cake

Basic Sponge Cake

Lesley Smith
Course Baking

Ingredients
  

  • 250 g Caster Sugar
  • 250 g Butter
  • 250 g Self-Raising Flour
  • 4 Eggs
  • Icing Sugar For Butter Icing
  • Butter For Butter Icing

Instructions
 

  • Mix sugar and butter together in a mixer or a bowl until smooth.
  • Add in the eggs and again mix until smooth.
  • The final step is simply to fold in the flour until fully mixed through and you've added air with the folding.
  • Cook in a moderate oven around 160 - 170. You can split the mixture into two tins which should cook in around 35 minutes, but it will take longer if you use one tin and slice the cake as I do. My last cake took nearly 50 minutes to be fully ready and I reduced the heat a little. I use a skewer to pierce the cake and if it comes out clean, I know it's ready. I use cake release spray on my tins, but a good old spread of butter will also help to turn out your sponge once it's cooked.
  • I slice my cake into two portions, allow them to cool and then fill with butter icing.
  • I judge butter icing by eye. I put approximately half a block of soft butter into a bowl and then just add icing sugar in small amounts until it reaches the thickness and consistency that I am after. Spreading the icing sugar on finishes the simple cake and then just sprinkle a dusting of icing sugar over the top.
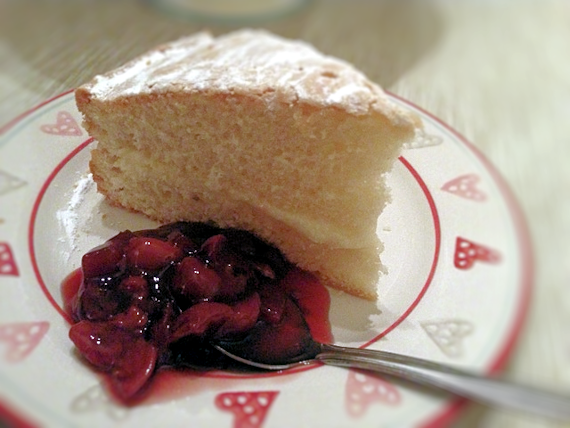
  • Serve with fruit coulis or sauce.


Posted on 6 Comments

Sloppy Joes Wrap Recipe with Piedmontese Beef

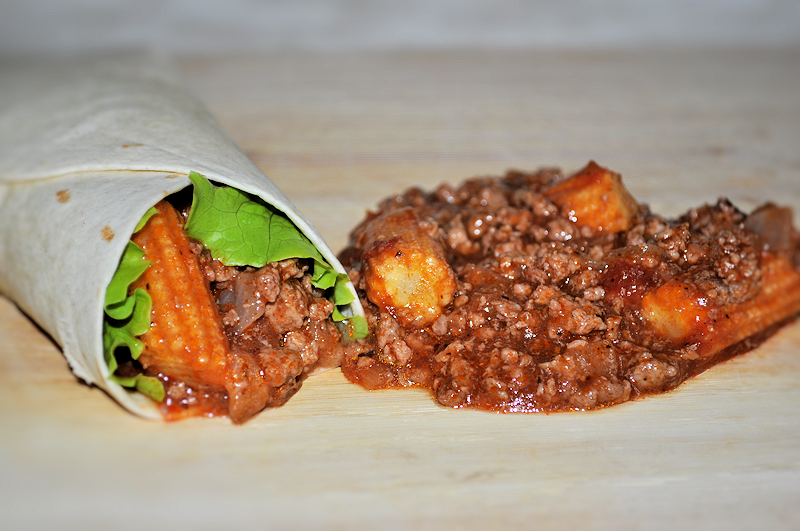
Sloppy Joes food is actually quite simple and easy to make.   We don’t have to be expert cooks to rustle up something as quick and easy as this.  It’s more known as Sloppy Joe from America and usually involves some kind of ground beef, vegetables and tomato ketchup type sauce bases.

I was lucky enough to try some of the lower fat than chicken beef which is Piedmontese.

I had 500g of mince and a plan to feed all 6 of us with it.  It was exceptionally easy.

Sloppy Joes Wraps

Lesley Smith
Course Mains

Ingredients
  

  • 500 g Piedmontese Mince
  • Halfl Water
  • 200 g Onions
  • 1 carton Tomato Passata
  • 400 g Mushrooms
  • 200 Baby Sweetcorn
  • LettuceWashed
  • 8 Tortilla Wraps

Instructions
 

  • Wash the lettuce, chop the onions and cut sweetcorn into pieces.
  • Put mince and onions with a little salt to taste on a moderate heat in a thick bottomed pan with no fat added. PIedmontese is very lean, but it can still take the beginning of browning. Use a wooden spoon to separate the mince in the pan as it browns.
  • Mushrooms can be cooked separately or added to the onions and mince in the pan. I cook them separately in a small pan.
  • When the mince is browned, add just enough boiled water to give a couple of mm depth and let the water finish cooking the mince. If you need to top up, add just a little at a time. Let it simmer for 10 minutes and add a carton (400g) of tomato passata. Allow the mixture to simmer. If it gets too thick, just add a couple of tablespoons to the pan.
  • Heat up the tortilla wraps, and serve in bowls for everyone to help themselves from.


Posted on 2 Comments

Microwave Lemon Curd Recipe

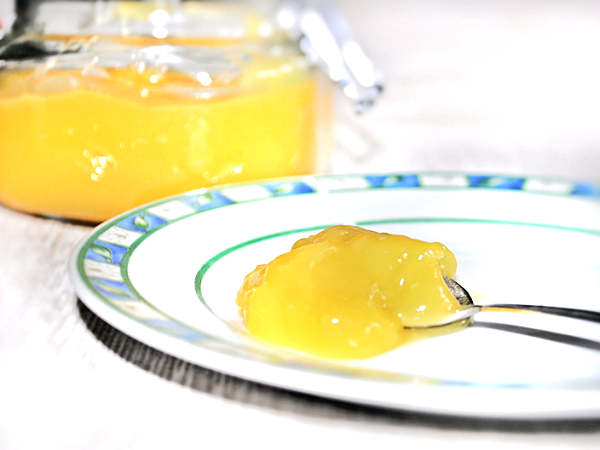
Making recipes easy and quick to do always sits well with me.  Toffee is quite hard to make in the microwave, but lemon curd is as easy as saying 1.2.3.   To cook lemon curd (lemon cheese) on a stove, you need to do a pan within a pan of water method as the curd can’t sit directly on the heat unless you want it to curdle.

Buy lemons fresh.  Lemon juice in a bottle won’t cut it for this unless you want a very tart curd.  This made a fair bit and in the microwave you need a good-sized jug or bowl as it does expand a lot while you heat it up.  I’d be tempted to go down to quantities of 3 eggs, 200g caster sugar and 100 or so grams of butter at my next attempt as I ended up with rather a lot.  I started off basing mine on the recipe at BBC Food and their quantities probably are good to follow if you want less than we had.

You will need a couple of small jars to put your curd into.  Make sure they’re washed and dried before using them and your curd will keep for up to 3 or 4 weeks in the fridge.

Lemon Curd Recipe

3 from 2 votes

Ingredients
  

  • 4 Lemons Grate the zest.
  • 4 Eggs
  • 330 ml Lemon Juice From Fresh Lemons
  • 130 g Butter - Unsalted if possible.
  • 275 g Caster Sugar

Instructions
 

  • This is easy. Just whip the sugar and eggs together until they are smooth. I used my food mixer for ease. Then it was just a case of stirring in lemon juice, zest and butter.

  • Cook in the microwave for one minute at a time and take it out to stir at the end of each minute.
  • When the mix is thickening and leaves a good coating on your spoon after stirring, it's ready. This could take longer than 5 - 10 minutes if you have a lower wattage microwave.
  • Pour into jars to set, pop into the fridge and enjoy.


Posted on 8 Comments

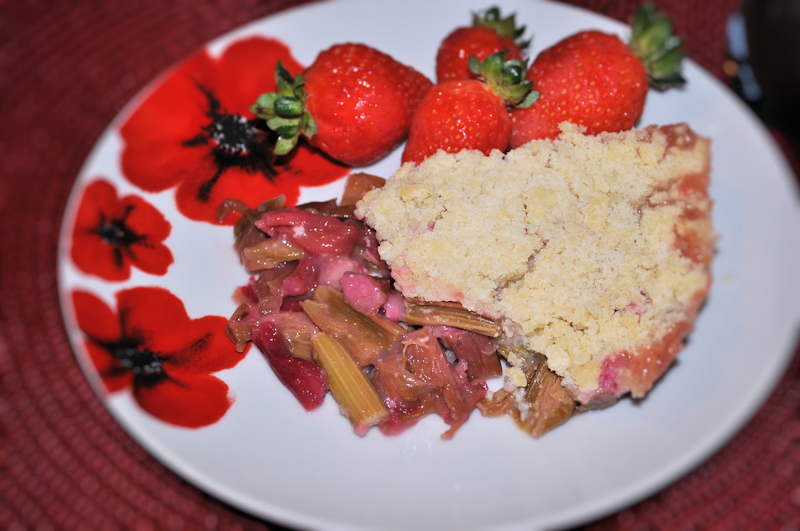
How To Make Rhubarb Crumble

I have not great memories of rhubarb as a child.  We had masses of the stuff growing in our garden and I could be sure of endless puddings and being made to eat horribly sour and tasteless desserts.  It wasn’t until I was an adult I realised that the rhubarb we had wasn’t really suitable for dessert, and that it should have had sugar added to make the rhubarb crumble recipe more palatable.

I needed to revisit the rhubarb as we’ve had some from our plot.  It’s not the greatest looking rhubarb around, but it worked just fine.

While you can reduce the sugar in this recipe, I needed it to entice my kids to eat it.  I made a smaller version for myself with Truvia which made it totally sugar-free & it came out ok so I think I’d make the bigger one with that next time.

Rhubarb Crumble Recipe

Prep Time 15 minutes
Cook Time 45 minutes
Total Time 1 hour
Course Dessert
Servings 6

Ingredients
  

  • 120 g Butter
  • 450 g Rhubarb Washed and Chopped
  • 180 g Caster Sugar
  • 3 tablespoons Water
  • 120 g Plain Flour

Instructions
 

  • Pre-heat the oven to 180 C. Wash and chop the rhubarb ready for the crumble.
  • In a bowl, mix 60g of sugar and the water with the rhubarb.
  • In a separate bowl, rub together the butter, remaining sugar and flour together until it is very fine, then sprinkle it all over the rhubarb.
  • Bake in the oven for 45 minutes.
  • Serve alone, with custard, cream, ice-cream or fruit coulis.


Posted on 1 Comment

Plot goodies. Eating the old fashioned way. Our recent homegrown vegetable haul.

Last Sunday, we had the pleasure of eating lots and lots of green vegetables with our evening meal.

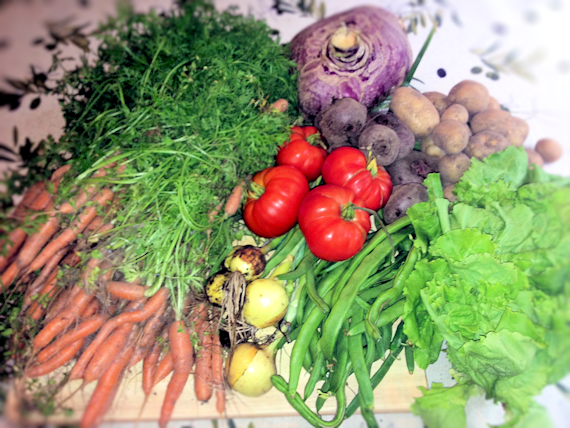
Every last one of them had been grown in our plot and were prepared and cooked for our Sunday Lunch.  The pictures are not the best as it was really dull and not the best light to take pix, but you get the general idea.

Garden Veg

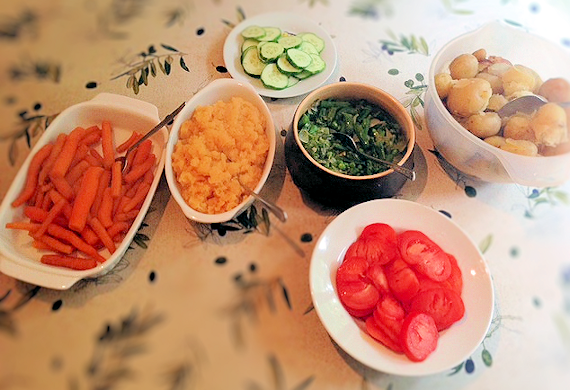
We had beetroot, carrots, red and white potatoes, onions, green beans, lettuce, turnip and fresh peas.

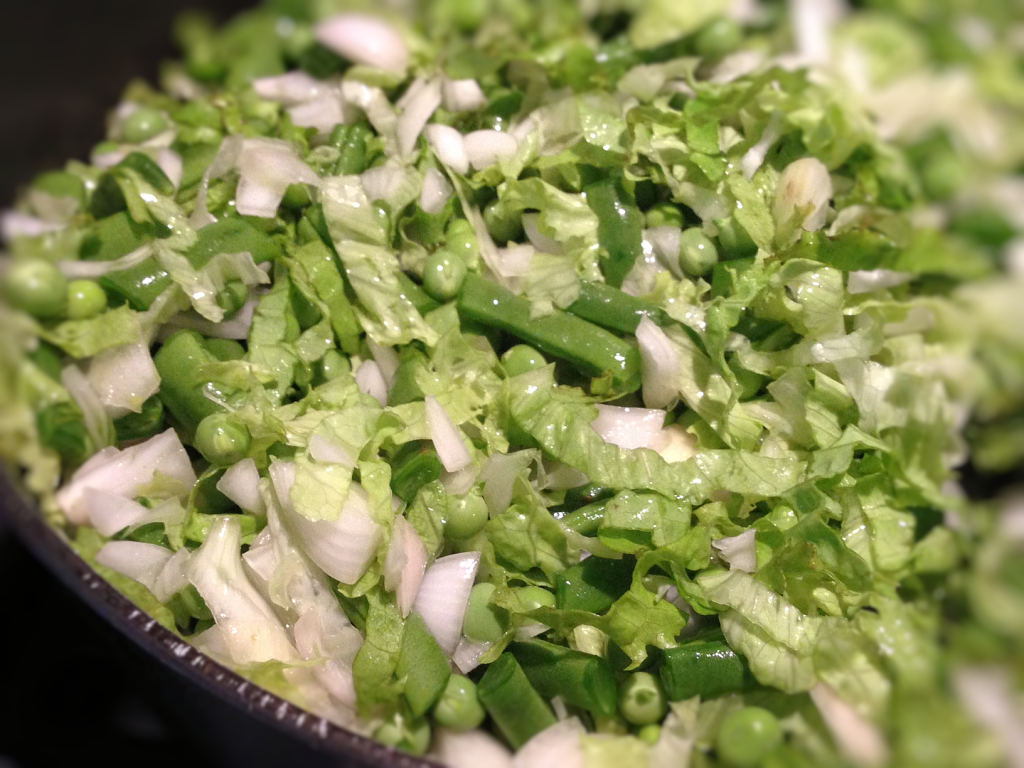
I lightly stir fried the onions with the lettuce chopped up small and the green beans.

Greens 2

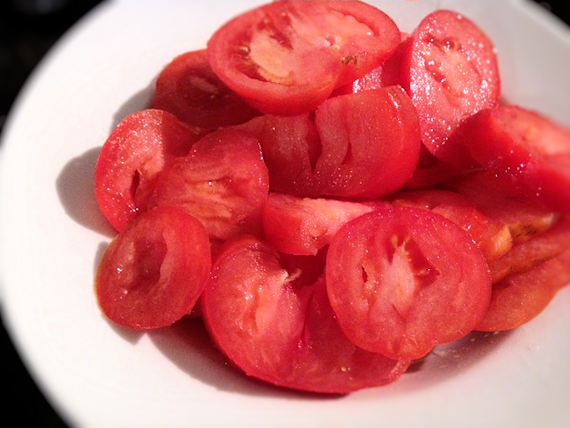
Tomatoes were just sliced and tasted awesome.

Tomatoes

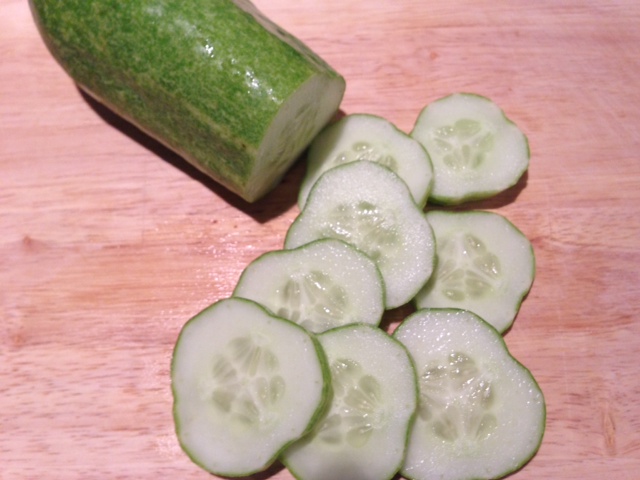
Sliced cucumber didn’t last long with eldest on the go.

photo (24)

The carrots I steamed and the potatoes just plain boiled although their skins shed slightly, but it didn’t change the fact that they all tasted completely awesome at the table.   The picture is rubbish, but you get a good feeling for just how much veg was cooked.

We’ve had to start pulling up young veg as the plot raiders have been out in force and seem to be stealing to order.  Some plot owners have lost whole crops of some veg and the thieves even cut the tops off some carrots and put the tops back in the ground to make it look like they were still there.

It looks like they are stolen to sell at some market or in some community somewhere on Sundays, as most veg seems to sadly disappear on a Saturday  night.  We’ll never manage to grow prized and huge veggies with pulling them out young, but what we do get tastes amazing.

Table Veg


Posted on 12 Comments

Mashed Turnips Recipe – The Scottish Way (Neeps / Swedes)

This is how my grandmother made her turnips.  I know the supermarkets call them swedes, and in England they may be just that, but up here they’re more widely known as neeps or turnips.

We grew our own this year in the plot and have been pleasantly surprised at how well they turned out.  I like them simmered for up to 2 hours which makes the flavour more intense and darkens the vegetables.  I didn’t have long enough for this recipe, so they’ve only been simmered for about 40 minutes and are quite light in colour.

Mashed Turnips 2

I was surprised at how easy it was to peel and chop our own fresh turnip straight from the ground in comparison to the bought ones from the shops.  The taste is also much sweeter and more attractive to the kids.  I know the picture doesn’t show them as how nice they look, but you get the idea of how they work.  They’re fabulous  alongside the vegetables for roast dinners, haggis and chicken meals.   One of my boys just likes potatoes with his.

Our neeps from the plot are fairly big.  I only needed one for 6 of us.  I usually have to use 2 or 3 from the supermarkets for us all.

Mashed Turnips (Neeps / Swedes)

Lesley Smith
4.50 from 4 votes
Cook Time 1 hour 30 minutes
Total Time 1 hour 30 minutes
Course Sides

Ingredients
  

  • 1 - 2 Turnips
  • Butter
  • Salt
  • Pepper

Instructions
 

  • As simple as it can be. Peel and chop the turnips (or swedes if that's what you call them) and put them in a big pan with boiling water. Add salt and pepper and simmer for up to 2 hours. Remember to replace the water as often as you need to. The neeps will be ready anytime after around 20 - 40 minutes, depending on your cooker and the size of chunks you cut your vegetables into, as well as your preference. We like long boiled darker mashed neeps here..
  • When cooked, the neeps will be easy to put a knife into and simply mash them with a little butter until the lumps are all out. Some people add a little milk, but I prefer mine without.
  • If you want to keep them hot while you are making a full meal ready, just put a knob of butter on the top, cover with tin foil and put in the oven on a low heat.

Posted on 3 Comments

Stir Fry Garlic Rainbow Vegetables Recipe

We use a lot of vegetables in cooking.  To see me you wouldn’t think so, but we do go through lots of fruit and veg.  Garlic rainbow vegetables are popular as they really just involve tossing in anything that’s in the fridge with a bit of colour.

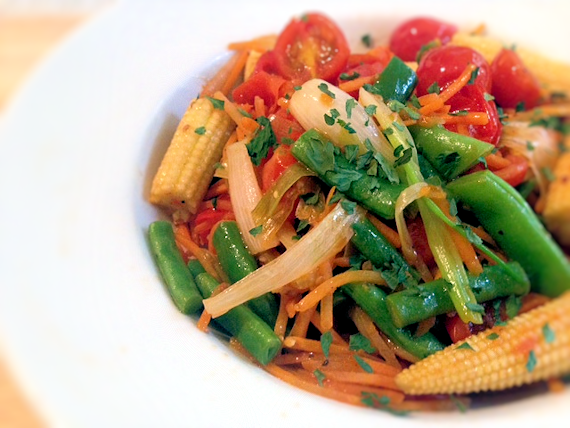
We had spring onions and runner beans from the plot to use up and some carrots, baby sweetcorn and tomatoes in the fridge so this was a perfect meal accompaniment for us.

Stir Fry Garlic Rainbow Vegetables

Lesley Smith
Prep Time 10 minutes
Cook Time 10 minutes
Total Time 20 minutes

Ingredients
  

  • Baby Sweetcorn Halved
  • Runner Beans
  • Grated Carrot
  • Sugar Snap Peas
  • Cherry Tomatoes Halved
  • Spring Onions Sliced
  • Rapeseed Oil
  • Garlic Clove - Crushed
  • Salt
  • Pepper

Instructions
 

  • Adding a little rapeseed oil to your wok or frying pan, make sure the oil is hot before adding the vegetables, but keep the heat on moderate or you could burn them easily.
  • Add all the vegetables, garlic and some salt & pepper to the pan. Use a flipper or wooden spoon to turn them over every 15 - 30 seconds until they are ready.

Notes

Again, I don't put quantities for this as it's more dependent on what you have in your fridge to use up.


Posted on 195 Comments

Giveaway: Scottish Fish Delivery Worth £67 – Straight to your door from Delish Fish.

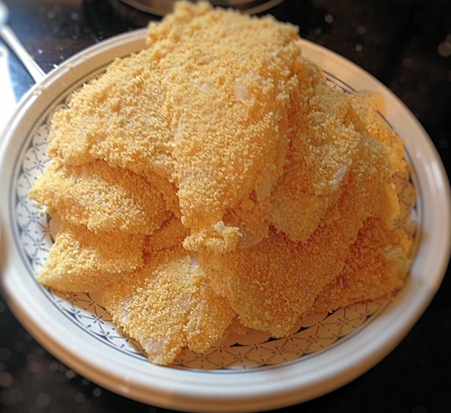
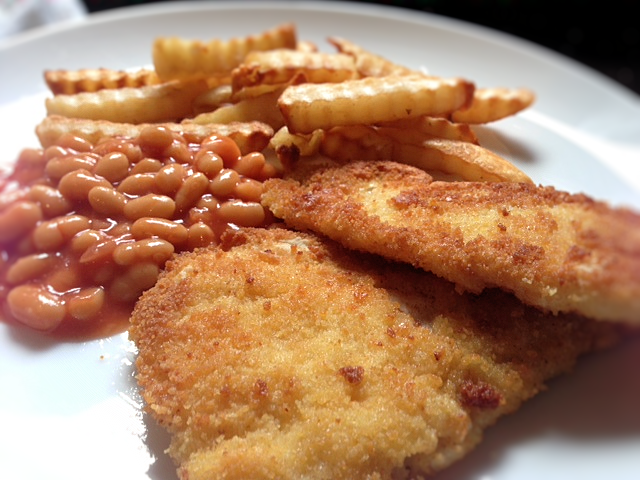
The lovely people at Delish Fish have offered a lovely giveaway for my readers.  I’ve had the pleasure of using Delish Fish produce in the past and their Wild Haddock made for very happy kids with their breaded fish.

Wild Haddock Fillets 3

logo

In the giveaway for my blog, Delish Fish are giving away a high class box of:

  • 1kg Monk
  • 1kg Freedom Salmon
  • 1kg Lemon Sole

To enter, simply work through the Rafflecopter widget with the entries you’d like to make and you are entered for the randomly generated giveaway.

a Rafflecopter giveaway

Terms and Conditions of Entry

1. Open to UK Mainland Entrants only.
2. The prize will be delivered and you must give us your address to send it to you.
3. Winners will be notified within 3 days of giveaway end.  If the winner does not respond within 7 days, a new winner will be drawn.  The draw closes on 30th September at midnight.
4.  The winner will be chosen by Rafflecopter random generator.
5.  Delish Fish reserves the right to amend, add or withdraw this giveaway at any time.
6. Each entry method entitles you to the corresponding amount of entries stated.

Order Fish from Delish Fish

If you’d like to order a pack yourself in the meantime, simply contact them online or by phone during the giveaway promotion time on 01779 477930, and mention Scottish Mum to have this £67 box of fish delivered for £56 anywhere on the UK mainland.

Beginning in Peterhead, the fish they bring to customers is brought directly by the Milne family at auction and hand filleted to be as skinless and boneless as possible.  The fish is caught, landed, prepared and frozen within 8 hours in Peterhead.

They’ve opened a new shop in Rose Street, Aberdeen and also take online orders.

Some dishes I’ve made from fish are:

[gmc_recipe 11560]

[gmc_recipe 10911]

[gmc_recipe 11605]

Good Luck to all.


Posted on 5 Comments

Sophisticated Suppers: Persuading your kids to eat unusual foods.

This post was written in collaboration with Supersavvyme.

If your children can’t resist snacking between meals or just can’t bear to eat without slathering their food in tomato ketchup, you’re not alone. Young picky eaters are common in households all over the country, not helped by the availability of fast food and those occasions where you don’t have a say on what your children are eating.

If you want to wean your kids away from unhealthy food and encourage them to improve their diet, take a look at these top tips.

Provide lots of options . . .

. . . but make all of them healthy. When encouraged to sample a number of different tastes and textures, your kids are a lot more likely to find something good for them that they like to eat. Try to venture outside of your comfort zone when planning your family meals, and build unusual flavours like olives and oily fish into your dishes. Don’t be afraid to offer them tasty salads or sophisticated dishes like mushroom stroganoff – you might be surprised at what they’ll actually eat when pressed.

France Fruit and Veg 5

Mix the conventional with the unconventional

Trying to get your kids to eat spinach? Put it on a pizza. Experiment with olive breads, or mushroom and tomato sauce on pasta. An excellent way to get your kids interested in new things is to get them to help you cook it. There’s some easy recipes out there that you can do as a family, and if your children have seen how something is made, they are much more likely to eat it later on. Cut vegetables into different shapes, use different crockery – anything you can to make trying new things feel cool and exciting. Don’t worry about cleaning up after them – there’s plenty of money off coupons out there to help you stock up on everything from washing up liquid to dishwasher tablets.

Introduce new things gradually

It might seem like a pain, but introducing “problem foods” into a child’s diet is made a lot easier if you have a blender. Pureeing mushrooms, onions, olives, anchovies – or anything else for that matter – means that you can introduce sophisticated tastes to your children without overwhelming them with the texture, shape or colour. You can then start to finely chop, loosely chop and eventually serve the foodstuff as normal as it slowly becomes part of their diet.

Reward your kids for eating like a grown-up

You can reward your children for trying new things in a number of ways – if they finish their meal or try something new, offer them a treat as a reward. It might feel like bribery, but positive rather than negative reinforcement has been proven to be much more effective at encouraging children to act in a certain way – the odd scoop of ice-cream can work wonders for regulating your child’s eating habits.