Posted on Leave a comment

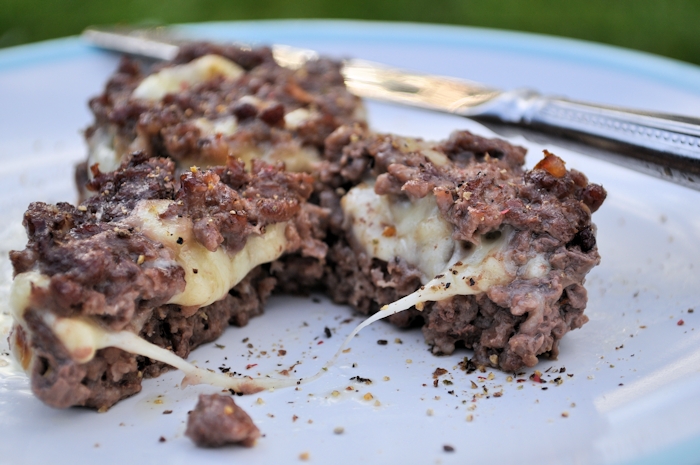
Cheesy Meatball Muffins Recipe

This was much more successful than I ever could have imagined as far as the kids were concerned.  All you need is some mince and cheese, then pop them in the oven for a luxurious treat.  If you add in some more veg, I suspect these might be a good way to hide some nutritious veg if kids are happy meatball eaters.

This is very much suitable as a leftovers dish too.  Mushing up whatever you have would go well with this type of thing.  Just make sure it is thoroughly cooked before serving.

Meatball Muffins Sliced

Cheesy Meatball Muffins

Lesley Smith
Prep Time 10 minutes
Cook Time 20 minutes
Total Time 30 minutes
Course Main
Cuisine British
Servings 12

Ingredients
  

  • 500 g Mince
  • 100 g Onions Finely Chopped
  • Grated Cheese - Use whatever you have. I had about 300g Mozarella in the fridge so just divided it between the 12 muffin slots I had in my trays.

Instructions
 

  • I used some cake release spray to line my muffin trays, but I suspect I didn't need to do that at all. Set your oven to around 160-180 Degrees, depending on which type of oven you have.

  • Simply put some mince on the bottom of each muffin well, and then pop in the cheese, and cover up with another layer of mince, pressing down slightly.

  • Bake in the oven until thoroughly cooked. Approximately around 20 minutes, but you all know your own ovens. I covered mine up with a layer of tin foil to prevent the tops from burning.

Meatball Muffins


Posted on 1 Comment

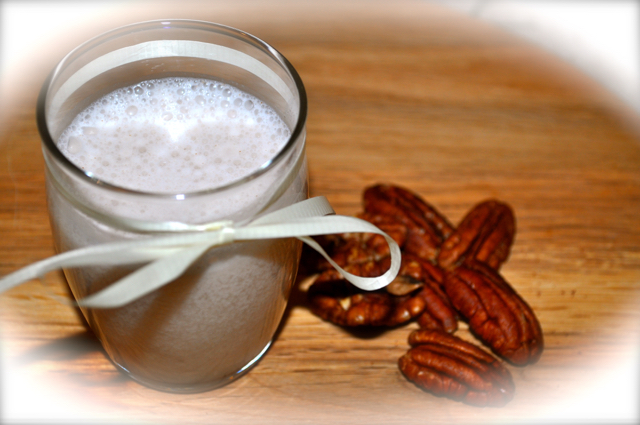
How to make unsweetened pecan milk.

Ok, I have to admit being a little ott about unsweetened almond milk.  I seem to use it for almost everything that needs milk, including smoothies, soups and much more.  The fact that it’s so low-calorie is what does it for me, but I wanted to try making some nut milks, to see how they do.

I’ve made soy milk in the past, and after finding almond milk, I’ve given up eating soy in any form at all.  I tend to make my smoothies with frozen fruit and veg, so mine are more like slushie consistency, but more creamy with milk.

Pecan Milk

I had a box of pecan nuts which needed eating, so I thought that would be as good a place to start as any.

I also didn’t have the patience to soak the nuts overnight on my first attempt, so I just went on whizzing mine up, although if you have a low watt blender, overnight soaking would be a better idea, as the nuts will leave far more gruel when it’s strained.  Milk from soaked pecans is definitely creamier.

I’ve taken an average of 1 litre of water to add to 2% pecan nut concentrate, as that’s what my favourite brand seems to say.

For this, I’m assuming 1ml = approx 1g, and 100g of my pecan halves being roughly 720 calories per 100g. That means, to keep the calorie content low, I need to use no more than 13 calories per 100g, which means I only have 130 calories to work with for a whole litre.

With 130 calories divided by 7.2 calories per gram, that leaves me with 18g of pecans that I can add to each litre of water.  That really does not sound like much, and I had little hope of the water turning white at first, but it does happen rather quickly.

Recipe: How to make unsweetened pecan milk.

Lesley Smith
Prep Time 2 minutes
Cook Time 2 minutes
Total Time 4 minutes
Servings 500 ml

Ingredients
  

  • 9 g Pecan Nuts
  • 500 ml Water
  • 2 Teaspoons Xylitol or substitute other sweetener

Instructions
 

  • Soak the pecans overnight if you can, then discard the soaking water for a smoother milk. If you're in a hurry, just add the pecans and water to your blender (I use Nutribullet). I blend for one minute, then rest for a minute, then blend for another minute again.

  • Strain the milk through a muslin square or similar, to remove the very fine grains. You don't have to do this, but I prefer the smoother texture.

  • Chill and enjoy. This doesn't keep for too long, so use it within a day or two.

  • If you like your milk thicker, just add more pecans at the next try. I wanted to keep mine low in the calorie department, but most people seem to make one third pecans to two thirds water.


Posted on 13 Comments

Handmade Candles – Smelly Heaven – Candlemaking for Mummy Bloggers

It’s about time I introduced one of my hobbies – my smelly heaven of candlemaking.  I absolutely love the scents and smells of burning candles.  Spring, Summer, Autumn, or Winter, I love, love, love them.

I started out by buying the ready mades you get in supermarkets, but they just didn’t cut it for me.  They either burned right down the middle, or they  burned too fast, or the scent was just awful.

I soon cottoned onto the partylite / yankee type candles which burn pretty well, and smell pretty good as well.  The only thing was, that the amount of candles I wanted to burn, I pretty much would have had to rob a bank to pay for my growing habit.

My next step was to move onto looking into how to make them for myself.  My first attempts at candlemaking were a complete and utter disaster if I am honest.  They either ended up too large, or too small wicks, or the wrong mix of scent to wax, and then I CRACKED IT.   

I found myself a fabulous formula for my wax and additives, and my candles all turn out fantastically.  I even make them with soy, and potter about decorating some of them.  I will put up more pictures over time of things I make, and how to get the best out of the ones you buy, but for now, this is just an introduction to my “hobby”.

If anyone is interested, I may even give you the recipes for some easy start candles to make yourself.  Apologies for the dark photographs as the only camera I had on hand this morning was my phone.

Posted on Leave a comment

Making Quiche / Flans on the Fly

Making quiche is easy.  It takes very little time, and you have a cracking meal very quickly.  

 I am one of these cooks who tends only to weigh what she has to.

  I weigh for doughs, bread and cakes, but I rarely weigh for things like pie fillings, pastas, rice, quiche, risottos, currys, stir frys etc etc. 

For those dishes, I reserve a remedy called

“chuck it in and hope for the best.”

Usually my chuck it in dishes turn out perfectly.  Not always, and one day I will post some of them.   Today is all about how I make quiche, or flan.

I have to thank @superamazingmum on twitter for the outline of how to make a flan, as I had no idea how easy it was until she posted it to me in three tweets.  I have made about a dozen of them since, and they ALL come out fabulous.

PASTRY

Making shortcrust pastry is easy, especially if you have a food mixer.  I really would recommend having one if you are planning to so any serious cooking for any length of time, as the pain it saves in your arms from all the mixing if you home cook a lot, is a true blessing.

250g  plain flour
110g  butter
Two pinches salt
Some water

This is easy.  Put flour and butter into a bowl and either rub the butter into the flour, or mix it in the food processor until it is a breadcrumb consistency.  Make sure that all the lumps of butter are rubbed in.

Add a couple of pinches of salt and mis in with your breadcrumb consistency.

Add a little water at a time and either mix by hand, or in the mixer / processor until the dough forms a ball.   Stop when the dough has bound together. 

Wrap the dough up with clingfilm and refridgerate for approximtely half an hour before using it. 

QUICHE

The dough mixed above, gives me enough dough for one large flan dish which is 8″ diameter, and two smaller ones approx 4″ diameter.

Taking the dough out of the fridge, flour a surface so that you can roll out the dough to the shape you need.  I use my rolling pin to roll the dough to a larger size than I need for my biggest flan dish.  I used to butter the dish before putting my pastry in, but now I have more professional baking tins, the ones I use for my flans (which came from tesco) don’t need greased before cooking.  I plop my rolled out piece of dough in the flan dish, press around the botton and the top, which takes the excess dough off the tin, and  repeat for the smaller flan trays.  Easy as 1, 2 3

All I need to do next is decide on a filling.  This week I have made cheese and tomato with chicken, and cheese and herb with garlic.  The world is your oyster.  Put in your flan whatever you want to.    Do not use raw meat in a quiche or flan as quiche is not cooked long enough or hot enough to cook the meat thoroughly. 

The egg and milk mix is the glue that holds the quiche / flan together.  To make one 8″ and 2 x 4″ flans, I need to crack open about 6 – 8 eggs and using a fork, whisk them for a minute.  I  then add 250 –  300ml of milk for each 4 eggs, or until I judge by eye that I have enough.

  •  To add a cheese and tomato with chicken, I would line the botton of the flan dish with a thick layer of grated cheese (usually mozarella in this  house).
  • Add chicken and sprinkle across the top of the cheese around the flan dish.
  • Place tomatoes, herbs and anything else you want to add on the top.
  • Fill up the empty space with the egg and milk mixture.
  • Bake for between 20 – 40 minutes at 160 – 170 degrees until all the egg is solidified.

The time to bake will depend on your flan size.  When you take it out of the oven, let it lie for five minutes for the egg to settle.