Posted on 2 Comments

Christmas Tree Napkin Fold Tutorial

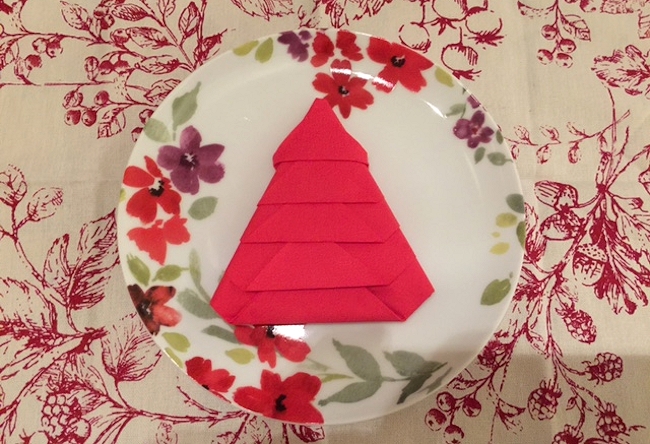
Christmas Tree napkin Fold Tutorial 1

This is so simple to do, and looks great on a table, or place setting.  It’s something a little different and personalised for your Xmas day guests.  Napkin folding is not something new, but we all appreciate the little touches that made Christmas Day that little bit more special.

Christmas Tree Napkin Fold 2

Here’s how to do it for yourself.

Step 1

Take your regular napkin from a pack and lay it flat.  Most napkins will come out of the pack ready to go, but just in case yours isn’t, you’ll need to fold it into a square.

Turn the napkin towards you, so it looks like a diamond shape, with the loose ends under your fingertips, like the image above.

Step 2

All you have to do is take one layer at a time and fold it upwards, so that it rests around half an inch or so from the top, and fold the line.  Do this with all four layers until you have the same shape as below.

Step 3

Turn the napkin around.  It should resemble a boat shape.

Christmas Tree Napkin Fold 11

Step 4

The aim is to have the point shape at the centre of the bottom of the napkin.  Fold the right hand side over to mid way on the opposite side and fold over.  Do the same for the left hand side.

Step 5

The point shape at the bottom should be in the right place.  When the sides are folded over, turn the napkin around again, and set it this way up.

Christmas Tree Napkin Fold 15

Some people will stop here, but if you want to have the full effect, simply fold each layer back on itself, and tuck it into the one above.


Posted on 5 Comments

Hand Made Jewellery Christmas Presents

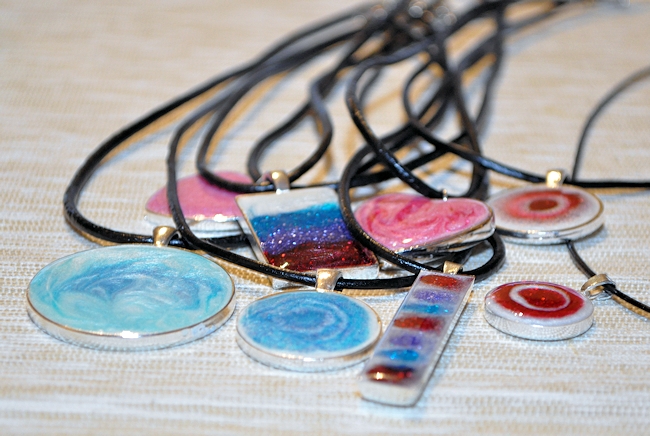
Here they are.  The personalised Christmas presents we made with the owners in mind.  We hope they enjoy wearing them as much as we enjoyed making them.  They’re all either rhodium plated brass as a base for the pendants, with only a couple that are sterling silver.  The colours are all made by cold enamelling, or resin casting.

We love what we’ve achieved and each and every one in this post has gone to a Christmas home, as well as a few others that didn’t get in the photographs as they were still curing.

As a hobby, this is great, as the kids could be involved.  Yes, it did mean taking some important steps to ensure they were safe with mixing the chemicals, and I wouldn’t do this with very young children, but for my older boys, it has been a great way to give christmas presents that actually mean something to them, and a handmade gift for the recipients, both at school and at home.

I’m actually really proud of what we achieved in such a short space of time.  I love the drop heart pendant, so plan on ordering more of those blanks.  We only had one, which was lovely when it was done.

Posted on 9 Comments

Home Made Ashes Rings

So, last night was mostly about making our Christmas presents.  I was talking to a Twitter friend who had bought some resin and made wee pendants, and it spurred me on to finish a project that was badly needing sorted.  The fact that it’s also led to another addictive hobby and ashes rings, is neither here nor there.

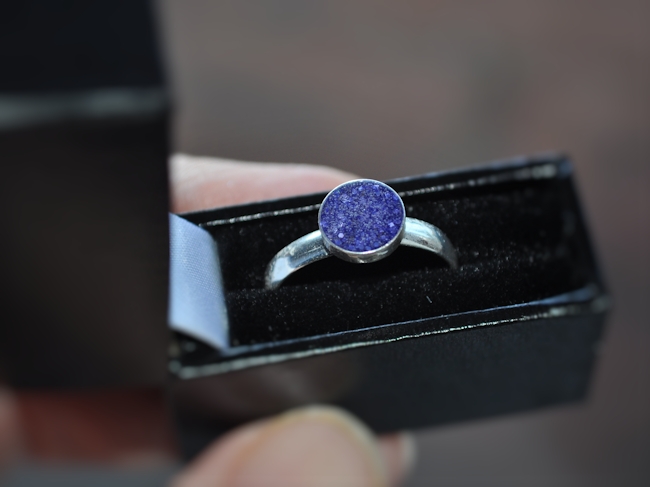
Among that, I also made myself an ashes ring with a tiny portion of the ashes from my dog, who passed away a wee while ago.  I tried that as a means of giving my boys and their siblings a keepsake of their birth mum.

I have a small vial of her ashes, and they all wanted a piece of jewellery.  Looking online, it was clear that the prices were extortionate, and not necessarily appropriate for the kids as they are now.  I really didn’t like the versions of ashes jewellery I saw that had flakes of the ashes very visible.  It seemed a bit morbid to me.

Honestly, this ring does look better in real-life than it does in a picture.

Ashes Ring 3

Using a mix of resin, glitter and colour, I’ve come up with an alternative, using sterling silver as a base, and the colour added to the settings, whether they’re rings or pendants.

After a few disasters, I’ve finally got it sorted.  This ring contains a tiny portion of my dog’s ashes, but I now know what I’m doing.

Yes, some of you might think it’s a little morbid to make jewellery out of pet ashes, or human ashes, but I think a piece of jewellery is a much nicer memory than an urn of ashes for children.

The girls are all getting ashes rings, and the boys will have cufflinks as a keepsake.  Ok, they don’t look like glass, but they do look very pretty and the sparkles are gorgeous.  I may add an extra layer of shine to the one above and see how that looks with a little dome on the ring, but it’s actually quite shiny as it is in daylight.

One of the girls wants red and one wants pink for their rings.  I’m waiting for more blank rings and cufflink blanks to arrive so that I can make theirs, so I’ll post how they all turned out too.

I’ve been experimenting with pendants, so they will also be used as Christmas presents.  When they’re all dried and had their chains added, I’ll post some pictures of those.  All in all, it means we can make different people lots of different presents year on year.  I’ll just have to keep tabs on what kind of design we give to each person.

Jewellery making could become far too addictive…….


Posted on 5 Comments

Guest Tutorial: Make a Colourful Autumn Tree Decoration

How to make an Autumn / Winter  tree decoration

Unfortunately summer has gone, now it is time to celebrate Autumn and the coming of winter.

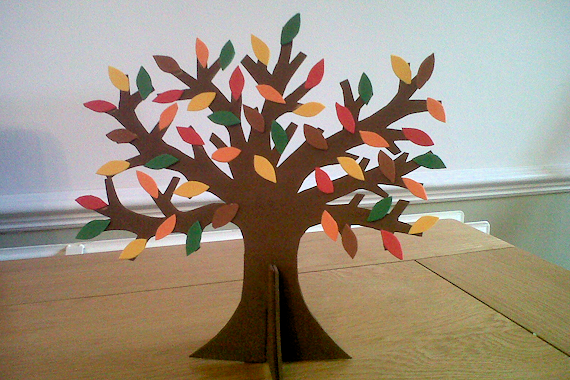
Bring some colour to those grey days with this beautiful fun tree decoration craft activity tutorial by Stacey for Cutfoam, which the kids will love making.   The tree shape can be a bit tricky to cut out so children may need some help but they can join in sticking on the leaves.

You will need:

Foam sheets of different colours

  • Scissors
  • Glue
  • Pencil and paper

Step 1

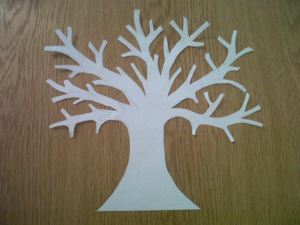
Draw  a tree shape on to a piece of paper  approximately 20cm x 20cm.  Then cut out.

Step 2

Draw around the paper template on dark brown foam.

Step 3

Cut out the tree shape and cut a 3cm slit in the bottom.

Step 4

Using the base of your tree as a guide cut out the shape shown. Make a cut in the top so that it will slot in to the bottom of your tree.

Step 5

Cut leaf shapes from green, red, orange, yellow and light brown foam.

Step 6

Glue the leaves to the tree branches.

Step 7

Slot your tree in to the base piece so it stands up.

If your tree does not stand on its own then glue another strip of foam to the back of the trunk and double the thickness of the base piece.   This tree would make a lovely centrepiece for any dining table or mantle piece which the kids can show off to the rest of the family.

This tutorial was brought to you by Cutfoam, the cushion foam specialists.

If you would like a fun tutorial for your blog please contact Stacey.lowe13 (at) yahoo dot co dot uk

Posted on 8 Comments

Painting with Acrylics on a Dreary & Drab Afternoon

Forget that it’s summer now as the weather has been atrocious.  I had the kids with me last week when we went out and about to get some cheapie new curtains for the lounge I am decorating.  Ok, the curtains didn’t end up as cheap as I was hoping to get them, but they’re certainly a bargain compared to the old faded drapes they are replacing.

Popping in to the Staples at Berryden, which is pretty close by, we really just went for a browse.  We came out with a basket full of cheap goodies and new school bags for August.  The kids were most excited about their find of some cheap artists canvas boxes, and the prospect of painting with acrylics.

Fab tracing by littlest.

A whole afternoon was spent dabbing, dotting and drawing and my kids were engrossed until their canvas masterpieces were finished.

Middler wasn’t interested so I tried my best to get some sort of semblance of some kind of abstract flower.  Am completely ok with how amateur it is, but we all had a fabulous afternoon and are now eagerly awaiting some more blank canvases arriving from Amazon.

My “cough” masterpiece.

The kids bedrooms will be full of their own pictures soon.  We’re planning on possibly painting a larger canvas sheet with dots and dabs to match the new lounge when I eventually get it completely finished.  It’s a tempting blank canvas at the moment.

Littlest creation. He regrets adding the dark black line around his figure.

Eldest gave his dad this for fathers day, saying that it was a picture of his dad when he gets old.

I half wish I knew someone who was a street artist to do something fancy, but you can’t win them all can you.


Posted on 7 Comments

Mothers Day – Crafty Tealight Candlemaking Tips for Mothers Day Gift Ideas

Making sure our mothers get a present that is fit for the fabulous job that they all do, is difficult.  Often, it is the time spent on making something that is more important than what it is that they have received.  How can we give our lovely mums something different?

Making handmade gifts lets your mum know that you think she is special and deserves the time and effort it has taken to make it.

We could:

  • Make some homemade cards.  Kids often love to make lovely things, so it’s an easy thing to do.
  • Buy one of the jars from supermarkets that have the clip on lids and make pot pourri, smelly jelly or simply fill it with her favourite sweeties as it will look much better than the shop bought cardboard versions.  After it’s made, you can tie a lovely ribbon around the neck and attack a tag.
  • Make candles..

Wooo hooo, did I mention making candles..  Ok, I’ve said before that I was going to help you all with making some basic candles, so here we go.

The very first things to learn about making candles is how to handle the materials.

Before you start making any candles, please read:

Tools for Candle Making

  • Wax melter or double boiler & Pour Pot
  • Stainless steel measuring cup if needed
  • Stirrer or wooden spoon
  • Scales
  • Thermometer
  • Scissors
  • Knife
  • A lid off a box, flat baking tray etc.

Don’t be tempted to harden your candles in a fridge.  They will cool too quickly, and the candle quality will be compromised.

Work Area

Prepare your work area.  Weigh out your wax so that you know how much you are using.  Make sure you keep records of amounts and weights for the future.  Candle making is all about testing what works for you.    Remember candles work differently with everyone in their own heat settings and environment.

What works for one may not work for someone else, ie wicks, temperatures and scents.  Keep notes so that you can replicate something wonderful and not copy what didn’t work for you.  You may think you might remember which wick, how much scent and which wax gave you a wonderful candle, but in two weeks time, you honestly won’t.

Scent and Colour

The general rule of thumb for all candle making with our chips and fragrances is

  •  Maximum 1oz scent to 1lb of wax, or the maximum of 10 percent rule.
  • With colour chips, use approximately 1chip to 1lb of wax (or less / more depending on what shade you want).  Less than 1 chip per lb will give you a lighter colour.  More than 1 chip per lb will give you a darker colour.

It is all down to testing your amounts and keeping records so that you know how to reproduce the effect that you want.

Double Boiler Wax Melting Method

This means boiling a pot of water on a heat source.  The temperature of the water will never exceed 212 deg. F.     The pour pot with the wax inside is then placed inside the boiling water.   The pouring pot is never in direct contact with the heat source and the water transmits the heat to the pouring pot quickly and evenly, without scorching the wax and minimizes the chances of a fire. Even with a double boiler, do not leave it unattended.

  1. Choose an old pot large enough to put your pouring pot into.
  2. Add an inch or two of water to the old pot.
  3. Bring to a boil.
  4. Place your pouring pot directly into this boiling water. You may wish to place a metal biscuit cutter, or something similar in the bottom of your old pot to elevate the pouring pot.
  5. Lower the heat to a simmer.
  6. Add water to replace water lost to evaporation. Do not let the double boiler run dry. It can quickly get too hot.
  7. Allow the wax to melt and monitor the temperature until you reach the temperature needed for the particular type of wax you are working with.
  8. A thermometer is a necessity when working with wax.  The temperatures that you work with can alter the burn properties of your candle.

The Nitty Gritty –  Making Tealights – Soy Wax

Materials

  • Soy wax
  • Wick
  • Glue spots
  • Fragrance Oil (optional)
  • Colour (optional)

To find out how much wax you need for each tealight, simply fill a tealight cup up with water and find out how much it holds.

Place your tealight cups on a flat surface, i.e. an old flat baking tray would do nicely and would catch any wax drips if you overpour.  Do not use it for cooking afterwards.

Leave a space between each of them, i.e. not touching.

  • Put a generous dab of your wax glue, or a glue spot onto the bottom of the sustainers attached to your tealight wicks and then stick your pretabbed wicks into the tealight cups.  Some people put  their tealight wicks in after they pour the wax, but I find that this can cause overpour.  It depends on your particular preference.

  • Melt the amount of wax you wish to use and keep a note, as it will affect the amount of scent and colour you use.
  • While your wax is melting, weigh out your scent, remembering your maximums and get your colour ready.
  • If you use half a lb of wax, use half a chip of colour.  For 1lb of wax, use one chip of colour unless you wish to have a darker or lighter colour.
  • Weigh out your scent.  For half a lb of wax, use a maximum of half an ounce of candle making fragrance oil to start off with.  Once you get the scent level you like, note it down and for future reference you will know how to reproduce   it.  Don’t think you will remember it in future, as you won’t.
  • Heat the wax to 165°F.
  • Be sure to stir/mix the wax while melting and after adding fragrance and colour.  Allow the wax to cool to your desired pour temperature, add the fragrance, colour and mix well.
  • Pour into your tealight cups.
  • Straighten any wicks that have bent over while pouring.  Do this before the skin forms.
  • Leave for a few hours to harden.
  • Your tealight is now ready for burning, but they would be best left to cure overnight if you have made scented tealights.
  • Pop it inside a tealight holder, or wrap it up to make it look pretty.


Posted on 6 Comments

Sand Art Home Packs from Kids Bee Happy

Sandra from Kids Bee Happy sent me some sand art packs to review.  My children whooped with delight considering they absolutely loved the sand art at our Christmas Party last year (that sounds such a long time ago).

The little packs come in boys or girls style pictures and the transformers and car pack was a huge hit here.

In the packs, there are 10 tubes of sand, two little sticker pickers to take the coloured paper off the picture to reveal the sticky bit to put the sand on to.   A sheet of instructions is very welcome and makes the project easy to follow, and with little pictures to show you what colours could be used, it is lots of fun.

These keep my kids happy for several hours, and they’ve enjoyed them thoroughly.  We found it easier to have a piece of white paper with a fold in it to shake the excess of each colour of sand on to.

Once they’ve shaken off the sand on to the paper, I can then slide what’s left back into the little bottle it came from so that it doesn’t get used up too quickly, and there seems to be plenty of sand with each pack to do all the sand art that’s needed.

There are little tabs and laminate pockets so that if you have a laminating machine, you can preserve the picture for the future.  I am just sad that our little trusty machine gave up the ghost a few weeks back.

That doesn’t stop them being popular though and the sand art pictures now adorn bedroom walls.   Once again, a lovely thank you from @kidsbeehappy on Twitter for such a fabulous experience.

You can buy them at Kids Bee Happy for £8.99 per pack.  Perfect for any birthday present, or just as a standby for rainy days.


Posted on 13 Comments

Handmade Candles – Smelly Heaven – Candlemaking for Mummy Bloggers

It’s about time I introduced one of my hobbies – my smelly heaven of candlemaking.  I absolutely love the scents and smells of burning candles.  Spring, Summer, Autumn, or Winter, I love, love, love them.

I started out by buying the ready mades you get in supermarkets, but they just didn’t cut it for me.  They either burned right down the middle, or they  burned too fast, or the scent was just awful.

I soon cottoned onto the partylite / yankee type candles which burn pretty well, and smell pretty good as well.  The only thing was, that the amount of candles I wanted to burn, I pretty much would have had to rob a bank to pay for my growing habit.

My next step was to move onto looking into how to make them for myself.  My first attempts at candlemaking were a complete and utter disaster if I am honest.  They either ended up too large, or too small wicks, or the wrong mix of scent to wax, and then I CRACKED IT.   

I found myself a fabulous formula for my wax and additives, and my candles all turn out fantastically.  I even make them with soy, and potter about decorating some of them.  I will put up more pictures over time of things I make, and how to get the best out of the ones you buy, but for now, this is just an introduction to my “hobby”.

If anyone is interested, I may even give you the recipes for some easy start candles to make yourself.  Apologies for the dark photographs as the only camera I had on hand this morning was my phone.