
This is so simple to do, and looks great on a table, or place setting. It’s something a little different and personalised for your Xmas day guests. Napkin folding is not something new, but we all appreciate the little touches that made Christmas Day that little bit more special.

Here’s how to do it for yourself.
Step 1
Take your regular napkin from a pack and lay it flat. Most napkins will come out of the pack ready to go, but just in case yours isn’t, you’ll need to fold it into a square.


Turn the napkin towards you, so it looks like a diamond shape, with the loose ends under your fingertips, like the image above.
Step 2
All you have to do is take one layer at a time and fold it upwards, so that it rests around half an inch or so from the top, and fold the line. Do this with all four layers until you have the same shape as below.


Step 3
Turn the napkin around. It should resemble a boat shape.

Step 4
The aim is to have the point shape at the centre of the bottom of the napkin. Fold the right hand side over to mid way on the opposite side and fold over. Do the same for the left hand side.


Step 5
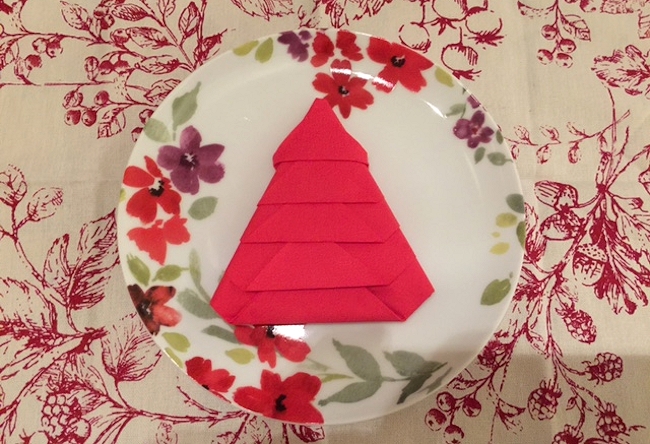
The point shape at the bottom should be in the right place. When the sides are folded over, turn the napkin around again, and set it this way up.

Some people will stop here, but if you want to have the full effect, simply fold each layer back on itself, and tuck it into the one above.


What a great tutorial I might surprise my guests with this:-) Thank you and have a lovely Christmas:-)
Hope it went ok if you tried it. Happy Christmas to you and yours.